|
05-19-2009, 09:10 AM
|
#2
|
|
Member
Drives: '09 135i
Join Date: Sep 2008
Location: Gotham
|
Front Pads:
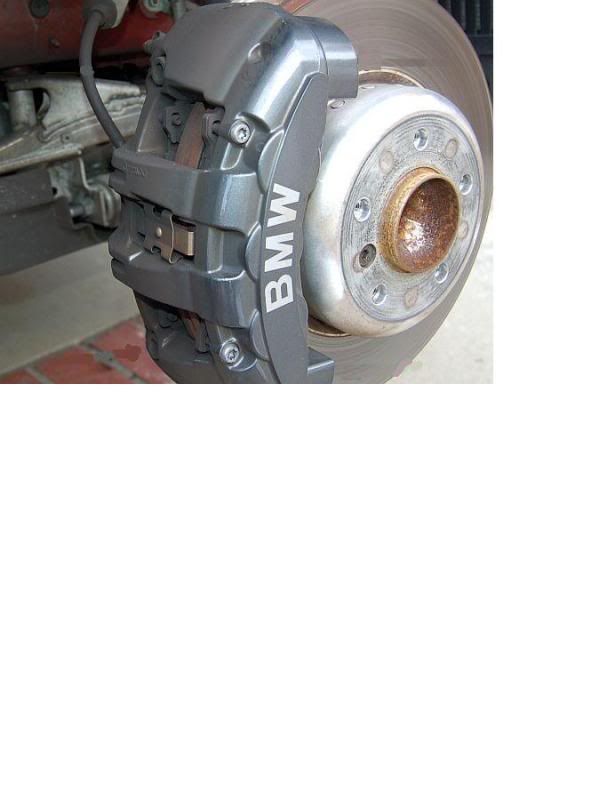
The front pads require the removal of the calipers.
Tools Required:
1.) 10mm Hex key/driver (Must be very strong. Cheap tools will break)
*If your hex tool is not very long, or you are using a normal sized ratchet you will need additional leverage. I used the top piece of my floor jack handle to extend the length of the tool.
2.) T-40 Torx bit/driver
Instructions
1. Open the brake fluid reservoir under the hood.
2. In order to make room to fit the new pads you must pull the pads away from the rotor. I actually pushed a flat-head screwdriver in between the pads and the rotor and leveraged them away from the rotor. You have to be careful not to damage your rotors. Make sure that you do not push the end of the screw driver into the rotor surface.
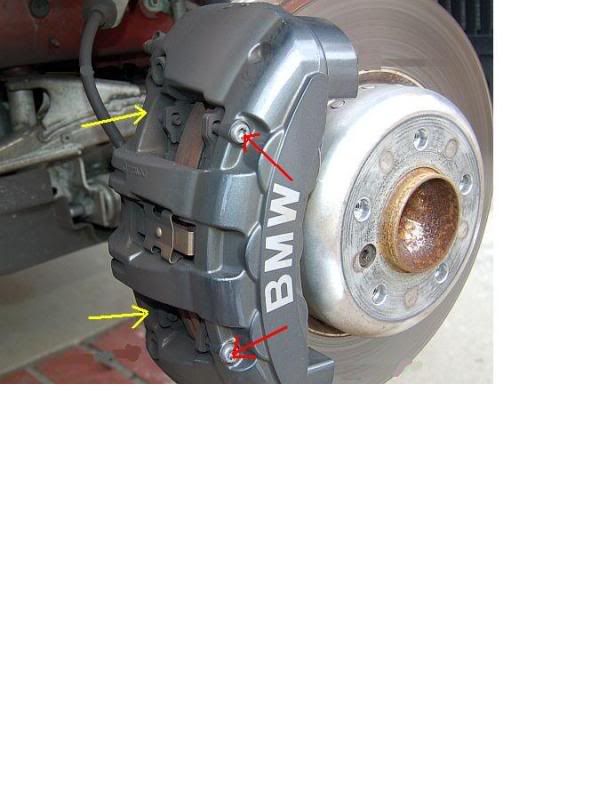
 3. Using the T-40 Torx bit, loosen and remove each of the 4 retaining pins. Note that on the front caliper there is one pin per corner, whereas on the rear calipers there were only 2 pins that spanned the entire caliper. The yellow arrows are pointing towards the pins on the back side of the caliper. Also, the retaining spring on the front caliper does not need to come out, and it will just stay in place while you perform this service. EDIT: It is not absolutely necessary to remove all 4 retaining pins. I have since found that removal of one pin from each side of the caliper allows for easy access.
 4. Now it’s time to get strong. Using your quality 10mm hex key/driver you must remove the caliper bolts which hold the calipers to the suspension knuckle. On my car these bolts were VERY firmly attached and were quite difficult to remove. I actually stopped at first and called my service tech to make sure the bolts weren’t reverse threaded. He said they were not, but he didn’t have the exact torque specs for the bolts. He told me that for caliper bolts the dealership uses the old German spec of “Gooduntight”.
 The hydraulic brake lines are still attached to the brake caliper, so you will not be able to completely remove the caliper from the wheel well while working on it. Be sure to have a firm grip on the caliper when you remove the bolts (these 6-piston monsters are not super light). It was useful to have a second set of hands to help here. Once the caliper bolts are removed you can pull the caliper away from the rotor and swap the pads.
*As in the rear, there are backing plates which I did not use on my new pads. EDIT: See note above regarding newer pads. I now use the stock backing plates for stock pads and race pads alike.
* The left front brake set has a wear sensor on the inside pad. As in the rear you can just pull this straight out of the pad. For the front I taped the sensor back over the hydraulic line to keep it out of the way. EDIT: Newer Hawk (and other) pads have a cut-out for the sensor, so feel free to reinsert the sensor into the new pads.
5. Once the new pads are in you can put the caliper back on the rotor and attach the caliper bolts. Attach the caliper bolts firmly (they are quite important) and then reinsert each of the four retaining pins until they are firmly in place. I will research the correct torque setting for these pins and the caliper bolts.
Notes:
1. Although I did not use the shims that come on the stock pads, some people have actually shaved down their new pads in order to get the shims to fit. I am not sure what the long-term consequences of not having them will be, but I can tell you what the short-term effects are. When I was executing the bedding procedure for the new pads, each of the pads individually popped into place under my first significant braking run. They actually moved up in the caliper until they were firmly against the pins. This was scary at first because it's very audible when it happens. I can only assume that the backing shims would keep the pads in one place. I also had to do a 3-point turn after my bedding procedure and when braking in reverse at least one of the rear pads popped back the other direction. The pads couldn’t be moving more than 1-2mm but it’s something I’d like to look into further. EDIT: Using new Hawk pads and the stock backing plates has eliminated this movement. I suggest that you use the stock backing plates if you can.
2. Make sure you perform the proper bedding procedure to impregnate the rotor with pad material. This is critical if you want your new brakes to work well.
3. Opening the brake resevoir just allows you to move the pads away from the calipers by releasing some of the pressure in the system. Make sure you close this back up when finished.
The hydraulic brake lines are still attached to the brake caliper, so you will not be able to completely remove the caliper from the wheel well while working on it. Be sure to have a firm grip on the caliper when you remove the bolts (these 6-piston monsters are not super light). It was useful to have a second set of hands to help here. Once the caliper bolts are removed you can pull the caliper away from the rotor and swap the pads.
*As in the rear, there are backing plates which I did not use on my new pads. EDIT: See note above regarding newer pads. I now use the stock backing plates for stock pads and race pads alike.
* The left front brake set has a wear sensor on the inside pad. As in the rear you can just pull this straight out of the pad. For the front I taped the sensor back over the hydraulic line to keep it out of the way. EDIT: Newer Hawk (and other) pads have a cut-out for the sensor, so feel free to reinsert the sensor into the new pads.
5. Once the new pads are in you can put the caliper back on the rotor and attach the caliper bolts. Attach the caliper bolts firmly (they are quite important) and then reinsert each of the four retaining pins until they are firmly in place. I will research the correct torque setting for these pins and the caliper bolts.
Notes:
1. Although I did not use the shims that come on the stock pads, some people have actually shaved down their new pads in order to get the shims to fit. I am not sure what the long-term consequences of not having them will be, but I can tell you what the short-term effects are. When I was executing the bedding procedure for the new pads, each of the pads individually popped into place under my first significant braking run. They actually moved up in the caliper until they were firmly against the pins. This was scary at first because it's very audible when it happens. I can only assume that the backing shims would keep the pads in one place. I also had to do a 3-point turn after my bedding procedure and when braking in reverse at least one of the rear pads popped back the other direction. The pads couldn’t be moving more than 1-2mm but it’s something I’d like to look into further. EDIT: Using new Hawk pads and the stock backing plates has eliminated this movement. I suggest that you use the stock backing plates if you can.
2. Make sure you perform the proper bedding procedure to impregnate the rotor with pad material. This is critical if you want your new brakes to work well.
3. Opening the brake resevoir just allows you to move the pads away from the calipers by releasing some of the pressure in the system. Make sure you close this back up when finished.
__________________
2009 135i
Dinan Stuff
Last edited by Ruffan; 11-09-2010 at 04:14 PM..
|
|
|
|