I originally posted this in the 128i engine section, but I figured it would be useful to have around in the DIY section as well for future reference material.
As some of you know I installed SuperSprint headers on my car a few months ago. It was also a bit of fitment R&D as the SuperSprint headers were for the Euro 125i coupe, and it wasn't 100% assured the fitment would be perfect(it was). As far as I know, this is the only 128i Coupe in the US with SuperSprint headers.
I meant to have a thread on the subject up fairly quickly, but recently I have been so busy that it proved impossible. Fortunately, this has given me the ability to record my long term thoughts on the mod, so in the end this is probably the best situation.

I also apologize in advance, photos were taken with a phone while working, so they aren't HDR perfection.
This thread will also be a very mild DIY, and I will be happy to give more detailed pointers/help to anyone else attempting this project. That said, since I don't support Chinese junk knockoff headers, I won't provide insight to anyone using MMW headers and the like. Buy from a reputable company like SuperSprint that refuses to export manufacturing and performs proper R&D before any project.
 Section 1: The Install
Time:
6 hours at a leisurely pace.

Tools:
Metric socket set
Various length socket extensions
O2 sensor socket
Power driver for time savings
Zip ties
Red Bull
Parts:
Supersprint Headers
Fresh stud locknut hardware
Fresh header to block gaskets
Fresh header to mid pipe hardware
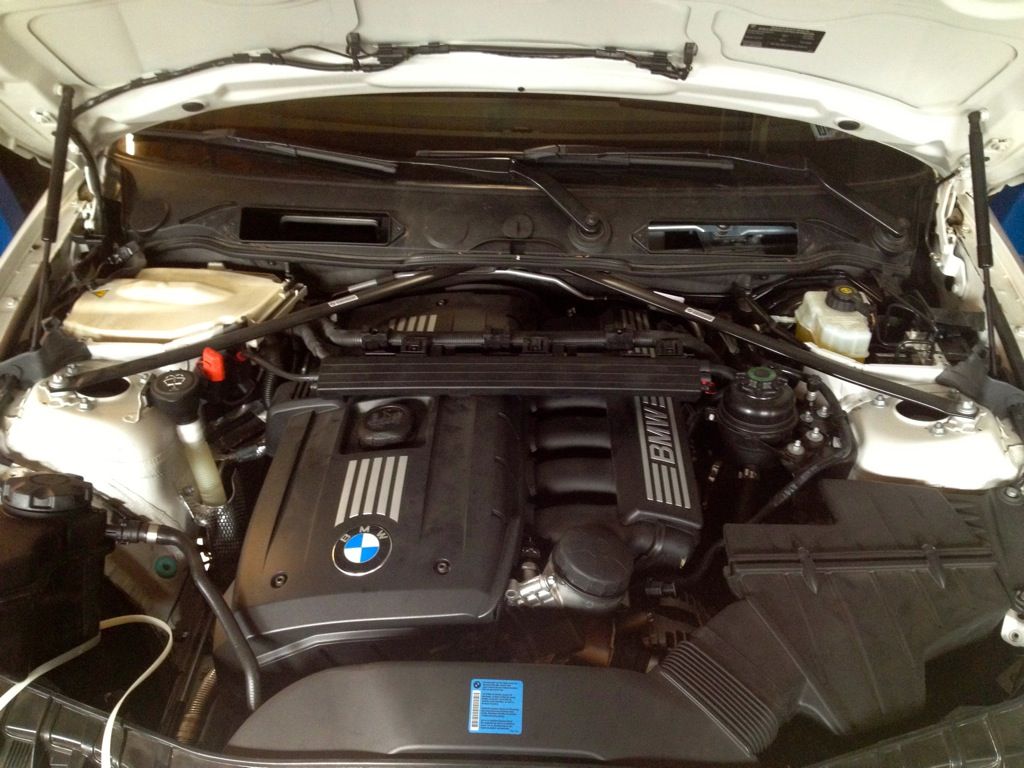
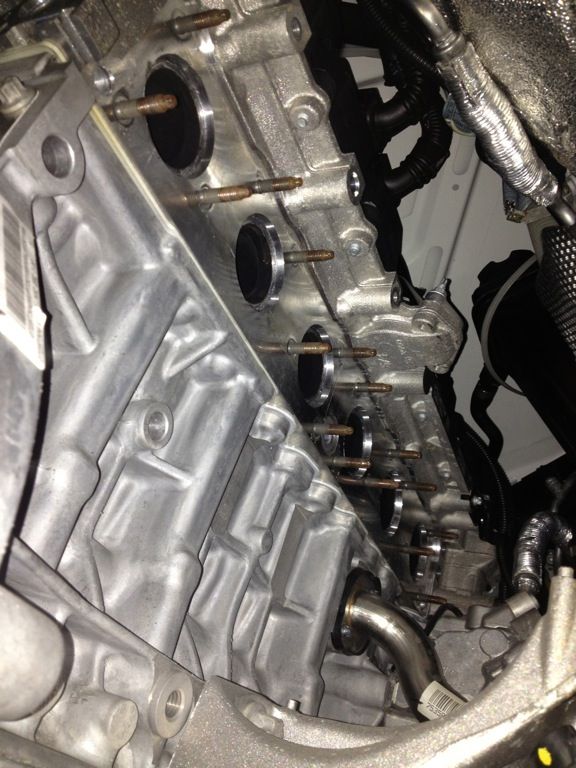
Here is where it all started. In order to proceed you need to remove the cabin air filter cover, cabin air filter, cabin air filter frame, disconnect the wires/enclosure that run above the the valve cover, remove the valve cover, and disconnect a few miscellaneous plugs. In addition, the washer fluid tank mounting bolt needs to be removed so that you can maneuver the washer fluid tank to allow access to the engine block side of the header mounting hardware.
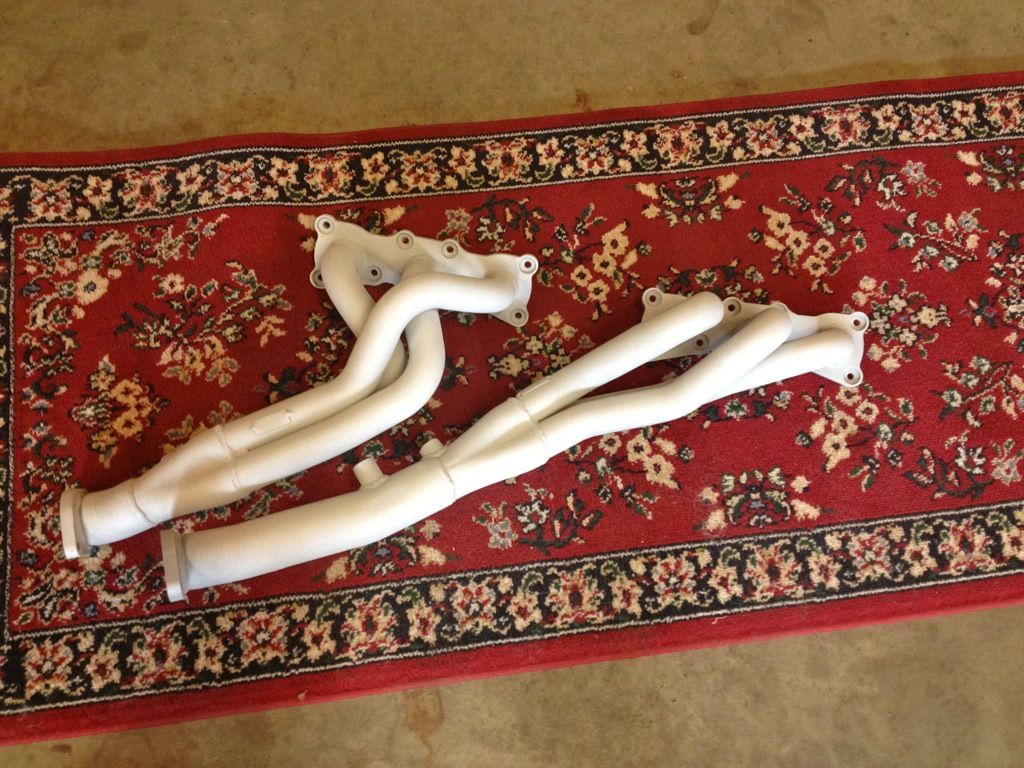
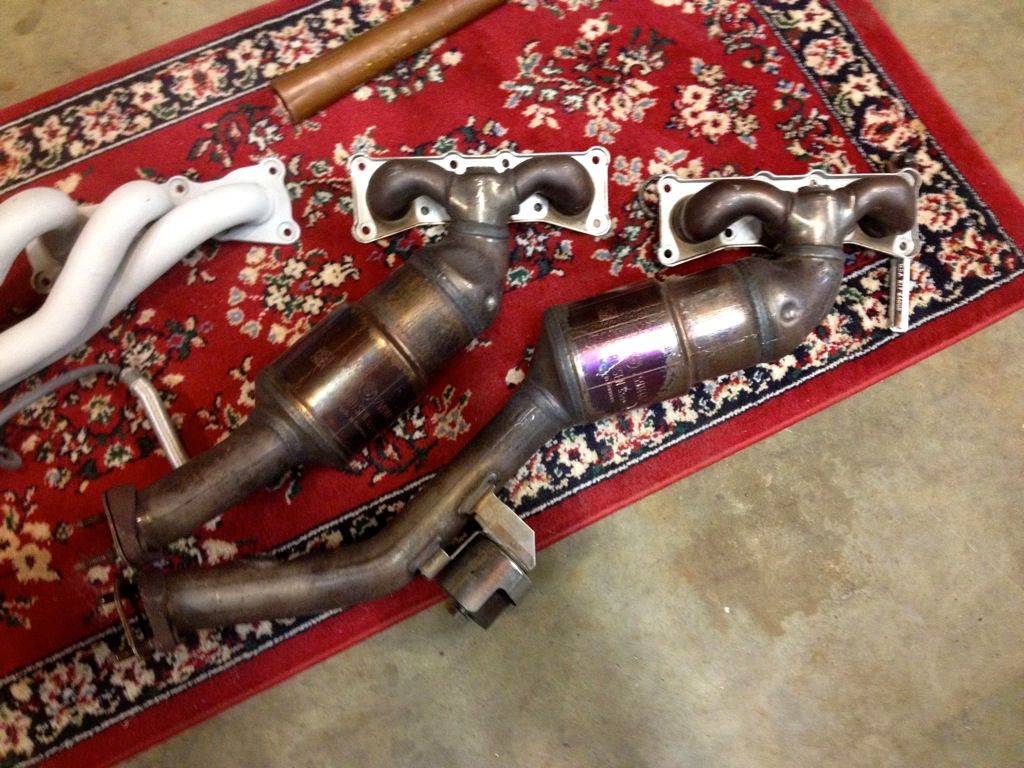
Here is what I installed. I never saw the SuperSprint headers in the raw as I had them shipped directly to
Swain Tech for a full ceramic coating. For those who are curious, coatings like this maximize the thermal efficiency of exhaust components and lower overall engine bay temperatures. The net result is a gain in power and reduction in heat soak, both of which seemed highly important to me in a N/A engine that I'm trying to get every ounce of power out of and is built primarily from aluminum and magnesium.

When you finish with the topside disassembly, this is roughly what you should be left with. You may have noticed in this pictures that the precat O2 sensors are mounted on the top of the collector banks, where on the SuperSprint versions they are mounted further down the manifold. More on that later.
At this point you are ready to move under the car. Remove the front underbody panels which should expose where the factory collector track bolts to the factory mid pipe. Also of note in this picture is the anti-vibration bushing fitted to the base of the factory collectors. Seeing as it is connected to the factory pipes, you are unable to reuse it, but I can confidently say in 2 months of usage I haven't heard so much as a peep of a vibration/rattle from the SuperSprint replacements. Also, make sure to wear a sweater while modding, it is cold this time of year.

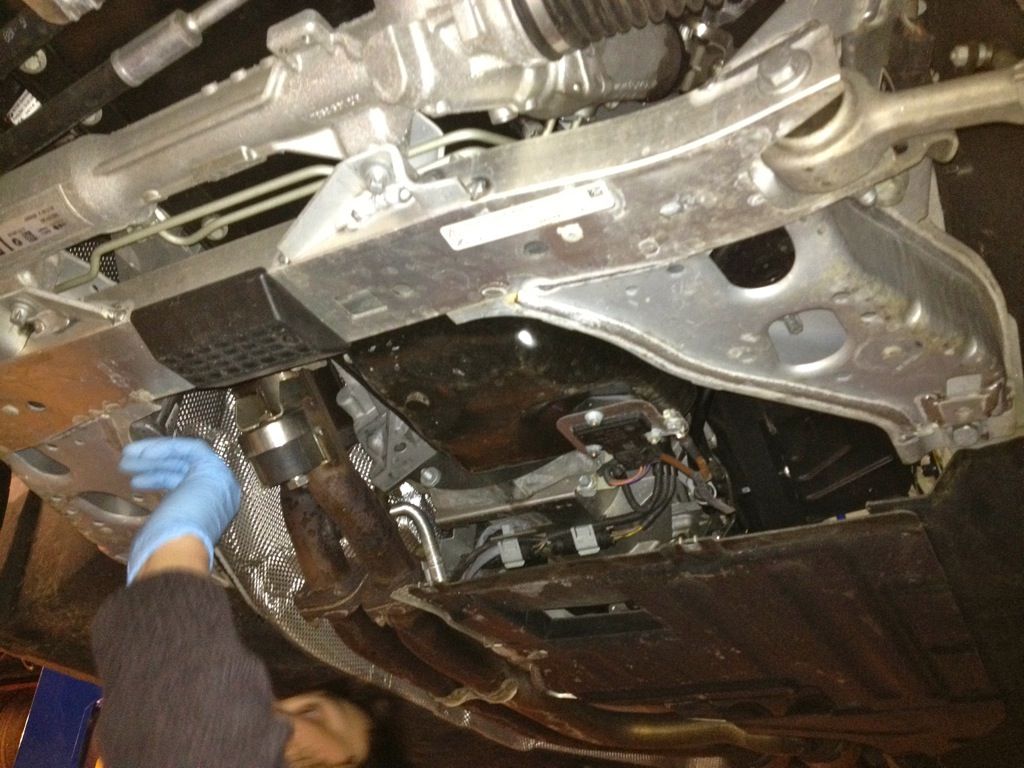
At this point, alternate from the top and bottom to remove the nuts from the engine block studs on the stock collectors. Some will be at awkward angles and require some ingenuity in terms of arm and body alignment for proper access. Don't worry about dropping/losing them as you should be replacing them with new factory hardware. The nuts are lock nuts and are a one time use item. Once you take them off they are spent and trash. New hardware also only costs a few bucks. When finished, return to the underside of the car and unbolt the headers from the mid pipe, making sure that you disconnected/removed the O2 sensors first. At this point you can feed the stock collectors down and out the bottom of the car, leaving you with this:
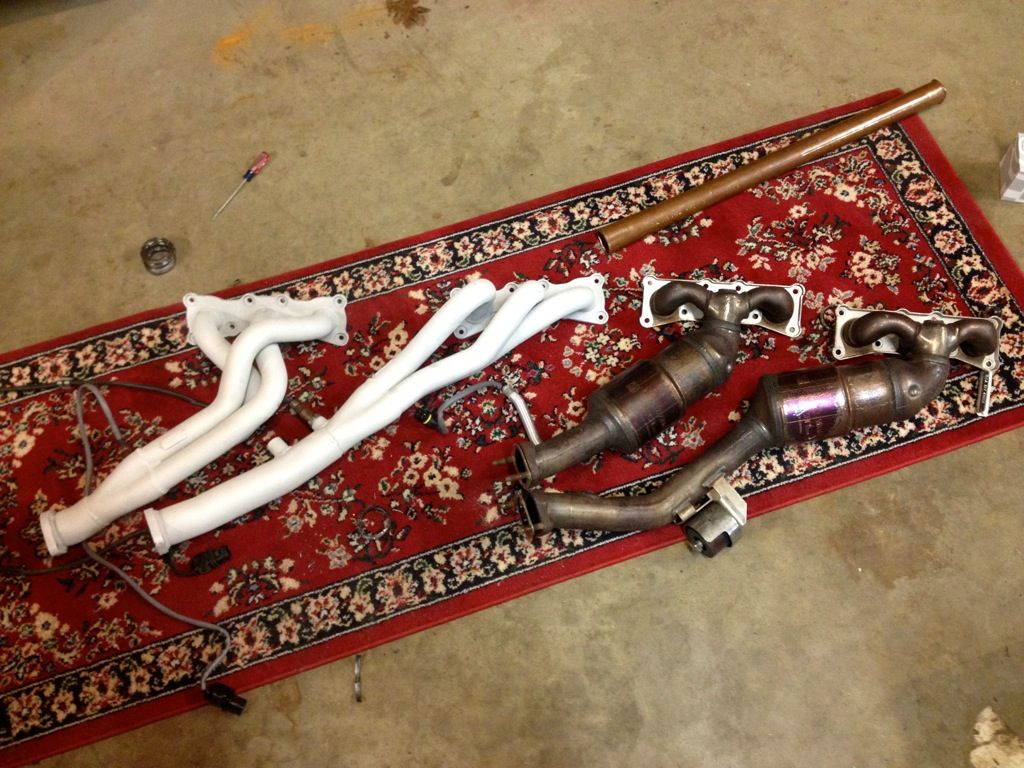
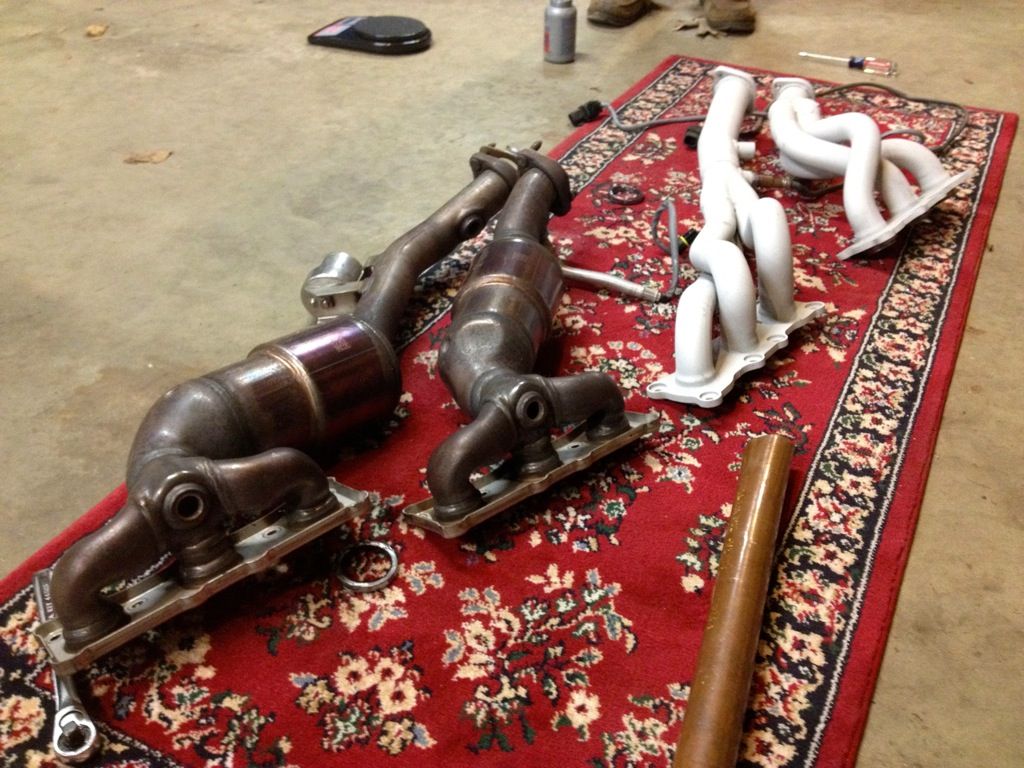
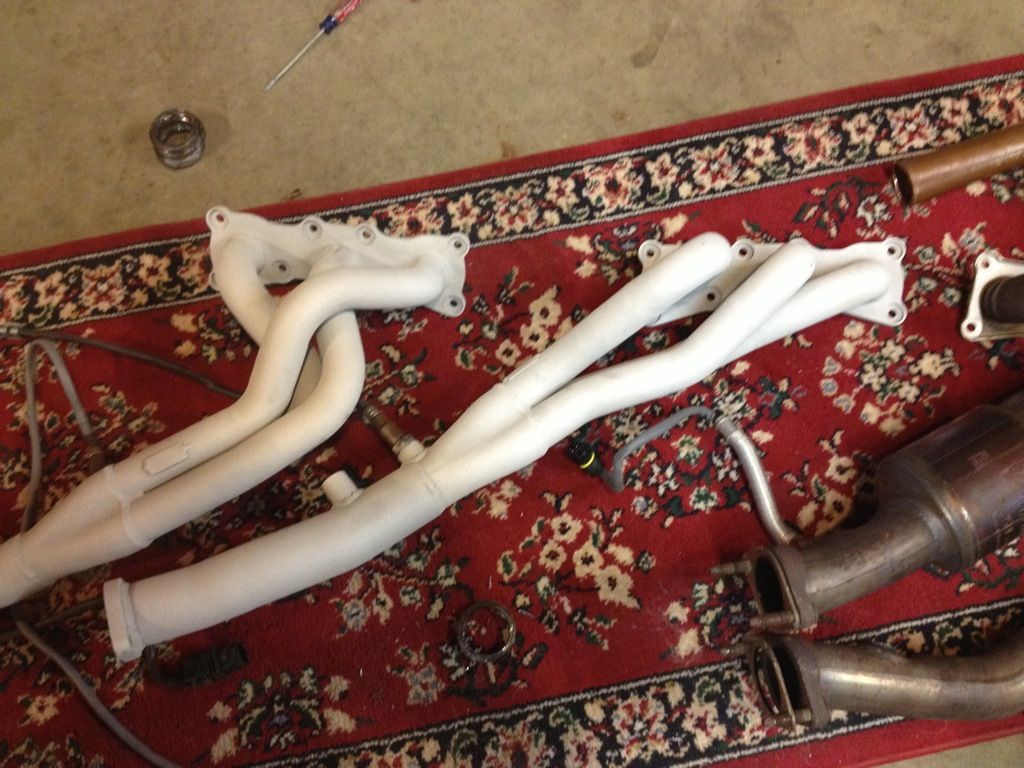
At this point I plunked the stock collectors down next to the SuperSprint headers for a photo op. The factory unit, while surprisingly light, still weighs a decent bit more than the SuperSprint version. In terms of equal length piping, there isn't even a shadow of similarity. This is also a good time to fit your new engine block to header gaskets in place on the headers. You need to do a good job of this because if you have a leak you will need to repeat the entire process over again. The fitment is extremely tight on the gaskets, so take your time. Also make sure to transfer the O2 sensors from the factory collectors to your new headers at this point.
After you have fitted the gaskets, you are free to feed the new headers up to the engine block. This takes a bit of time and positioning, but is a pretty easy process. I honestly forget exactly which one goes in first, but I vaguely remember it being one to about a halfway point, and then the other one joining it to go up. After you get them near the block, feed them on to the studs and apply a few new lock nuts to each bank to keep them from falling off. Work your way around and get a lock nut on each stud of the block. Working your way around again, tighten them all down equally in small amounts so that no nut gets far ahead of another in tightness.
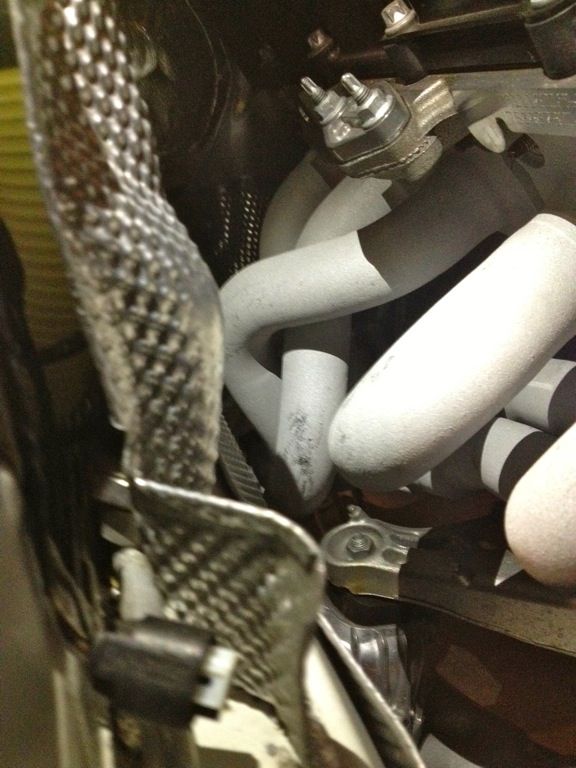
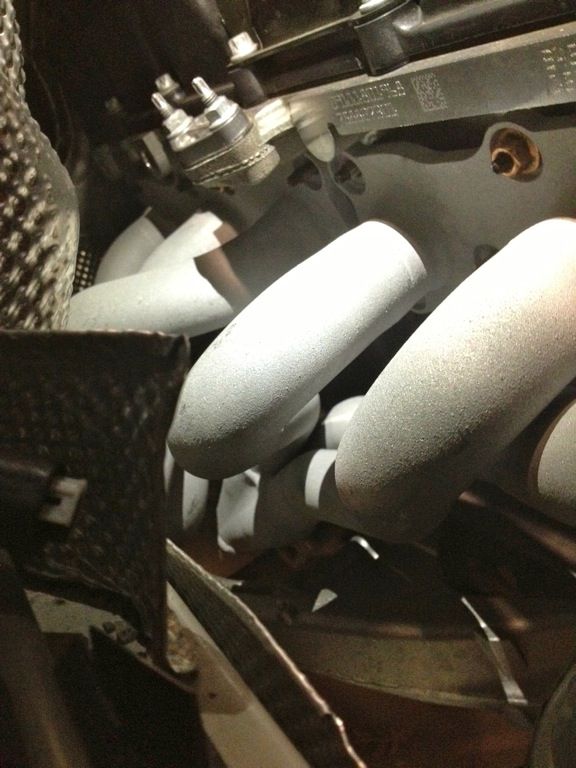
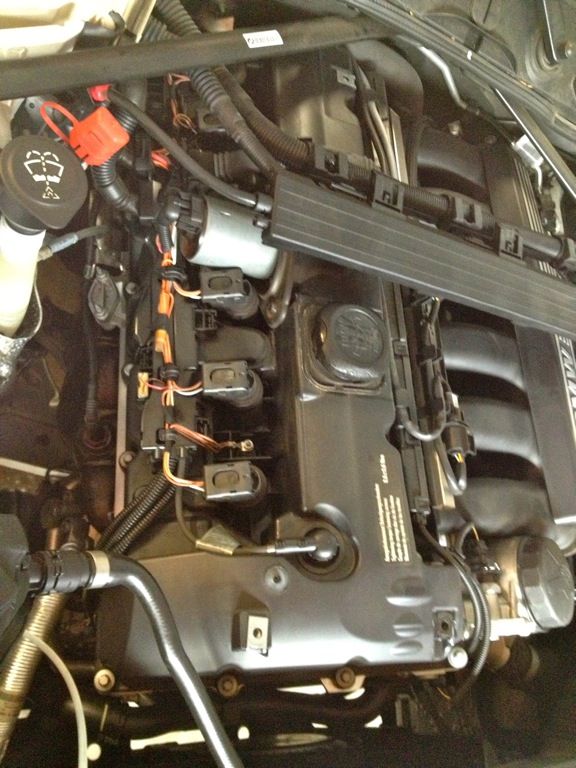
With everything tightened down, you should be left with something similar to this. This is also when you need to reroute the wiring from the O2 sensors. Using some of the original factory clips and some other routing, I was able to get them back up to the factory connectors under the valve cover. It is a tight fitment, but it works. I should note that the scuffs you see on the headers are from a bit of the heat shielding rubbing off onto them during the install, not the other way around.

At this point you just need to reassemble everything you took apart from the top and bottom sides of the car.
Section 2: Review
Wow.

I was simply floored at the difference the headers made over stock. I installed them expecting a few HP(SuperSprint is notoriously conservative in their gain estimates) and what I got was a completely transformed car.
Fitment was perfect. I'm used to this from a large amount of experience with other SuperSprint products, but it is the case all over again. Don't expect this with Chinese junk knockoffs, I've seen that pain first hand many times.

In terms of power there are gains across the entire band. Low end torque is vastly improved, mid range power is more insistant, and top range horsepower really pulls the car along now. Throttle response is also vastly improved without feeling jumpy in any way.

In terms of sound the headers would be worth even if they made zero power. On stock pipes aside from the "golf tee" mod the car is perfect. Zero drone inside the car, complete comfort with the windows up, and the sounds of an absolute animal when you get on it. Even low speed driving is a complete blast. Let off the gas from 2500-3500 and the car has a spectacular new burbly overrun. I sadly was unable to capture it on video, but you will find yourself tapping the gas incessantly to trigger it. I welcome any 128i owners who are in my area to swing it for a demo, it is fantastic.
Without further ado, the video, which like all exhaust videos, barely captures how awesome it is:
Dyno:
