So i did and Helix FMIC install today, solo i might add.. took me around 4 hours to do however, but i didnt mess anything up.
If you have retard strength like me , you dont need help..

OK,
So basically i wanted to take pics as i went along with this install. I mainly stopped and took photos of certain areas and procedures of the install that where not included or unclear in any of the FMIC videos or guides I saw on youtube.
I will skip a lot of whats already included in a lot of
those videos already and just attempt to clear up the parts they may have missed.
those videos :
and
Removal of the stock FMIC is very easy and well documented in these videos. No need to discuss that further..
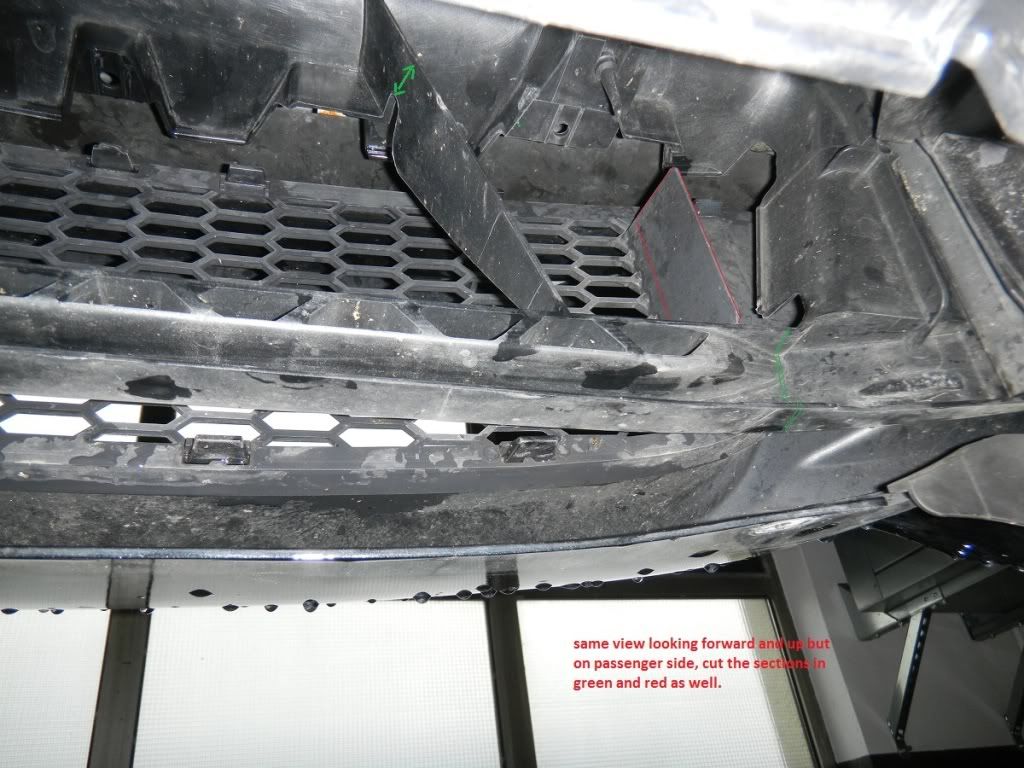
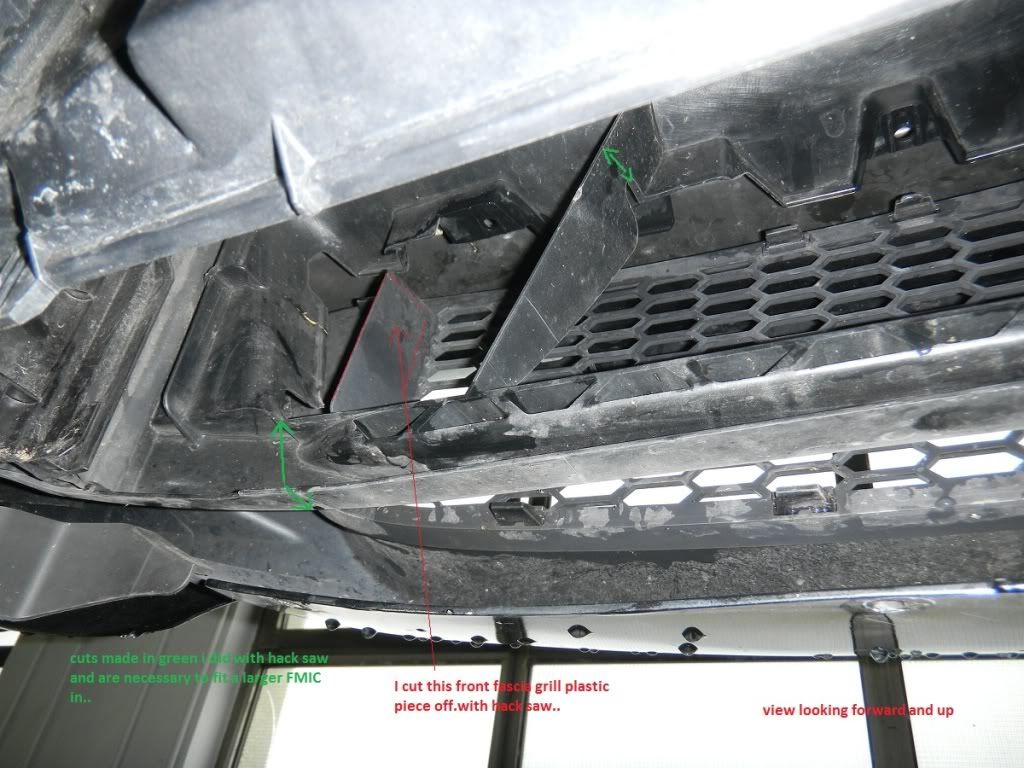
Now, One major thing everyone wants to know and is not included in these videos, where to trim! ?
Trimming i did is based on the Helix FMIC and HPF intercoolers:
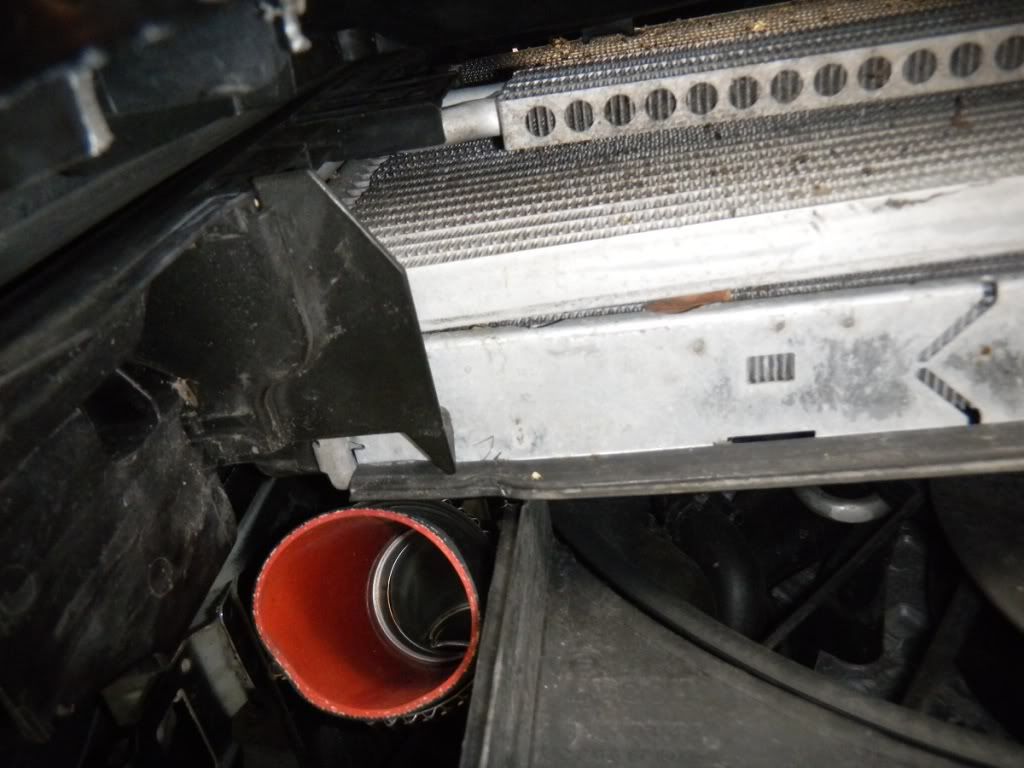
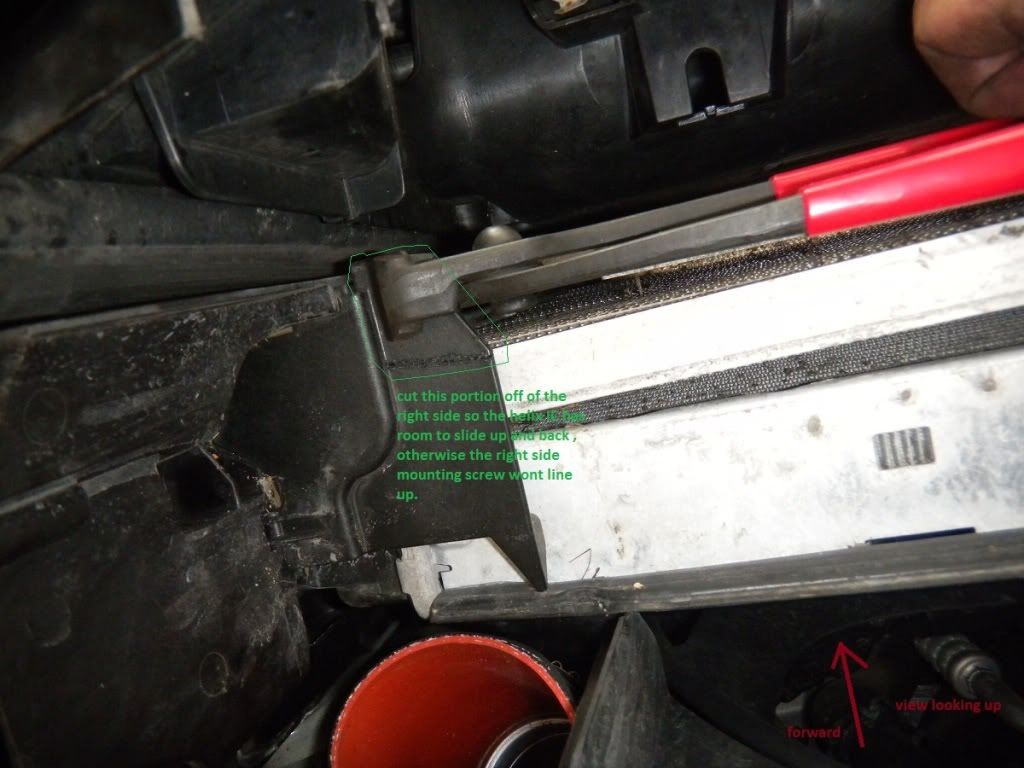
 This small corner of plastic was a big deal. I was able to put the FMIC up and in enough but was not able to line up the passenger side mounting screw. It had to come off..
This portion on passenger side only, you will need to trim if you are installing the Helix FMIC, im not sure if you need to trim it with the HPF IC..
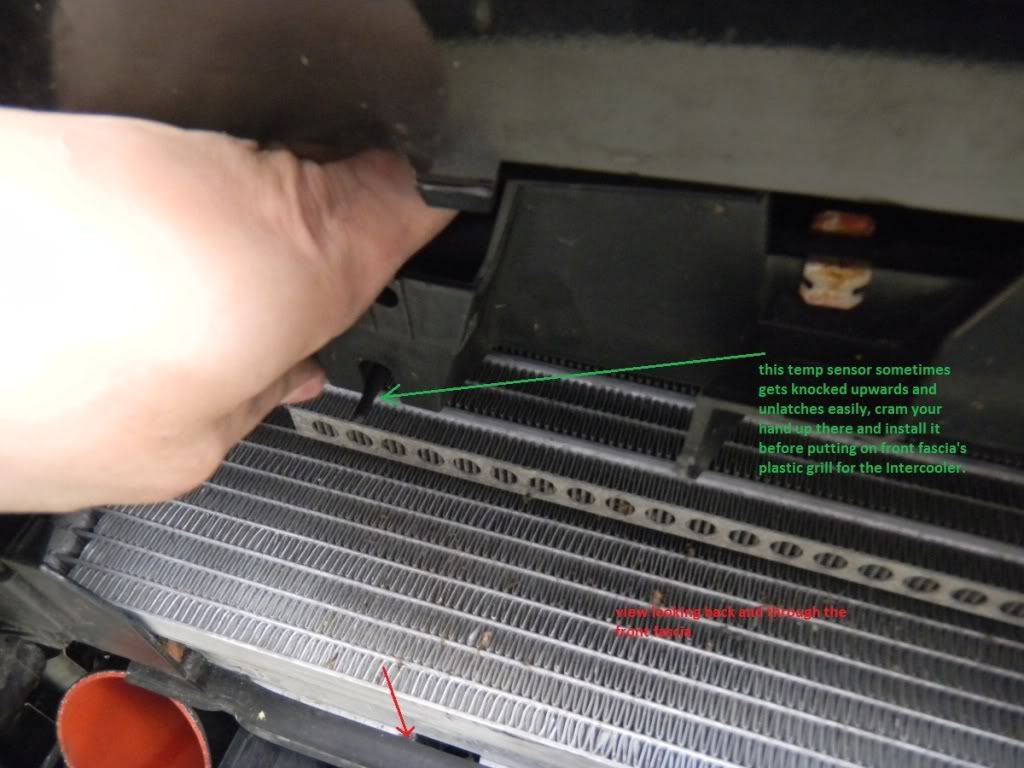
 When installing the Helix FMIC(with its tall front face stepped portion) you will most likely hit a temp sensor mounted just inside the front fascia's plastic grill on the top passenger side area.. It looks fragile and can break if you dont place it asside before mounting the intercooler. It comes out easily by pushing straight up on it. putting it back, you will have to do a reach around method
  as seen below, and to do this, you will need the plastic grill removed:
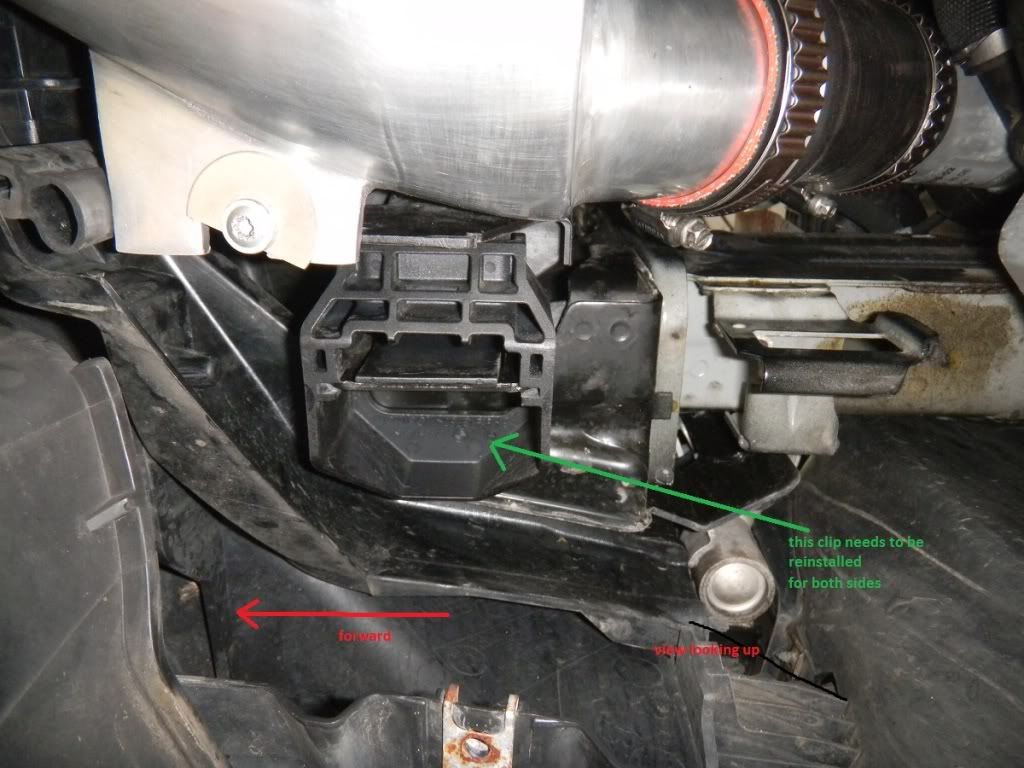
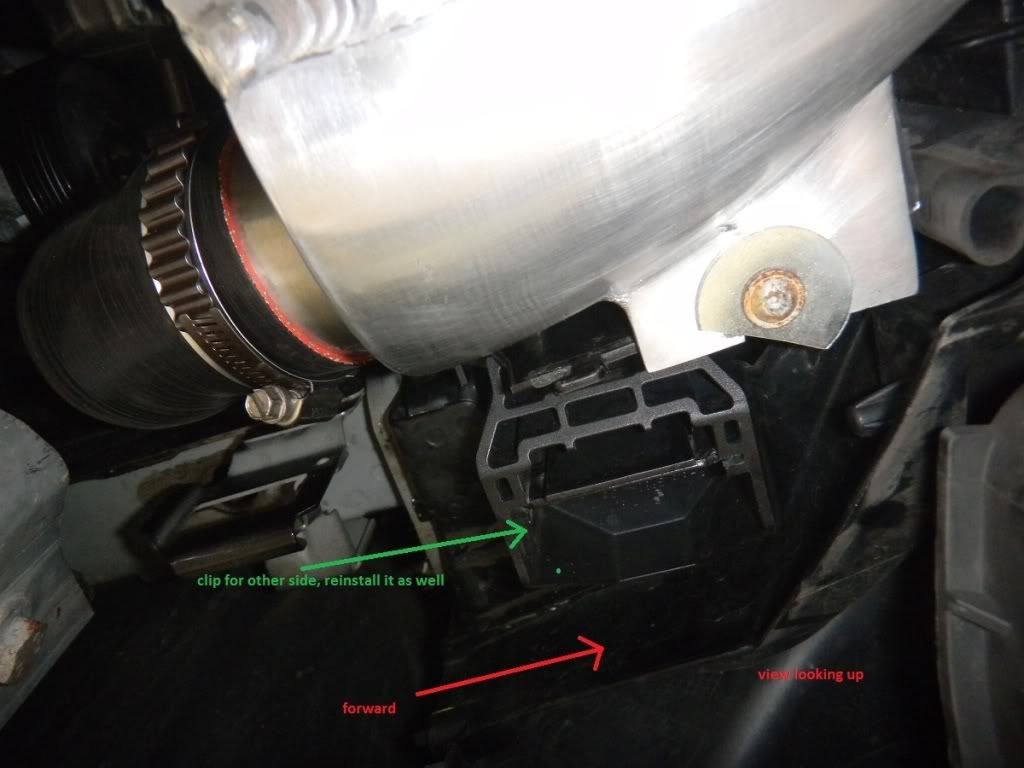
 Another crucial part not really shown besides Helix' video(very briefly however) is the load bearing clips that hold it all together.. they are the main thing that prevent the radiator and FMIC from falling out of the car! besides the hoses .. lol.. Taking these clips off is necessary to get a lot of play in the structure that the intercooler mounts too.. This play will help when installing the rubber couplings and clamps as well.
Quick Video to get an idea of whats going on when the clips are removed:
Another crucial part not really shown besides Helix' video(very briefly however) is the load bearing clips that hold it all together.. they are the main thing that prevent the radiator and FMIC from falling out of the car! besides the hoses .. lol.. Taking these clips off is necessary to get a lot of play in the structure that the intercooler mounts too.. This play will help when installing the rubber couplings and clamps as well.
Quick Video to get an idea of whats going on when the clips are removed:
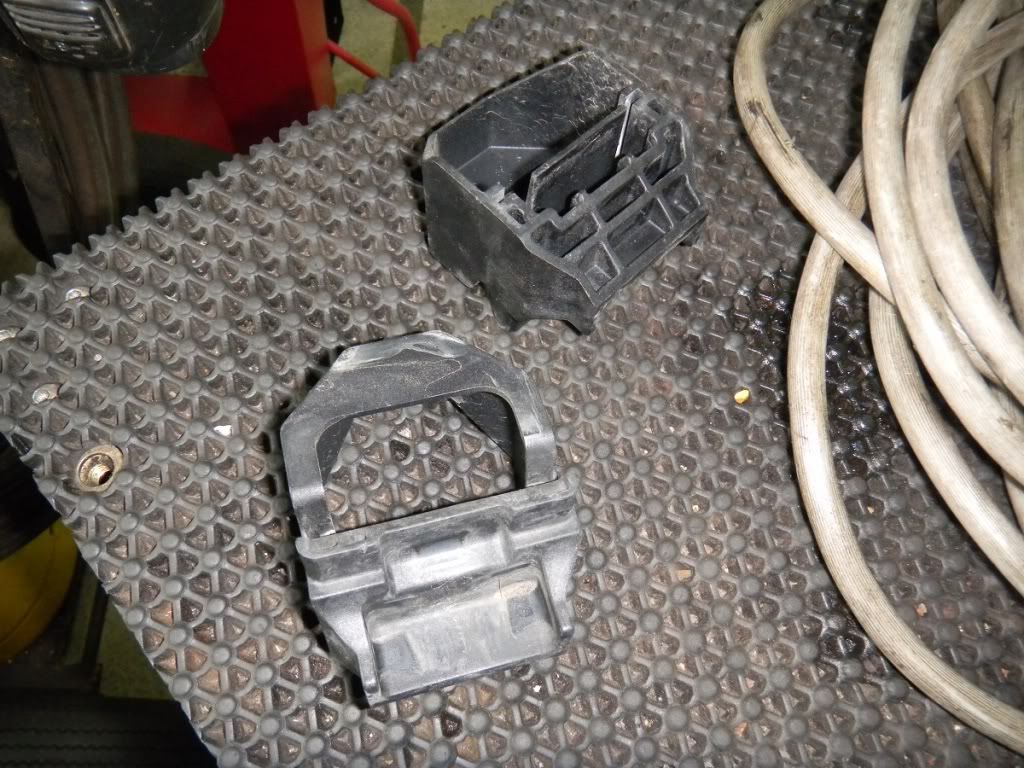
 this is what the clips look like top and bottom:
 install clips after your new IC is mounted with screws and the duct couplings are lined up or already tightened. I personally lined up the ducts on the IC and then to get more of the rubber over the new IC i had to push the IC+radiator assembly up hard and get both clips to lock in place. This gave me more rubber to work with and create a good seal with the clamps.
 One last thing other DIY's didny tell ya! Use Enginuity!

Hopefully after this extra info it will make installs easier for other people, as well as more confidence when your out there getting your
hands dirty..
My pain your gain...