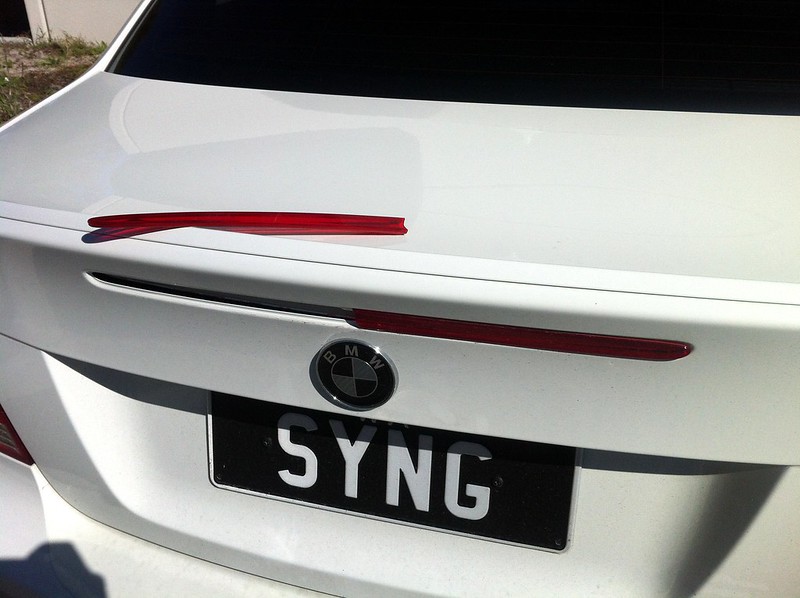
Following my theme for random unfortunate events with cars I walked to my car one day to notice half the brake light on the ground. As it turns out it is a common phenomenon for the 135i’s to break the 3rd brake light due to a design flaw and that it is covered under warranty.
“Nature of Defect:
EXTERIOR LIGHTING:BRAKE LIGHTS
Bulletin Number:
SIB-63-10-08
Bulletin Date:
Jun 2010
Summary:
BMW: MOUNTING TENSION OR THE CUTOUT AREA OF THE TRUNK FOR THE LIGHT IS CAUSING THE THIRD BRAKE LIGHT LENS TO CRACK. THIS IS ALLOWING WATER TO LEAK IN. ( NHTSA ITEM NUMBER - 10036986 )”
I spoke to Auto Classic about it and they denied this fact and wanted to charge me $500 to replace it. I couldn’t be bothered dealing with them since a genuine new replacement only cost $60 online so I might as well cut my losses.
My luck with cars:
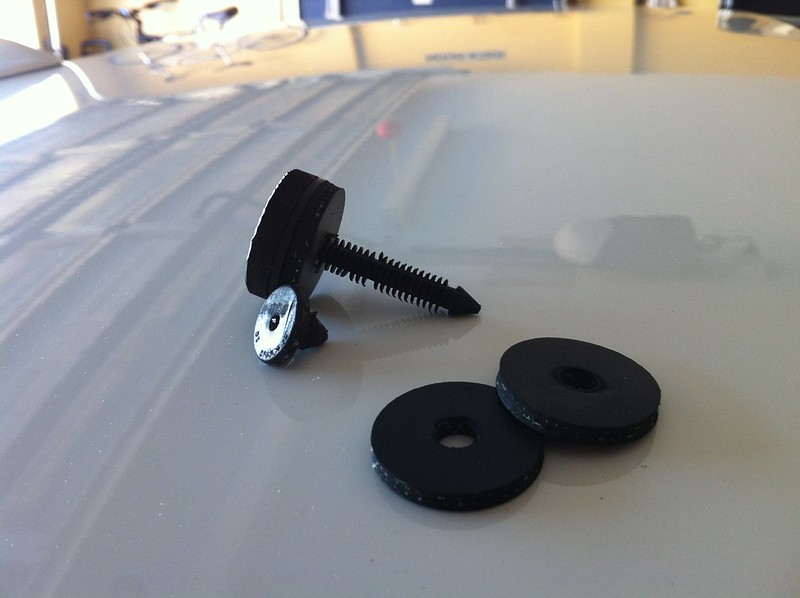
The same day my BMS clutch stop arrived in the mail. The original BMW clutch pedal has a significant dead zone beyond the full disengagement of the clutch resulting in an unnecessary long throw. This is resolved by simply replacing the stock stop with a simple BMS item which improved it drastically.
Stock nipple vs BMS stop (I am running 2 spacers):
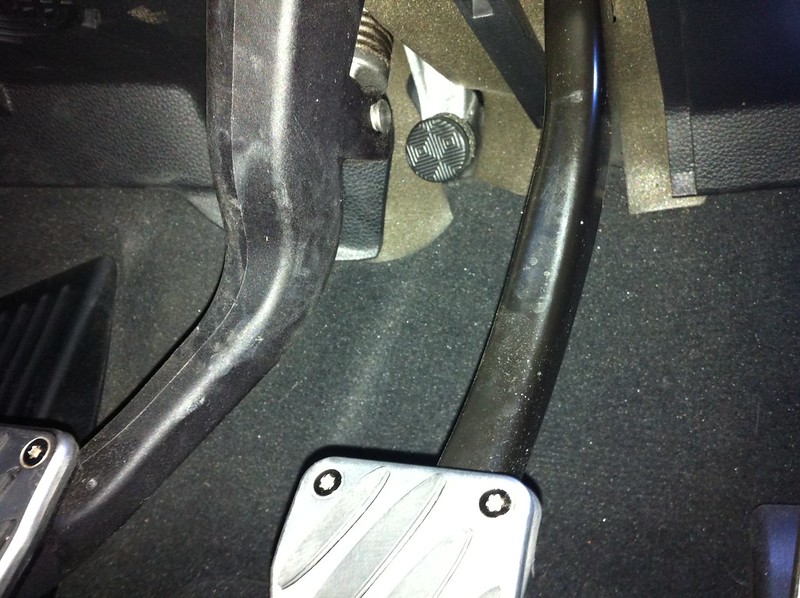
Installed stop:
I also began removing the standard spoiler:

That weekend I went to visit Josh at Galvsport again to finally fit the Eibach springs. I also went ahead and did something dodgy, I bought set of Macht Schnell spacers to “stance” out the wheels temporarily until I decide on what new wheels to run so they were fitted too. Upon arriving Josh was not impressed with my partial spoiler removal, I gave up on removing the adhesive however he demanded me to finish it off haha. BMW used some nuclear grade tape to attach the stock spoiler; it took a solid 30 mins with Prepsol to remove the adhesive. Once it was clean I installed the carbon fibre replacement.
Such a pain:
Parts waiting to be installed:

“Hellaflush” (The Celica in the distance):
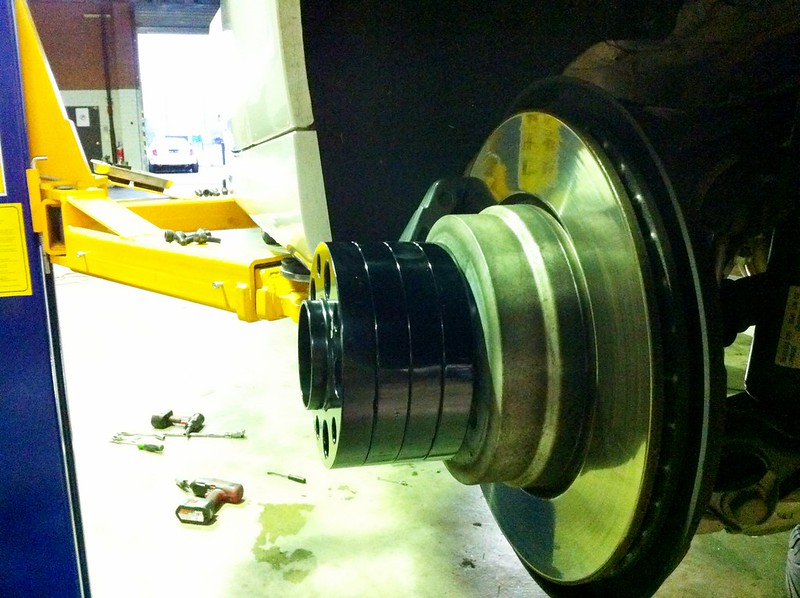
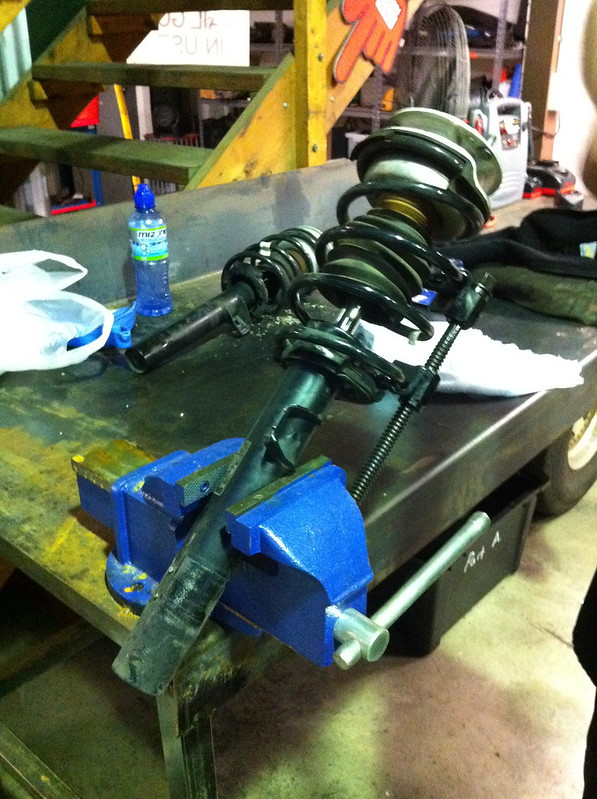
The spring install was relatively straightforward; the only complication was to make sure we didn’t damage the sensors for the brakes and headlight height sensor.
Front struts out:
Stock front springs vs. Eibachs:
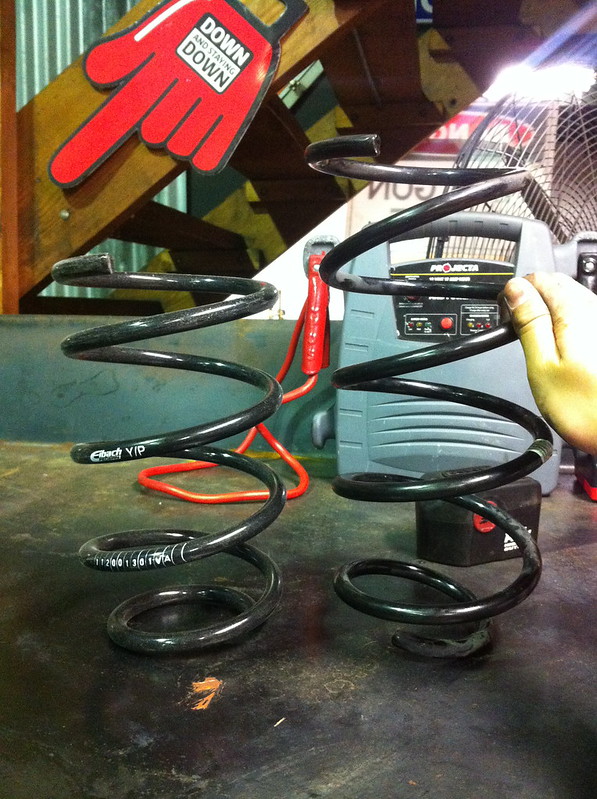
Stock rear springs vs. Eibachs:

Rear 20mm spacers:

Front 20mm spacers:
The springs didn’t settle for a few days so the pictures aren’t the best representation. The drop isn’t drastic but it has improved the appearance significantly. Others recommend 15mm spacers on the front and 12mm spacers on the rear. I was happy with my choice of 20mm on the front but I do admit I went too aggressive in the rear using the 20mm spacers given the fact I am running 255 Federals that run wide over the standard 245 Bridgestone run-flats. I went ahead and ordered another set in 15mm to replace the rears.
All these minor upgrades here and there started inspiring me to pick up the pace and install other parts I had lying around. Knowing my luck with hitting things I got the carbon diffuser strengthened before I went ahead and fitted it.
Stock diffuser removed:
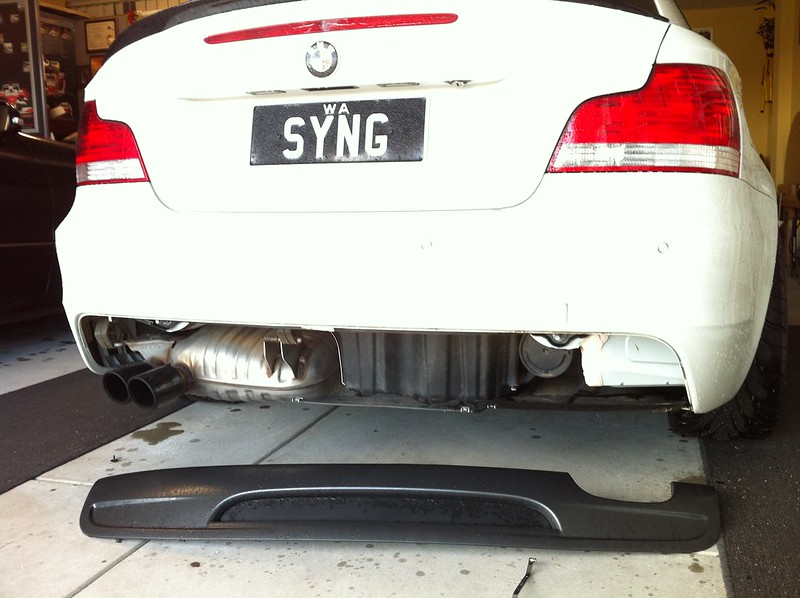
Carbon diffuser fitted:

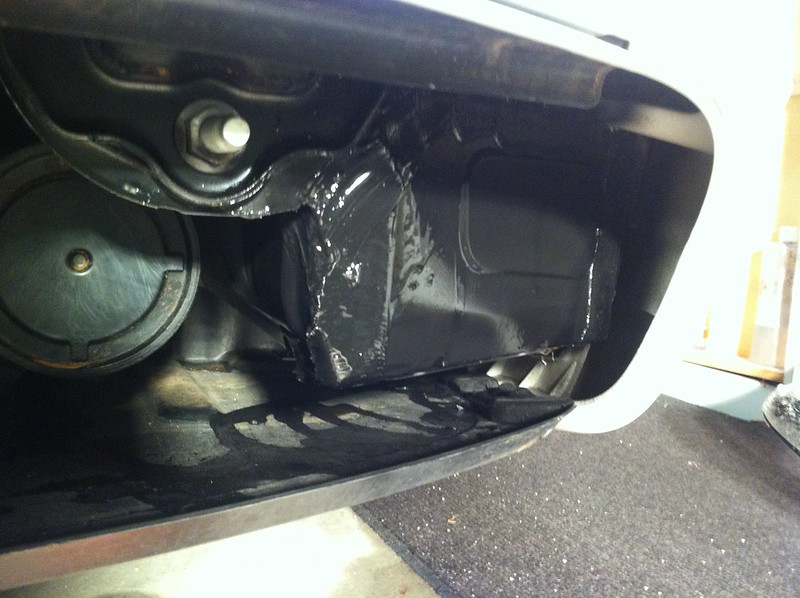
The diffuser has mesh on it that exposed the silver muffler along with some white painted areas behind it. I wasn’t happy with how this looked so I went ahead and masked up the area and attacked it with some high heat black paint. It has been a few months now and there are no signs of paint flaking.
Problem solved:
Blacking out the muffler:
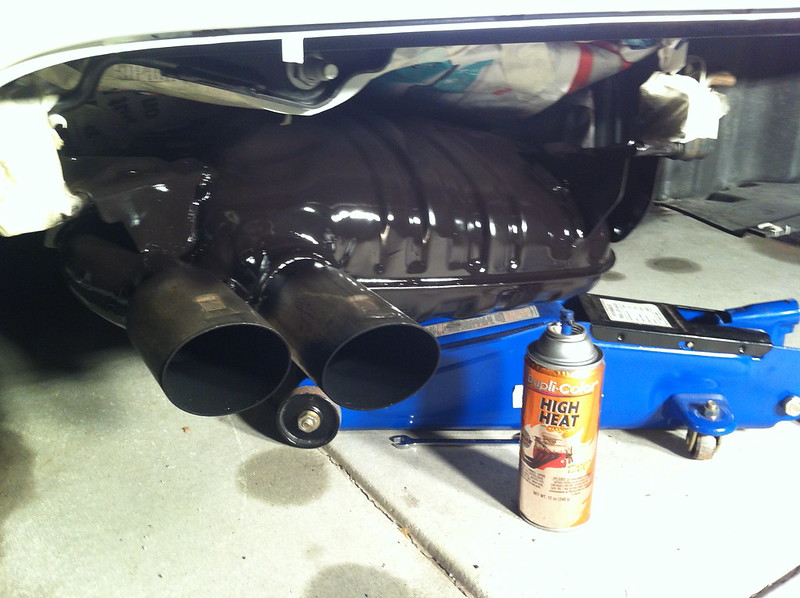
Revised carbon rear end:

The Celica has a satin black roof; and since I am such an original thinker I decided to go on a
completely different path with the 1 and chose gloss black instead this time around. This actually helps the sunroof blend in much better along with suiting the car more in my opinion. Gavin and Ryan at GT Graphics did the wrap once again and I am very happy with the results. I decided against carbon fibre mirrors for the time being so I got them to wrap the white mirror caps instead.
Déjà Vu:

Blowtorches are totally necessary:

Wrapped mirrors:

Nothing interesting happened for another 2 weeks, except that my replacement 15mm MS rear spacers arrived so I went ahead and installed them.
Replaced rear spacers:

I had a slight rubbing issue after the spacers and lowering so I needed to get the rear guards rolled. After hearing reviews of Des from AutoFX I went ahead and booked him in for the rear roll. He dramatically improved the issue, but he wasn’t comfortable on bolting in a guard roller in fear the guards will get damaged. The heat gun and mallet technique was employed instead, but due to the design of the BMW rear guards and his conservative approach I may need to get the guards cut or at least rolled again in the future once I change the wheels to something wider and more aggressive.
Des “rolling” the rear guards:

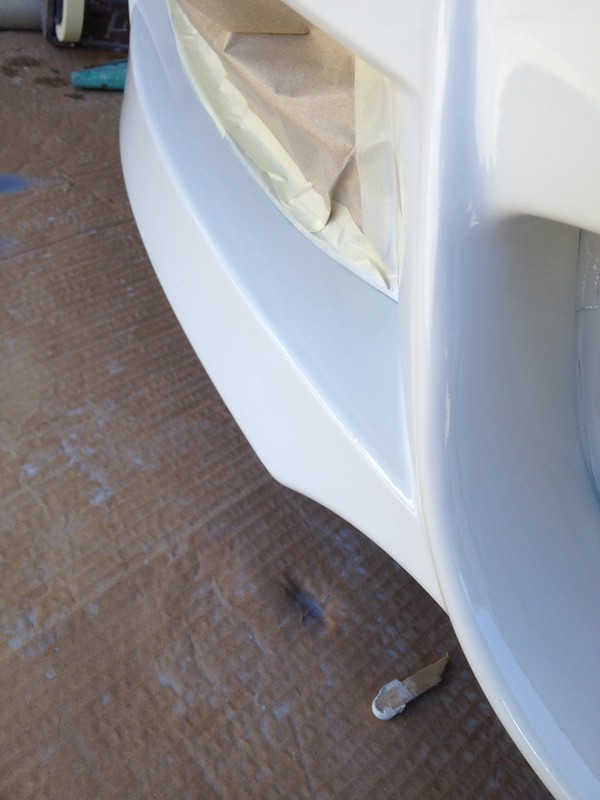
Now this can’t be my patented build thread if there weren’t any “incidents”. I was driving down the freeway during heavy rain heading to indoor soccer one day and as I was crossing Mount Henry Bridge the curse of the Morgan appeared. A piece of metal fell off the back of a truck in front of me; and with limited space and time I wasn’t able to dodge it so it struck my car at a considerable force. I didn’t think much of it and continued driving. It was only upon reaching Lords I realised the extent of the damage, the piece of metal managed to create a gash in my bumper. In hindsight I was lucky it didn’t land higher up otherwise it may have caused considerably more damage.
Not ideal:

To add salt to the wound a set of Exotics Tuning carbon fibre front splitters arrived a few days later. I didn’t want to run the Kerscher or iCarbon front lips due to the common nature of them in the 1 series scene. Exotics Tuning made a carbon splitter that was different and I liked them. The only issue was that they only produced a limited 100 set run. As luck has it someone was selling a set with very minor damage over in Canada. I bought them from him and planned to get them fixed locally before I fitted them. Turns out I had to fix my front bumper before I fitted them too.
Exotic Tuning splitters:

Now we fast-forward a couple of weeks. I was away in Hong Kong and on the day I returned to Perth the car was not running as smooth as I expected. There were a few misfires when boost came on and I thought it was just a case of older fuel and a possible need for a spark plug change. The daily errands continued until this came up.
Lol:

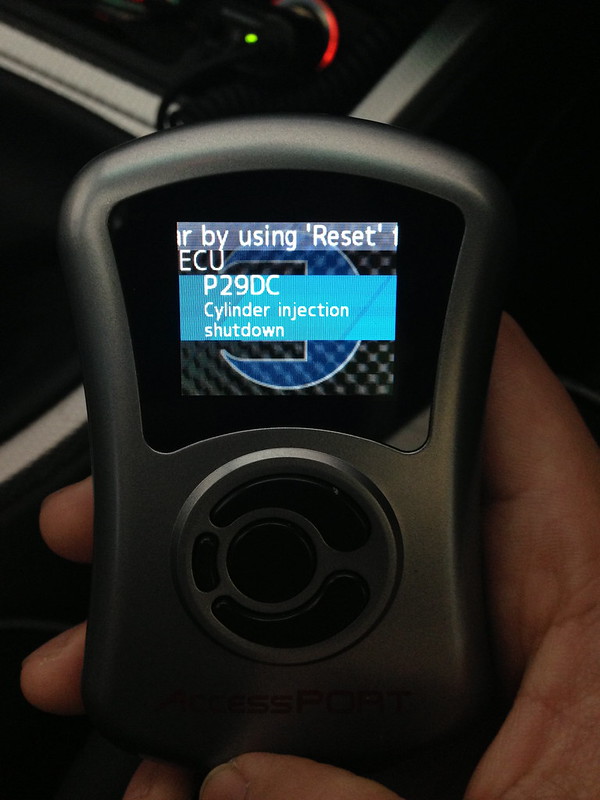
I was in 2nd gear at the time accelerating at a moderate pace, the car made a loud bang/miss and the warning came up. I pulled over to the side of the road and checked on the car, I noticed the intake was a bit loose so I re-tightened it and turned the car on again. It ran as normal so I didn’t think much of it, when I was home I checked the Cobb and it came up with a “P29DC – Cylinder injection shutdown” fault code. I knew something wasn’t right. I had the suspicion it was injector failure due to the fact the N54’s had a recall a while back for failing ones. The thought of a failing high-pressure fuel pump “HPFP” also came across my mind since once again there was a recall for them too. However there were no obvious codes coming up and the car drove fine for the next few days, I still loaded a 92ron map on the Cobb just in case and waited for some more codes to come up for easier diagnostics.
Fault code:
I organised a time to get the bumper repaired but curiosity got the best of me and I trial fitted the splitters. The damaged edges were already fixed so I wanted to make sure the fitment wasn’t effected.
Trial fit:

My trial fit ended up staying on the car even though it wasn’t fitting properly, others were not impressed with my dodgy ways when they saw it at breakfast at txtSHOTS that weekend. After breakfast we went to visit Steve at Autopro Innaloo I wanted to see if he had the spark plugs in stock so I could change them that afternoon, unfortunately they weren't but he went ahead and ordered a set for me at a very decent price. It turns out the N54's use a different spark plug socket compared to the norm so it wouldn't of been possible to change the plugs that day anyway. We also went to Galvsport afterwards and it appears Josh stepped it up with customer service. With the money he makes on my breakages he invested in a larger tow truck to fit both the cars in times of need.
How thoughtful:

A week had passed and the car still wasn’t throwing codes nor did it consistently show the traits of a failing HPFP or injectors. This was rather frustrating due to the fact it makes diagnosing what to fix quite hard. One night driving home it finally happened, the ECU went into limp mode and the Cobb came up with the same issue “P29DC – Cylinder injection shutdown”.
Limp mode:

Same code:

I was happy/disappointed at the same time since I have finally isolated on what needed replacing. Upon speaking to several people very familiar with N54’s they suggested this code doesn’t necessarily mean it needed new injectors but instead it is an early sign of the HPFP letting go. I started looking into the options of bringing the car back to Auto Classic which required me to remove all the modifications, or if it was worthwhile getting the parts ourselves and replacing it instead.
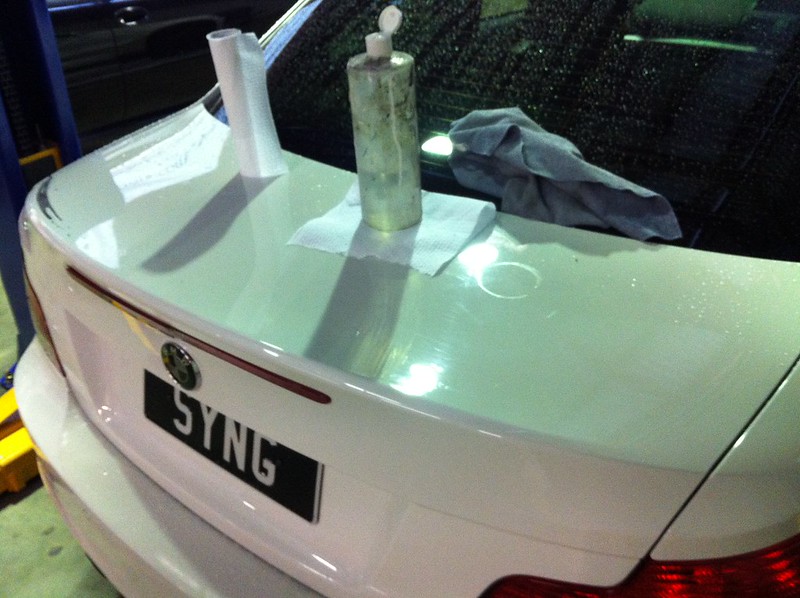
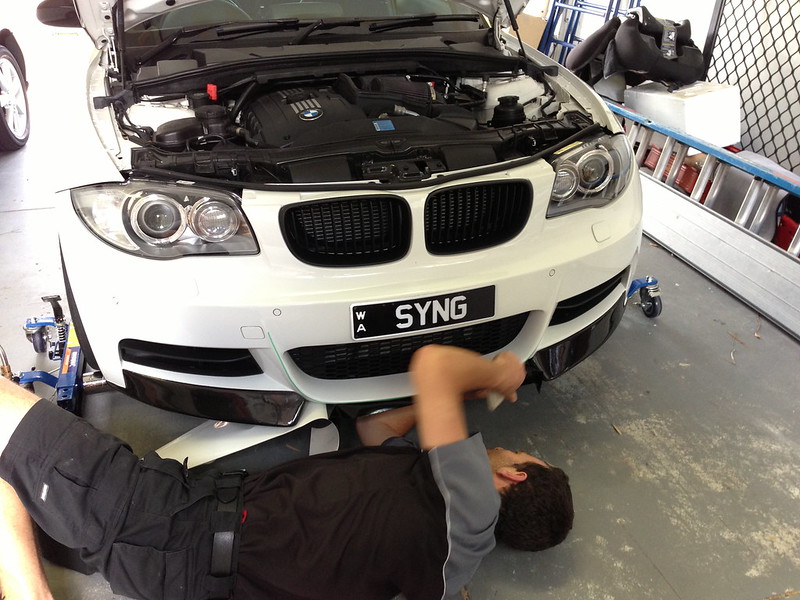
Regardless I still went ahead with getting the front bumper repaired along with fitting the splitters. I had plans on changing the front bumper entirely but was talked into repairing the bumper instead. So far it appears to be holding up and unnoticeable unless you look very critically. If it ever annoys me enough I will change to a new bumper in the future but for the time being, it will stay.
Repair:
Carbon splitters installed:

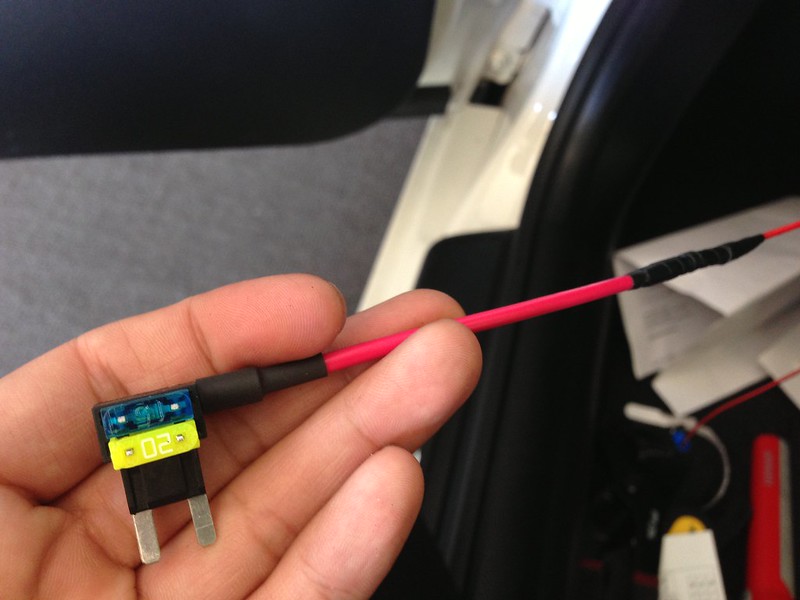
Other little things I did was doing a hard wire install for my radar detector, it occurred to me the dash looked much better without the ugly cable reaching into the 12v socket when I drove without it for a few days so it inspired me to finally fit it. The wiring in the 1 is quite tight so for ease of install I bought an aftermarket hardwire kit along with a mini fuse tap.
Stupid fuse box location:

Alternative to splicing wires:
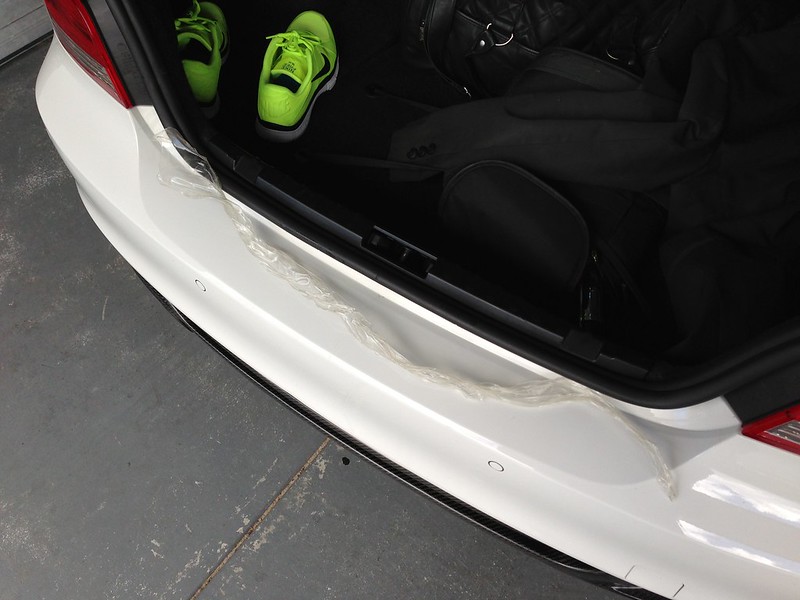
Truth be told I wasn’t 100% happy with how the splitters linked to the front bumper, something looked missing. The idea came across my mind of getting the same vinyl on my roof wrapped on the bottom lip of the bumper to create a subtle link. Hiding the white underside was all that was required, in my opinion this would improve the overall appearance. So once again I harassed Gav at GT Graphics and he was happy to do the job for me. Whilst he was working on applying the vinyl on the front I went ahead and removed some vinyl on the back. The car came with clear vinyl protection on the rear bumper to prevent scratches when loading the boot. I always hated this due to it yellowing however I never came around to ripping it off. The noises I was making literally ripping it off created a concerned look on Gavin’s face, but miraculously I didn’t do any damage.
Gav working his magic again:
Didn’t tear off the paint:
Subtle link:

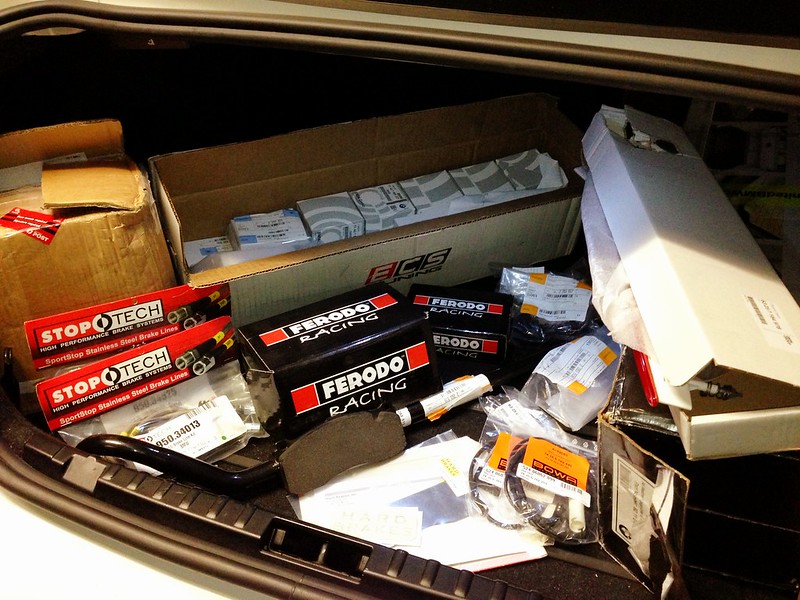
The car required new front brake pads, so showing true form I once again engaged the compulsive idiot mode and went ahead and ordered a few more parts. This consisted of; Ferodo DS2500 front and rear pads, new brake sensors, StopTech braided lines, Hard Brakes titanium shims, E92 M3 front sway bar, 3rd brake light (finally), ZHP gear knob, wipers, filters, and other random miscellaneous things. These were separated into three different suppliers (HPA, ECS, United BMW) but miraculously they all decided to arrive at the same time.
Irony (sway bar into fragile logo):

Bliss:
I was quite excited to fit the ZHP gear knob; during my initial test drive of the 1 my first criticism was the standard M sport gear knob. It is not very ergonomically shaped, it has rough edges, and it feels cheap. I struggled to find a replacement. I didn’t want something too aftermarket looking and BMW’s have no thread to screw on so there were limited options. The “M sport” ZHP gear knob looked plain and OEM but more importantly it is much more comfortable. Since I was making an ECS order I decided to just give it a shot and I don’t regret it a single bit.
No more awkward squared “gooseneck”:

The spark plug socket also arrived (traditional left, N54 right):

A few more days had passed and it finally happened. The car was stuttering and went into limp mode during normal driving. As weird as this sound, this was a sigh of relief. It confirms the car needs a new HPFP, which is much easier than changing the injectors or even having to trouble shoot endlessly. BMW has several revisions on the HPFP unit now (5 from memory) and claim the latest version no longer fails. They also brought down the price from $2000+ (crack pipe) to $350 so it is safe to say many others have suffered the HPFP failure. I was actually in the middle of an order getting processed with BMR so it was a case of just requesting an extra HPFP to be shipped with my order. After a bit of discussion we came to the conclusion I should change my brake rotors whilst we upgraded everything else brake wise, I went ahead and ordered ECS 2 piece cross-drilled and slotted front rotors and 1 piece slotted rear rotors. Once again I used the excuse “might as well order other stuff while I am at it” and bought an Evolution Racewerks competition series FMIC kit and also a BMS oil catch can. Once they arrive along with the HPFP the 1 will go into Galvsport to get some love.
HPFP code:

So there we have it, I have finally made a build thread for the 1 and covered majority of its life up until now. It actually took me a few days sparing free time here and there to type all this. If you made it this far I thank you for taking the time to read it. I hope the next update is good news with all the planned upgrades/repairs going ahead smoothly.
Until then, ciao."