**DISCLAIMER**
This write up is from direct personal experience with my 2009 135i coupe (e82) automatic w/o comfort access. The parts reference many other models/years (ranging as old as 2005 to as new as 2013). Do the research to find what will work for your vehicle.
**DISCLAIMER 2**
I completed everything myself in about 30 minutes (I do not have shop access), and while it is definitely doable (very easy actually), I accept no responsibility to errors in the write-up and recommend professional install.
Part Numbers:
Remote Starter (T-harness, module and expansion pack) -
ADS-BM1
Weblink Cable (required to flash module/expansion) -
ADS-USB
Drone Mobile add-on (optional - for smartphone control) -
DR-3100
Install guide numbers:
Using factory remote only -
22049
Factory remote and Drone Mobile -
22041
Tools required:
T20 screw driver
Zip ties
Diagonal cutters (for zip ties only. This kit is
PLUG AND PLAY)
Windows (native or virtual) with Internet Explorer (MS Edge, and other browsers may not work)
Internet access
Intro:
After getting a whole bunch of "Nope. Not possible." answers online, I finally went to a local high end audio shop and asked them about remote start for my 2009 135i and was pleasantly surprised when he said "hold on" while he ran to the back. He returned with a box in hand and proceeded to tell me how it was completely plug and play and even allowed you to use the factory remote for the controls. Or you could use either of the included remotes, or even add a module that allows you control with a phone. When he said $1250 installed, that's when I cringed. I wanted it, but I wasn't about to pay that kind of cash. I shopped around and found the remote starter, phone module, and cable required to flash the firmware for roughly $600 on ebay (Brand New). Did some more searching and was able to piece the instructions together to do the complete install and programming myself. It wasn't too easy to find documentation because the industry really wants the end user to have a pro do it. After successfully completing the install and having no issues whatsoever, I figured I'd post what I did to at least give hope to those who want remote start on their bimmers.
Write up:
First off, decide which guide applies to you and then read it thoroughly. It may seem daunting at first, but lay the parts out in front of you and follow the instructions through a couple times if you have to in order to understand the flow. The factory guides are actually very well written and easy to follow (I was surprised). Having said that, I won't get too specific on the steps, except provide clarification when needed.
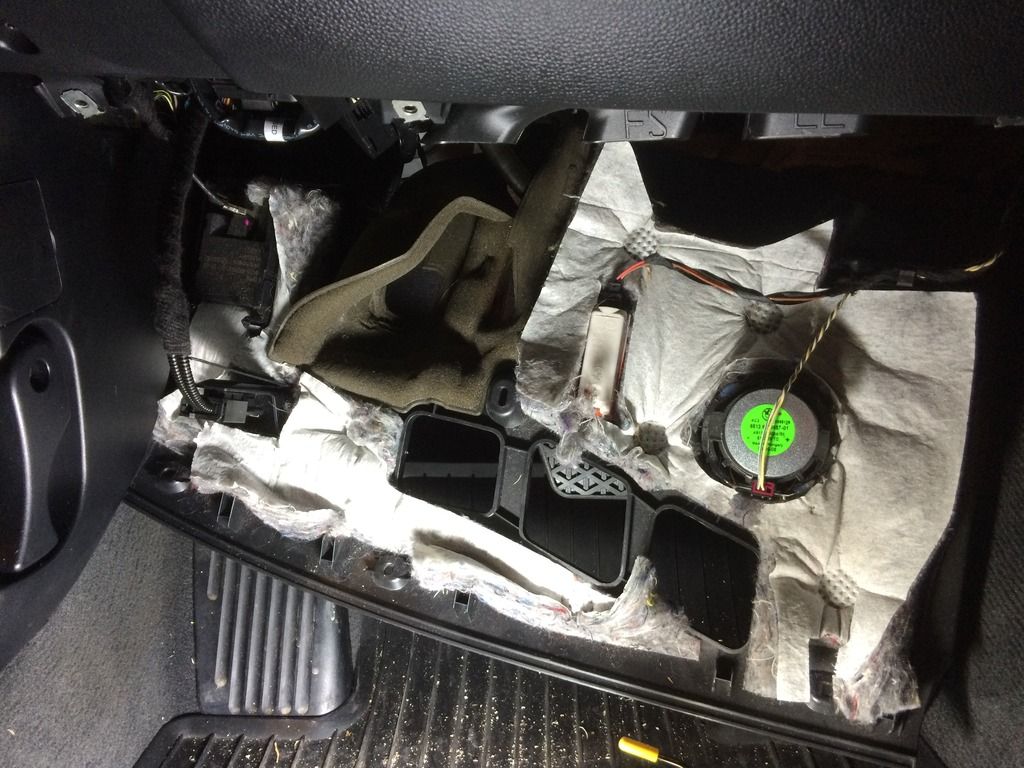
Remove the hardware securing the kick panel under the Driver side dash.

Just angle down the panel and push forward toward the pedals. There will be more than enough room to work. No need to disconnect anything (contrary to some instructional videos).
 Guide commentary:
Box Contents 1 of 1
Guide commentary:
Box Contents 1 of 1
When you do the inventory, set aside the following (pictured) as you won't be needing them and may just confuse you later on:
10 pin white connector (grey/black and grey/white wires)
12 pin black connector (white/green, grey, and brown/black wires)
Aftermarket hood switch and cable (black wire)
18 pin white connector - adapter cable (p/n ADS-HRNBMW01-2) (black wires and white wires)
The whole RF Kit - (black cable, blue cable, red and black wires, decoder box and antenna [ANT-2WSP])
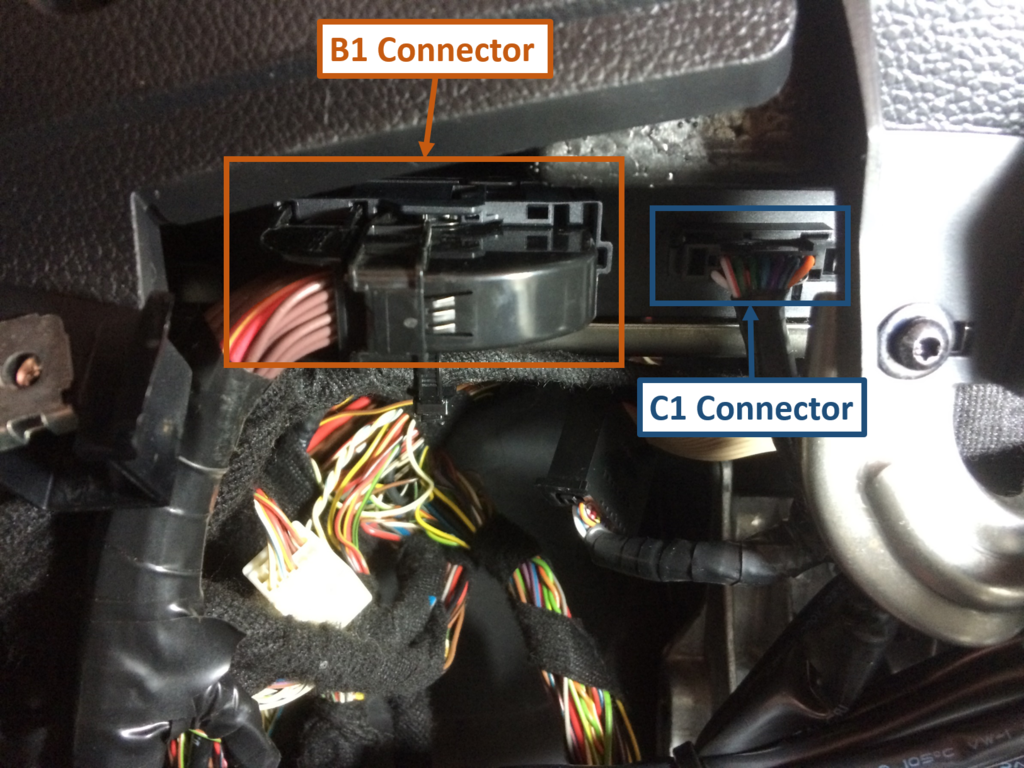
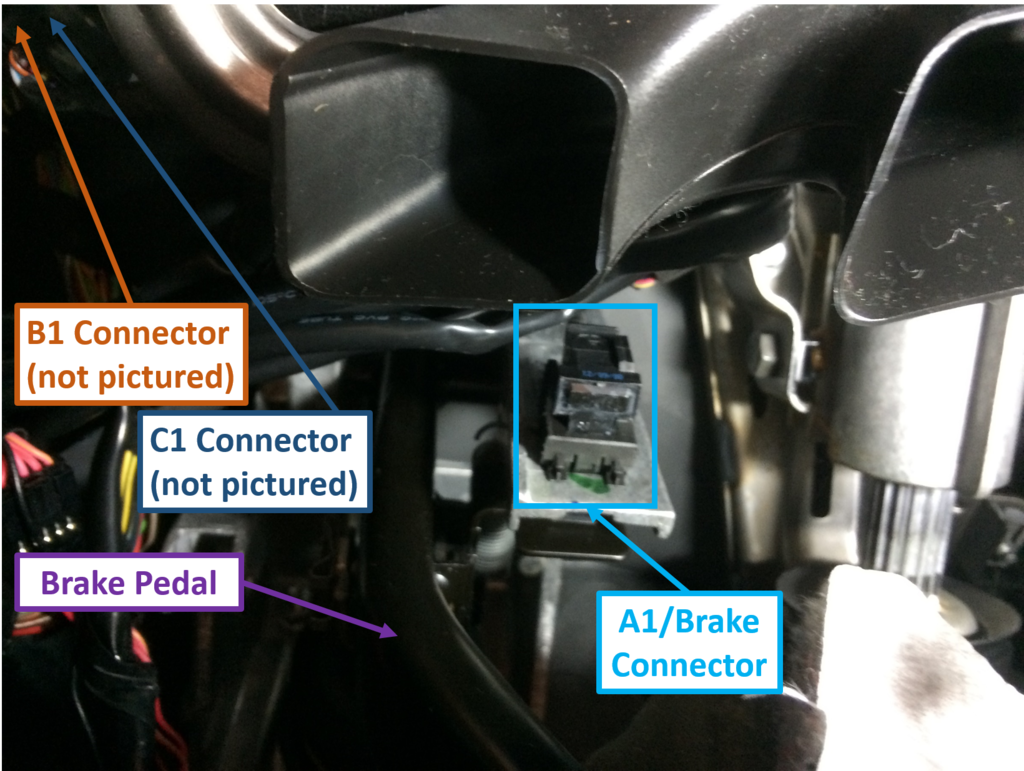
 Module Installation Procedure 1 of 1
Steps 1-4 - self explanatory
Step 5 - This step is completed at the following site after logging in.
http://www.idatalink.com/weblink/. In order to be able to flash the module and expansion, you will need to set up a few things on your computer. Let's call these substeps:
Step 5a - Follow
link and create an account. If you are not part of a shop, then select "Freelance Installer" as the company type. Follow on screen instructions. You may need to activate/validate account via email.
Step 5b -
Log in to account using Internet Explorer (11 worked w/o issues). You will likely be prompted to install the Weblink plugin. Follow instructions. Webpage should refresh, but will say something along the lines of Weblink Cable not found. Disregard for now.
Step 5c - Plug in the Weblink Cable USB into your computer (do not plug in to module yet) and allow Windows to install drivers.
Step 5d - Restart computer
Step 5e - Plug in the Weblink Cable USB into your computer (if not already done so) then plug in to the Weblink port on the Module (not the expansion pack).
Step 5f - Follow
link and log in to account using Internet Explorer. If everything is working correctly, green LEDs should illuminate on the Module and Expansion Pack (if red LEDs, unplug and repeat steps 5d-5e), and the page should refresh to show your Remote Starter and Expansion Pack. Note that those pictures are actually tabs which represent what is about to be flashed.
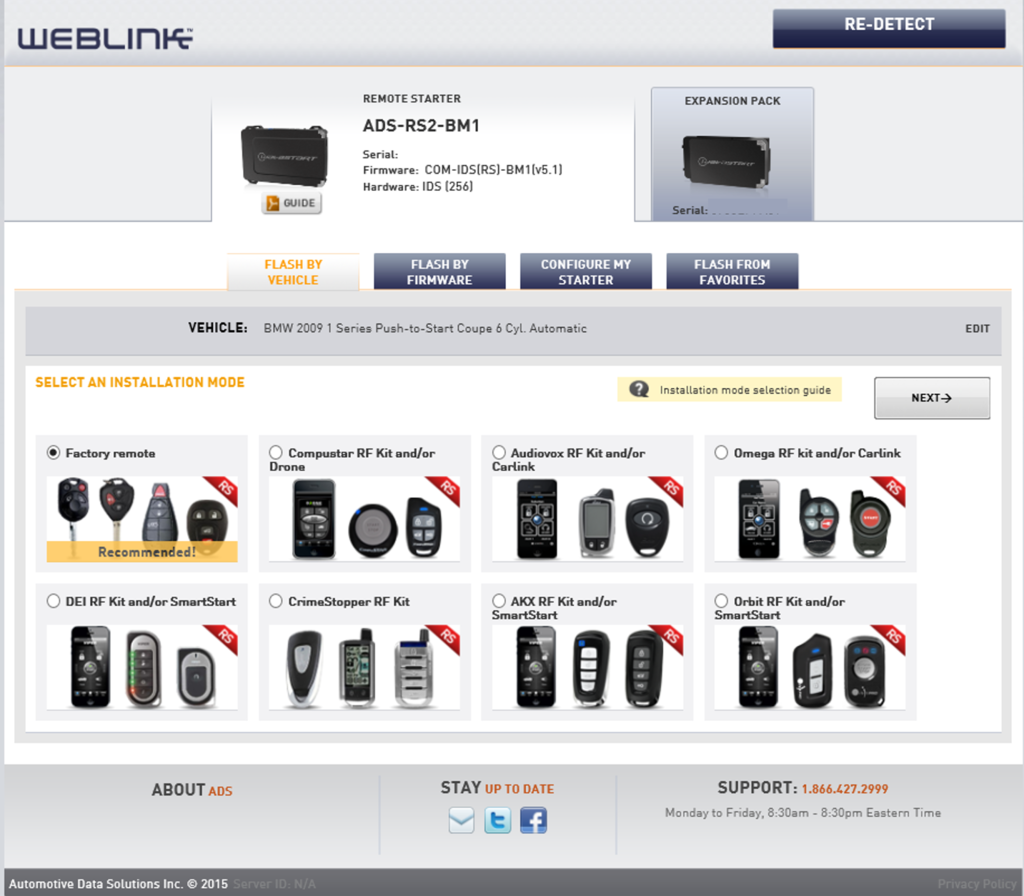
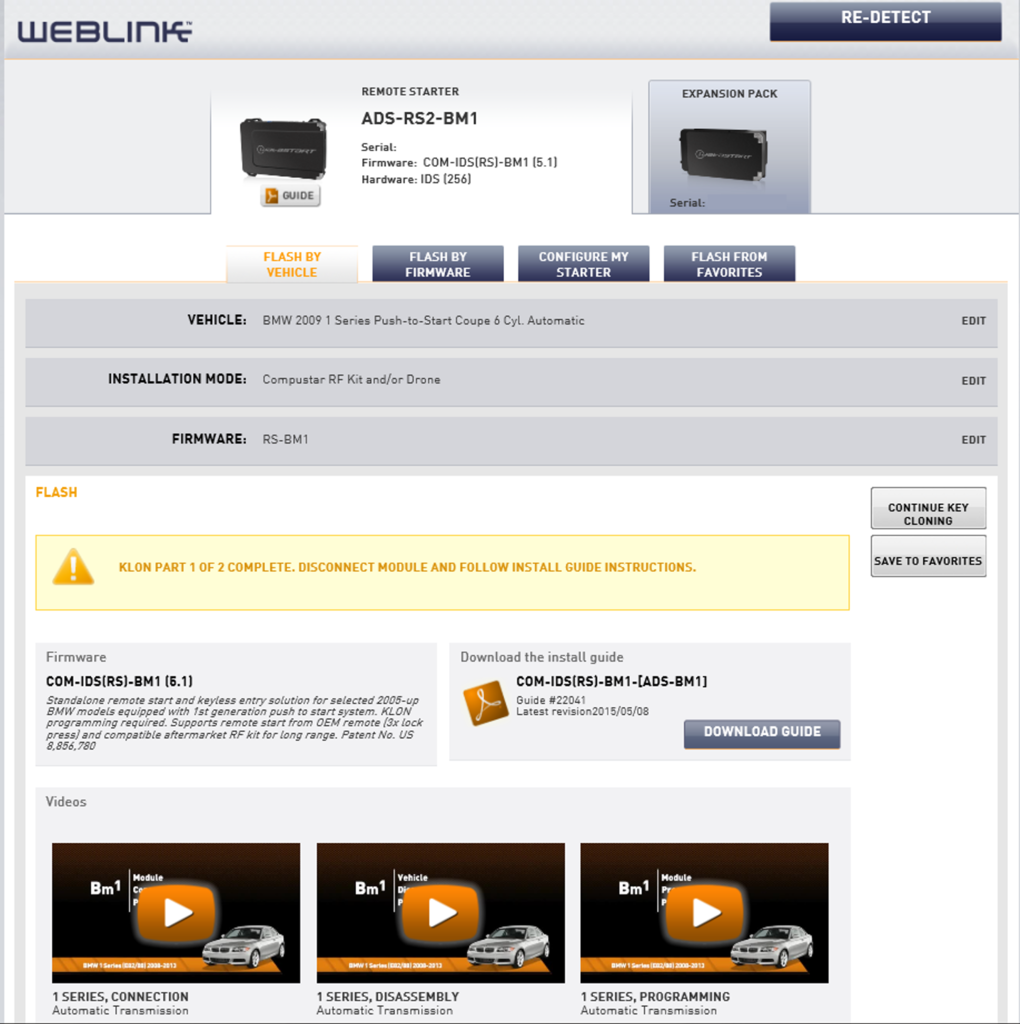
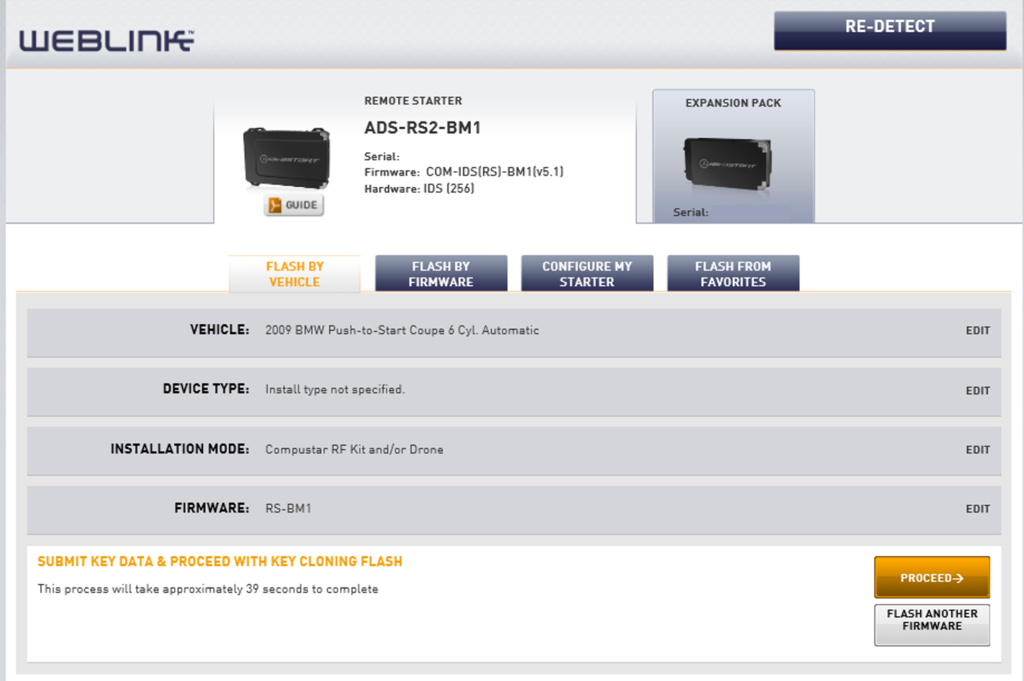
Step 5g - With Remote Starter tab selected, click the Flash By Vehicle tab. Select your vehicle.

Step 5h - If only using the factory remote, select "Factory remote", if using Drone Mobile, select "Compustar RF Kit and/or Drone", then click Next.
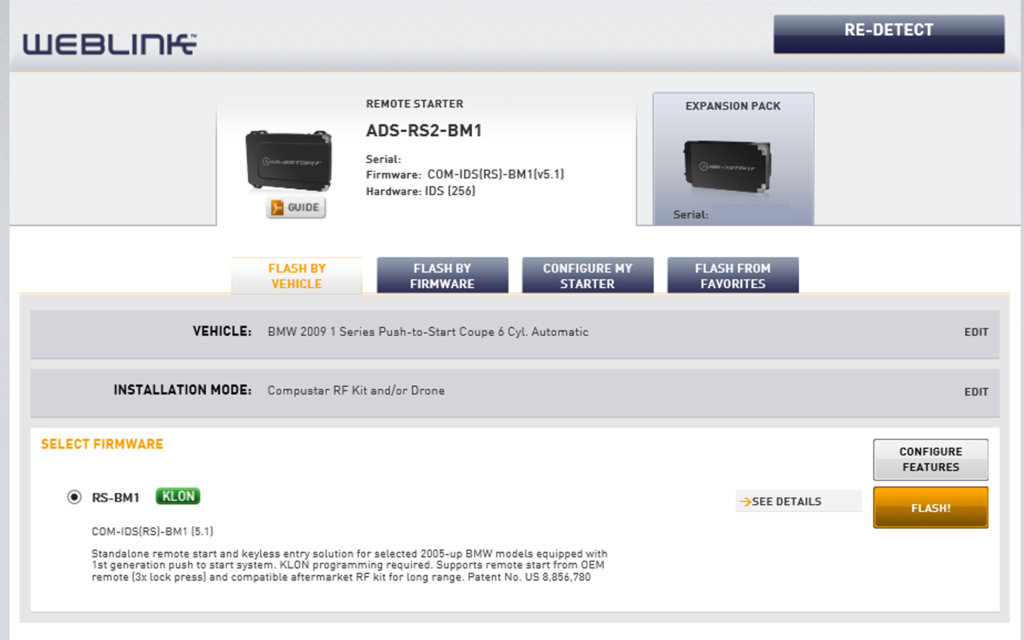
Step 5i - If you wish to change any default features, click Configure Features, otherwise click Flash!
Step 5j - A popup will appear reminding you to flash the Expansion Pack. You can close this window.
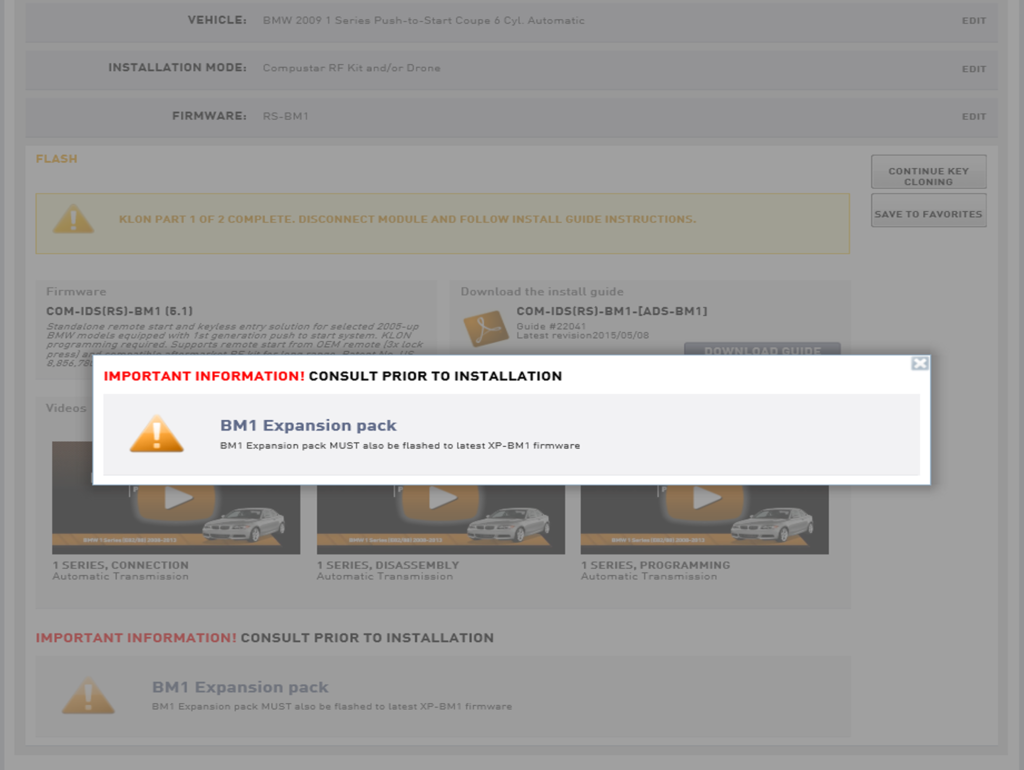
Step 5k - When flash is complete, you'll see a yellow message stating "KLON part 1 of 2 complete..." Before disconnecting, click Save To Favorites (this saves the firmware type and prevents you from having to select your vehicle again if you ever have to reset and reflash your Module).
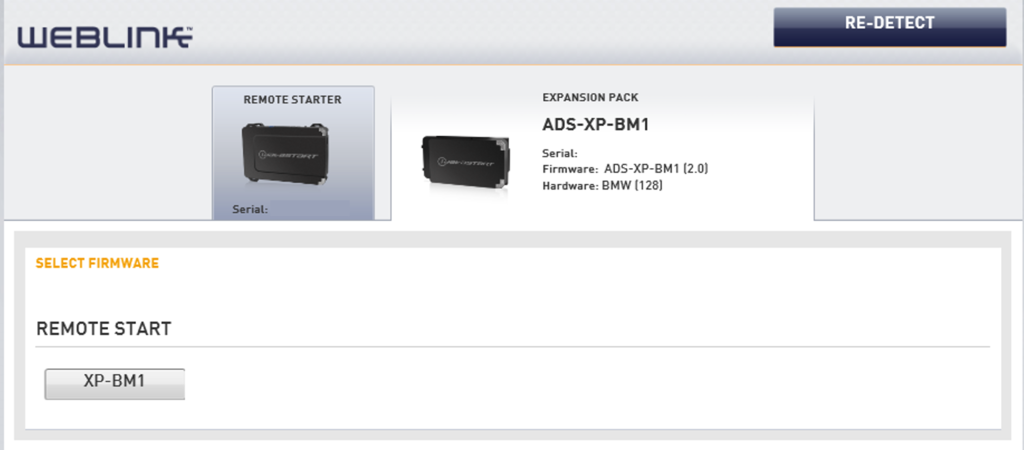
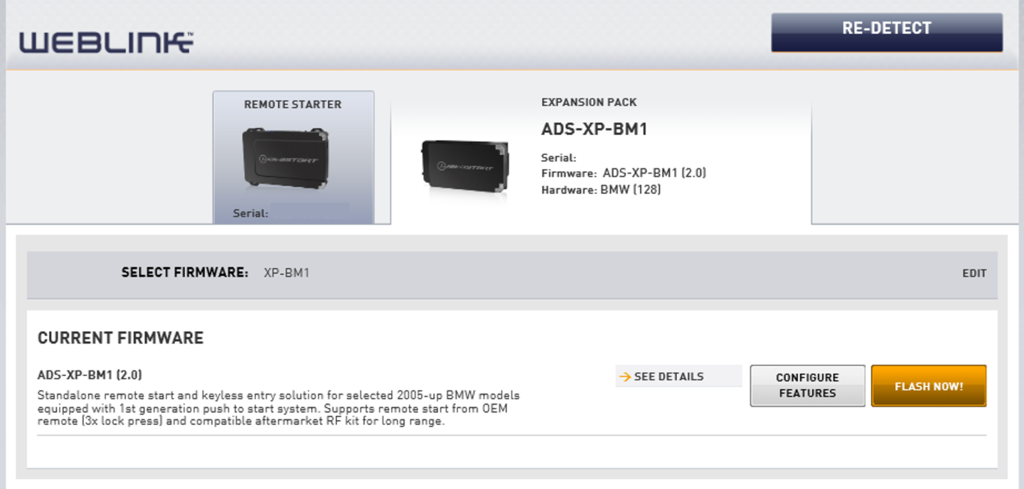
Step 5l - Then click the Expansion Pack tab, then XP-BM1, then FLASH NOW! to flash the Expansion Pack.
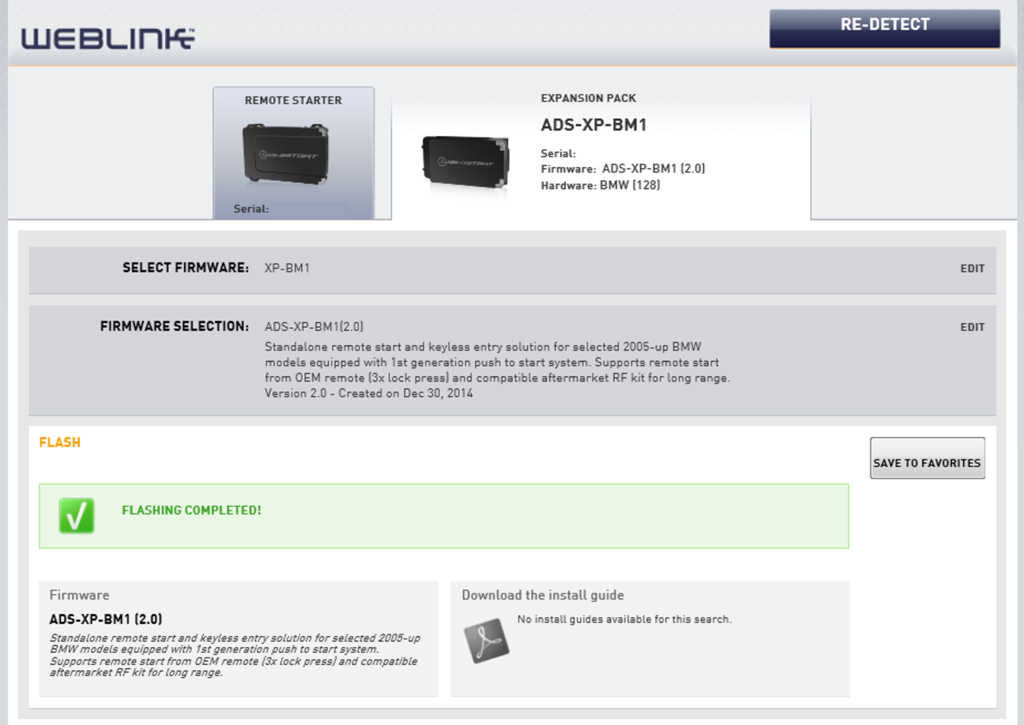
Step 5m - Once Expansion Pack is flashed (and you've already completed the initial flash of the Module), unplug the Weblink from the Module, then continue to step 6.
Steps 6-12 - self explanatory
Step 13 - if using Drone Mobile, connect black cable/plug of Drone Mobile to the Blue Telematic Port on the Module. Otherwise, skip.
Step 14 - does not apply
Step 15-16 - self explanatory
Type 1 Wiring Diagram 1 of 1
Steps 1-3 - self explanatory
Step 4 - does not apply
Type 2 Wire Chart 1 of 1
Does not apply
Type 2 Wiring Diagram 1 of 1
Does not apply
Module Programming Procedure 1 of 1
Steps 1-8 - self explanatory (this process captures the key information in the module).
Step 9a - Reconnect Weblink Cable to Module. If you did not close the browser or log out, then click Re-Detect, otherwise
log back in.
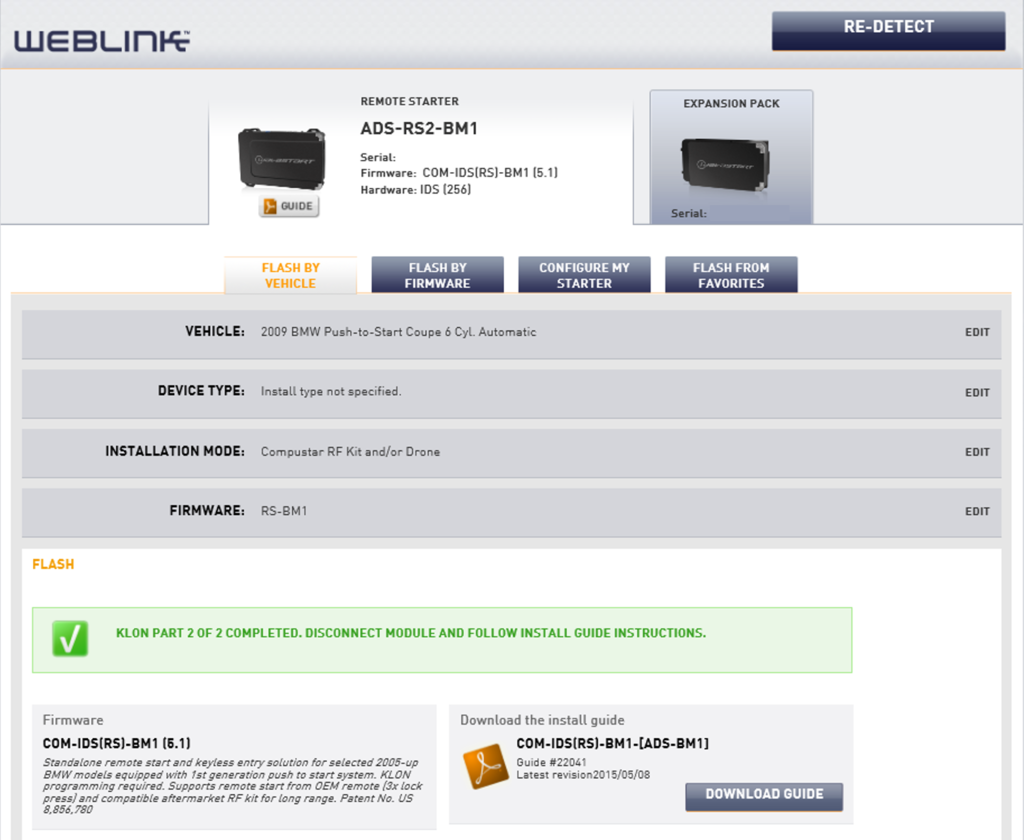
Step 9b - Click Proceed (this finishes flashing the key information to the Module).
Step 9c - A popup will appear again reminding you to flash the Expansion Module. You can close this window. Disregard message as you've already flashed the Expansion Pack.
Step 9d - "KLON part 2 of 2 complete..." Disconnect Weblink cable and proceed to step 10.
Steps 10-15 - self explanatory
Valet Mode Programming Procedure 1 of 1
I skipped this entirely as I don't care to use this feature, but the steps seem self explanatory
Aftermarket Remote Programming Procedure 1 of 1
I skipped this entirely as I don't care to use this feature, but the steps seem self explanatory (this applies to the key chain fobs, not Drone Mobile).
Module Navigation Procedure 1 of 1
Not required as you have access to change the controller settings when you flash the module.
The remainder of the guide is self explanatory.
Zip-tie excess wiring and place module in any available space that won't interfere with brake or steering operation. If need be, secure module with zip-tie(s).
Reinstall the kick panel under the Driver side dash.
NOTE:
If you installed the Drone Mobile module, you'll need to go to the
Drone Mobile website and create an account/register your device. You also need to download the Drone Mobile app on your smartphone. If you made it this far, the onscreen steps should be self explanatory.
Enjoy!!