

|
|
|
|
|
| 08-16-2014, 07:35 AM | #1 |
|
Lieutenant
 
77
Rep 541
Posts
Drives: 2008 135i AT Monaco Blue
Join Date: Dec 2012
Location: Brisbane, Australia
|
OzJustin's 135i Build & Ownership Adventure Thread
Hi all
Well after first reading about the 135i in 2007 and patiently waiting for the right used example to become available I finally became an owner of one of these great cars this week. I've been watching the market closely for the last 6 months and had my heart set on a manual example but when this Steptronic came up it was too good a deal to refuse. I have to say the Steptronic is growing on me too with sport mode! To share my excitement I thought I'd create a build thread for my 2008 135i Coupe.  My new car: 2008 135i in Monaco Blue with Terracotta leather and Glacier aluminium trim 66 000km Key options: CCC iDrive HiFi stereo Sunroof etc Current modifications: Exterior: LUX V3 angel eyes BMW 1M taillights Interior: Tune2Air WMA1000 bluetooth adaptor Wheels/Brakes: Avant Garde M310 in Machine Gunmetal (HRE P40 reps) (18x8+40 F&R) Michelin Pilot Sport 3 225/40 (front) Bridgestone SO4 Pole Position 245/35 (rear) EBC GD sport drilled & slotted rotors (F&R) EBC red stuff brake pads (F&R) BMW Mobility Kit Suspension: Stock Msport suspension 1M front control arms Engine/Drivetrain Modifications: BMC drop in panel filter ETS 5in FMIC Turbosmart Kompact diverter valves Exhaust - AR downpipes, Berk Street axle back Cobb AccessPort V2 with custom 98RON BPS tune (247rwkw/612nm)  Future plans: Walnut blast! BMS Oil Catch Can (OCC) AFE dual cone intake Blackline LCI taillights Schmeidmann carbon fiber splitter and diffuser Carbon wrapped interior trim Alpina B3 TCU transmission flash Rewire paddle shifters to M3 'pull' spec MotiveMods M5 shifter retrofit Eurotek LM wheels swap (maybe) BlackVue dash cam Minor stereo upgrade (Focal front speakers & Alpine PDX-V9 to power fronts + subs) First up I have to say that I love this car! It is such a step up from my previous Nissan's and you cannot beat that wall of torque (especially with a tune)!  Given the car already has a good collection of goodies there isn't too much I plan to do to it. My 'future plans' list above seems pretty long but it's really just tinkering around the edges.  I plan to include many photos so stay tuned. My detailer will be working his magic in the next two weeks then I'll get some proper photos. I hope you enjoy reading about and sharing this journey with me.  Last edited by OzJustin; 06-27-2015 at 10:00 AM.. |
| 08-16-2014, 07:45 AM | #2 |
|
Brigadier General

331
Rep 4,021
Posts
Drives: F32 Coupé
Join Date: Mar 2011
Location: Brisbane, Australia BMW Club QLD Member
|
Very nice mate.
 I love Monaco Blue. Don't understand why they discontinued it...
__________________
 |
|
Appreciate
0
|
| 08-16-2014, 07:58 AM | #3 | |
|
Lieutenant
77
Rep 541
Posts
Drives: 2008 135i AT Monaco Blue
Join Date: Dec 2012
Location: Brisbane, Australia
|
Quote:
Yes the Monaco Blue doesn't seem to be a very popular colour. I wasn't sure at first either but it has really grown on me. It's the best of both worlds imho - black at night and a deep metallic blue under daylight.  |
|
|
Appreciate
0
|
| 08-16-2014, 08:10 AM | #4 |
|
Captain

151
Rep 929
Posts |
Nice! Congratulations and welcome!
Any thoughts on handling changes from installing the M3 control arms? Were you able to observe any incremental improvements, or did you install with a host of other mods?
__________________
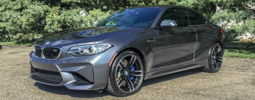 F87 '16 M2 ... Mineral Grey, 6MT, Exec, MPE Gone: E82 '13 135is 475/586 ... Mineral Grey / Oyster, DCT, Premium, Tech, HK, Michelin PSS, BMW Performance Suspension |
|
Appreciate
0
|
| 08-16-2014, 08:38 AM | #5 | |
|
Lieutenant
77
Rep 541
Posts
Drives: 2008 135i AT Monaco Blue
Join Date: Dec 2012
Location: Brisbane, Australia
|
Quote:
|
|
|
Appreciate
0
|
| 08-29-2014, 04:42 AM | #6 |
|
Lieutenant
77
Rep 541
Posts
Drives: 2008 135i AT Monaco Blue
Join Date: Dec 2012
Location: Brisbane, Australia
|
Quick update to my thread.
I've been fixing up a few cosmetic aspects of the car this week. Firstly, my driver's seat bolster was noticeably worn after 66 000km so I decided to have it redyed. I wasn't sure how the colour match would go being terracotta but I was very happy with the outcome. The seat now looks near new. I can highly recommend Glen from FibreNew should any of you require any leather repair work. http://www.fibrenew.com.au/ Before:  After:  I also had a number of small shopping trolley type dings on both doors and one on the roof. Jon Speller from Dent Removal Brisbane came to the rescue via paintless dent removal and was able to completely remove the dents. I can't even tell where they were anymore. Again I can highly recommend Jon should you require some PDR repairs. http://www.dentremovalbrisbane.com.au/ Next up is my detailing job which is happening tomorrow morning. Really looking forward to the outcome of the clay, machine polish etc. It should look absolutely schmick inside and out after all this work. Will keep you posted. |
|
Appreciate
0
|
| 08-29-2014, 08:39 AM | #7 |
|
Brigadier General
331
Rep 4,021
Posts
Drives: F32 Coupé
Join Date: Mar 2011
Location: Brisbane, Australia BMW Club QLD Member
|
Looks great mate. Out of interest, what do they charge for the dent removal? I have one ding on my left rear quarter that's bugging me...
__________________
|
|
Appreciate
0
|
| 09-01-2014, 09:03 AM | #8 |
|
Lieutenant
77
Rep 541
Posts
Drives: 2008 135i AT Monaco Blue
Join Date: Dec 2012
Location: Brisbane, Australia
|
Ok time for another update. My detailer went to town on the car this last saturday gone. He spent 8 hours on the car and did a fantastic job.
If any Brisbane Beemer owners are looking for a dedicated detailer (and chatty honest car enthusiast) I can highly recommend Gavin Herrenberg from Auto Carma. This is the second car Gavin has detailed for me over the last few years and both have come out looking excellent. http://www.autocarma.com.au/ Gavin clayed and machine polished my car to correct general wear and swirl marks. He also applied Duragloss 105 Total Performance Polish, Duragloss 921 Fast Clean and Shine, a Dodo coating to my glass and cleaned up my wheels. The car has a real shine to it now that was lacking previously. I suspect I will pay the price for choosing a dark coloured car (my last car was a pewter silver) but when it's clean like this it definately looks the part! Apologies for the photo quality. It was getting dark and I was rushing but it should give you an idea. Gavin is a real character and it shows in his latest work vehicle.       You can see here that I debadged the car the other day. I purposely did this just before my detail so Gavin could machine polish out the adhesive outline fully. I think it turned out perfectly and is very stealth now. 125i with 250kw...    These photos should give you an idea of how the paint is now i.e. much better. The front bar has quite a few stone chips and imperfections but from the front wheels back the rest of the panels are in very good condition.     I hope to clean my terracotta seats with some Leather Master cleaner and protection cream soon. They've been dirty since I bought the car but I hope to return them to their former glory (especially now that the bolster has been repaired).   Next round of updates coming soon. First of which may be some new angel eyes as my driver's side LUX V3 bulb seems to have died...  |
|
Appreciate
0
|
| 09-01-2014, 09:27 AM | #9 |
|
Lieutenant General
2278
Rep 12,565
Posts
Drives: Z4 M, X5, GX460
Join Date: Apr 2008
Location: CT
iTrader: (99)
Garage List F15 X5 xDrive35i [8.33]
E86 Z4 M [10.00] F10 550i (Retired) [9.17] F25 X3 xDrive35i (R ... [9.33] E82 135is (Retired) [9.46] E85 Z4 M (Retired) [9.41] E90 328i xDrive (Re ... [9.00] E86 Z4 3.0si (Retired) [9.20] |
I hate how rear seat center armrest indents so easily after folding it down once. I have that stupid crease too and it won't go away.
__________________
Follow
|
|
Appreciate
0
|
| 09-08-2014, 04:36 AM | #10 |
|
Lieutenant
77
Rep 541
Posts
Drives: 2008 135i AT Monaco Blue
Join Date: Dec 2012
Location: Brisbane, Australia
|
Another small update -
Today I had Accelerate Automotive (AA) modify my paddle shifters to 'M3 spec' so now right pull is upshift and left pull is downshift. I have to thank AA for squeezing me in at such short notice. They're a great bunch of guys and very helpful. In reality they really only had to modify the left paddle connector so that pin 1 is now swapped with pin 3 (about 15 minutes work). I provided them the wiring diagram from this tutorial if anybody else is interested in performing this modification: http://www.bmwfanatics.co.za/showthread.php?tid=35699 Now I must say that this is how the car should have come from the factory! I took the car for a decent drive around Mount Tamborine today (in the wet unfortunately) but it was a completely different car with such a simple modification. Blipping the throttle with the left paddle is extremely addictive! I cannot wait until I can pair these new and improved paddles with the Alpina B3 transmission flash to really sharpen up the manual shifts (cable on order). I would highly recommend this paddle rewire. The only downside to my day was AA diagnosed my LUX V3 angel eyes and unfortunately it wasn't the power supply that was the problem (I had a spare one at the ready thanks to Stuart at BMR). The LED bulb itself is busted so now I have to decide whether I want to replace the V3's with the newer V4. I hope they last longer than this set if I make the jump... Of course threads are worthless without pics. A random I snapped out shopping the other day  |
|
Appreciate
0
|
| 09-08-2014, 12:29 PM | #11 |
|
General
2038
Rep 25,989
Posts |
Nice pick up! The interior|exterior color combo is superb
__________________
VMR|Wheels | 714.442.7916 |
sales@velocitymotoring.com | www.velocitymotoring.com | facebook | flickr | Instagram |
|
Appreciate
0
|
| 09-08-2014, 02:20 PM | #12 |
|
1Addict
3227
Rep 7,889
Posts |
Love the terracotta interior. The leather redye/repair job looks great as well. More pictures!
__________________
|
|
Appreciate
0
|
| 09-09-2014, 03:29 AM | #13 |
|
Lieutenant
77
Rep 541
Posts
Drives: 2008 135i AT Monaco Blue
Join Date: Dec 2012
Location: Brisbane, Australia
|
Thanks guys. I picked up some Leather Master cleaner & protection cream last weekend so when I get a chance to clean the seats I'll post up some more pictures.
Really looking forward to seeing how good a job I can do carbon wrapping the trim & how the combo will turn out with the terracotta.
__________________
|
|
Appreciate
0
|
| 09-09-2014, 12:21 PM | #14 |
|
Joint Chiefs of Staff

24026
Rep 190,498
Posts |
Looks good
__________________
Check out our current sale by clicking on this link!
https://x-ph.com/sale/ Phone number 702-494-9435  |
|
Appreciate
0
|
| 09-23-2014, 08:30 AM | #15 |
|
Lieutenant
77
Rep 541
Posts
Drives: 2008 135i AT Monaco Blue
Join Date: Dec 2012
Location: Brisbane, Australia
|
Some further updates. It's vinyl wrapping time!
I got my hands on some 3M Scotchprint 1080 vinyl wrap for my standard glacier aluminium trim and got to work. The door and dash trim was very easy to remove and wrap. My attempt at the bends on the door trim wasn't perfect but I'm generally pretty happy with the results. The carbon look definately makes the interior look much tougher. While I was at it I also measured up the stock auto shifter and cut a piece of wrap to size. Again it isn't perfect but I think it matches up quite nicely and gives the auto knob a fresh look. 3M wrap purchased from here: http://www.ebay.com.au/itm/110900699...84.m1439.l2649 Next step is to figure out how to wrap the centre console with minimal work. The tutorials I've read that suggest you have to pull the entire centre console out just to remove the two trim pieces has slightly put me off. Anybody in Brisbane performed this who wants to give me a hand... Now some pics to show the process and half finished result:          I also had a chance to properly clean my wheels and apply a Nanolex Premium coating to them. They're nice and shiny now and the coating should make it 100x easier to clean off brake dust during washing.    I have a few parts on their way so more updates soon! |
|
Appreciate
0
|
| 09-23-2014, 07:09 PM | #16 |
|
Second Lieutenant
20
Rep 299
Posts |
Awesome looking car. I've always wanted to wrap my interior but wasn't sure if the wrap would work with the textured glacier aluminium trim so thanks for proving that it works
Was the one roll from the ebay link you posted enough to cover the entire interior? Looking to do this as my next mod! |
|
Appreciate
0
|
| 09-23-2014, 08:07 PM | #17 |
|
Brigadier General
331
Rep 4,021
Posts
Drives: F32 Coupé
Join Date: Mar 2011
Location: Brisbane, Australia BMW Club QLD Member
|
Looking great mate. I'm interested to see how much of a difference you think the Nanolex makes...
__________________
|
|
Appreciate
0
|
| 09-24-2014, 04:18 AM | #18 | ||
|
Lieutenant
77
Rep 541
Posts
Drives: 2008 135i AT Monaco Blue
Join Date: Dec 2012
Location: Brisbane, Australia
|
Quote:
Quote:
|
||
|
Appreciate
0
|
| 09-28-2014, 05:34 AM | #19 |
|
Lieutenant
77
Rep 541
Posts
Drives: 2008 135i AT Monaco Blue
Join Date: Dec 2012
Location: Brisbane, Australia
|
Time for my next round of updates.
It's Alpina flash time! There were two reasons why I ended up settling for a Steptronic over a manual transmission car. The first was the ability to rewire the paddle shifters to work properly (left=up, right=down). The second was the Alpina B3 transmission flash. I'm sure many of you have read about this fabbled flash. Well I finally got it installed yesterday and can say that it lives up to the hype. Preliminary thoughts after maybe 40km of driving: - Being able to see gears 1-6 via D, S and M modes is very handy. - D mode is more refined and very smooth shifting, almost to the point where you can't feel the shifts at all. It's into 5th gear by 50kph and a great cruising/fuel economy/quiet mode. - S mode is also a substantial improvement over the factory settings. Gear shifts are noticeably quicker and it holds gears depending on how much throttle you feed in. I haven't driven a great deal in this mode however, as it tends to sit in 3rd gear at 60kph (i.e. on main roads) just below 3 000 rpm which I find is a little noisy for cruising with my AR downpipes and Berk exhaust. - M mode is where it's at for me. Upshifts are a noticeable improvement over the factory settings, however they haven't completely eliminated the lurching as the car changes gears. It is a lot better than before though. Downshifts are extremely quick and responsive. The paddles are that much more fun now and I find myself dropping down a few gears regularly just for the bark it produces. Being able to control what gear I'm cruising in at 60kph (5th gear) also gives me the response of S mode but the quietness of D mode. M mode may become my default driving mode.  For those interested in performing this flash, I ended up buying this cable which worked flawlessly. Be aware you can buy cheaper cables on Ebay but I wasn't willing to risk it and went with a tried and tested quality cable. http://www.one-stop-electronics.com/...&product_id=16 The tutorial to carry out the flash is available here: http://www.n54tech.com/forums/showthread.php?t=20991 I had a very kind member from N54tech remotely carry out the flash for me. The hardest part for me was carting my big heavy PC down to the carport for the flash as I didn't have a laptop available. I got a few funny looks from my neighbours but was worth the inconvenience in the end!   Next up was a set of Blackline LCI taillights (thanks Stuart from BMR). I already had regular LCI taillights from a 1M but I really wanted the tinted Blacklines as I felt they would better complement my dark Monaco blue paint. Having now installed them I'm happy I went down this path. They look fantastic and really give the car a more aggressive look. Super happy with the result and it was a very easy install. The tutorial I followed is available here (thanks Dack!): http://www.1addicts.com/forums/showthread.php?t=716583 Below are a few pics showing the install and the difference between the two LCI versions. I feel the side view really captures the most noticeable difference. Previously you could really see a cherry red with the 1M tails, but with the Blacklines it's a much darker and sleeker maroon/burgundy.      Finally, were a replacement set of H8 angel eyes. The driver's side LED bulb seemed to die only two weeks after I got the car which was a shame. I was told that it had LUX V3 bulbs installed but upon removing them it turns out that was not the case. They're some form of cheaper Cree bulb that I haven't seen before. Either way I wouldn't recommend them given their short lifespan. I ended up purchasing a set of BMR's own angel eyes as replacements. I test fit them yesterday and they are slightly brighter and whiter than my previous Cree set which is a good surprise. Similar to many of you however, I had huge problems getting the plastic covers back on. After 1 hour of trying I gave up and pulled out the bulbs to let me mechanic finish the install another day. Let me be clear that this is not a problem with the BMR bulbs or ballasts, this is just the finicky nature of the BMW light cover. Such a pain! Really looking forward to getting the new bulbs installed and having both angel eyes working again. Here's a few pics of BMR's version in case you haven't seen them before. They seem to be a good cheaper alternative to LUX and DTEC. The old Cree bulb:  The new BMR H8's:     I also had a chance to finally clean and condition my terracotta leather seats with the Leather Master LM250 kit. They are much cleaner, softer and smell nicer now. Ran out of time to take pics but will hopefully get some good ones of the complete interior (seats and trim) once I get the last centre console part of the trim finished in the 3M carbon fiber. |
|
Appreciate
0
|
| 09-30-2014, 08:46 PM | #20 |
|
Private First Class

13
Rep 113
Posts |
the work you are putting in is just awesome, funny enough you bought this car if the dealer at Tamworth couldn't do a deal this car was my next choice.
|
|
Appreciate
0
|
| 10-01-2014, 04:56 AM | #21 | |
|
Lieutenant
77
Rep 541
Posts
Drives: 2008 135i AT Monaco Blue
Join Date: Dec 2012
Location: Brisbane, Australia
|
Quote:
__________________
|
|
|
Appreciate
0
|
| 10-04-2014, 04:57 AM | #22 |
|
Lieutenant
77
Rep 541
Posts
Drives: 2008 135i AT Monaco Blue
Join Date: Dec 2012
Location: Brisbane, Australia
|
Minor update. Finally got the BMR angel eyes installed and they look great! They're definately brighter and whiter than my old bulbs. They also stay nice and bright/white when the Xenons go on. Loving having daytime angels again.
Install tip: The covers are a real pain to remove/reinstall but I have discovered the trick to make it easier. Make sure you align the two locking tabs at the bottom of the cover and make 100% sure they are locked in tight at the bottom before trying to press in the top half of the cover and clipping the left and right locking pins back in place. The locking tabs at the base of the cover need to be pressed in VERY firmly by angling the tabs directly into the openings. I found it easiest to feel underneath the tabs with my fingers to make sure the tabs were actually in the slots and not just resting above/next to them. It will be a real pain (i.e. nearly impossible) trying to close the left and right locking pins if the base of the cover isn't on snug. It's very easy to think you have pushed the covers on properly only to realise they are not completely in at the bottom. This is crucial to make sure they seal properly and prevent any moisture/dust and headlight failure. Hope that made sense and helps some of you. Here are a few evening shots of the angel eyes and blacklines operational. Apologies the quality isn't fantastic as it's hard to take decent night shots. Darkness:  Angel eyes:   Xenons and angel eyes:  Blacklines - I think centre exit quads would offset this stance nicely  
__________________
Last edited by OzJustin; 10-20-2014 at 08:28 AM.. |
|
Appreciate
0
|
Post Reply |
| Bookmarks |
| Thread Tools | Search this Thread |
|
|


