|
|
|
|
|
| 09-15-2013, 05:27 PM | #1 |
|
Lieutenant General
 2282
Rep 12,565
Posts
Drives: Z4 M, X5, GX460
Join Date: Apr 2008
Location: CT
iTrader: (99)
Garage List F15 X5 xDrive35i [8.75]
E86 Z4 M [10.00] F10 550i (Retired) [9.17] F25 X3 xDrive35i (R ... [9.43] E82 135is (Retired) [9.50] E85 Z4 M (Retired) [9.41] E90 328i xDrive (Re ... [9.25] E86 Z4 3.0si (Retired) [9.22] |
DIY: How to Install BMW Performance CF Trunk Spoiler
I know there are a few DIY's floating around on Bimmerpost anywhere from Z4's to 5-series but figured I'd do my part to contribute to 1addicts. For what it's worth, I've done the same install on my Z4 but I used betalink at the time. Betalink is the adhesive BMW recommends but I personally would not use it again. It's really difficult to use and mistakes are costly since it's a permanent and removing the spoiler could cause paint damage. I was careful with the Z4 but that install took me nearly 4 hours, this took me only 1 hour.
Tools: 1) 3M Adhesive Remover 2) Goo Gone 3) 3M Double Sided (Moulding) Tape 4) Fishing wire 5) Painters tape 6) Microfiber towels 7) Isopropyl alcohol 8) Clay bar (optional) Instructions 1) First thing you need to do is remove the original painted lip. I parked the car outside for 2 hours to let the paint warm up. If weather isn't cooperating, you can always use a blow dryer but the point is you want the existing adhesive to warm up for easy removal. Cut some fishing wire and place it under the edge of the lip, and slowly go back and forth in a "saw" motion. 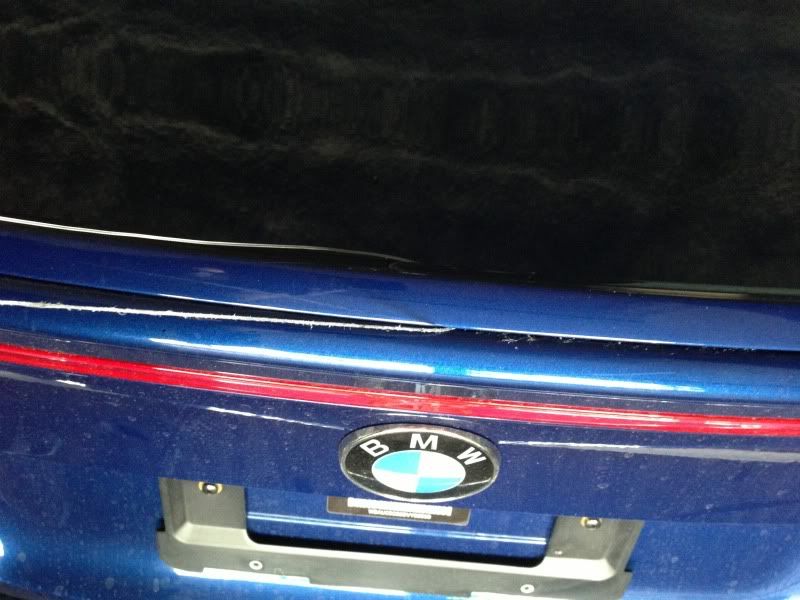 After you get to the other side, the spoiler should lift like this: 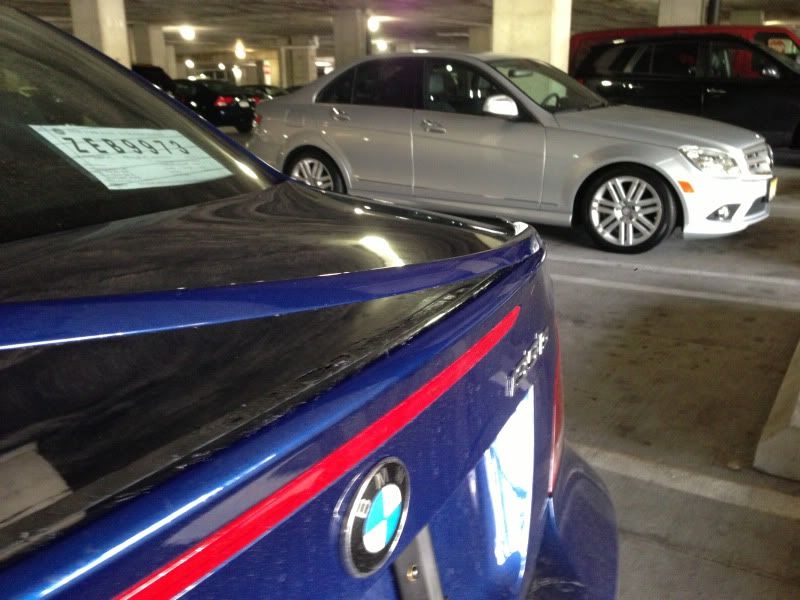 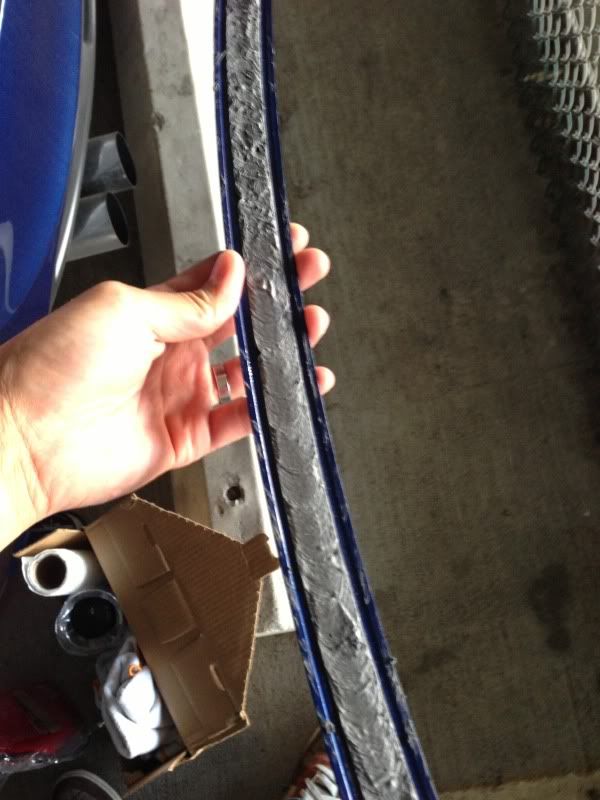 2) Now you'll need to remove the double sided tape that's stuck on the trunk. That's where the adhesive removal comes into play. You can spray directly onto the trunk but work at a section on time. The stuff dries up fast so there's no point in spraying the whole length of the trunk. 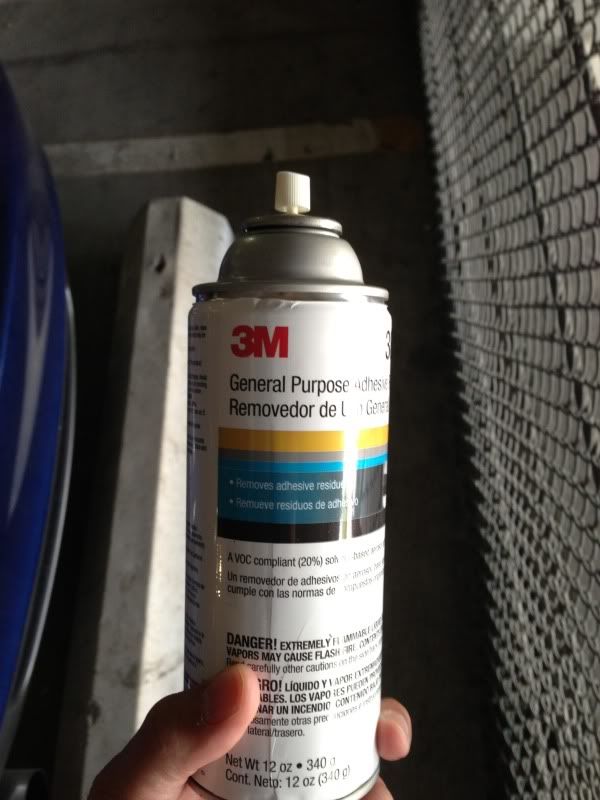 Warning, I can't imagine how someone would do this without the adhesive remover. Even after having this stuff my thumb got a little raw and a blister formed. Whatever you do, avoid the temptation of using your nail. You don't want to scratch the paint! Tape off 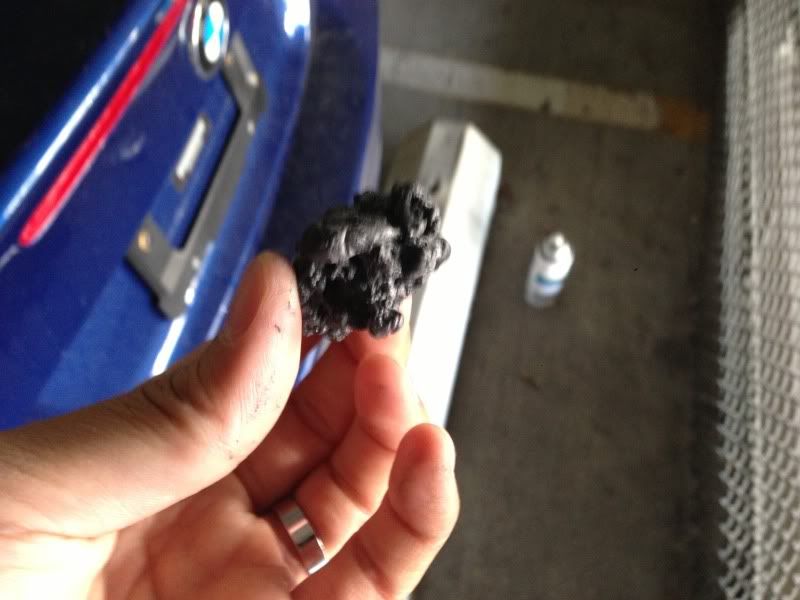 but notice the residue still left on the trunk 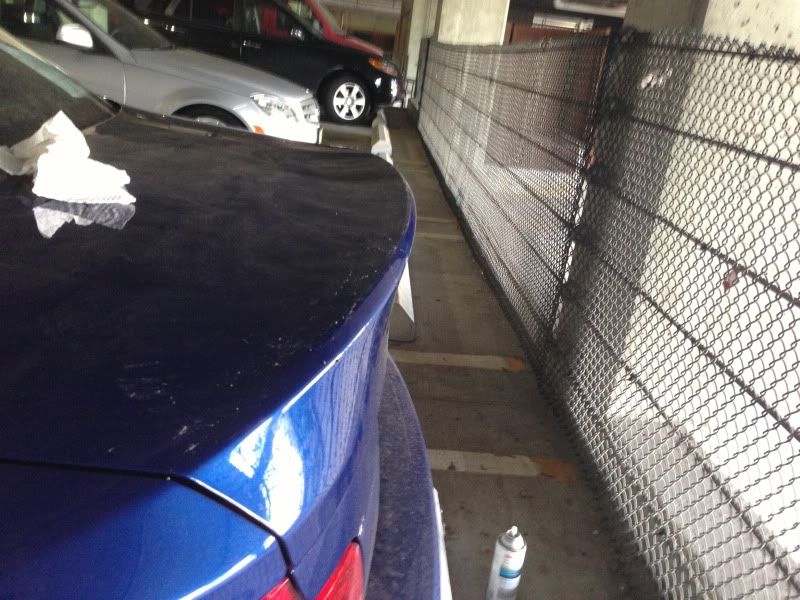 3) At this point, Goo Gone works great. You might wonder why I didn't suggest using Goo Gone to begin with but GG has a very oily texture and I'd imagine it'd be difficult to remove the adhesive that way. The fact the 3M stuff dries rather quickly, it's easy to get enough friction to roll the stuff up with your finger. Spray Goo Gone on the trunk, let it sit for about a minute and wipe off with a microfiber towel. 4) This is optional but I then decided to wash the car and bust out the clay bar. Although the trunk felt smooth, there's always some stuff on that you can't see. And sure enough, on first glide I felt the bar pickup some grime 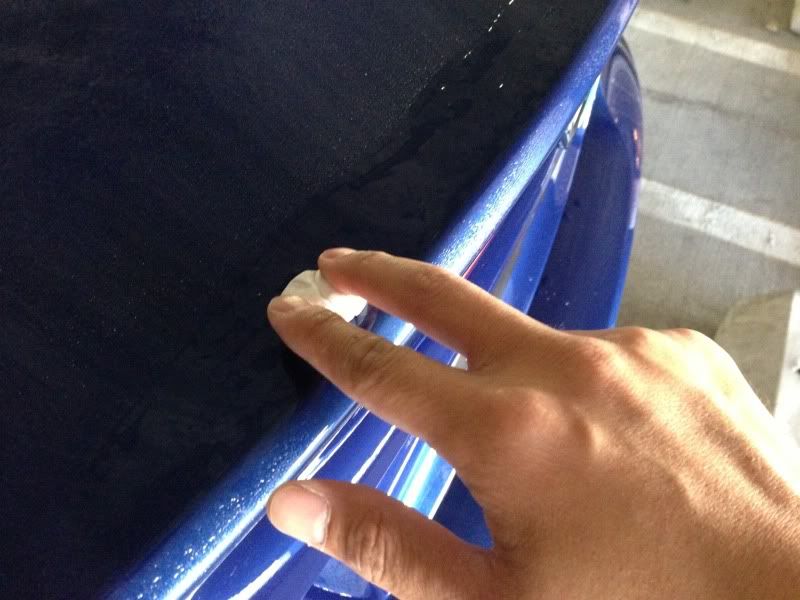 5) Wipe down the trunk once with isopropyl alcohol (IPA) and now it's time to line up the spoiler. Once you've test fitted the spoiler and ensured it was centered, cut out little pieces of painters tape and mark down the edges of the spoiler. This will make installing the spoiler MUCH easier after you've applied your tape. The pieces of tape that matter the most are the edges of each side and the center of the lip at the edge of the trunk (not shown). The center of the spoiler indents right around the 3rd brake light. Placing tape there at each indent point is what will really help center the spoiler if you're doing this by yourself. 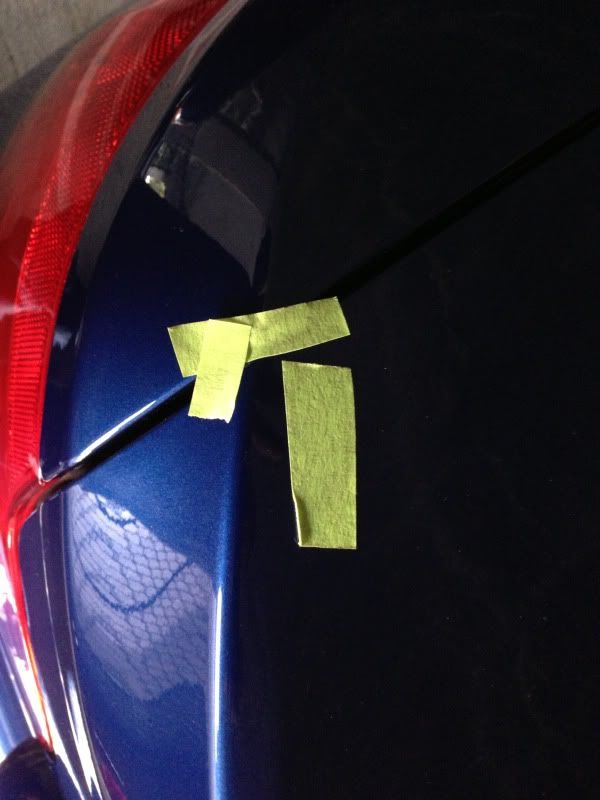 6) Now cut pics of your 3M double sided tape and apply to the inside of the lip. Here are some tips: - The more pieces you cut the more you to peel so go for longer pieces over many short pieces - As you apply each strip, pull/stretch the tape to thin it out. If not after you press down on the spoiler, the tape will bulge up a little and it won't sit as flush. But if you pull too much it loses some of its stickiness so don't go crazy with it. - The performance lip makes contact with the trunk on 2 surfaces, 1 on the top of the trunk AND on the front edge of the trunk so make sure you apply tape on those areas as well. If you're looking at the side of the trunk, think of a giant 7, the spoiler will touch both top and the corner of the 7. 7) Peel backside of tape and position spoiler where your markers were: (I know the edges aren't even, I re-positioned after I snapped these pics) 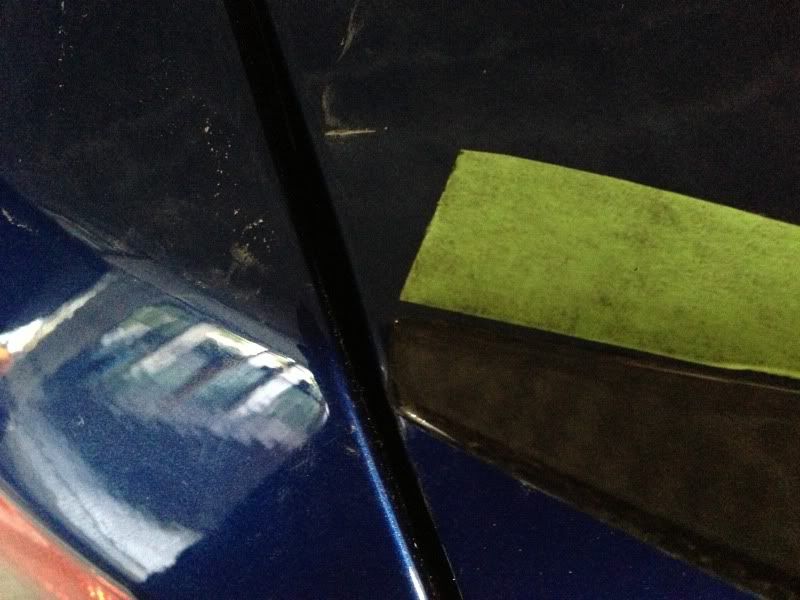 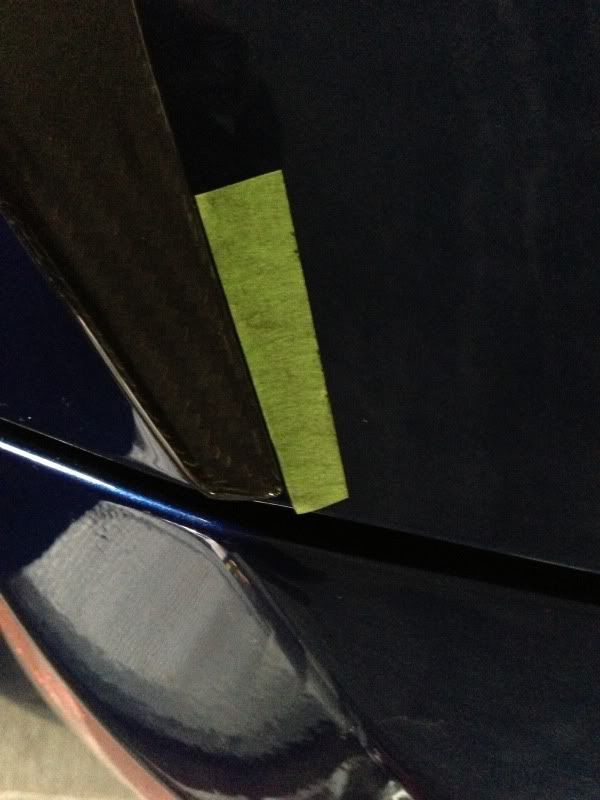 8. And now you're done. Press down on every section of the spoiler and afterwards, tape down the spoiler for few hours! 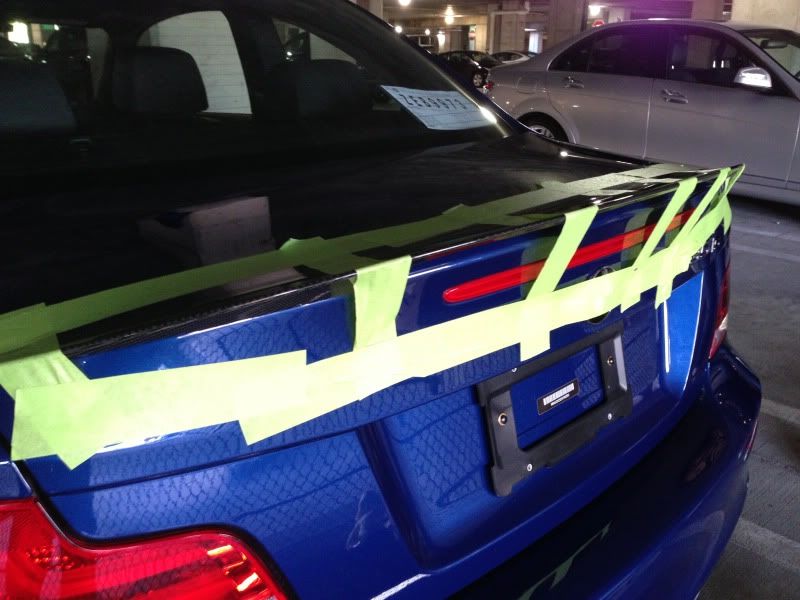
__________________
Follow
Last edited by 3002 tii; 06-09-2014 at 05:53 PM.. |
| 09-15-2013, 07:53 PM | #2 |
|
Lieutenant General
2282
Rep 12,565
Posts
Drives: Z4 M, X5, GX460
Join Date: Apr 2008
Location: CT
iTrader: (99)
Garage List F15 X5 xDrive35i [8.75]
E86 Z4 M [10.00] F10 550i (Retired) [9.17] F25 X3 xDrive35i (R ... [9.43] E82 135is (Retired) [9.50] E85 Z4 M (Retired) [9.41] E90 328i xDrive (Re ... [9.25] E86 Z4 3.0si (Retired) [9.22] |
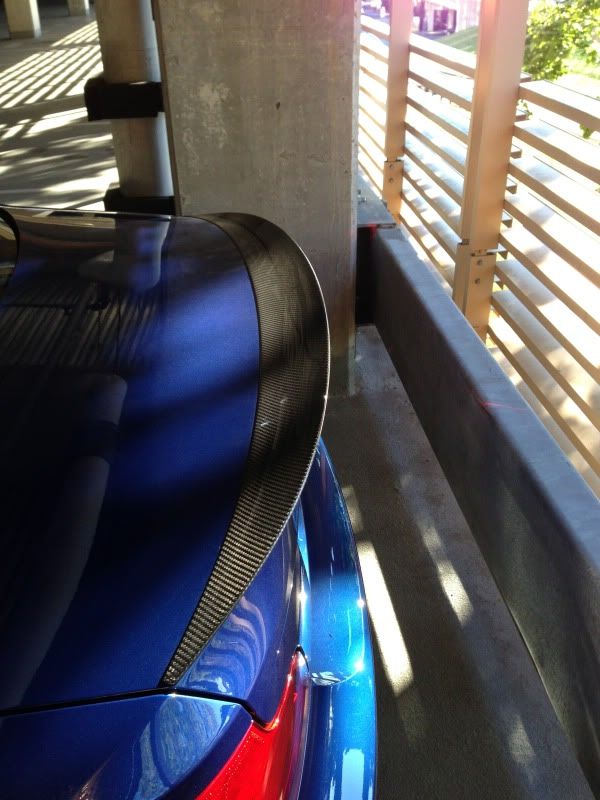
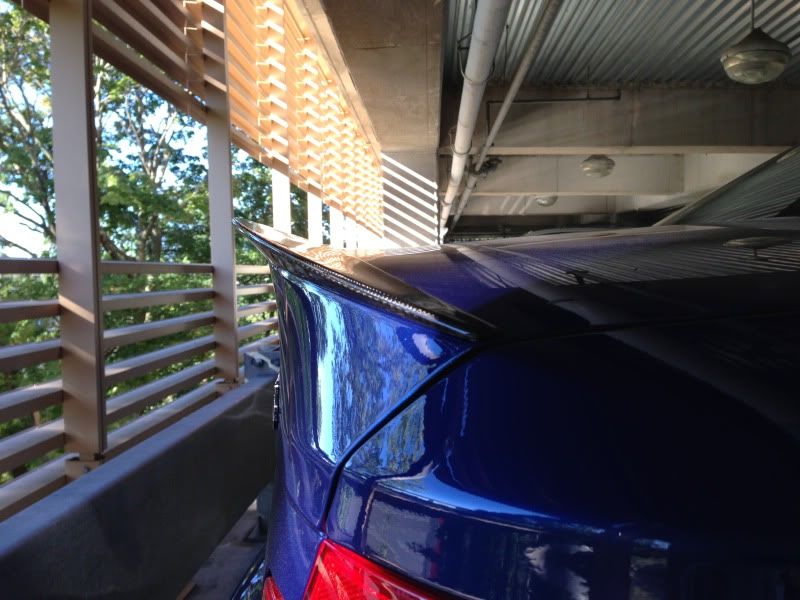
Waited couple hours, removed tape and the thing is on rock solid. Really happy with how it turned out.
__________________
Follow
Last edited by 3002 tii; 09-18-2013 at 06:04 PM.. |
|
Appreciate
0
|
| 09-15-2013, 08:17 PM | #3 |
|
Wolfsburg to Munich

75
Rep 294
Posts |
Great write up. I recently did this job and I would add a few thing
I warmed the tape and trunk prior to installing the spoiler. I found that putting a second layer of tape on the front edge of the spoiler was essential for good adhesion and avoiding contact between the spoiler and the painted surface. Bear in mind that my car is a Cabrio so there might be slight differences in spoiler shape. Thx |
|
Appreciate
0
|
| 12-23-2013, 11:12 AM | #5 |
|
Captain
 
151
Rep 929
Posts |
Great job. Nice DYI guide, and the new CF spoiler looks great!
__________________
 F87 '16 M2 ... Mineral Grey, 6MT, Exec, MPE Gone: E82 '13 135is 475/586 ... Mineral Grey / Oyster, DCT, Premium, Tech, HK, Michelin PSS, BMW Performance Suspension |
|
Appreciate
0
|
| 12-27-2013, 08:11 AM | #8 |
|
Resident Tamed Racing Driver
298
Rep 4,697
Posts |
It's not a bad process. I found the easiest way to do it was to enlist two more people to guide and confirm a perfect line up on each end, while I manned the middle.
The only thing I would add is that you get one shot at mounting it. The carbon fiber is thin. If you have it loaded up with double sided tap and touch it to the hood, there is a good chance you will break it trying to get it off to re-position it.
__________________
2005 E46 M3 Interlagos/Cinnamon with Sunroof Delete
|
|
Appreciate
0
|
| 06-09-2014, 04:33 PM | #9 |
|
Lieutenant General
2282
Rep 12,565
Posts
Drives: Z4 M, X5, GX460
Join Date: Apr 2008
Location: CT
iTrader: (99)
Garage List F15 X5 xDrive35i [8.75]
E86 Z4 M [10.00] F10 550i (Retired) [9.17] F25 X3 xDrive35i (R ... [9.43] E82 135is (Retired) [9.50] E85 Z4 M (Retired) [9.41] E90 328i xDrive (Re ... [9.25] E86 Z4 3.0si (Retired) [9.22] |
Just a little follow up, I'm still very happy with the lip. Everything is on firmly and dead centered. I noticed though there's some tiny gaps on the ends of left and right sides where I couldn't tape underneath. Quick fix would be to apply caulking in a precise manner with a syringe, similar to the guy in the video. The adhesive I purchased was Permatex brand, easily found at your local Advance Auto. Syringes I ordered from Amazon.
 Be sure to tape off the area and have some paper towels and rubbing alcohol handy so you can wipe off any excess.
__________________
Follow
Last edited by 3002 tii; 06-17-2014 at 12:23 PM.. |
|
Appreciate
1
|
| 06-09-2014, 05:47 PM | #10 |
|
European Editor

10532
Rep 22,992
Posts |
Thanks for putting this DIY together!

__________________
|
|
Appreciate
0
|
| 10-11-2015, 04:10 PM | #11 |
|
Colonel
 706
Rep 2,446
Posts |
Any pics after applying the permatex? Just installed mine. Completely flush except the ends
__________________
|
|
Appreciate
0
|
| 10-11-2015, 06:38 PM | #12 | |
|
Lieutenant General
2282
Rep 12,565
Posts
Drives: Z4 M, X5, GX460
Join Date: Apr 2008
Location: CT
iTrader: (99)
Garage List F15 X5 xDrive35i [8.75]
E86 Z4 M [10.00] F10 550i (Retired) [9.17] F25 X3 xDrive35i (R ... [9.43] E82 135is (Retired) [9.50] E85 Z4 M (Retired) [9.41] E90 328i xDrive (Re ... [9.25] E86 Z4 3.0si (Retired) [9.22] |
Quote:
__________________
Follow
|
|
|
Appreciate
0
|
| 10-11-2015, 06:56 PM | #13 |
|
Colonel
706
Rep 2,446
Posts |
Oh. Well thanks for taking he time to reply. I managed to get one piece across the front. The thickness of the tape causes the slightest gap at the very ends. Everywhere else is flush. Probably just keep an eye on it and if it bugs me I'll get the permatex.
__________________
|
|
Appreciate
0
|
Post Reply |
| Bookmarks |
|
|