

|
|
|
|
|
| 08-08-2008, 09:30 AM | #45 | |
|
Lieutenant
 134
Rep 536
Posts |
Quote:
|
|
|
Appreciate
0
|
| 08-09-2008, 08:15 AM | #46 |
|
Coming Soon

254
Rep 960
Posts |
For those of you hardwiring, while a fuse if probably a good idea, its probably not neccesary. Simply take a normal telephone cable, and power the red wire and ground the green wire and your 8500 will be good to go.
|
|
Appreciate
0
|
| 08-09-2008, 08:46 AM | #47 | |
|
Unindicted co-conspirator
66
Rep 1,734
Posts
Drives: to work, mostly.
Join Date: Oct 2008
Location: Pittsburgh, Pennsylvania / Detroit, Michigan
|
Quote:
|
|
|
Appreciate
0
|
| 08-09-2008, 12:52 PM | #48 | |
|
Banned
76
Rep 5,970
Posts |
Quote:
Be carefull with that. Some of the telephone cables mix up the wire colors, so the pins you need aren't always the red and green. It's a good idea to double check the pinout online before hooking up the power. As for the fuse, I'm running without one. The wires in the phone cable are so small they'd probably act as a fusable link if something in the detector shorted out, and the fuse that's supplying the dome light I'm wired into would pop if not. The inline fuse isn't a bad idea, but the risks are pretty low even without it. |
|
|
Appreciate
0
|
| 08-18-2008, 10:31 PM | #49 |
|
Brigadier General
 
2350
Rep 4,253
Posts |
Just did this! Getting those clips out was tedious.. and I ended up scratching that soft reflective material underneath the light cover. A piece of advice.. tape that up first! The cover for that light fell off almost instantly for me, mine never seemed to be very solid.
Otherwise it went smooth. Thanks AndyM, for the write up!
__________________
///M Power
|
|
Appreciate
0
|
| 09-02-2008, 12:47 PM | #50 | |
|
**************
29
Rep 190
Posts |
Quote:
AMEN! And then some. I just got done doing this install twice. Turned out Red and Green WERE the right colors, but reversed. I looked inside the plug, saw red and green in the middle and thought I was ready to go. After doing the entire install, the detector did not come on. Checked all connections, looked good. (Fortunately I tested it out before reinstalling the panel.) Finally looked at the plugs for the cigarette lighter cord and the phone cord side by side and realized that all four wires were reversed. (Works fine for a phone, as long as pin A is wired to pin A on the other end.) So, I removed the wiring, cut off the connectors I had just put on, and reversed it to Green power and Red ground. Moral of the story: check the wiring VERY carefully before using ANY pre-configured wires! Colors are not consistent, and the manufacturers get tricky about it. |
|
|
Appreciate
0
|
| 09-03-2008, 01:39 PM | #51 |
|
Enlisted Member
 2
Rep 36
Posts |
I'll throw in my $.02 about getting the panel off of the headliner.. If you unscrew the screw underneath the clip that holds the visor (it's a torx head) on both the driver and passenger side, the headliner will come down very easy. I tried to do it the way of just pulling it down and pushing the clips but had no luck, the headliner was starting to make bad noises.. by undoing those screws its very easy, took 30 seconds.
|
|
Appreciate
0
|
| 09-04-2008, 03:38 PM | #52 | |
|
Private First Class
 5
Rep 132
Posts |
Quote:
|
|
|
Appreciate
0
|
| 09-04-2008, 06:04 PM | #53 | |
|
Coming Soon
254
Rep 960
Posts |
Quote:
I actually have a 12v battery from a garage remote control which i use to test the wires with before installing. |
|
|
Appreciate
0
|
| 09-05-2008, 12:38 AM | #54 | |
|
Private First Class
5
Rep 132
Posts |
Quote:
:thumbup: |
|
|
Appreciate
0
|
| 10-11-2008, 10:55 PM | #55 | |
|
Only 1 n Rome
10
Rep 166
Posts |
Quote:
Gotta pull 'em off the MINI in a few days & really appreciate this DIY.
__________________
 Drives a Sawed-Off Shotgun Drives a Sawed-Off Shotgun135i/SGM/Terra/Gray Poplar/Sport Pac/H&R Sport Springs & Sways/Heated Seats/Premium HI-FI/Sat  |
|
|
Appreciate
0
|
| 03-22-2009, 01:27 PM | #56 | |
|
New Member
1
Rep 20
Posts |
Quote:
Just get a small flat screwdriver, use it to pop open the cover on the inner visor clip, then undo the torx screw. The clip will come off, then do this on the other side and you have plenty of room to get between the headliner and undo the light panel clips. |
|
|
Appreciate
0
|
| 04-24-2009, 11:52 AM | #57 |
|
Member
1
Rep 23
Posts |
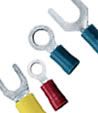
I used these (the ones in the middle) and had no issue at all:
__________________
6MT 135i Black Sapphire
") Production #: 399XXXX. Status: In my hands! - 4/27/08 Configuration: 6MT, Black Boston Leather: Gray Poplar Wood: Premium Package: Sport Package: Heated Seats: Navigation: Satellite Radio: iPod and USB adaptor |
|
Appreciate
0
|
| 04-24-2009, 09:11 PM | #58 |
|
Yr1OfD1
106
Rep 900
Posts |
here is the conservative way
http://www.1addicts.com/forums/showt...highlight=8500 |
|
Appreciate
0
|
| 07-05-2009, 12:27 PM | #59 |
|
Brigadier General
273
Rep 3,164
Posts
Drives: Many
Join Date: Feb 2009
Location: North of 7K RPM
iTrader: (1)
Garage List 2020 BMW M2 CS [0.00]
1994 Audi RS2 Avant [0.00] 2021 Audi RS6 Avant [0.00] 1988 BMW E30 M3 [0.00] 2011 BMW 1///M [0.00] 2017 BMW F80 M3 30 ... [0.00] 2018 Porsche 991.2 GT3 [0.00] 2015 Porsche Macan ... [0.00] 1998 Porsche 993 C4S [0.00] 1994 Lancia Delta I ... [0.00] 2008 Audi RS4 [0.00] |
Is this the part needed for hardwiring the Escort 8500 X50 (the $10 variant, the $25 has the mute button)?
https://www.escortradar.com/store/straight-cords/ I also have seen these alternatives on Ebay that go to the fuse box, any idea what makes for a better/cleaner install? http://cgi.ebay.com/Escort-Passport-...3A1%7C294%3A50 http://cgi.ebay.com/ebaymotors/ESCOR...fAudioQ5fVideo
__________________
2011 BMW E82 1///M: AW, all options; Renntech, Akrapovic, Forge, P3, RevoZ CF bits, many mods
1988 BMW E30 M3: Hennarot, S14, stock 2018 Porsche 991.2 GT3: PtS, CXX, LWBS, PCCB 1998 Porsche 993 C4S: Zenith Blue, last aircooled widebody, Bilstein PSS10, Fister II + Fabspeed exhaust 2008 Audi B7 RS 4: Sprint Blue, Audi Exclusive Euro Bucket Interior, Premium+Titanium, many mods |
|
Appreciate
0
|
| 07-05-2009, 05:37 PM | #60 |
|
Coming Soon
254
Rep 960
Posts |
///M1 i suggest wiring it directly from the sun roof control box like Andy suggested using a REGULAR telephone cable....
Take a telephone cable, cut on end off. Then take a small 12v battery used in garage remote controls and put power to the 4 exposed wires until you figure out which wires power your radar detector. Then just tap those 2 wires into your sun roof per Andy's instructions. Its super clean once installed. The ebay kit looks fine too, and will work with Andy's method. |
|
Appreciate
0
|
| 07-06-2009, 05:44 PM | #61 |
|
Coming Soon
254
Rep 960
Posts |
Thought i would take come pictures to help explain wiring with a normal telephone cable.
Take a normal telephone cable and cut off and strip one end. (2 or 4 wire cable is fine)  Now look very carefully at the other end. The middle 2 pins are the positive and negative terminals.  In this picture, the negative terminal is RED on the left and the positive terminal is GREEN on the right. (Your colors may vary so just figure out which is the left and right pin to determine which wires are positive and negative) Now put the negative wire to the ground and the postive wire to the dome light like Andy showed in post 1. Last edited by stevenc; 07-09-2009 at 07:54 PM.. |
|
Appreciate
0
|
| 07-09-2009, 03:00 PM | #62 | |
|
formerly izzo/comeback
287
Rep 3,382
Posts |
Quote:
got a v1 on the way and hard wiring this week probably
__________________
BMW CCA # 418268
|
|
|
Appreciate
0
|
| 07-11-2009, 08:33 PM | #63 |
|
Lieutenant Colonel
 
59
Rep 1,859
Posts |
Did this yesterday, very easy, good DIY, thanks!
__________________
E82 N54 6MT 6FL 668 KASW turned in
E92 Crimson/Cream N54 6MT, ZSP, ZPP, ZCW, Nav, Sat radio, HD Radio, Logic7, PDC, Active Steering, Active Cruise, 6FL, CA |
|
Appreciate
0
|
| 08-30-2009, 11:22 PM | #64 |
|
Major
 346
Rep 1,288
Posts |
Okay, so I did this to my 8500 today and man what a PITA those clips were. Do yourself a favor and invest in some torx drivers and remove the sun visors + the visor clips. I removed the entire driver's side and just the clip from the passenger's side... from that point forward it only took about 10 minutes to button everything up.
I used a standard 4 conductor phone wire, though I really felt the wire could have been a higher gauge, it does seem to work just fine...  |
|
Appreciate
0
|
| 04-18-2010, 06:46 PM | #65 |
|
New Member
0
Rep 24
Posts |
need some help, just did the DIY and everything worked great (the torx screw trick made the clips really easy). My problem is I tapped in to the #3 pin green and white wire..and no power.
any ideas? i'm sure i'm on #3 b/c of the numbers on the back of the harness. thanks! |
|
Appreciate
0
|
| 04-18-2010, 09:19 PM | #66 |
|
Major
346
Rep 1,288
Posts |
Those wires are a ridiculously thin gauge.. I'm assuming you are using the t-style crimp connector that clamps over the green wire?
Just make sure you use the smallest one of those connectors that you can find so that you ensure that when you clamp it down it actually cuts all the way through the insulation. Maybe clamp it down and kind of rotate it around a bit to make sure you cut all the way through? |
|
Appreciate
0
|
Post Reply |
| Bookmarks |
|
|


