

|
|
|
|
|
|

| ||||||||||||||||
Post Reply |
|
|
Thread Tools | Search this Thread |
| 10-31-2011, 11:22 AM | #1 |
|
Banned

262
Rep 5,018
Posts
Drives: VALNCYA
Join Date: Jan 2009
Location: Jersey
|
Here is DIY on how to install BMW Performance Steering Wheel Version II Flat Bottom.
INSTALL PDF ATTACHED ! I BORROWED SOME PICS FROM THIS USERS DIY It is not very difficult you just need to take your time and pay attention to what you are doing, and TAKE YOUR TIME! Tools: 1. Not very big Flathead Screwdriver 2. 16mm socket with wrench and extensions 3. T15 torx socket ( i think it is T15 but I might be wrong) 4. Very small flathead screwdriver or Small Pik 5. 10mm socket 6. Plastic Pry Tools (RECOMMENDED) 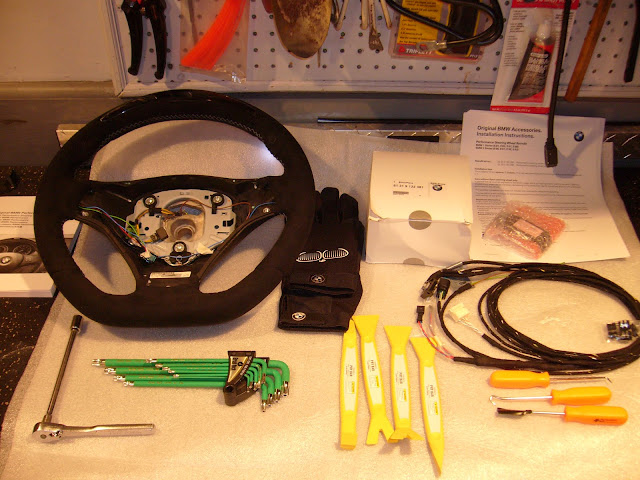 This DIY is for you just to look/read and get an idea on how it can be done. I am not encouraging you to do this installation unless you are technically inclined to do so. I will not be responsible for anything that might happen to you, your vehicle, or anybody who might be helping you, or anything else. Before you start taking everything apart you need to read PDF Instructions (there not included but will try to attached on here) and get familiar with it. - Make sure you understand what goes where. After you did that, I would recommend to label supplied BMW harness with A1,A2,A3,A4,A5,A6, and A7 tags. It will be easier to figure out what goes where. NOW LETS BEGIN -------------------------- 1. Make sure you have your trunk open and I would recommend also lowering your windows and leave your key away from the car (if comfort access equipped) 2. Disconnect your Battery and make sure your (-) Negative terminal will not touch the battery, I kept a micro-fiber under neath to avoid contact 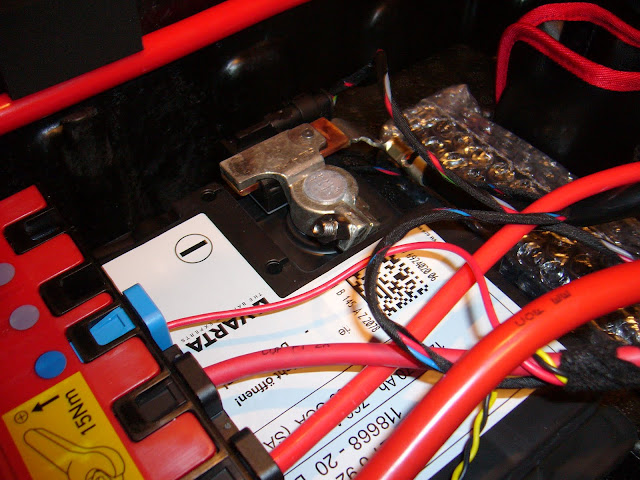 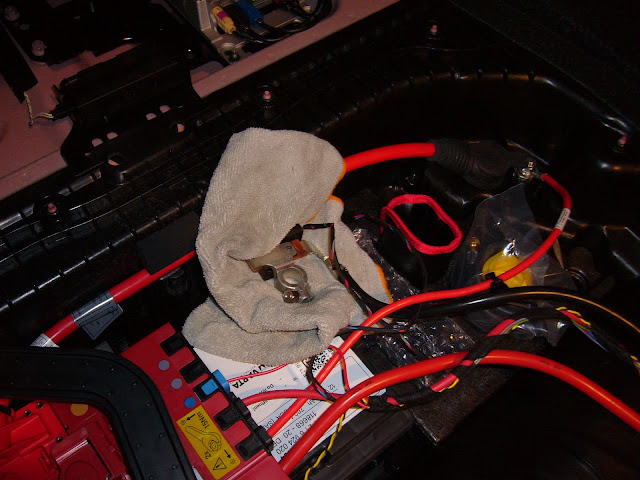 3. Next remove all trim work on both sides of the footwells, use caution as the trims and clips are fragile if not taken into account for your own strength. 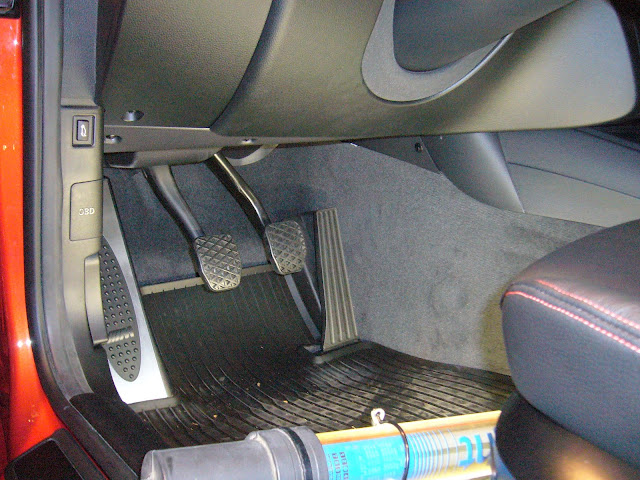  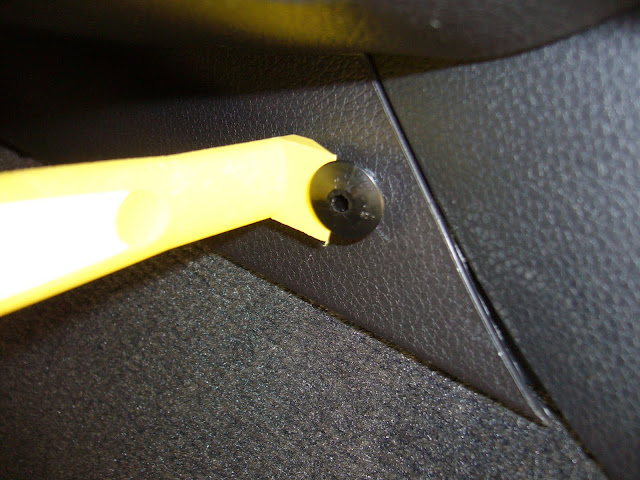 4. The hood release has a phillips screw and then underneath the hood latch is another phillips screw. 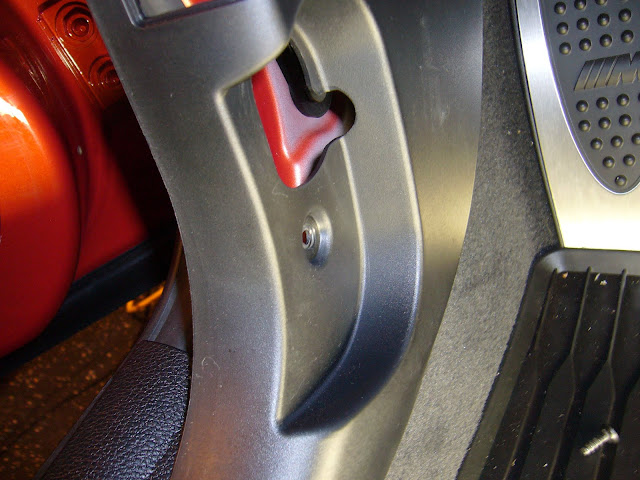 5. Use caution when removing the trim work as there are MANY connectors and modules in this footwell panel 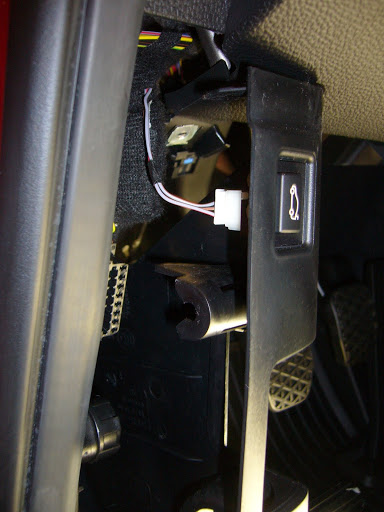 6. Next remove the driver footwell covering ( 3 T20 screws or T15s I forget) 7. Then completely remove the driver footwell panel (USE CAUTION PULLING CONNECTORS OFF) 8. Next remove the passenger side foot well and side kick plate (CAREFUL there are 2 plastic tabs that hold it into place use your plastic pry tools to remove.) 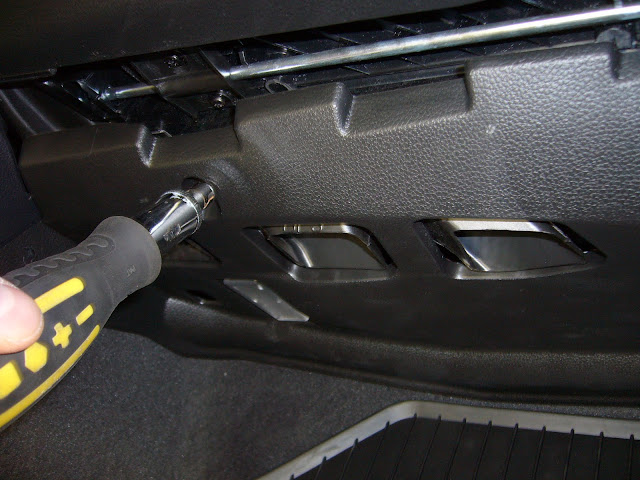 9. You will then see 2 Sets of connectors BLUE & BLACK, unplug the BLUE connector 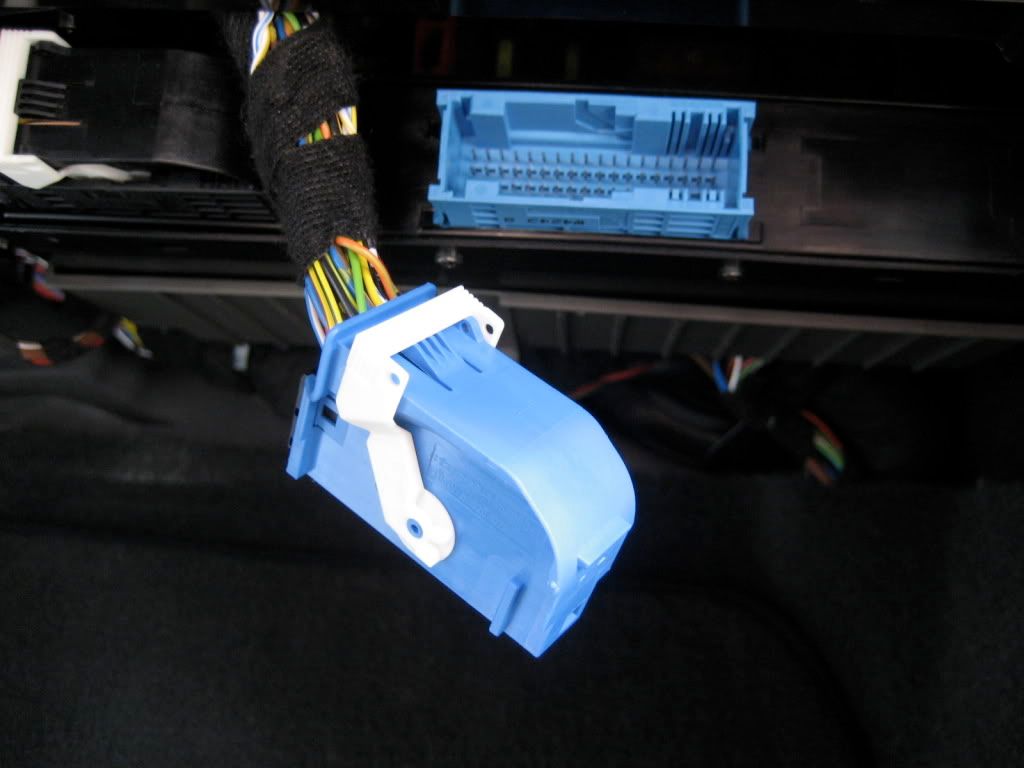 10. Next remove the connector from the sleeve. 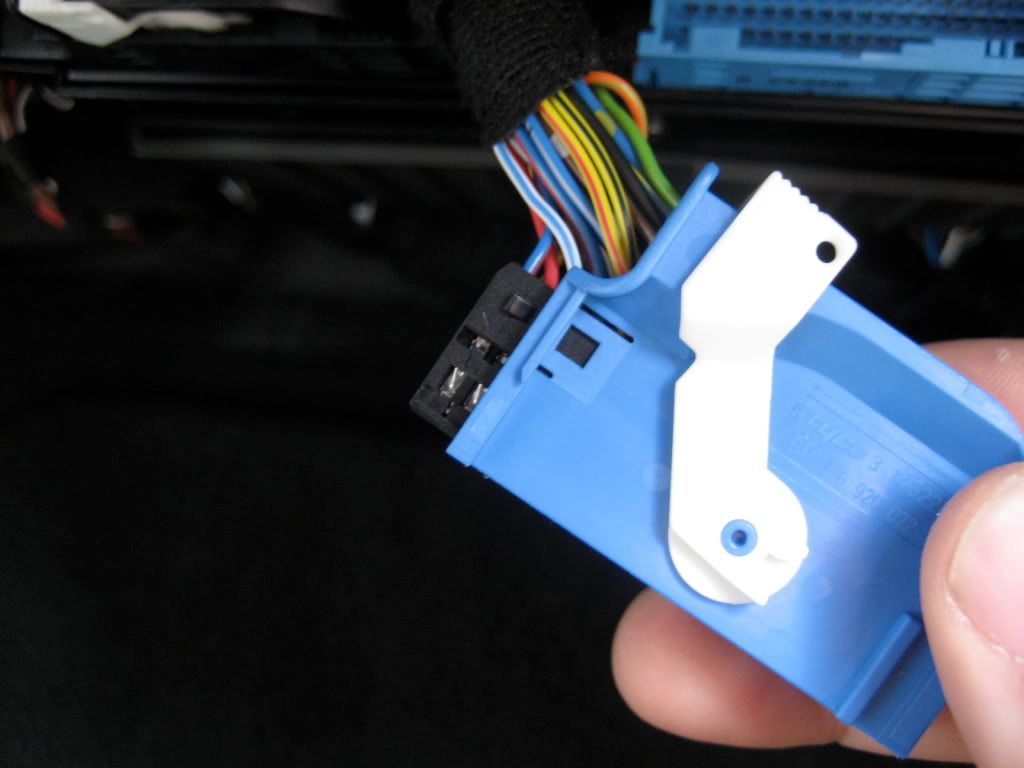 11. Connect the 2 BLUE & RED Wires  12. Read PDF installation and remove Blue/Red wire from Pin1 and Red from Pin2. Insert A3 into Pin1 and A4 into Pin2. Now install wires that you removed from Pin1 and Pin2 into Connector E - Pulling out wires from Pin1 and Pin2 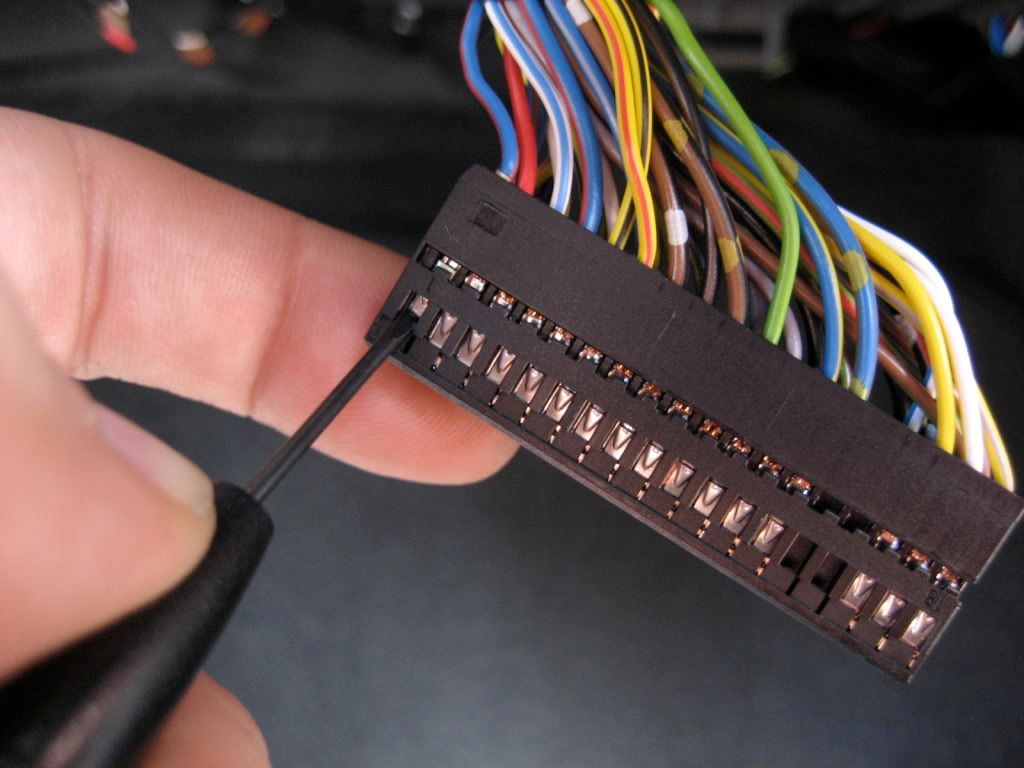 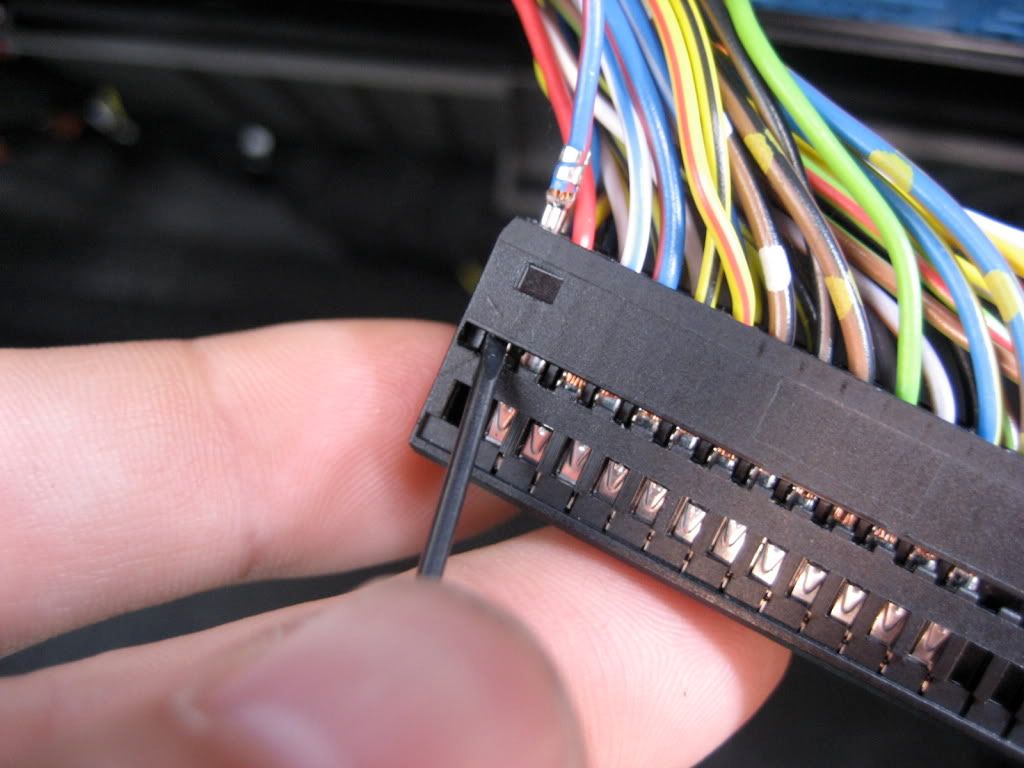 13. Connector Labeled E removing and installing the loop back loom. 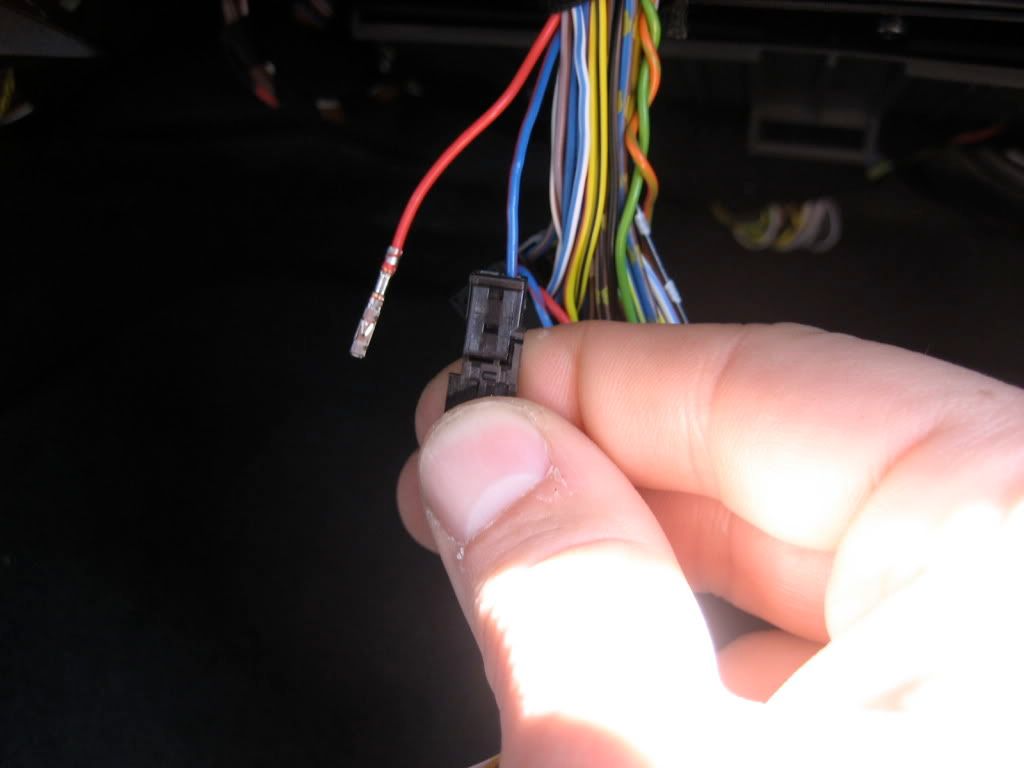 14. Connecting the new harness 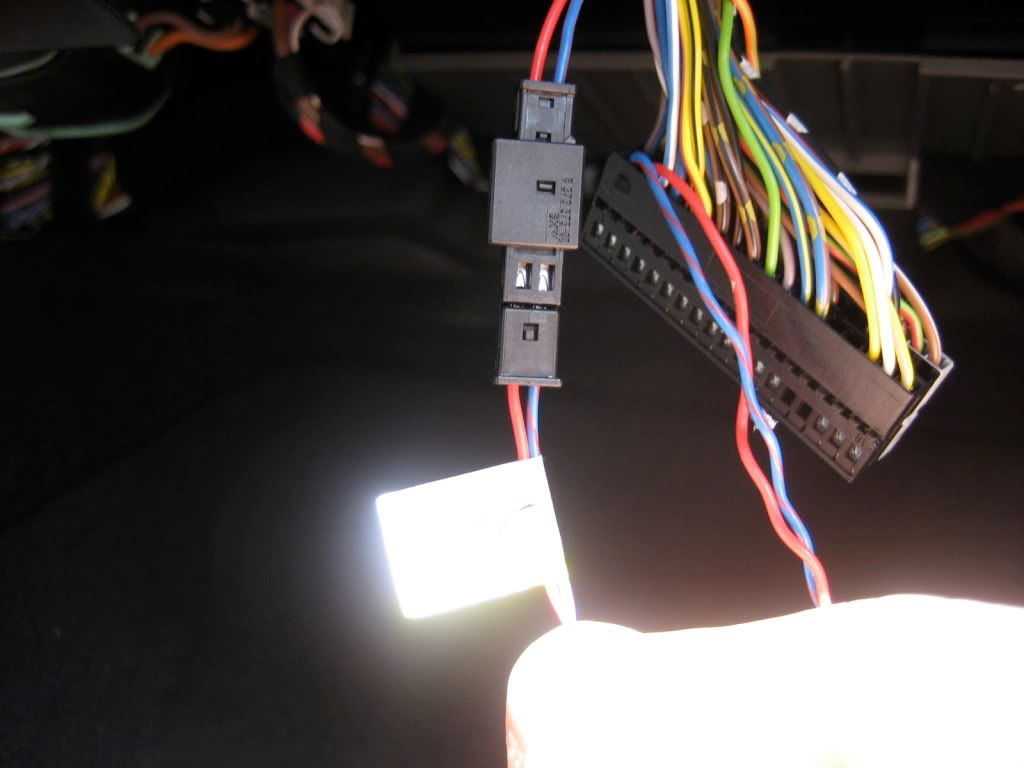 15. Install the control module B 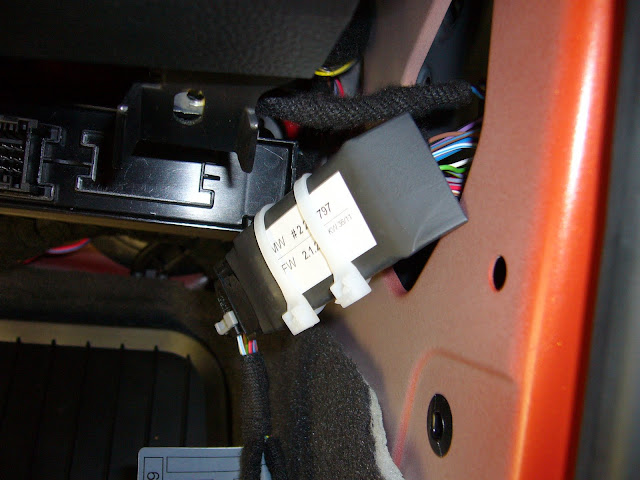 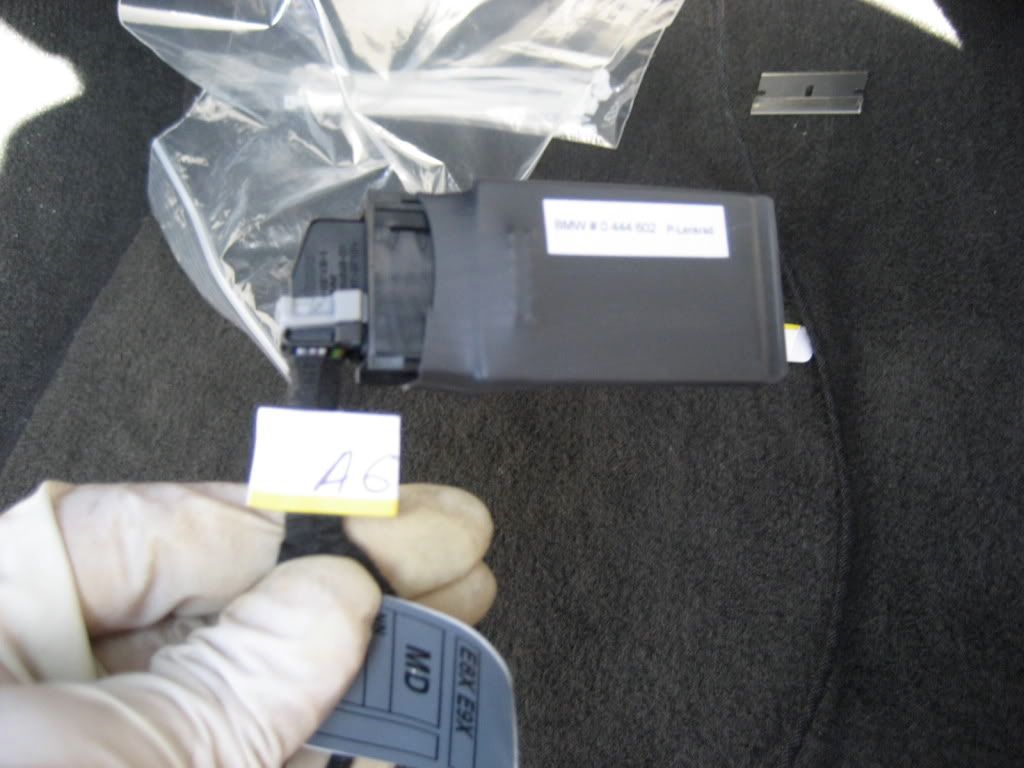 16. Install the Black connector into Blue connector and then reinstall Blue connector. I used zip-tie to get all those wires together. Gotta keep it neat ! 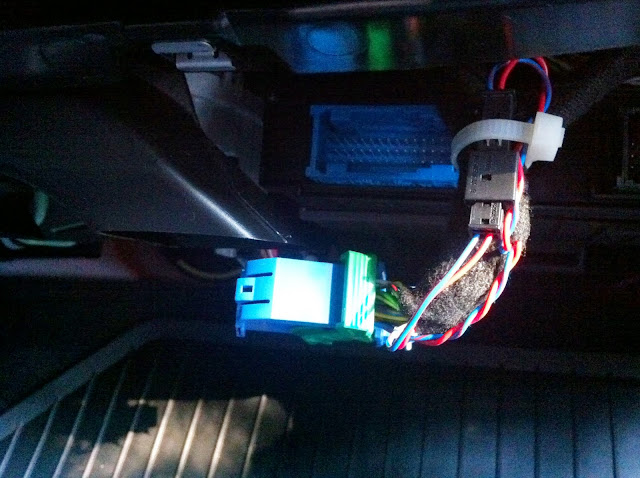 17. Next feed the longer of the 3 cables into the glove box (this cable is for the track side module small 2 PIN Round Connector) 18. Now feed the remaining 2 connectors thru the console and have them out the driver side 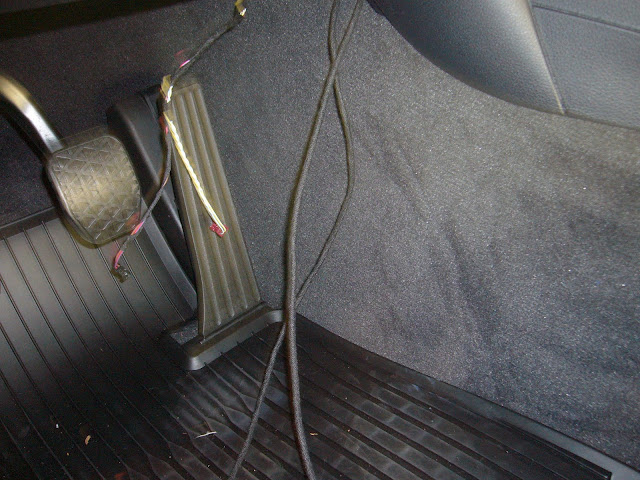 19. Next remove the Air Bag Module using a flat blade screw driver to reach the release tabs. Next disconnect the connectors using a small flat blade screwdriver to remove the connector security tabs. 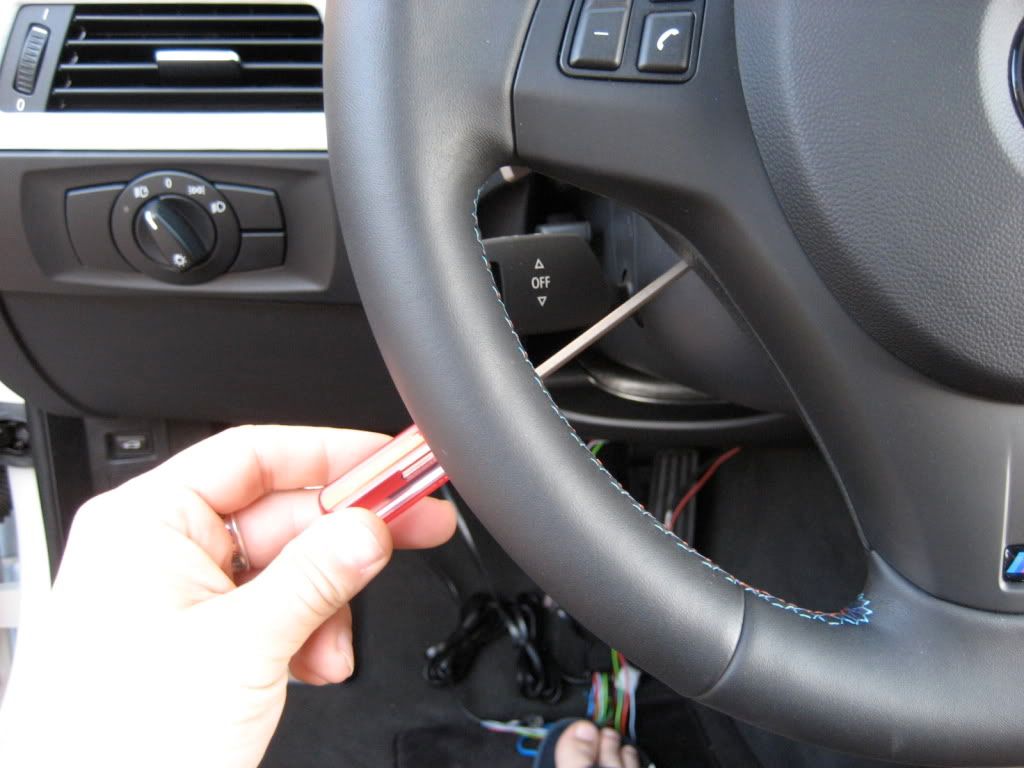 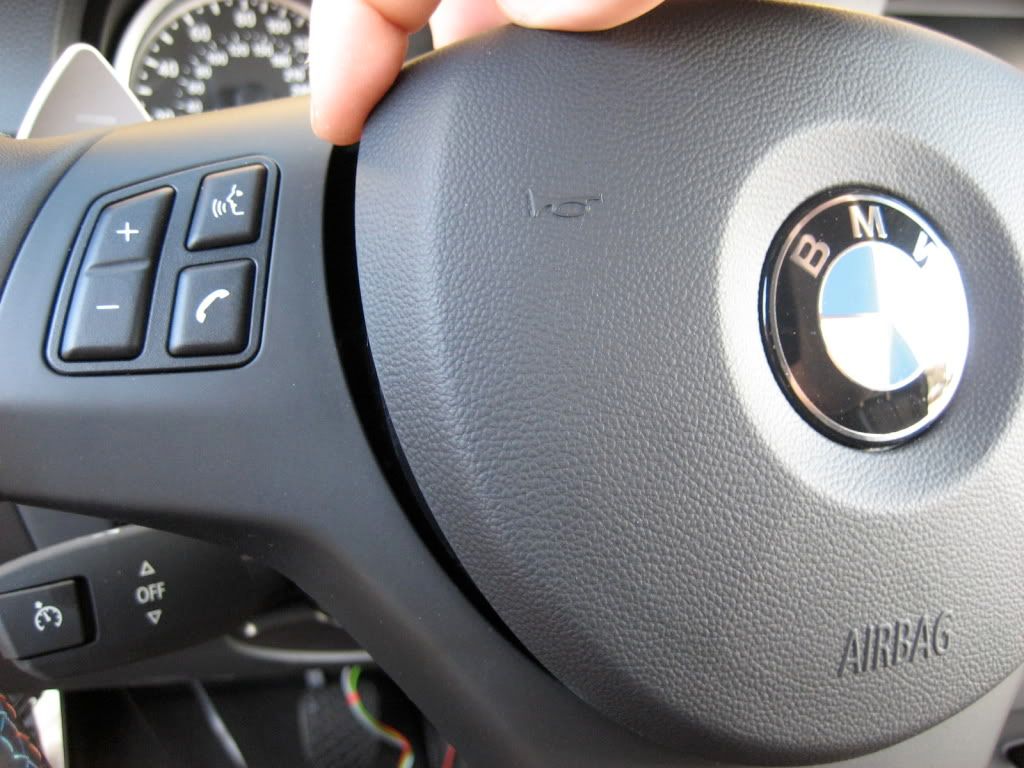 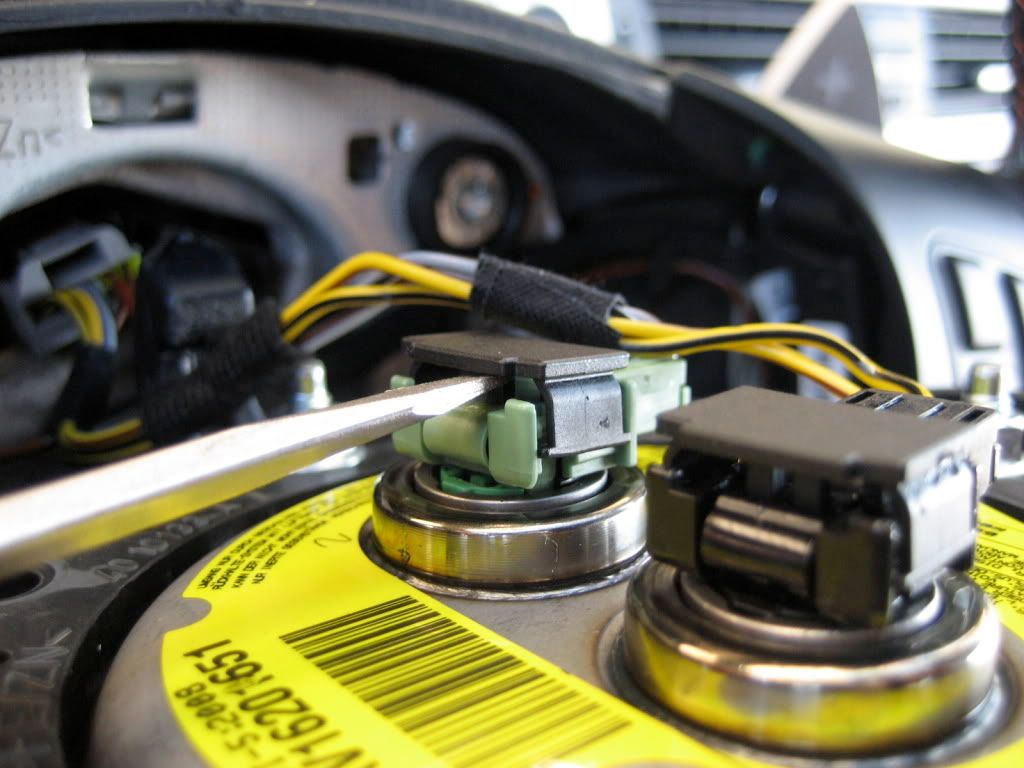 20. Disconnect the connectors on the steering wheel. 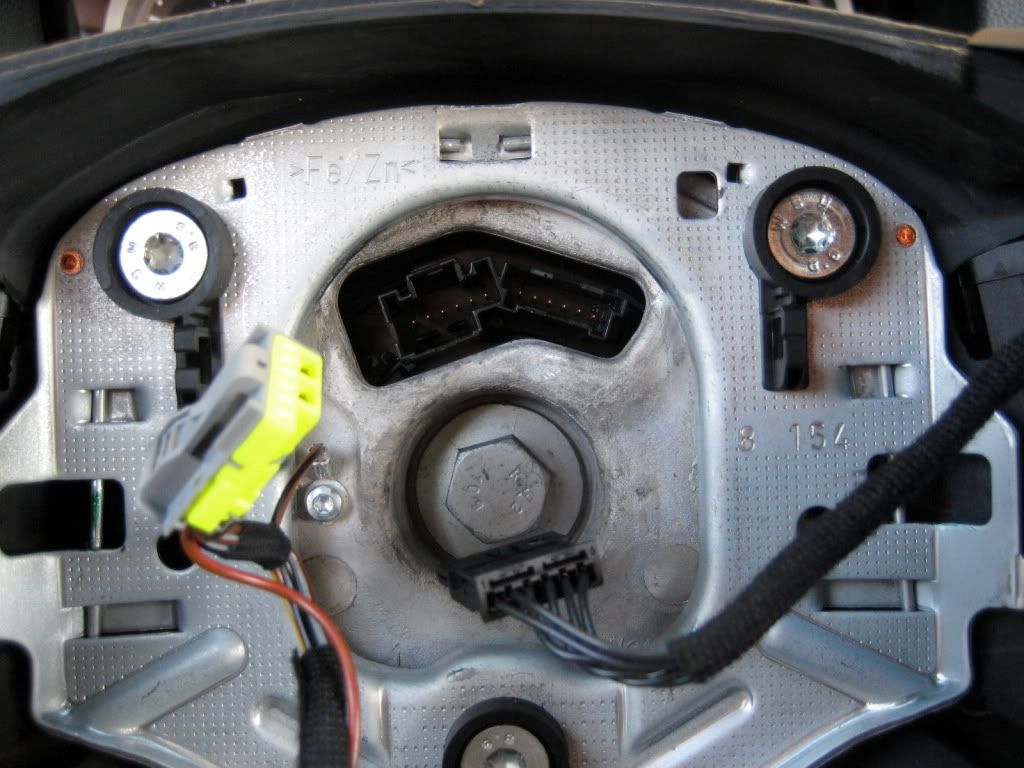 21. Next is to remove the wheel. 16MM Bolt 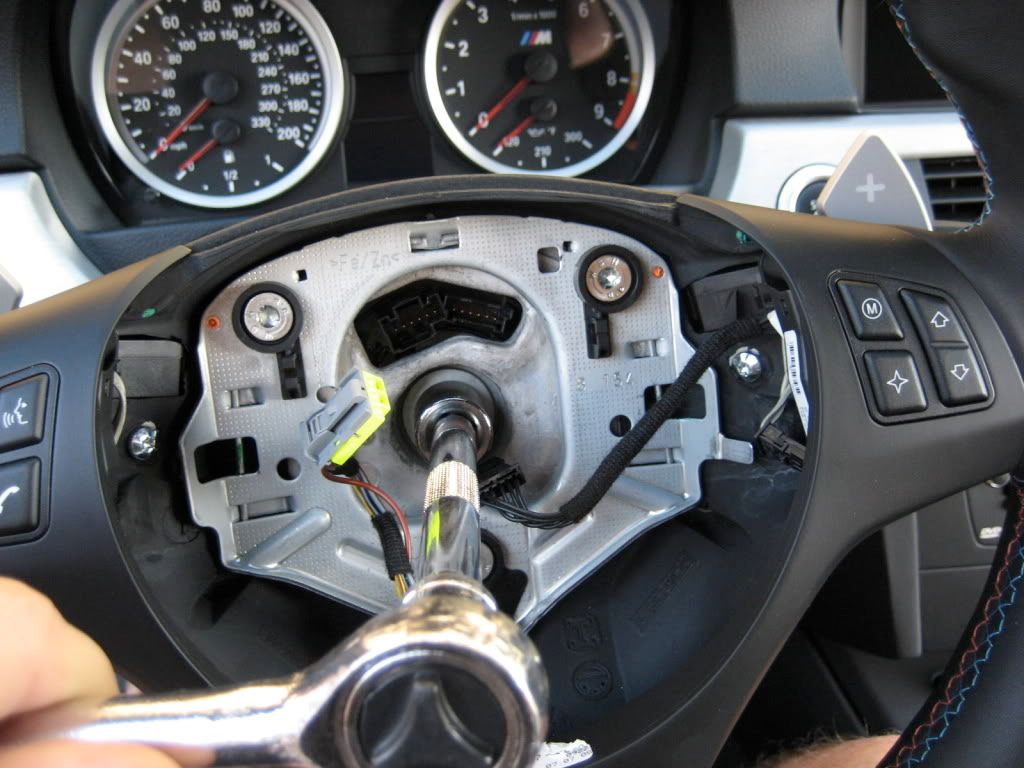 22. Now we need to remove upper/lower steering column trim. Pull the upper part first. Pull it up and do one side at a time. You can use your plastic pry tools again and push it up from the inside, but be very careful and take your time. 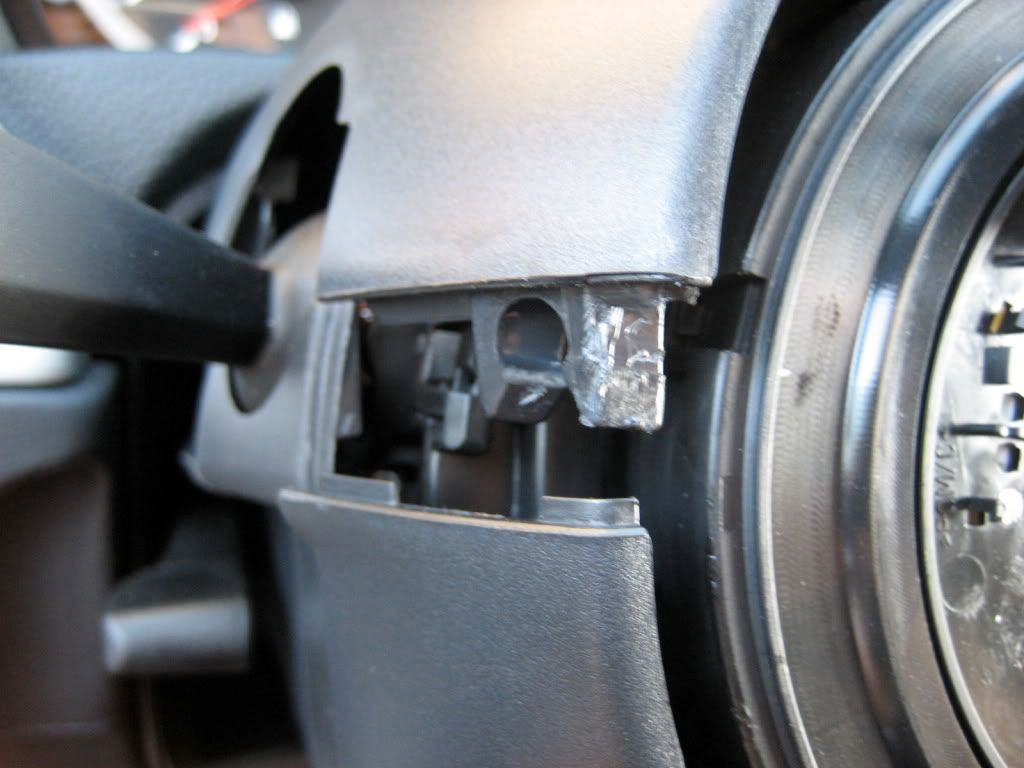 23. Removing the Coil spring cartridge with T15 torx. Unplug Black & White small connectors on the RT side. 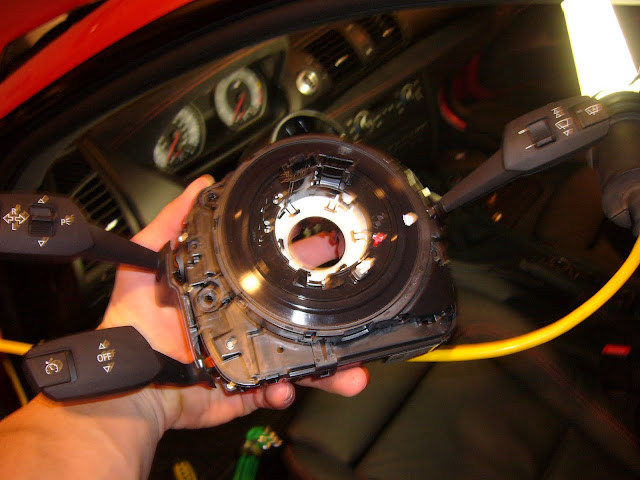 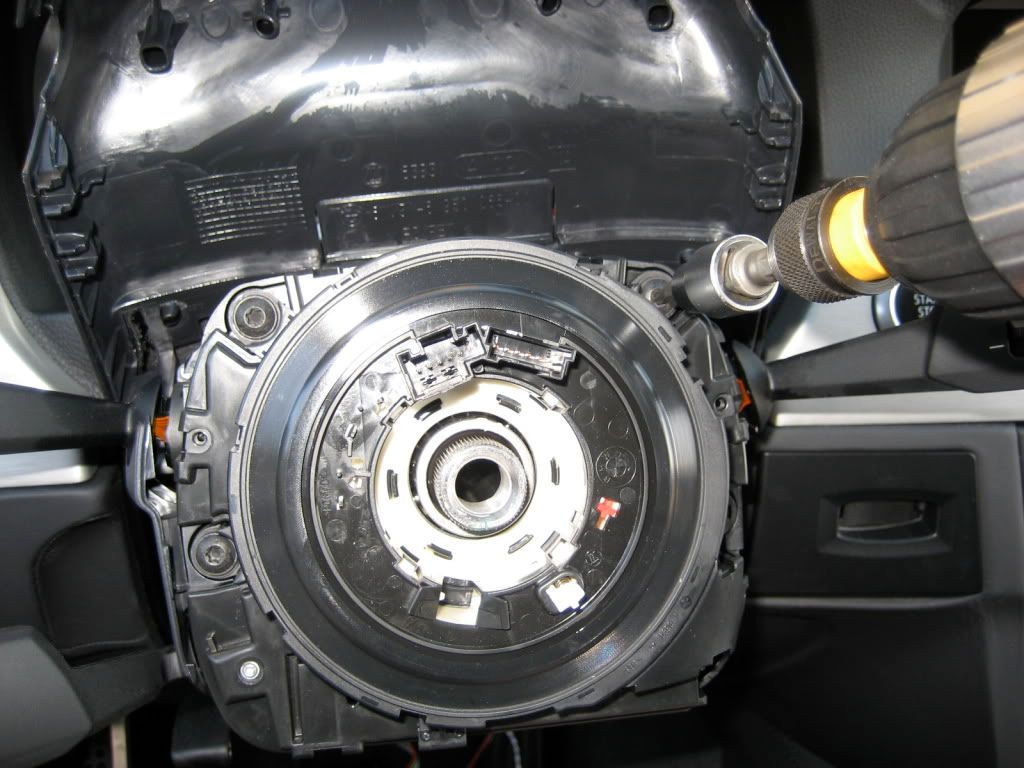 24.Make sure not to pull the whole assembly out of the column. Very Important. Unclip all the clips and remove just the Coil spring cartridge and nothing else. These are the clips that are holding it on the side, so make sure to unclip them 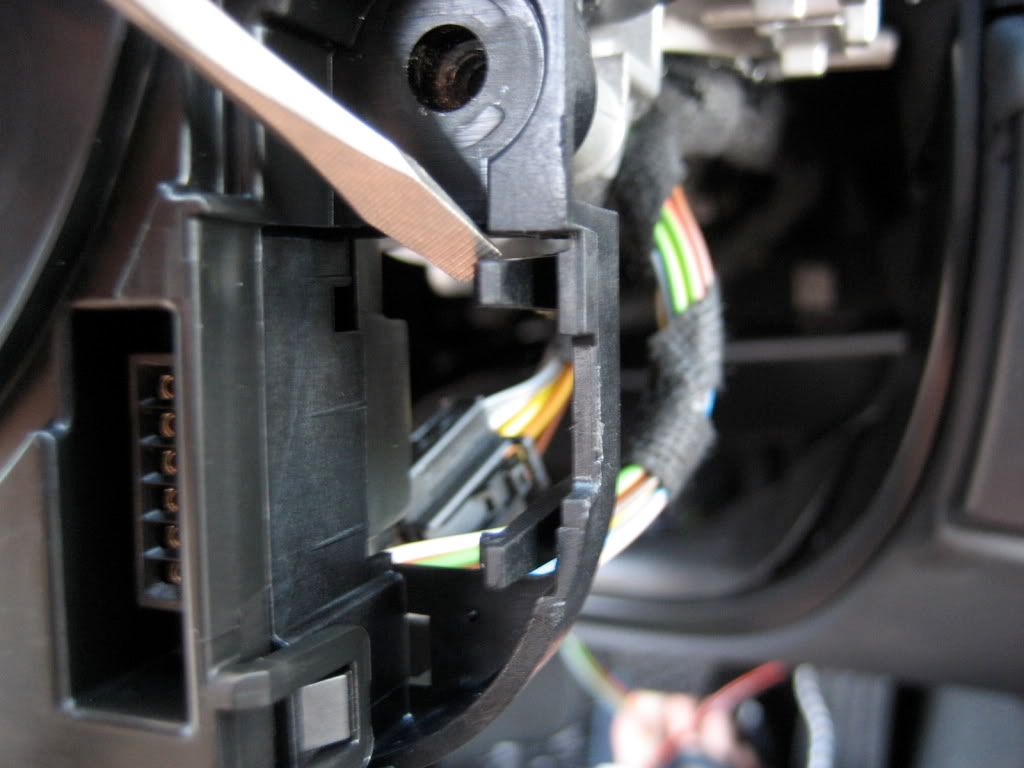 25. Bring the white connector up the steering column. Read PDF instruction and remove wires from the Black connector (it has 6 wires in it) and insert them into A7 white connector. They are numbered 1-6 and you need to insert them the same way ... #1 from Black connector goes to #1 in A7 White connector and so on ... 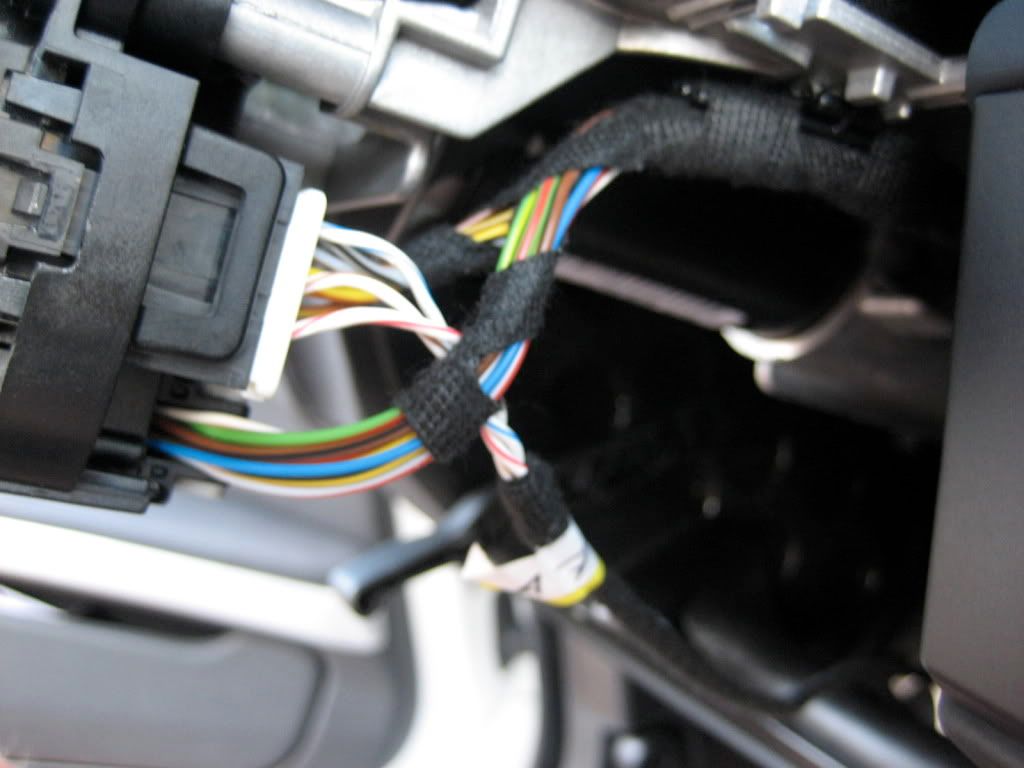 26. Connect this connector and the smaller connector to the new Coil Spring. Re-Install the Coil Spring 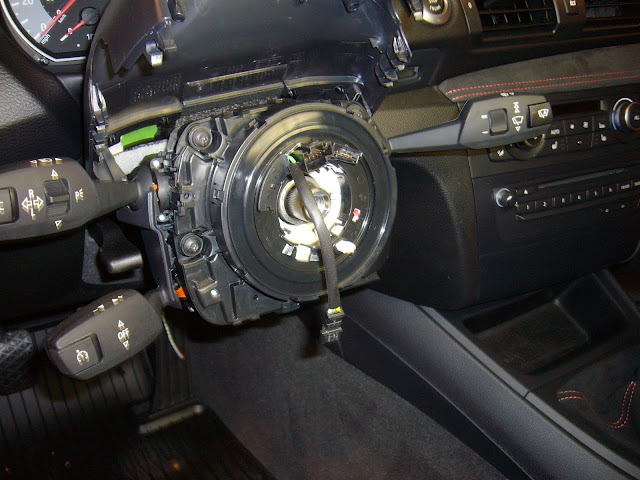 27. Pull the open brown and green wires to the OBDII PORT Wires are BROWN TO BROWN GREEN TO GREEN YELLOW Test first before tapping! 28. Next transfer over your controls and trim to the new Performance Wheel V2  29. Re-Install Wheel - Transfer everything from your old wheel to your new PSW and install everything back. Read the PDF file. Connect black connector from the new Coil spring cartridge to the Green connector on you new PSW. The rest is the same. In PDF file it says to connect Black connector to Black but it is actually Green and not Black. Just FIY. 30. COMPLETED Simply test and re install all trim work after you have verified working. ENJOY !!! 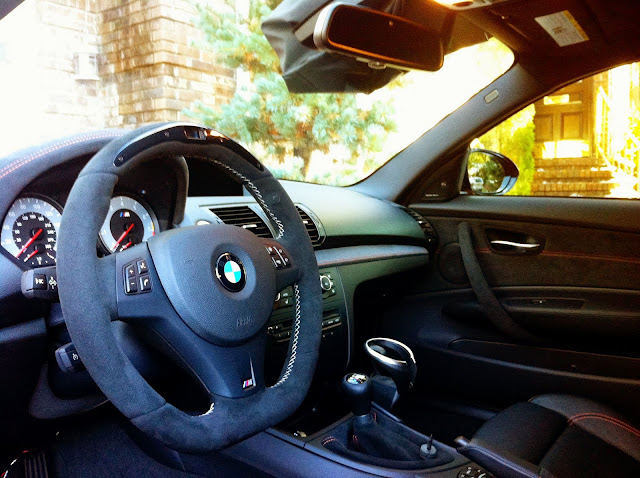 Last edited by MusclezMarinara; 11-01-2011 at 09:22 PM.. |
| 10-31-2011, 12:07 PM | #2 |
|
Captain

95
Rep 854
Posts |
Great write up. I am only in the market for a 135 at the moment but I almost bought this wheel yesterday as I knew it'd be one of the first things I'd do.
|
|
Appreciate
0
|
| 10-31-2011, 02:53 PM | #3 |
|
Banned

476
Rep 1,711
Posts |
Nice write up. How long did it take you to do this?
I had an alcantara steering wheel trim on my e46 m3. It looks and feels great, only problem is, it wears off pretty quickly. Last edited by Groundpilot; 10-31-2011 at 03:00 PM.. |
|
Appreciate
0
|
| 10-31-2011, 02:57 PM | #4 |
|
Captain
95
Rep 854
Posts |
I always wondering as well why they changed to the 'Version 2' with the large plastic cover on the top. I like the suede but the times I hold the wheel up top it'd feel awkward to be holding on to that thing.
|
|
Appreciate
0
|
| 10-31-2011, 03:16 PM | #5 |
|
Banned
262
Rep 5,018
Posts
Drives: VALNCYA
Join Date: Jan 2009
Location: Jersey
|
Love the wheel nice solid sturdy wheel can't wait to try the track module!
After toying with it I'd say an 1.5 hrs not a big install at all I've done wheel removal so much I can have one off in 3 minutes haha. The plastic at the top not sure how it will feel keep ya posted |
|
Appreciate
0
|
| 10-31-2011, 09:43 PM | #6 |
|
Private
 79
Rep 79
Posts |
Is this M/T only? Because some of your pictures showed the DCT paddles behind the wheel and I was under the impression that this steering wheel only fit M/T models.
 |
|
Appreciate
0
|
| 10-31-2011, 09:50 PM | #7 |
|
Banned
262
Rep 5,018
Posts
Drives: VALNCYA
Join Date: Jan 2009
Location: Jersey
|
As stated I borrowed some pics from another member yes this is 6MT
|
|
Appreciate
0
|
| 11-02-2011, 04:02 PM | #8 |
|
teh porcupine

96
Rep 1,726
Posts
Drives: 2020 Tesla 3 LR AWD
Join Date: May 2011
Location: penthouse
|
Great write-up.
 To install the non-electronic performance wheel would it be just steps 19, 20, 21, 28, 29? |
|
Appreciate
0
|
| 11-02-2011, 04:28 PM | #9 | |
|
Banned
262
Rep 5,018
Posts
Drives: VALNCYA
Join Date: Jan 2009
Location: Jersey
|
Quote:
 anytime an airbag is removed you must disconnect the battery . anytime an airbag is removed you must disconnect the battery . |
|
|
Appreciate
0
|
| 11-04-2011, 06:59 AM | #10 |
|
teh porcupine
96
Rep 1,726
Posts
Drives: 2020 Tesla 3 LR AWD
Join Date: May 2011
Location: penthouse
|
any time you work on the car...
 My wheel just arrived today so I have a weekend project. Thanks again for the great write up. |
|
Appreciate
0
|
| 11-04-2011, 07:43 AM | #11 | |
|
Banned
262
Rep 5,018
Posts
Drives: VALNCYA
Join Date: Jan 2009
Location: Jersey
|
Quote:
 |
|
|
Appreciate
0
|
| 11-04-2011, 01:08 PM | #13 | |
|
Banned
262
Rep 5,018
Posts
Drives: VALNCYA
Join Date: Jan 2009
Location: Jersey
|
Quote:
|
|
|
Appreciate
0
|
| 08-30-2012, 06:42 AM | #15 |
|
New Member

0
Rep 8
Posts |
Thanks for the great write up and sorry for the thread bump, but per the installation manual, the Performance steering wheel version II requires coding if you do not have a sports steering wheel installed, I'm confused as to what exactly is a "sports steering wheel".
Does my standard E90 M3 (2008) have a sports steering wheel or not (it's the M wheel with the four sets of buttons on either side). |
|
Appreciate
0
|
| 08-30-2012, 03:39 PM | #16 |
|
Lieutenant

25
Rep 469
Posts
Drives: 2008 Bmw 130i E81
Join Date: Aug 2012
Location: SouthAfrica
|
Bootifull
 Nice work! Nice work!
__________________
Wishlist...
Bmw 135i Convertable White... |
|
Appreciate
0
|
| 11-19-2012, 01:25 AM | #18 |
|
Lieutenant Colonel

201
Rep 1,714
Posts
Drives: 2011 335i
Join Date: Apr 2008
Location: Norwalk CT
|
Hey where did you get those m guage face for The cluster panel. Looks so freaking good. Thanks in advance.
|
|
Appreciate
0
|
| 11-25-2012, 12:08 PM | #19 |
|
Private First Class
 13
Rep 165
Posts |
I think the car is a 1M
__________________
BMW 135i Jet Black AT. Hpf intercooler, Hpf exhaust, injen intake, ER competition oil coolers, ER charge pipe, Tial BOV, AR catless DP,BMS OCC, VMR 718s 19s, BMW performance spoiler, agency power rear diffuser, slek lip (on highway somewhere), FXomar abs lip, Ohlins Suspension, All M3 bits, Cobb protuned, turner 3 clutch LSD, Escort 9500ci
|
|
Appreciate
0
|
| 04-13-2013, 11:16 AM | #20 |
|
New Member

3
Rep 19
Posts |
I currently have the electronic v2 wheel in my car its a dct and want to swap it into a manual will this be possible ? Or will I need to buy the wheel specific to the manual
and any tips on how I'd go about reversing the process and installing the wheel again in the manual car (I didn't originally install the wheel) |
|
Appreciate
0
|
| 04-16-2013, 08:28 AM | #21 | |
|
Lieutenant Colonel
247
Rep 1,585
Posts
Drives: 2011 VO 1M
Join Date: Sep 2010
Location: Jupiter, FL
iTrader: (28)
Garage List 2010 Porsche 911 GT3 [10.00]
2021 BMW X5 SD40i [0.00] 2023 Toyota TRD Pro [0.00] 2011 BMW 1M [9.83] 2014 Ford Raptor [0.00] 2005 Ariel Atom 2 [0.00] 2008 135i SOLD [10.00] |
Quote:
__________________
///1M #643 of #740
|
|
|
Appreciate
0
|
| 06-27-2013, 09:21 PM | #22 |
|
Brigadier General
 
384
Rep 3,450
Posts |
Does this installation require codings in BMW dealer ship, or you could just plug it out, plug in and play..
Because I'm in a serious buzz and sentiment with my BMW dealership, won't let them touch my car! |
|
Appreciate
0
|
Post Reply |
| Bookmarks |
| Tags |
| performance steering wheel v2 |
|
|


