

|
|
|
|
|
| 03-04-2013, 09:12 PM | #1 |
|
Major
 74
Rep 1,001
Posts |
P3 Vent Boost Gauge Install
This isnt a complete DIY because the instructions are fairly good at the P3 site:
http://www.p3cars.com/bmw-install But the DIY is missing a few things, which I had found and will discuss here. I didnt take many or very good pictures, sorry... Still hopefully this is useful. I did this in 30 degree weather in the NJ winter. I did it in the evening under fairly low light. Taking the gasket off is easy. It pulls off without much issue. 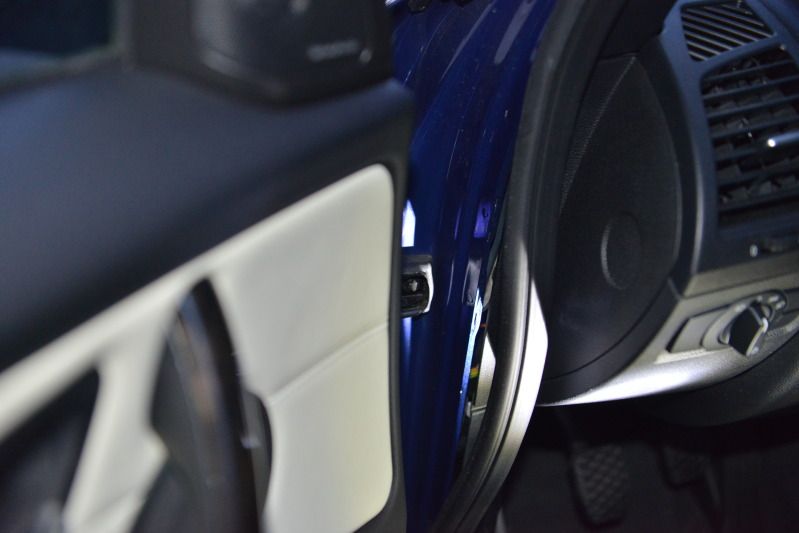 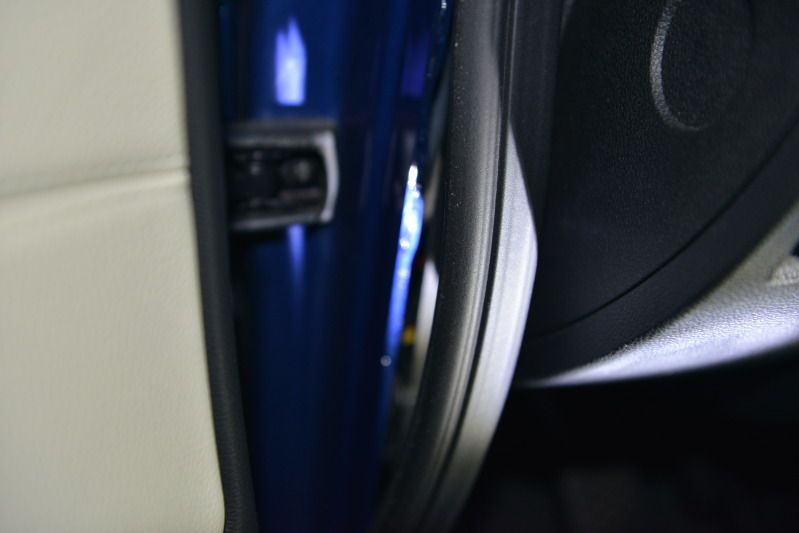 Once off, you need to work from the bottom like they stated in the instructions. But if cold/stiff, it is not easy. In fact, many of these steps can be painful on the hands if cold (obviously). There is a small tab at the bottom that helps to wiggle the bottom rearward (towards the door entry) and outboard. 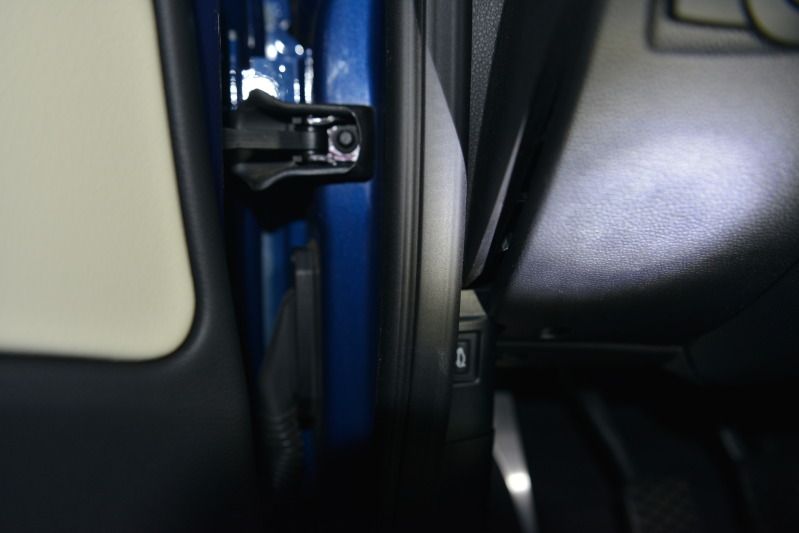 Just pull a bit more and it will start to come out. 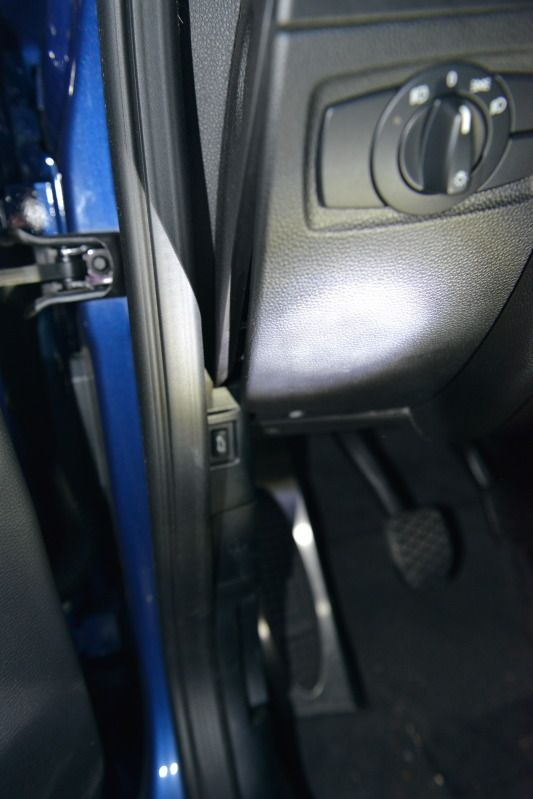 As you can see, there is a tab at the lower end of the cover that needs to come outboard so that you can work the cover out. There is also the thick piece of foam in there which needs to be carefully pulled out along the metal pinch weld along the panel. Once you get there, you need to remove the vent. It is kind of scary. They say to use a screwdriver in the hole, Im not seeing why. The tab is pretty big and takes a good amount of force. It is best if you can also pull the dash edge with the holes slightly outboard. You need almost three hands, but pushing the tab in while pushing the tab in and pulling the vent up is a tough thing to do... Kind of scary like something may break.  Then you remove the headlight switch panel, no big deal, and then pull that away. Then you go after the kickpanel by the pedals. The instructions say three screws, but I also had to remove this thing from the far right side, at the inboard edge. 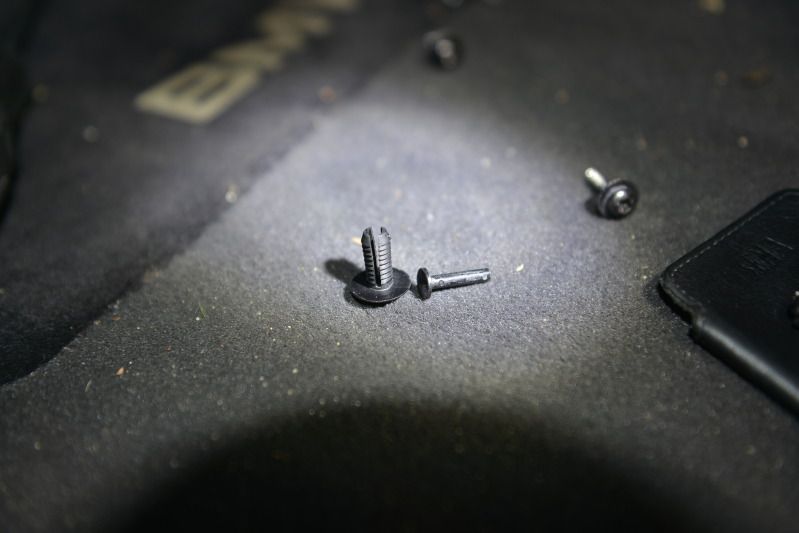 They say to lay the kickpanel down, but I had no luck because of the wired sensor. I found out by accident that you can remove it by pushing the whole sensor which is mounted on a separate bit of plastic. The sensor doesnt come off of the vertical plastic part that it is mounted to (easily at least). 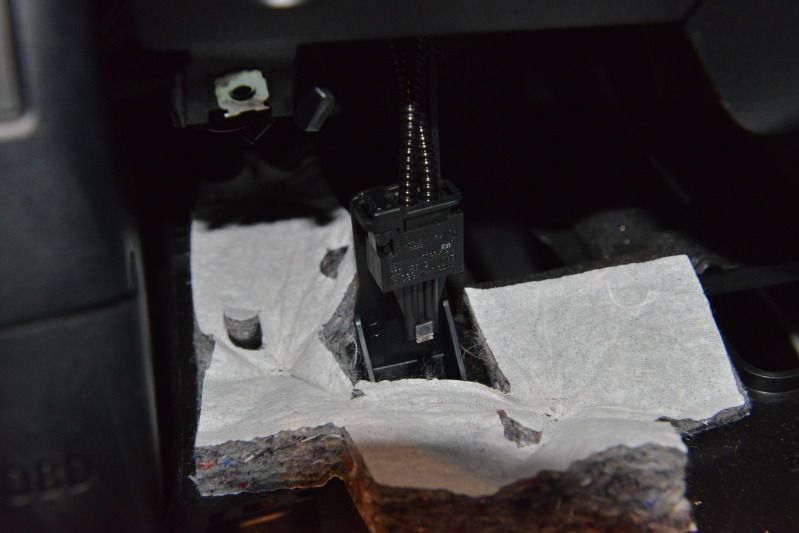 So once that stuff is pushed aside (more like a big mess in the footwell that makes it difficult to work around), the next step is figuring how to route the cable and the little control box. They say to just pull the screws and hood pull, and then bend the panel out of the way. I dont see that being doable. Mine had the screw at the hood pull, and then one screw underneath, but there are two yellow tabs and a lot of overlap on the lower rearward edge of the panel. I dont see bending it forward as easily doable, at least in the cold. You can see the connector that you would need to slip a "C" shaped recepticle on the kickpanel out of, but it is constrained by another one that is in another direction lower and forward, as well as the object sticking out from the hole that the hood pull is attached to.  I found it easiest to pull the whole thing out by pulling it inboard to get the one yellow clip out of its hole, and at the same time slide the whole thing forward so the other yellow clip in the picture releases. It needs to go far enough forward to get out from underneath the plastic ledge that makes the bottom part of the door opening. By doing that, you have a lot of space, but not everything is easily disconnected, so it is still tight in there. 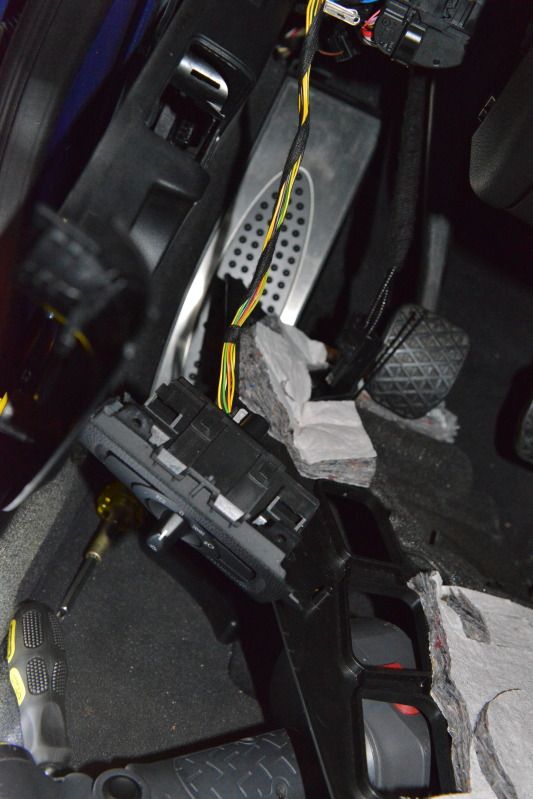 The hole where the new vent goes is here: 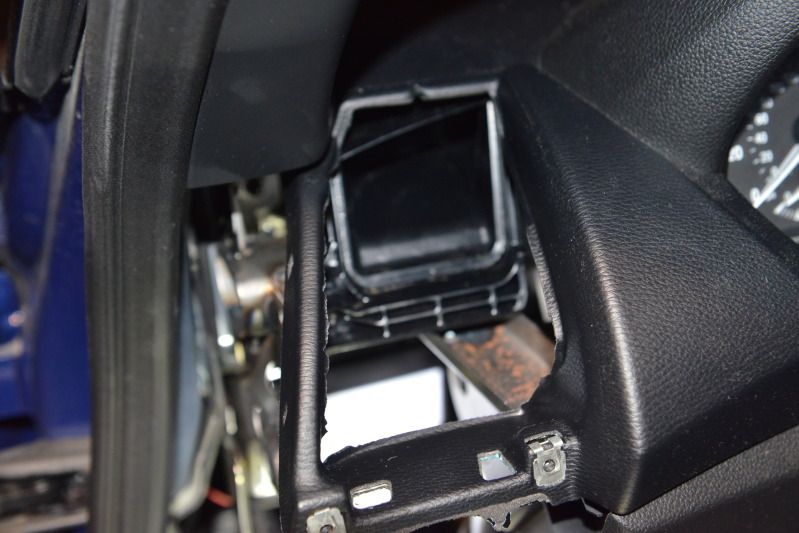 The cable for the gauge just gets forced in the gap around the foam that seals the vent to the duct behind it. The cable has some coating on it to help protect from friction. You need to push it in and inboard first to get settled all the way in deep, then you can get those clips that you had to press in to get the other one out, back in... I found it easier to pull a bit on the thin dash edge that makes what the outboard clips connect to, so it flexes and has a bit more give. But my mistake? Before you put the vent all the way in, be sure to put the kickpanels back in. I had done the side one by the OBD port, but forgot to do the one with the light switch, mainly because the instructions say to install the vent... But when the vent is locked in, you cant tighten the light switch panel area back in with the top two T20 torx. There is a ton of space to place the control box behind the light switch. It is all metal in that area though so the box should be wrapped or tied or padded with rubber or something so that it doesnt get beat up, knocked or shaken too much. I found that routing the OBD cable was easy, but when putting the outboard kickpanel back in, you need to be careful of the "C" clip that is shown in the picture above, because there is a lot of plastic around that C. so you need to route the wires behind that, and up above where they can remain coiled and out of the way. There is PLENTY of slack with both the ribbon cable (gauge connector) and the OBD cable. It may make sense to wrap or cover some areas where the cables might rub. Hope this helps... |
| 05-03-2013, 10:10 PM | #4 | |
|
Second Lieutenant
 
9
Rep 274
Posts |
Quote:
__________________
aFe, UUC, Macht Schnell, Bilstein, Swift, REMUS, ETS, BMS and some other shiii...
|
|
|
Appreciate
0
|
| 05-03-2013, 10:15 PM | #5 |
|
Major
74
Rep 1,001
Posts |
Definiely PM around and ask about it. Seems like there are a few folks who are always looking to sell theirs.
Around the time I bought, I had PMed a couple folks who had already sold theirs, but then I got a few PMs from others asking if I wanted to buy... So keep the eyes and ears open. Might also post a WTB thread over in the buy/sell area. |
|
Appreciate
0
|
| 05-03-2013, 10:19 PM | #6 | |
|
Second Lieutenant
9
Rep 274
Posts |
Quote:
__________________
aFe, UUC, Macht Schnell, Bilstein, Swift, REMUS, ETS, BMS and some other shiii...
|
|
|
Appreciate
0
|
| 05-04-2013, 01:23 PM | #7 |
|
Major General
 
377
Rep 5,730
Posts
Drives: BMW i3 rex
Join Date: May 2006
Location: SoCal
iTrader: (44)
Garage List 2018 I01 i3s | CURRENT [0.00]
2018 G01 X3 | CURRENT [0.00] 2017 I01 i3 | SOLD [0.00] 2017 F48 X1 | SOLD ... [0.00] 2016 I01 i3 | SOLD [0.00] 2017 F22 M240 | SOLD [8.00] 2016 F25 X3 diesel ... [0.00] 2006 E60 550 | SOLD [6.00] 2011 E90 335 | SOLD [8.66] 2012 E82 135 | SOLD [5.50] 2011 E82 1M | SOLD [7.94] 2007 E85 Z4M| SOLD [4.50] 2003 E53 X5 4.6is S ... [9.00] 2008 E92 328 | SOLD [0.00] 2008 E82 135 | SOLD [0.00] 2008 E90 335 | SOLD [0.00] 2003 E46 M3 | SOLD [7.50] 2006 E90 330 | SOLD [10.00] 2003 E46 330ZHP | SOLD [0.00] |
excellent!
|
|
Appreciate
0
|
Post Reply |
| Bookmarks |
|
|


