

|
|
|
|
|
| 02-11-2012, 09:02 AM | #1 |
|
Second Lieutenant
 
26
Rep 293
Posts |
DIY Minor Scratch Repair Using BMW Touch Up Paint
I purchased my car in September of 2010. About 1 month after purchasing it and being SUPER careful about where I park (I rarely parked it on the street) my front bumper was scratched by a tow hitch even though I was parked in a corner spot. While taking the car in for service, I got a quote from the body shop at the dealer for about $900 to completely replace, paint, and install a new front bumper. That is some serious money. I knew eventually I'd have to bite the bullet and do it but I thought to myself, now my front bumper is "city-proof", I will have no qualms about having someone scratch my front bumper again. This didn't give me a license to just freely park anywhere but because I still live in NYC and the majority of people just bump & park, I convinced myself to hold off. In the meantime, I had to find a way to get rid of the eyesore; each time I walked to my car, I had to look and see the big gash on in the front, there was no escaping it. I decided to do something about it and gave BMW touch up paint a shot. After reading several discouraging posts about other people's experience with touch up paint, I tried anyway; it couldn't get any worse. Here are the results:
Here is a before shot (also notice the small chip on the bottom, below the license plate): 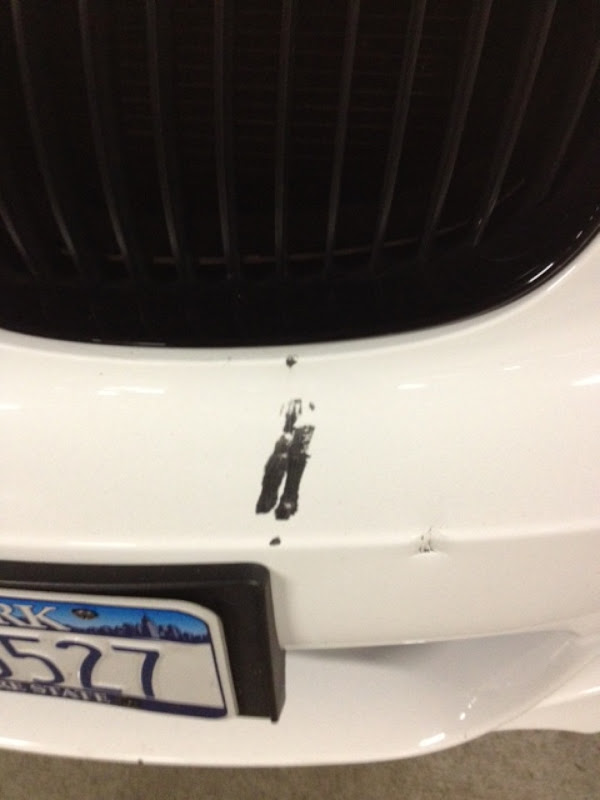 Here is a shot after applying the BMW Alpine White touch up paint: 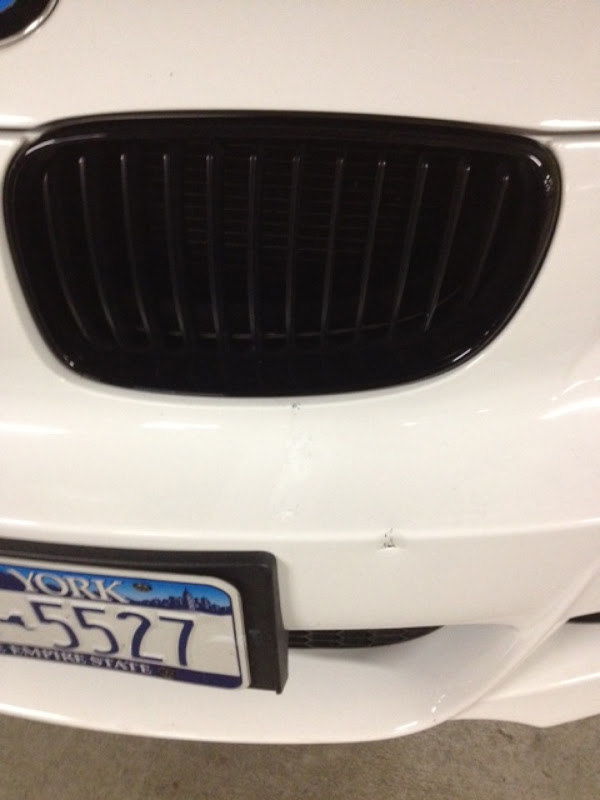 Here is a final shot after applying the BMW clear coat: I am very pleased with the results because I had very low expectations going into this project given the negative experience people have shared on this forum with touch up paint. This is not the perfect solution but for now it will do. Total cost: $25  Thanks Phil at Reeves BMW for the good deal on the touch up paint. Thanks Phil at Reeves BMW for the good deal on the touch up paint.Here is a shot taken from a distance before the touch up paint (notice how the gash REALLY sticks out):  Here is a distance shot after the DIY: 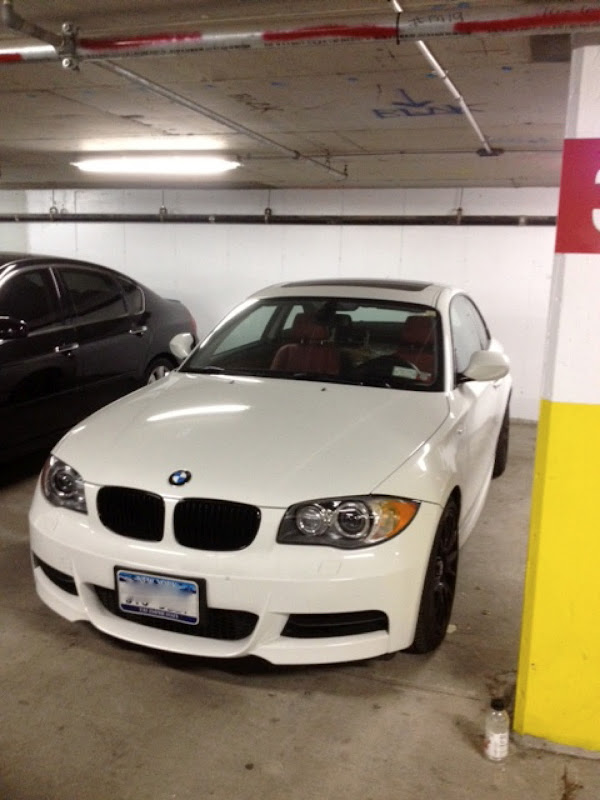
__________________
Cold Weather Pkg / Sport Pkg / Active Steering / Comfort Access / Prem Hi-Fi / Bluetooth / Rear PDC / BMW Perf 313s wrapped with Michelin PSSs / Dunlop Winter Sport 3D (winter) on 17'' Motegis / Blacked Out 135i badge / BMW Performance Grills / BMW Performance Power Kit Stage 1 / BMW Performance Exhaust
Last edited by Maconer98; 02-11-2012 at 09:16 AM.. Reason: Added photos |
| 02-11-2012, 01:18 PM | #2 |
|
Colonel

1579
Rep 2,406
Posts
Drives: E30 M3 Cecotto, F85, G05, G07,
Join Date: Mar 2006
Location: Outside Atlanta
|
Looks good Bro!
__________________
 |
|
Appreciate
0
|
| 02-12-2012, 08:40 AM | #3 |
|
Lieutenant Colonel
 
724
Rep 1,755
Posts |
Better than nothing. Touch up paint is a band-aid thats great for a 10 foot look. Especially to cover up nicks on metal to stop rust before it starts.
__________________
2016 428ix, r, 2018 430iC, 2018 330it
|
|
Appreciate
0
|
| 02-12-2012, 01:54 PM | #4 |
|
Lieutenant Colonel

127
Rep 1,604
Posts |
Not bad. I probably got a few small scratches that I need to touch up.
__________________
2014 Alpine White 328i M Sport | M Performance Exhaust | M Performance Front Splitter | M Performance Carbon Fiber Spoiler | M Performance Grills | M Performance Pedals[/SIZE]
______________________  |
|
Appreciate
0
|
| 02-12-2012, 02:02 PM | #5 |
|
or Rosencrantz
11
Rep 455
Posts
Drives: 2008 Montego Blue 128i
Join Date: Apr 2008
Location: Cleveland, OH
|
Touch up paint adds character, like a patina on an old gun. It tells you the car is out there being used as it was intended.
If you follow up with a cutting clear coat polish it looks even cleaner. But then you have to re-wax the whole area. I only do that about once every other year. It's a long weekend kinda project. |
|
Appreciate
0
|
| 02-12-2012, 05:56 PM | #6 |
|
Lieutenant
72
Rep 487
Posts |
Looks great. No one will notice that scratch except just you and some other freaks like me. I have a few small scratches on my car but I've learn to just be ok with some scratches
|
|
Appreciate
0
|
| 02-12-2012, 09:14 PM | #7 |
|
Colonel
166
Rep 2,926
Posts |
Looks great! Anyone have experiences with deep chips in the paint? I have a few on my AW that are pretty deep (one on the front fender and hood) that show the gray undercoat. I don't know if fixing it will look good...
Any advice?
__________________
 |
|
Appreciate
0
|
| 02-12-2012, 10:07 PM | #8 | |
|
or Rosencrantz
11
Rep 455
Posts
Drives: 2008 Montego Blue 128i
Join Date: Apr 2008
Location: Cleveland, OH
|
Quote:
You could also go real crazy and feather sand and stuff, but I wouldn't just for a chip that isn't rusting. Hit up a pick a part and buy a fender and practice before you do that though. |
|
|
Appreciate
0
|
| 02-14-2012, 05:13 AM | #9 | |
|
Captain
11
Rep 770
Posts |
Quote:
A surface scratch that will `catch' your fingernail is approximately 0.04 Mil (1.0 µ) deep will usually require wet sanding and the clear coat refinishing Removing a scratch requires removing the layer of paint that contains the defect; you need to level the paint to the lowest point of the scratch. Removing more that 0.5 mil (12µ) of clear coat will cause premature paint film failure as UV protection percolates to the top of the clear coat. Check paint film thickness with a Paint Thickness Meter (PTG) before you attempt to remove As you go over a deep scratch, the abrasives round off the edges of the high spots of the scratch. The result is a shallower scratch (when no full correction can be made) rounded edges dont reflect light the same way a sharp edge will and is therefore less noticeable. It may be necessary to carry out some localized wet sanding to facilitate full removal of any deep scratches, once again, paint thickness must be checked, and if the paint is too thin wet sanding should not be considered |
|
|
Appreciate
0
|
| 02-14-2012, 05:43 PM | #10 | |
|
or Rosencrantz
11
Rep 455
Posts
Drives: 2008 Montego Blue 128i
Join Date: Apr 2008
Location: Cleveland, OH
|
Quote:
Either way go get an old fender and play! You feel all accomplished and stuff!  |
|
|
Appreciate
0
|
Post Reply |
| Bookmarks |
| Tags |
| diy, front bumper, repair, scratch, touch up paint |
| Thread Tools | Search this Thread |
|
|


