| 04-19-2015, 10:47 AM | #1 |
|
Lieutenant
 

349
Rep 424
Posts |
Carbon Trim
Part 1 how to laminate real carbon onto a part.
With having the M3 CSL i like the look of carbon trims. So i have decided to make a few for my 1M fist thing i did was source the parts from bmw so i can keep the original trims for the car. Easy you may think  Gave bmw the chassi no and the parts were ordered (nextday) wrong parts gave him the part no of the part fitted to the car (nextday) wrong part. after some digging he sorced the correct parts i needed to do the aircon surround and the radio Gave bmw the chassi no and the parts were ordered (nextday) wrong parts gave him the part no of the part fitted to the car (nextday) wrong part. after some digging he sorced the correct parts i needed to do the aircon surround and the radio First you need to cut the carbon cloth a little larger than the part then sand the part so the resin can get a good grip 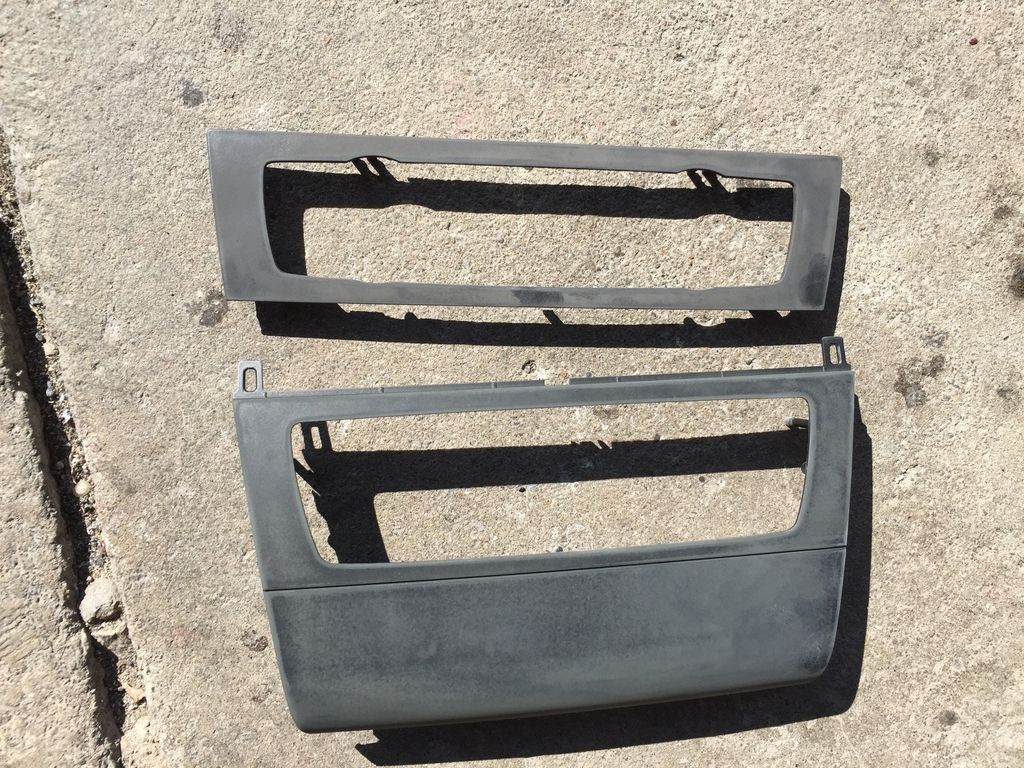 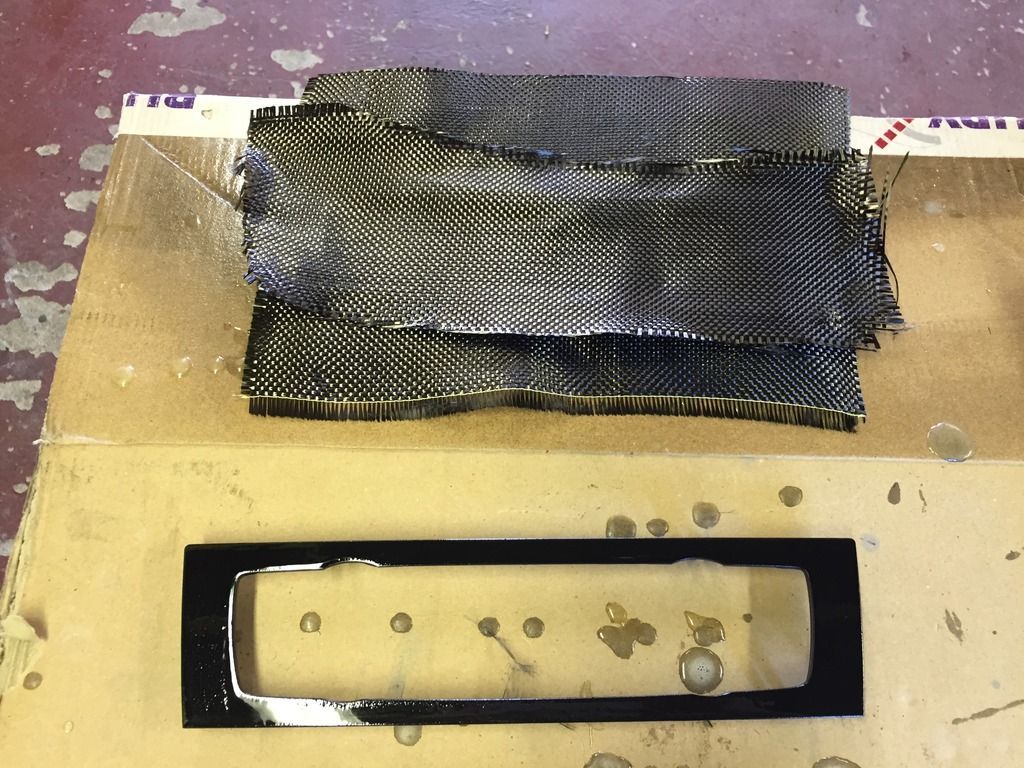 Then you mix the 2 pack resin and let it sit for 5min so any air bubbles and escape. The brush the parts with the resin and sit to one side for 4 hours till tacky but dry too the touch. 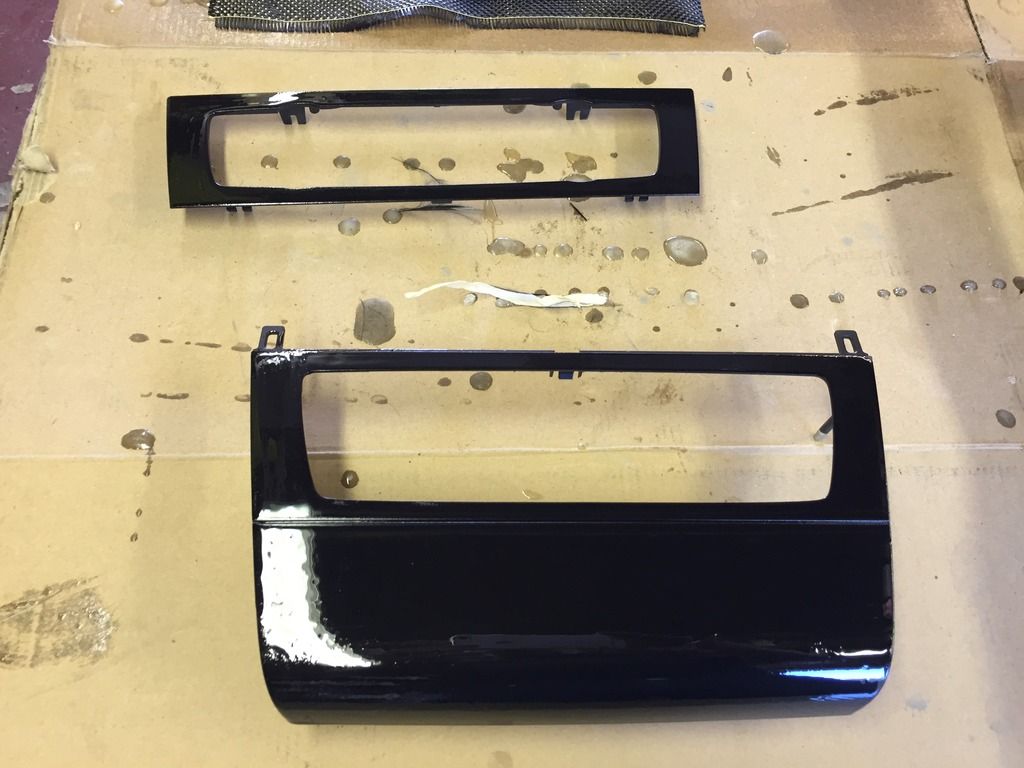 Lay the carbon over the part pressing gently then into relise film and pop it into the vacumme bag for another 4hours. This makes the carbon a good tight fit to the parts. 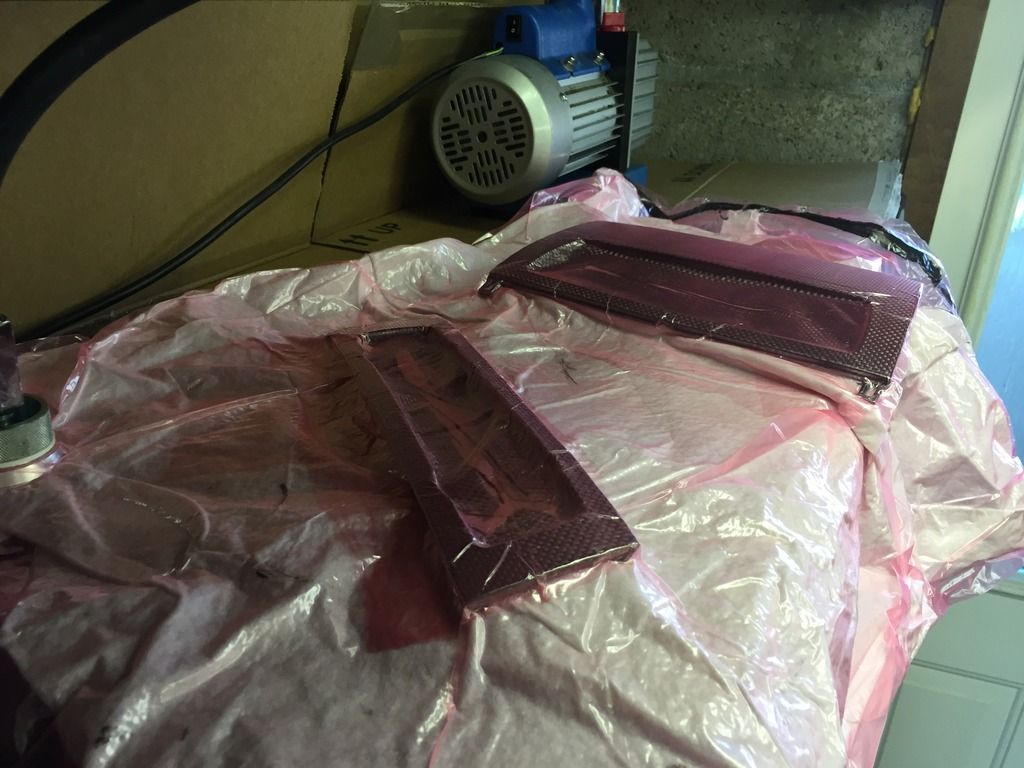 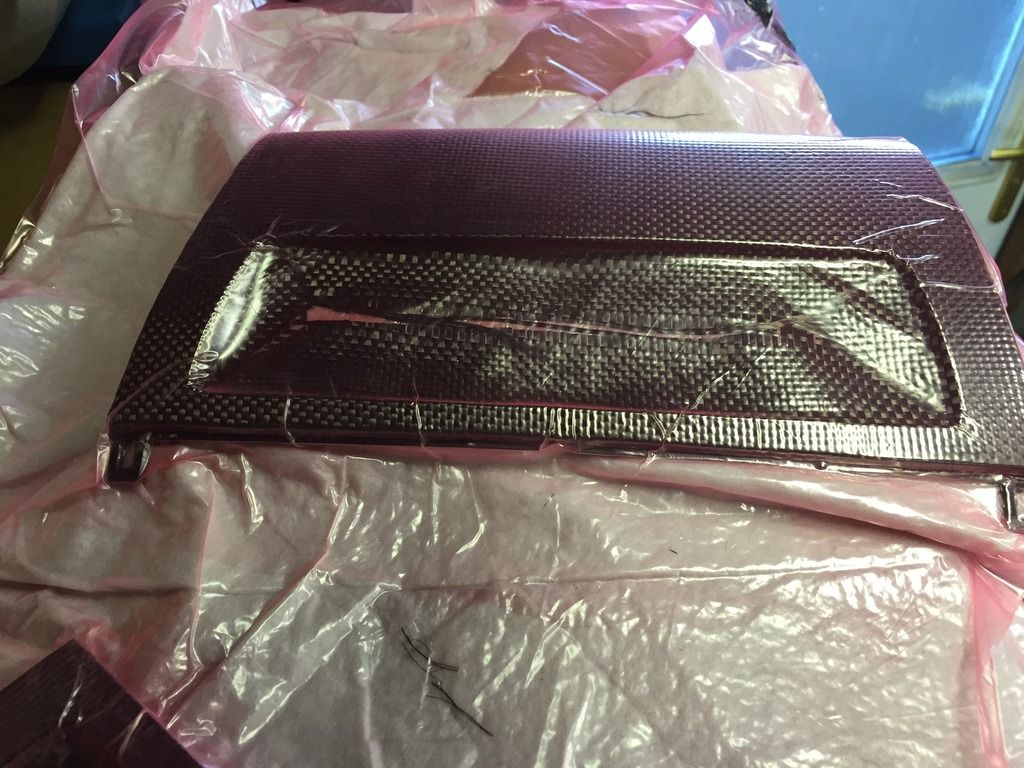 When the parts are dry remove from the bag and the film now you can put on the 2 coat of resin.( it takes time )  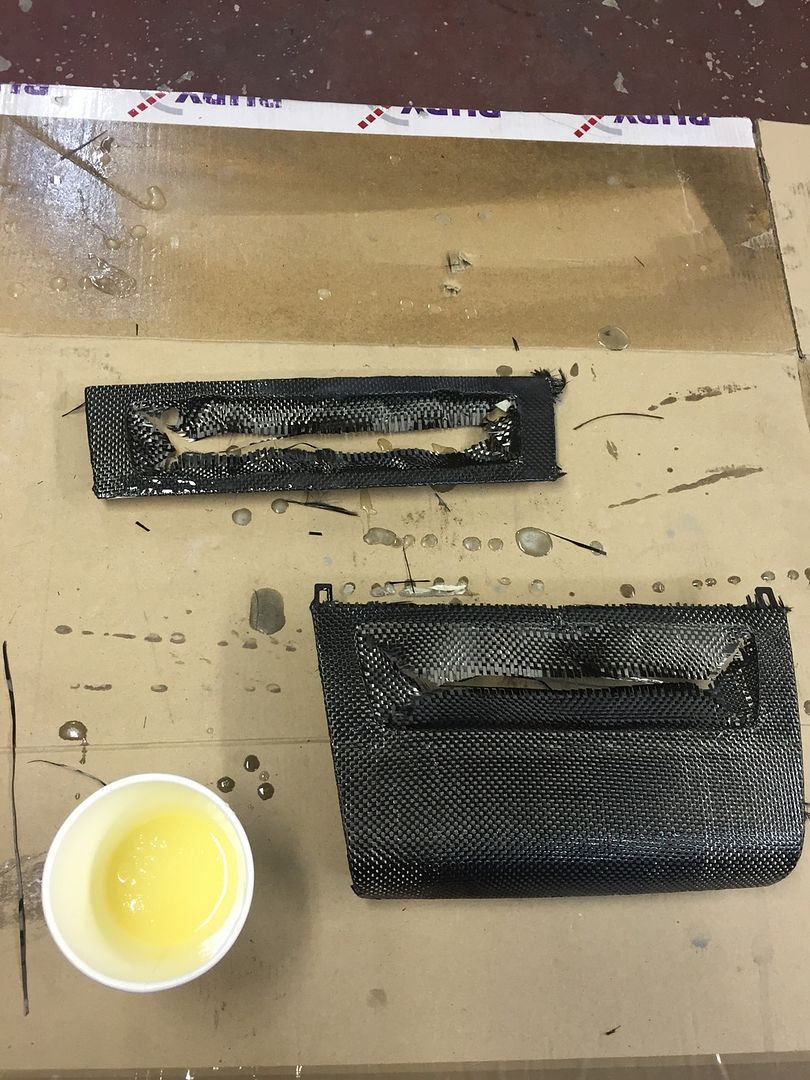 Then its another 12hours drying time then remove the excess carbon cloth i use a sharp knife and 80grit and paper to remove this and sand the edges clean. Then sand the part lightly to smoth the ridges down not too much or you will rub through the resin into the carbon. 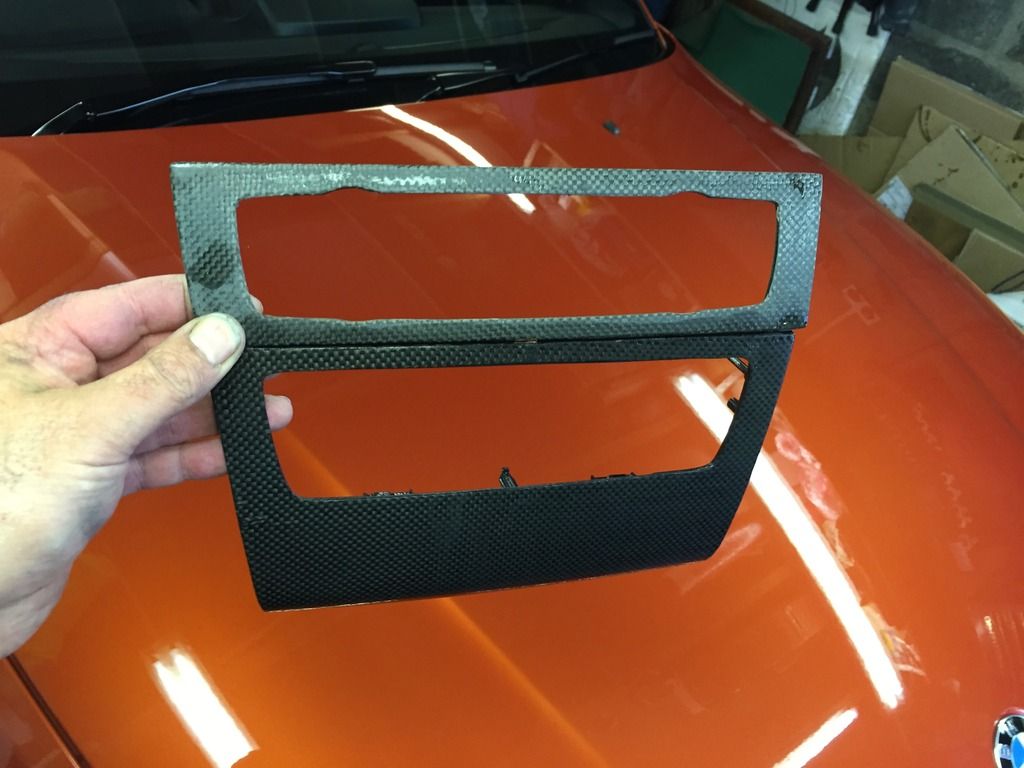 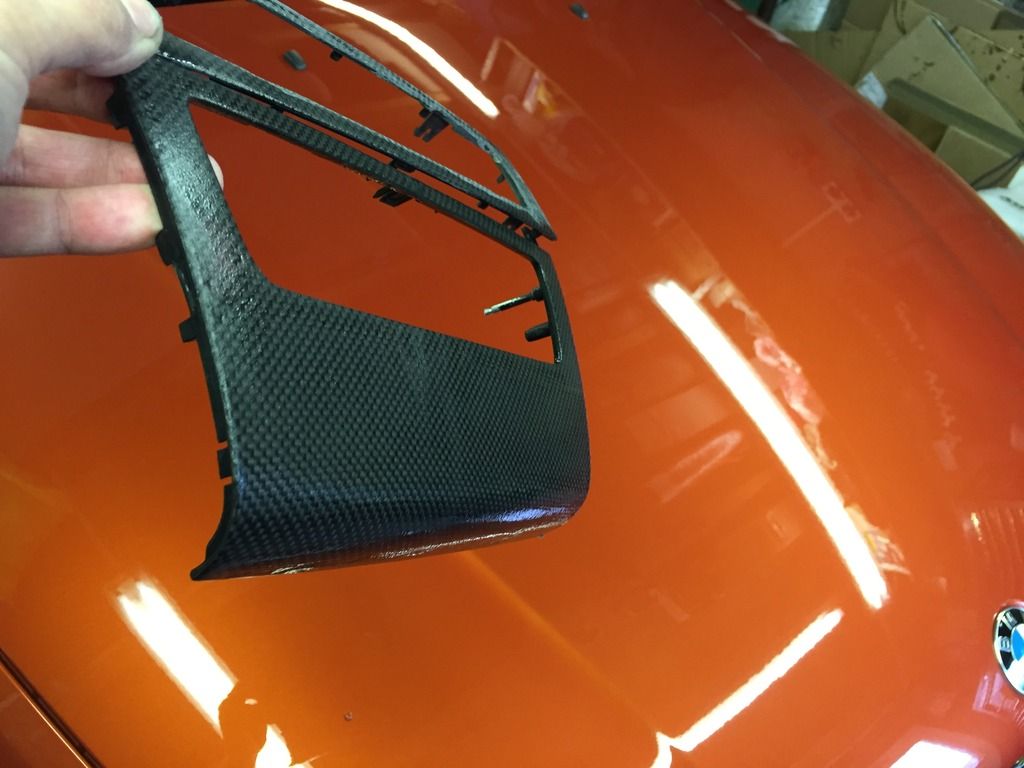 Then another coat of resin and wait another 12hours till its dry. This will be shown in part 2 tomorrow. Thanks for looking  |
| 04-19-2015, 05:13 PM | #5 | |
|
Lieutenant
349
Rep 424
Posts |
Quote:
buy the parts as the kits are too small amounts just remember its messy and takes time also for the best finish i spray them with 2k lacquer you also need lots of grades of wet and dry sandpaper the vacumme pump is the most expensive thing to buy but worth it Hope this helps This is the V8 M3 Pollen covers i did for a lad  Mirror covers i made  |
|
|
Appreciate
0
|
| 04-20-2015, 10:45 AM | #7 |
|
Lieutenant
349
Rep 424
Posts |
Part 2
The parts are now dry and they get sanded with 800grit wet and dry till smooth. 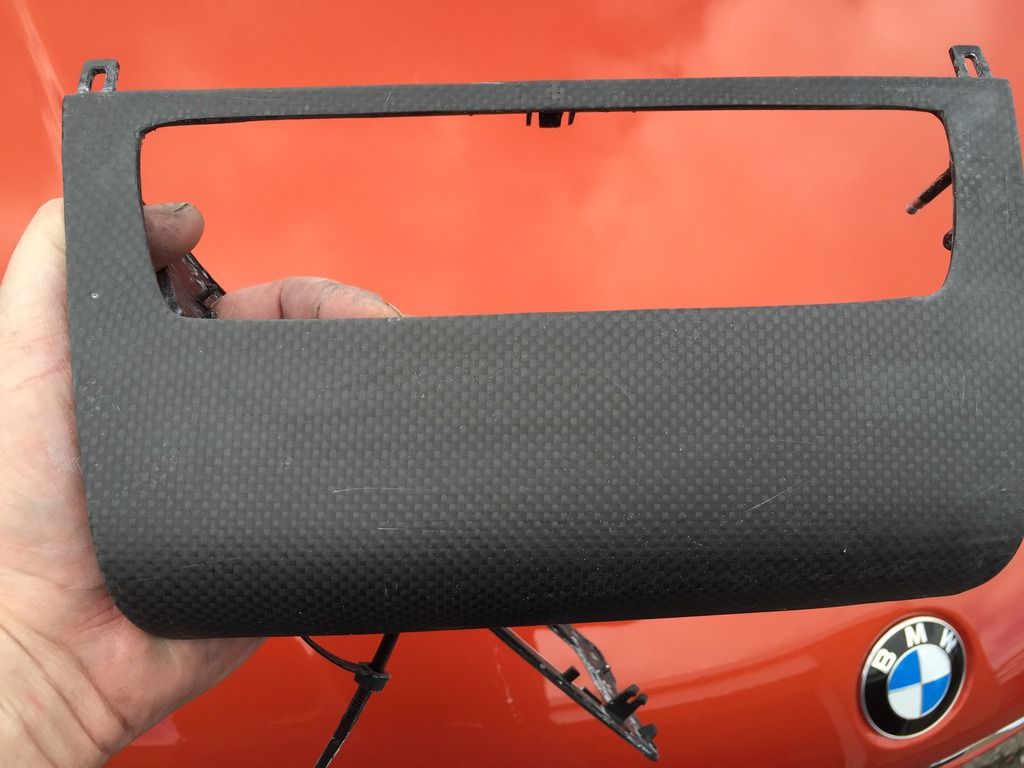 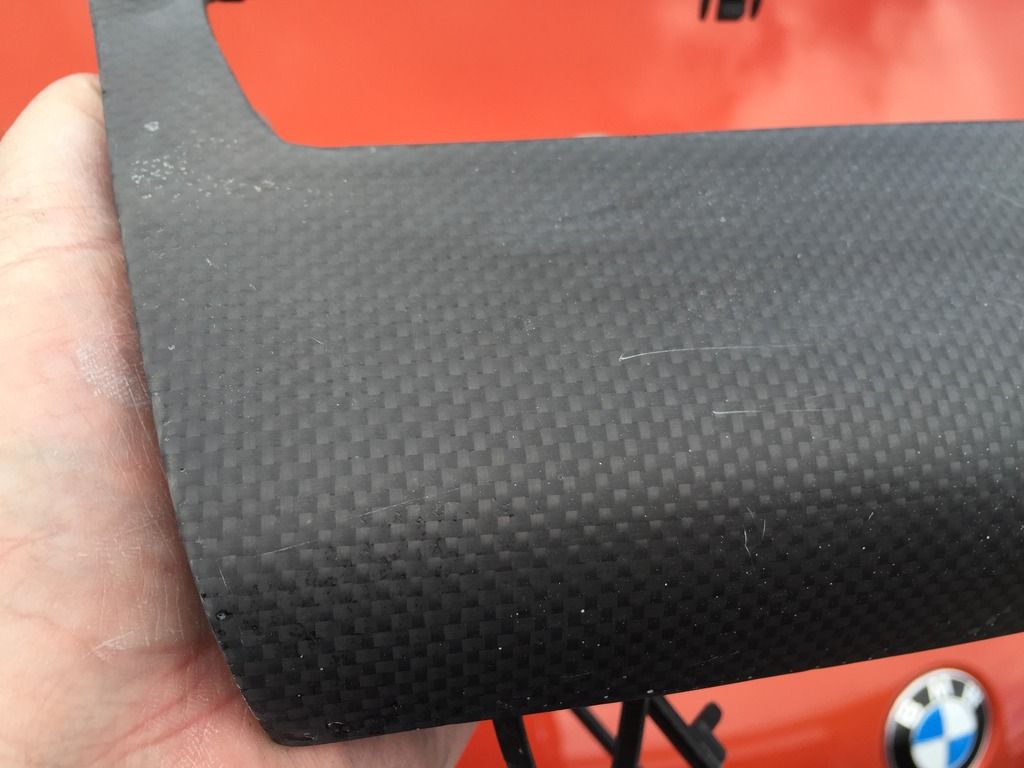 When the parts are dry they get a wipe with panel wipe then when dry they get 3 coats for 2K clear out the spray Gun. This is the First light coat then wait till tacky around 15min. 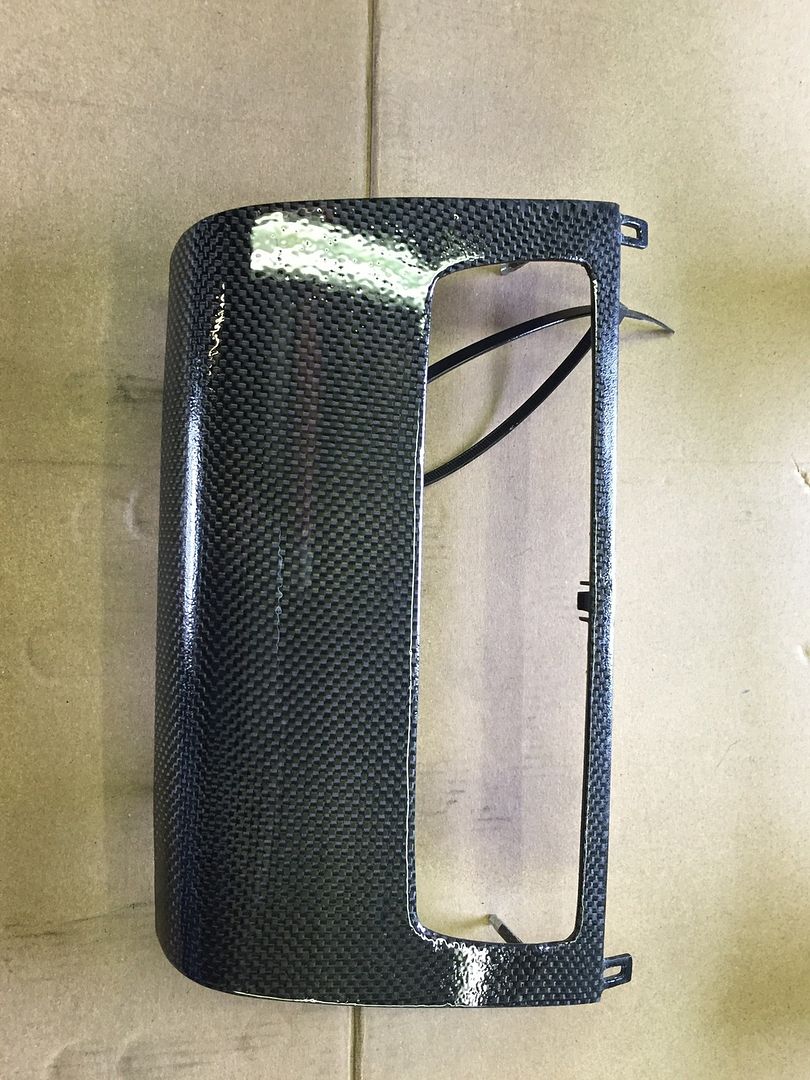 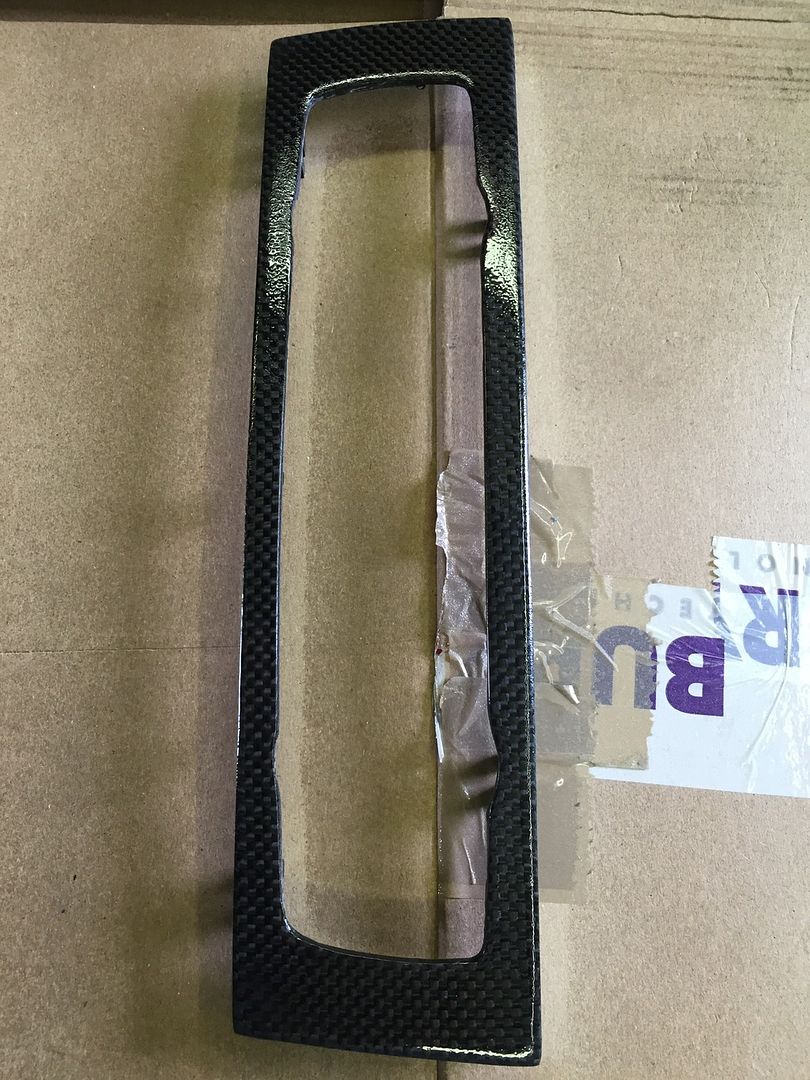 This is 3 coats of 2k 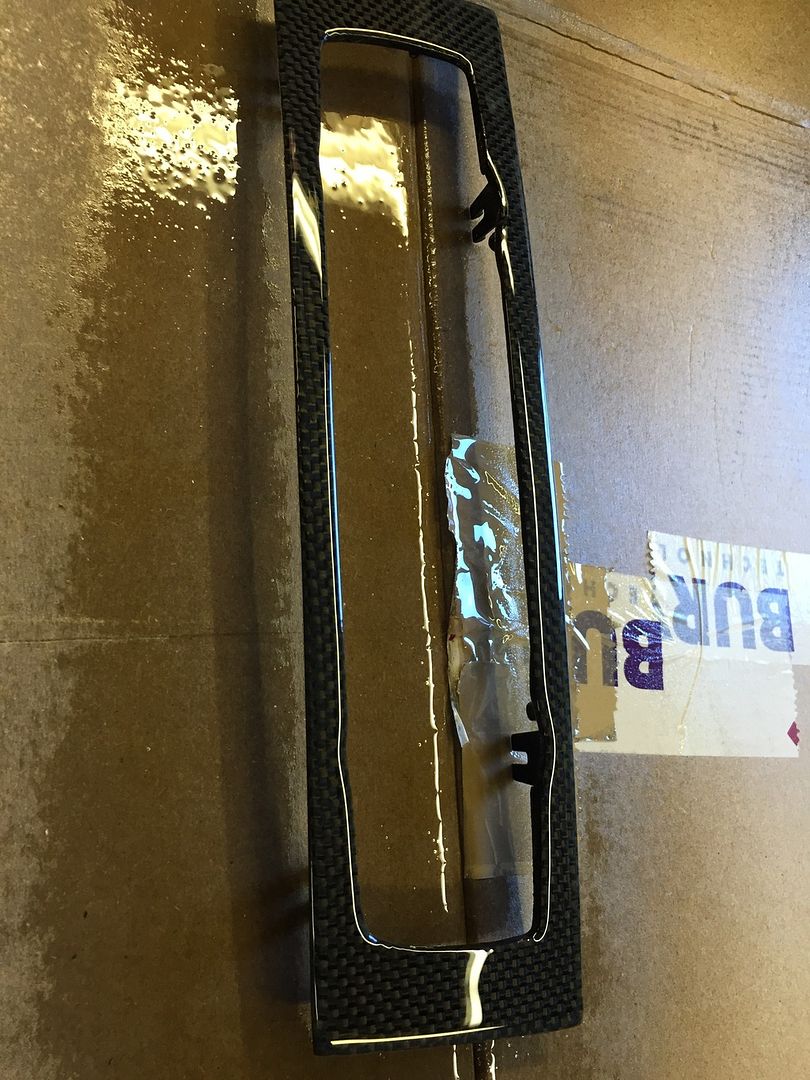 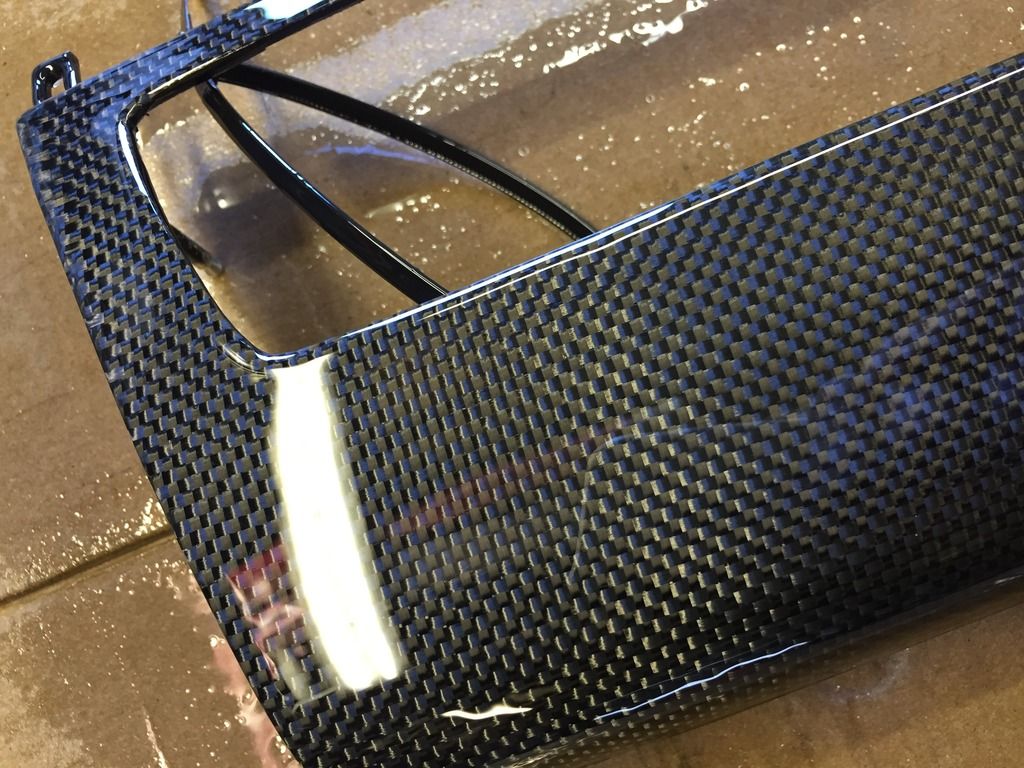 Once the 2k clear is dry they will get sanded with 1500grit and then 2000grit and pollished then fitted to the car. I will post pictures of them fitted when done |
|
Appreciate
0
|
| 04-20-2015, 11:05 AM | #8 | |
|
Brigadier General
 
827
Rep 3,856
Posts |
Quote:
|
|
|
Appreciate
0
|
| 04-20-2015, 11:36 AM | #9 |
|
Joint Chiefs of Staff

24095
Rep 190,633
Posts |
Looks really good, did the same with my car
__________________
Check out our current sale by clicking on this link!
https://x-ph.com/sale/ Phone number 702-494-9435  |
|
Appreciate
0
|
| 04-21-2015, 03:29 PM | #11 | |
|
Lieutenant
349
Rep 424
Posts |
Quote:
|
|
|
Appreciate
0
|
| 04-21-2015, 03:41 PM | #12 | |
|
Private First Class
 20
Rep 120
Posts |
Quote:
|
|
|
Appreciate
0
|
| 04-22-2015, 05:49 PM | #13 |
|
Colonel

1299
Rep 2,093
Posts
Drives: '11 135i M Sport
Join Date: Dec 2013
Location: Delmarva Peninsula
|
So where do I put my order in
 would love Carbon Fiber cowl covers. would love Carbon Fiber cowl covers.
__________________
|
|
Appreciate
0
|
| 04-23-2015, 05:18 AM | #17 | ||
|
Colonel
1299
Rep 2,093
Posts
Drives: '11 135i M Sport
Join Date: Dec 2013
Location: Delmarva Peninsula
|
Quote:
__________________
|
||
|
Appreciate
0
|
| 04-23-2015, 05:56 AM | #18 |
|
Lieutenant
349
Rep 424
Posts |
Yes these could be done
I did the pollen cover on my M3 CSL and the same on the e90 M3 V8 They looked great i was thinking the air intake feed would look cool in carbon |
|
Appreciate
0
|
| 04-23-2015, 06:34 AM | #19 | |
|
Colonel
1299
Rep 2,093
Posts
Drives: '11 135i M Sport
Join Date: Dec 2013
Location: Delmarva Peninsula
|
Quote:
__________________
|
|
|
Appreciate
0
|
| 04-23-2015, 04:17 PM | #20 |
|
Lieutenant
349
Rep 424
Posts |
I buy my cloth and resin from here
http://www.easycomposites.co.uk/ For the best results get a vacuum pump it makes a better job and the parts dont delaminate also spray the parts with 2K it stops the sun from affecting the carbon |
|
Appreciate
0
|
Post Reply |
| Bookmarks |
|
|


