

|
|
|
|
|
| 02-18-2011, 02:09 AM | #1 |
|
Black/white Ninja

13
Rep 139
Posts |
* How to install a BMW Cup holder in to the 1-series
* How to modify the cup holder to Iphone holder (TomTom Iphone cradle) *Search parameters: Centre console removal, gaiter removal, armrest removal, cupholder install, TomTom Iphone cradle There're a few pictures missing at this point and the modification of the cup holder is still in the works, but thought I would share this on the boards. Please feel free to comment! The intention of this guide is to show how you should proceed when you want to install the original cup holder placed besides the gear lever. First, you need to buy the cup holder. It consists of three parts and are as follows: * Trim * Bracket * Cup holder * Screws (Didn't buy them myself since the TomTom mod left me two screws I could use, but are you not doing this, remember to buy the screws) The parts has the following numbers: 51 16 9 122 656 51 16 9 144 632 51 16 9 122 655 Link to real OEM. Please double check your color preference, since the trim comes in three different options. (See object 20 on realoem.com) Tools youll need to do this install: Electric drill (Metal drills) Sharp knife Torx screwdriver (magnetic preferred) Small flat head screw driver (a big one too is an advantage for prying one of the covers off!) Socket wrench (size 10 head + extension) A friend 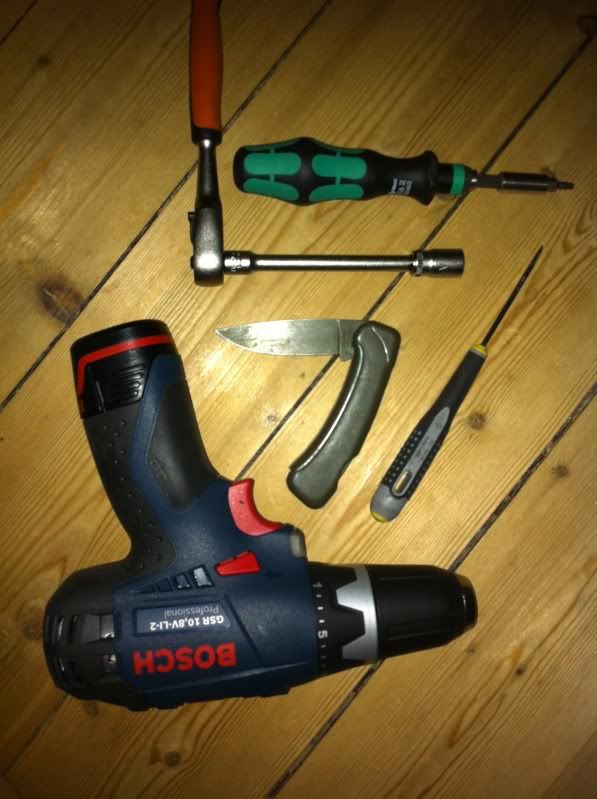 For the navigation unit/install you will need: Aux cable male/male TomTom navigation unit for Iphone Loctite Glue I have not been able to find any detailed DIY across the message boards for the 1-series, so thought to do one myself explaining all steps needed to take the centre console out of the car and modifying it to whatever extent is suited for you. For good measure, remove the battery connection in the trunk. I just loosened the plus connection and slid a piece of plastic between.  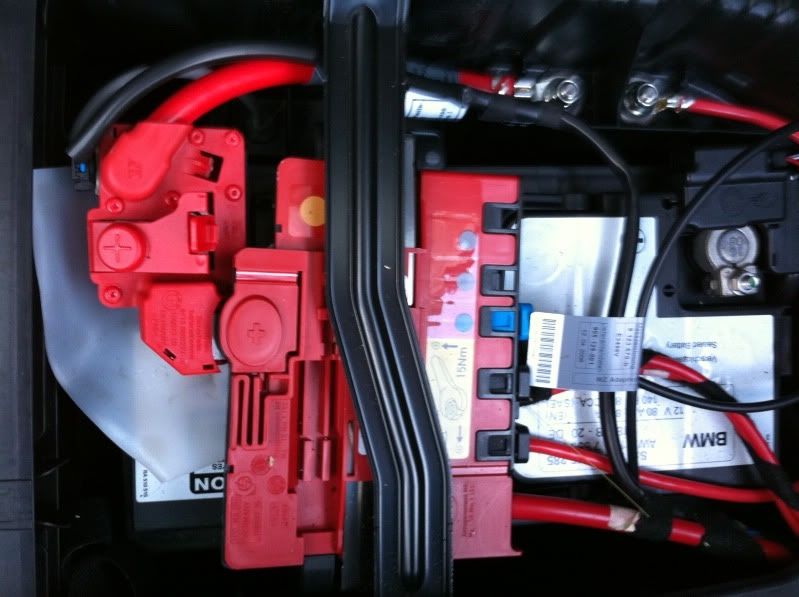 Start by removing the gear knob and gaiter. The gaiter is attached with small snaps and can be removed by pulling inwards on the Gaiter as shown by the arrows below. Remove the gear knob. Place the lever in 2nd gear and pull hard upwards. Do not hit your self in the head =) [Picture missing] Continue with removing the handbrake + gaiter Pull upwards, hard, at the point shown below. This requires force and will not feel comfortable. When the gaiter has loosened take of the entire handbrake by loosening the remaining snaps and slide up over the handle.  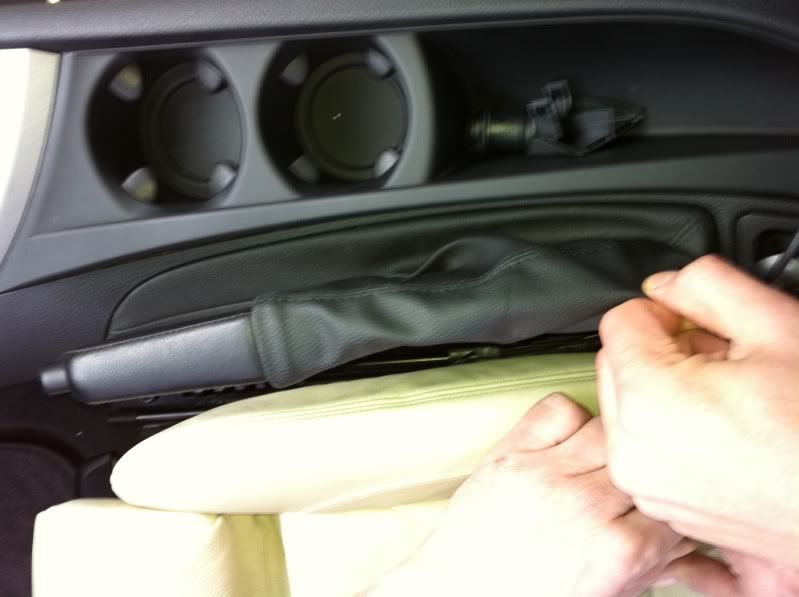 Now, remove the trim around the gear lever gaiter. This trim is retaining by snaps engaged vertically. Youll need to pull inwards towards the gear lever while pulling upwards. You can see/feel the trim loosen and continue to pull upwards and continue all the way around.  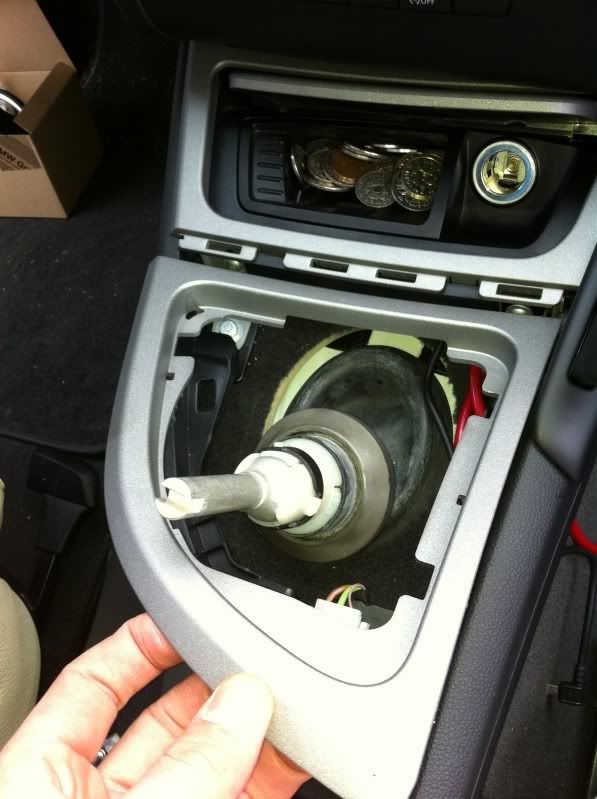 Now you need to remove a small piece of trim under the arm rest. Use a flat head screw driver to pry it off on the top. It has a snap in both sides, so mirror your efforts to the other side. Underneeth a bolt is found. Partially loosen the bolt. Go to the backseat and start removing the arm rest. Start by prying the trim loose with a screw driver. See below. Lift the screwdriver upwards and away from the front until the clips underneath give loose. Pull the trim off. [Picture missing] Loosen and remove the two screws and two bolts underneath, as seen on the picture.   Now pull the armrest backwards and off. Proceed with loosening and removing the bolts found underneath the hand brake gaiter, the gear lever gaiter and the bolt you partially loosened earlier under the arm rest.  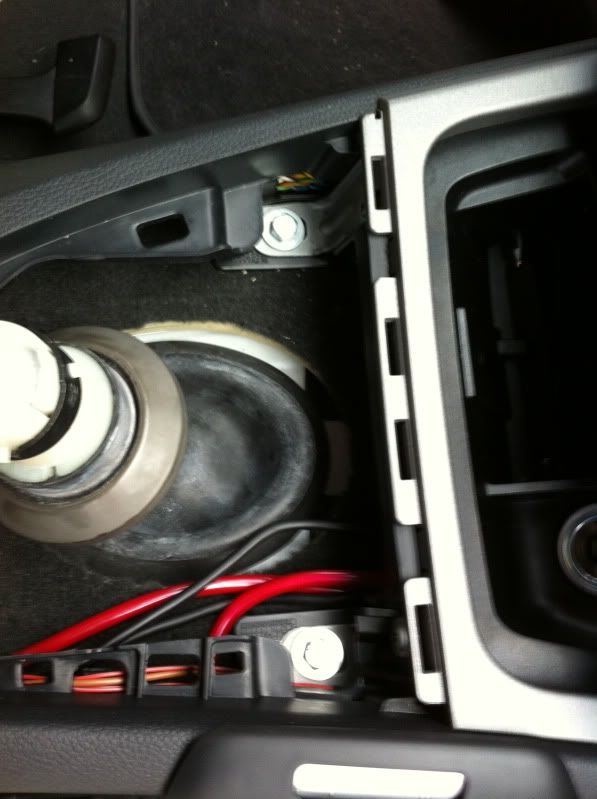 Now position, in this case, LHD passenger seat so you can access the trim/screw found as seen underneath. Remove the trim with the flat head screw driver (gently) and remove the screw.  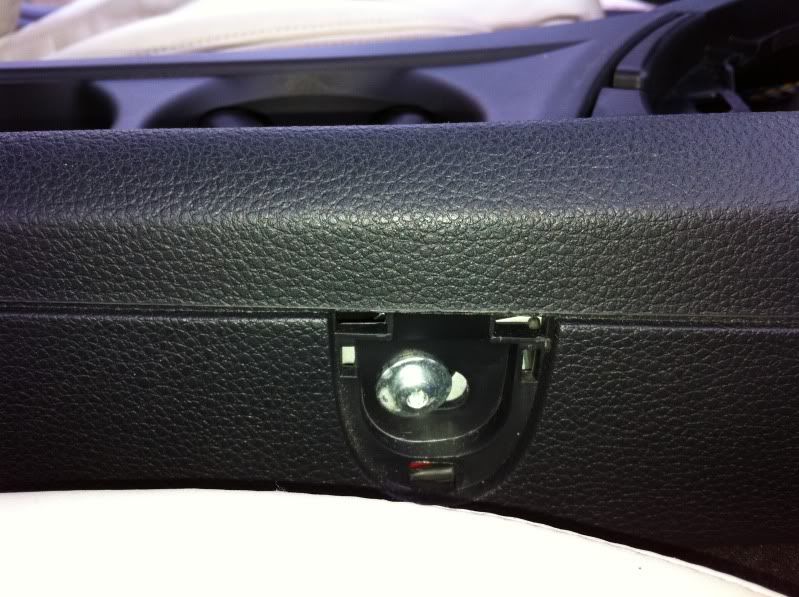 Now for the hidden plugs. They are placed on either side of the trim right under the dash board. Remove the centre pin first and then the large plug (expansion plug). 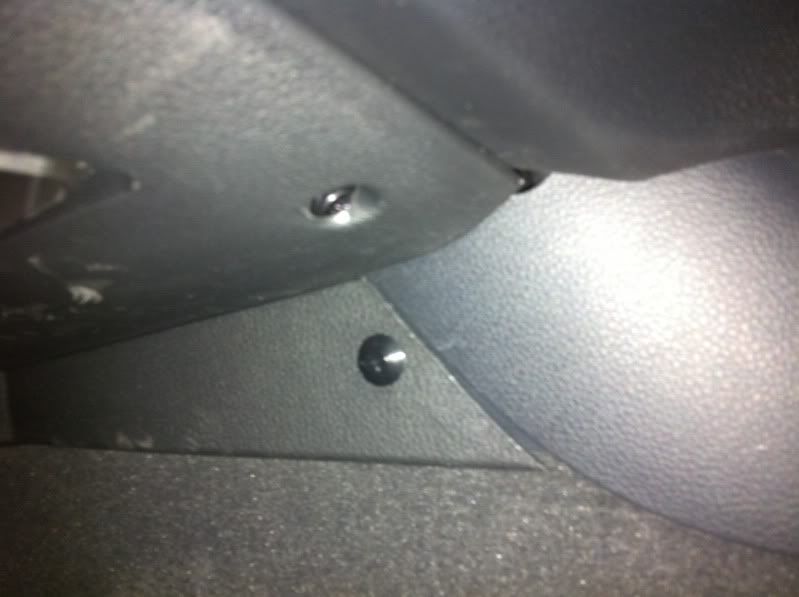 Before you can remove the console, push down clutch and brake, and yank the handbrake hard. This is needed for the console to clear the handbrake. You'll find that you can pull the handbrake further by pressing down the pedals. Unclip the plug for the 12V and the ash tray lighting.  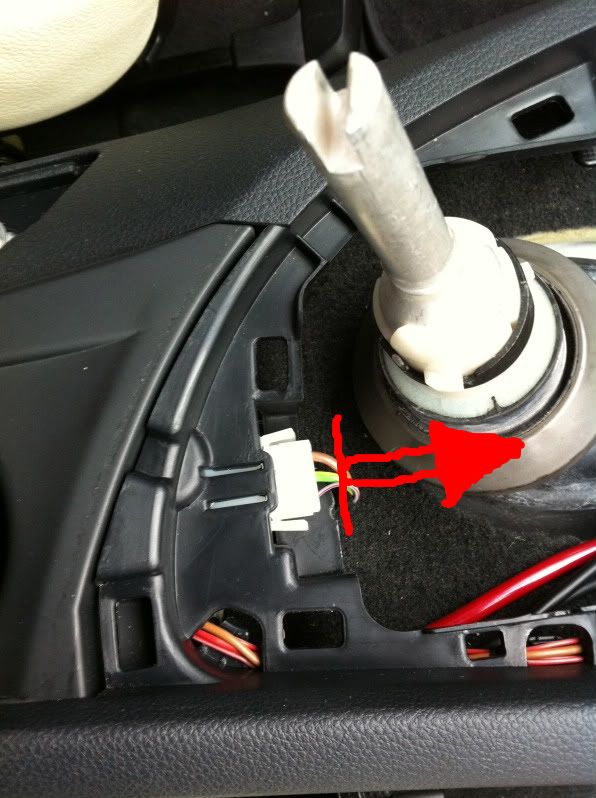 Pry the 12V and AUX trim off and unclip the plugs for both. Notice that the AUX plug goes very tight, so use force, but pull straight!  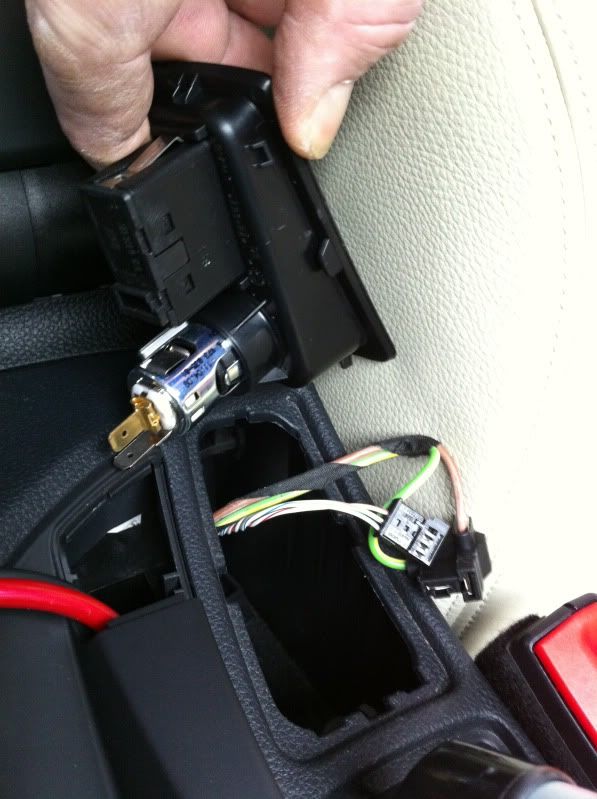 Now, lift up the console from the rear, while pulling backwards and clearing the handbrake. Now you need your friend pulling out on the small flaps on the dash overlapping the centre console. Now the centre console should be off, and off to cutting up your car!  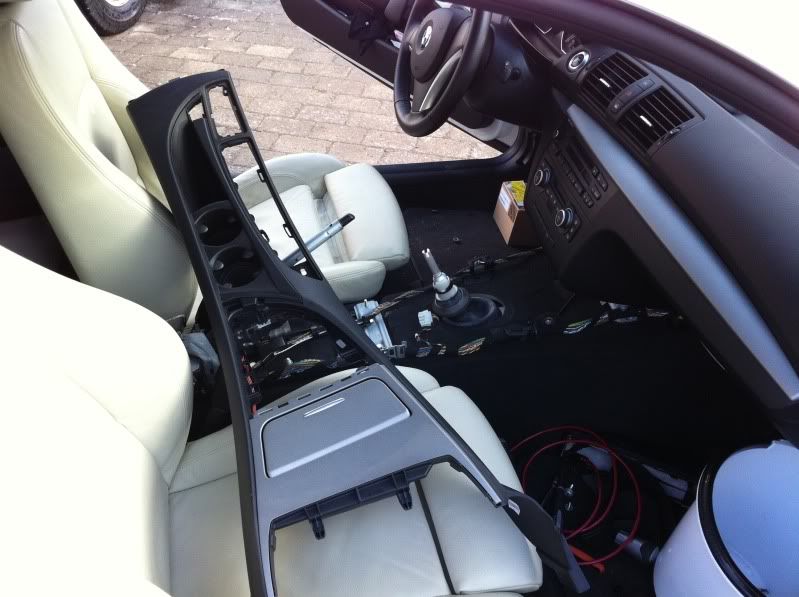 Take of the metal bracket you see on the picture below, insert the cup holder bracket, and the insert the metal bracket again. Mark the centre of the hole of the bracket, so you know where to drill, and remove both brackets. 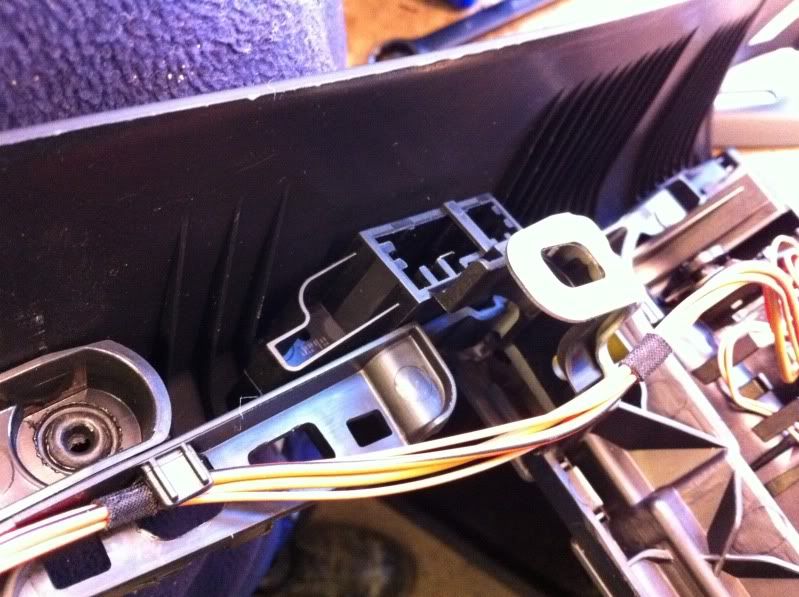 Take a deep breath, drill some holes within the area you are certain you need to remove, and as soon as the hole/area is large enough to use your knife in, switch to this method instead. Continue to work your way outwards to the shape seen below. Double check ALL the time with the bracket (and the trim). Remove too much material and it will show when you assemble everything.   Here you see how the bracket should fit in the hole you cut!  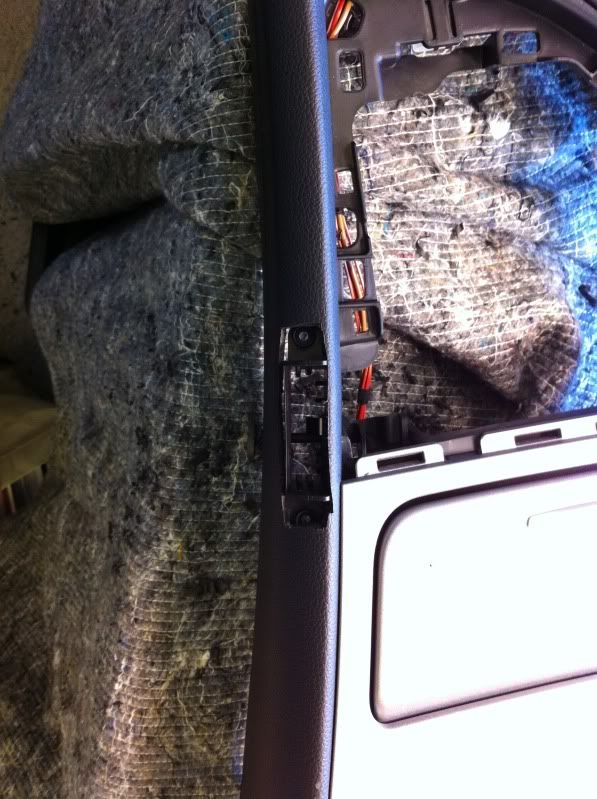  Mount the trim by screwing it firmly in place from the bottom side. 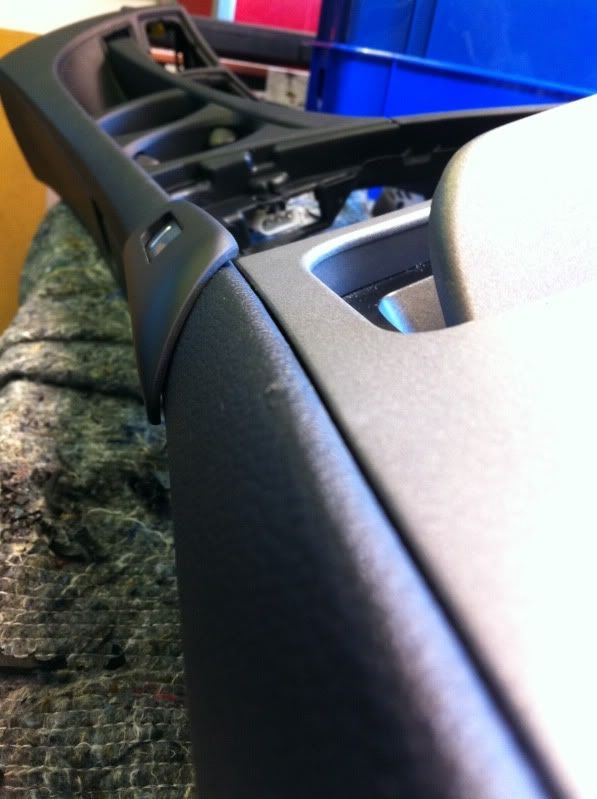 Are you not mounting the TomTom Iphone Navi unit, you can now go back to the car and assemble everything as it came apart. Smile as you have done something your self  For the navi install I opted for a cleaner install and wires inside the console. After I mounted the console, and before I started bolting everything down, I pulled the wires for the AUX and the 12V on the inside and let them come out under the arm rest as seen below. 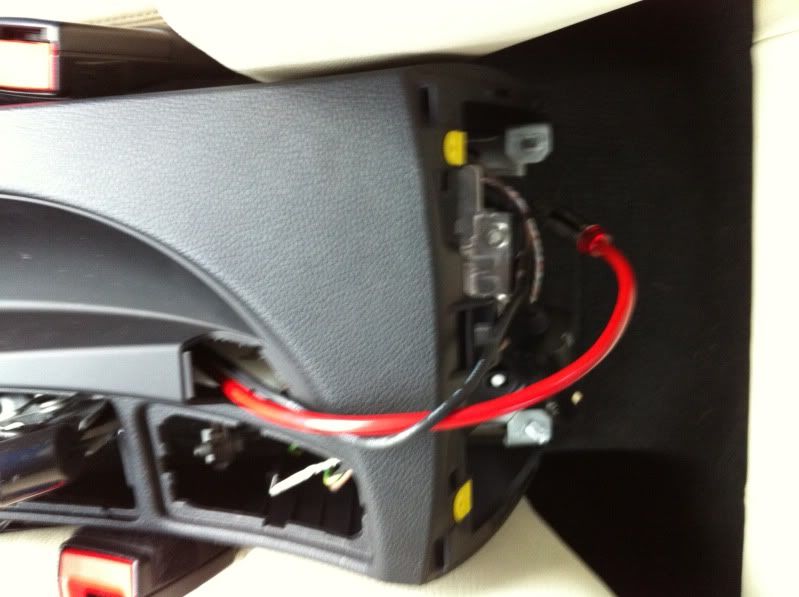 The wires were longer than from just the armrest and to the gear lever, so I let the extra length loop in under the ash tray area and back as seen below. 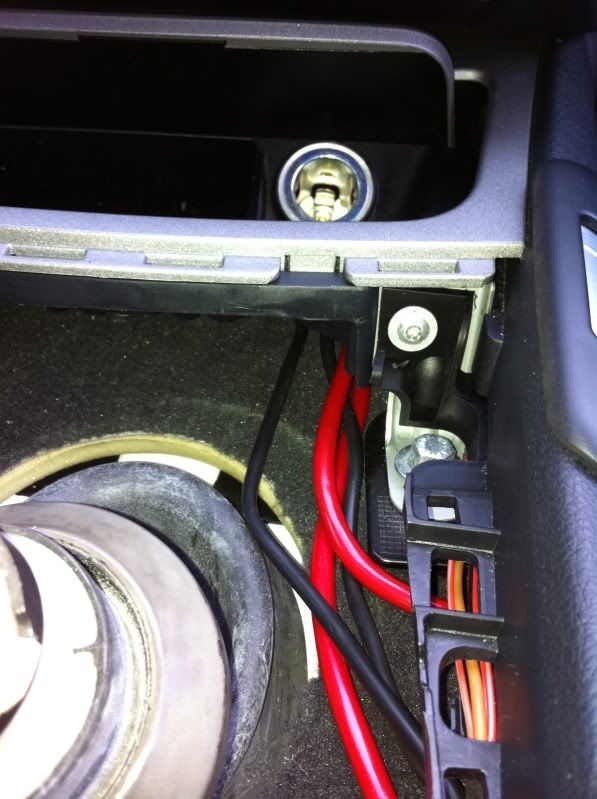 Roughly measure out the length needed to the cup holder, but as you have extra length to pull out from under the ash tray area, this is not critical. 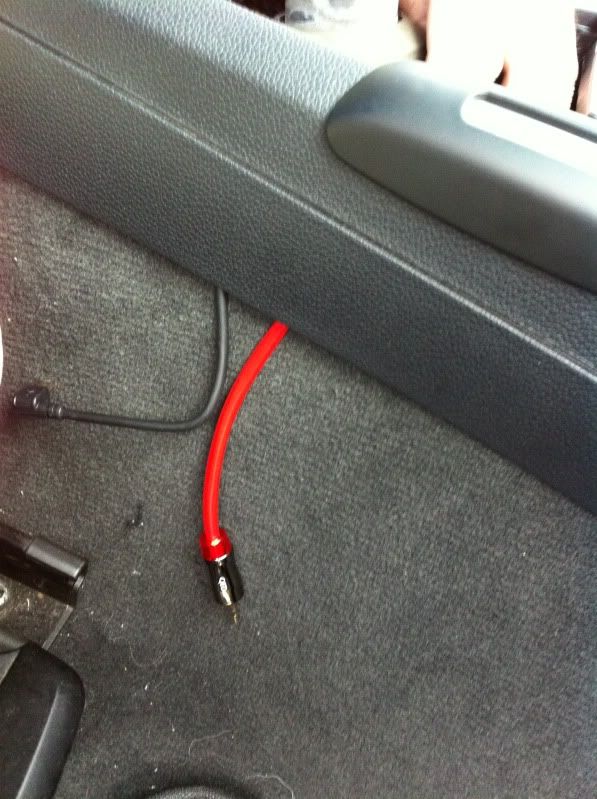 Wirering done. The small piece of trim is not mounted here. But to mount the trim here, cut room for the exiting wires in the side of the trim and snap it in place. 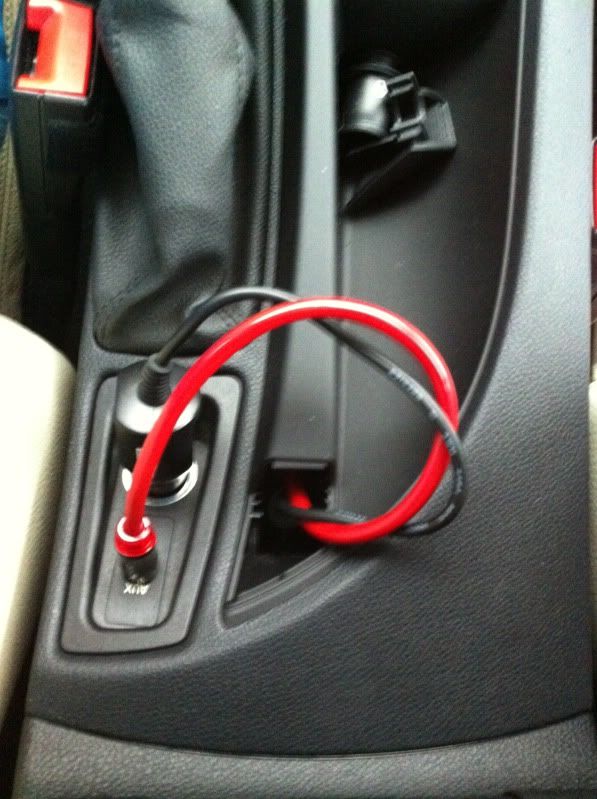 Reverse everything you have done and assemble the console again. When finished, this will be the result. 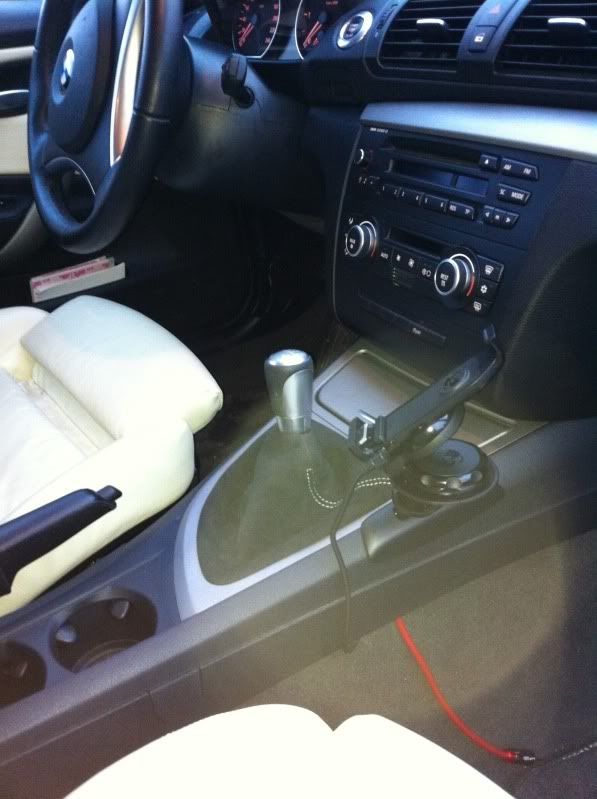 *** Hook up the battery ** Start the car * Smile
__________________
2008/06 lemon on white 118D. Coilovers, 19" and a bit of OEM extras!
 Last edited by dela; 02-18-2011 at 02:17 AM.. |
| 02-18-2011, 06:49 AM | #2 |
|
Lieutenant
 

233
Rep 448
Posts
Drives: G20 330i M Sport
Join Date: Feb 2009
Location: Monmouth, UK
|
Is it possible to remove the centre console without removing the gear selector knob? I have DCT gearbox.
|
|
Appreciate
0
|
| 02-18-2011, 06:57 AM | #3 | |
|
Black/white Ninja
13
Rep 139
Posts |
Quote:
But since I haven't tried it, it's all assumptions from my side.... 
__________________
2008/06 lemon on white 118D. Coilovers, 19" and a bit of OEM extras!
|
|
|
Appreciate
0
|
| 10-09-2011, 01:56 PM | #4 |
|
UMADBRO?

11
Rep 188
Posts |
Bump, I'd like to see the DIY of the tomtom modded cupholder not just the trim removal
__________________
2008 BMW 135i Dinan
 325whp and 345wtq on a parking lot dyno at 28*Celcius |
|
Appreciate
0
|
| 12-22-2011, 08:29 AM | #6 |
|
Black/white Ninja
13
Rep 139
Posts |
Sorry guys, I've been mad busy for the last few months and did forget about it. I'll see if I can get around to updating the guide with the missing pictures and the few missing comments on the cup holder re-build too....
__________________
2008/06 lemon on white 118D. Coilovers, 19" and a bit of OEM extras!
|
|
Appreciate
0
|
| 08-12-2012, 09:38 AM | #7 |
|
Second Lieutenant
58
Rep 200
Posts |
Holy crap! Love the oem ashtray with another power jac and closing lid as well!! My US version simply has on open big tray....ugly!
Any one try this mod already?
__________________
2011 AW 135i
|
|
Appreciate
0
|
| 08-11-2014, 07:56 AM | #10 | |
|
Black/white Ninja
13
Rep 139
Posts |
Quote:
__________________
2008/06 lemon on white 118D. Coilovers, 19" and a bit of OEM extras!
|
|
|
Appreciate
0
|
| 08-11-2014, 01:16 PM | #11 |
|
Brigadier General
 368
Rep 3,547
Posts |
I put the idrive cup holder in my car and my wifes without disconnecting the battery. The only electrical thing you do is to unplug the connectors for the accessory socket and aux/usb port. Not necessary IMHO.
__________________
128i Convertible, MT, Alpine White, Black Top, Taupe Leatherette, Walnut, Sport
Ordered 5/22/09, Completed 6/4/09, At Port 6/9/09, On the Georgia Highway 6/13/09, Ship Arrived Charleston 6/24/09 at 10pm, PCD 7/21/09 |
|
Appreciate
0
|
| 05-28-2017, 05:11 PM | #13 | |
|
Supreme Galactic Commander (one galaxy over...)

666
Rep 1,777
Posts |
Quote:
__________________
Best,
Andy  '12 E82-PS2,Stoptechs,Clubsports+M3 bits,Accusump,Wagner DP+EVO III FMIC,ERCP,BMS Intake,Mason Strut Bar,Wedge Tune |
|
|
Appreciate
0
|
| 05-28-2017, 05:12 PM | #14 | |
|
Supreme Galactic Commander (one galaxy over...)
666
Rep 1,777
Posts |
Quote:
__________________
Best,
Andy '12 E82-PS2,Stoptechs,Clubsports+M3 bits,Accusump,Wagner DP+EVO III FMIC,ERCP,BMS Intake,Mason Strut Bar,Wedge Tune |
|
|
Appreciate
0
|
| 05-28-2017, 05:13 PM | #15 |
|
Supreme Galactic Commander (one galaxy over...)
666
Rep 1,777
Posts |
Thx for this thread, OP. Was a pretty straightforward job and this DIY was very useful.
__________________
Best,
Andy '12 E82-PS2,Stoptechs,Clubsports+M3 bits,Accusump,Wagner DP+EVO III FMIC,ERCP,BMS Intake,Mason Strut Bar,Wedge Tune |
|
Appreciate
0
|
Post Reply |
| Bookmarks |
|
|


 only got one in the center lol.


