*EDIT* Here's a very handy set of documents I recently created to help with this process: https://drive.google.com/drive/folde...A6?usp=sharing Includes spreadsheets (both excel and G-sheets) with built-in calculators and tracking table, and PDF that illustrates the process, much like this thread. */EDIT*
Good day to you all! I have finally found time and reason to write up this DIY on how I do alignments in my own garage, with tools that you can find just about anywhere.
This assumes that you know the basics of vehicular alignment terms and concepts. Here's an excellent article from the Tire Rack:
https://www.tirerack.com/tires/tiret...e.jsp?techid=4
You also need to be familiar with a basic understanding of mechanic-ing and how to be safe while working on your vehicle. As much fun as it is to tell stories about losing a finger or getting a huge scar, I'm sure it's not actually all it's caked-up to be. You are responsible for completing this job safely and exercising good judgement, and understand you are following the instructions of a 17-year-old (at time of writing). You are responsible for any and all damage you do to your vehicle or to yourself and your property as a result of following this guide.
Alignments aren't dangerous, though.
 My Target Specs:
Front:
1/12-1/8" toe-in
Max. possible neg. camber
Caster is a moot point
Rear:
1/16" toe-in
1/2-5/8" neg. camber
Required Tools/Thingies:
- Race Ramps, Rhino Ramps, Blocks, or some other method of elevating your vehicle via the wheels.
- A jack, unless you're using drive-up ramps, then lucky you.
- Four (yes 4) L-shaped 90-degree rulers. Two large ones (25" tall or so on the long end is good) and two smaller ones (10-12" is perfect).
- Four large clampy clippy thing-a-ma-hoochies. You need to clamp all the things. See pic below for actual usage that users of technical terms will immediately understand and say "That's a ___!"
- A laser level tool that will sit on a platform. I got this Kobalt-brand one at Lowe's for around $50, and it's already made up it's price in the number of alignments and adjusting I've done so far...
- One large marker or other clip-on-able device that you can see from a wheelbase away to aim that shiny laser beam.
- 21mm socket, 18mm socket, 18mm wrench (close-ended works nicest)
- Torque wrench to go to 80 ft-lbs
- Torx bit socket (in my case) to loosen tie rod pinch bolt
- Vise-Grips to adjust tie rods (the wrench part on mine was stripped)
- Pictures:

 Actual Instruction Bit:
Now for the important part, the DIY bit.
First, you want to jack up (or if you're a fancy-pants type with drive-up ramps, drive up) the end of the car you are aligning. If you're doing a four-corner alignment, put all four wheels on blocks/ramps. Make sure your ramps or blocks are tall enough so that you can fit larger-sized wrenches underneath, and that you aren't millimeters away from your presumably-hot exhaust.
I'm doing a rear end alignment to correct excessive negative camber on the passenger side of the car (my mistake) and to just reset it to perfection before my track weekend coming up soon.
Next, you're going to put together your rulers and clips like in the first picture above, you will need to adjust the "probing" ruler's height off the ground based on your wheel and tire combo. You want the end of the ruler to sit on the center caps of your wheels. Make sure that it sits the same way front to back for consistency's sake...


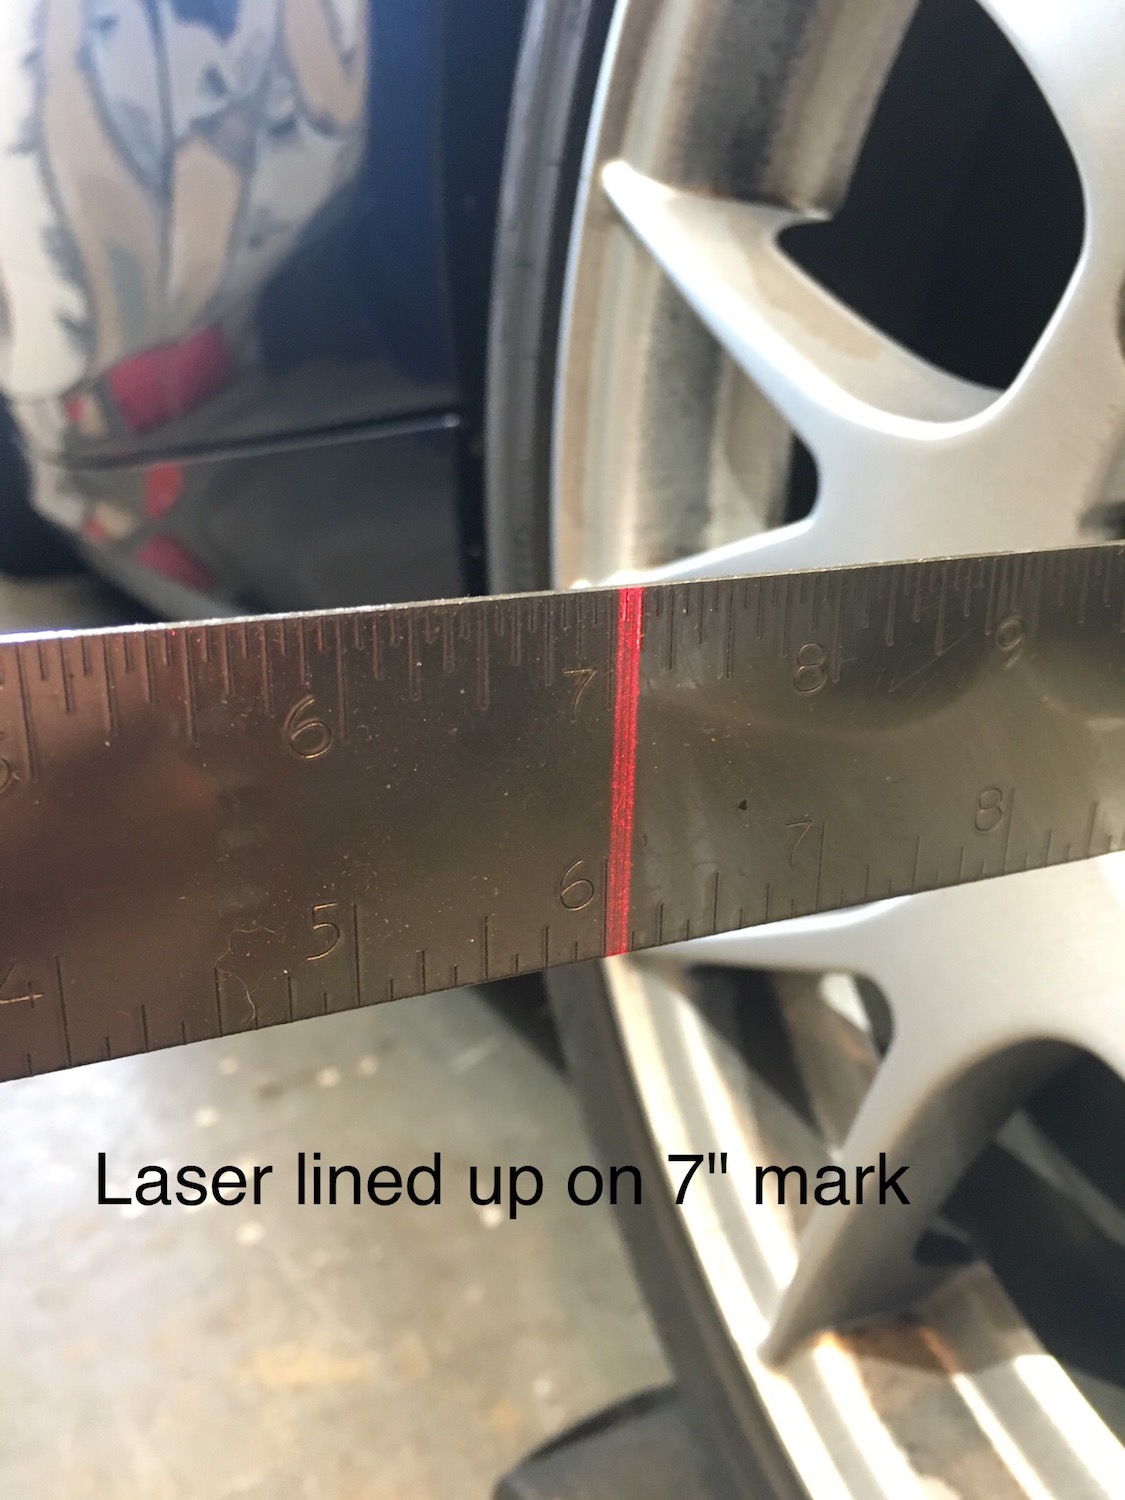
Now, attach your marker/target device to the probe end of the ruler. I use the 7" mark on the top.

Now set your laser on a platform that is steady and either above or below the height of your ramps or blocks, so that the beam hits both rulers. I used a portable tool box that also happened to be magnetic this time around, and this was the best solution for me yet. Here's a diagram sorta illustrating the process of setting the laser's position:

When it's properly aligned, both rulers should show the laser at the same mark:

And the view from the laser's location:

Now, here are the two bolts you are concerned with for adjustment purposes (yes my rear end is rusty-ish):

The upper bolt adjusts toe, as the picture demonstrates. The lower bolt adjusts...you guessed it, camber. You will notice that the washer behind the nut is off-center, this is an eccentric bolt, (think the crankshaft of a Wankel engine). If you notice that the "lobe" of the washer is towards the inside of the car (look at my toe arm), then you are at either maximum toe-in or maximum negative camber depending on the arm you're looking at. If the lobe is towards the outside of the car, then you are at maximum toe-out or maximum positive (relatively speaking) camber.
The specs I was looking for, and aiming for (measuring in inches difference) were 1/16" of toe-in and about 1/2-5/8" of negative camber.
To measure your toe specs, simply move your ruler assembly on the wheel you are measuring to the back (closest to the laser) of the wheel (touch the very lip of the wheel, not the tire!), find the nearest whole number, and note how far the laser beam is from that number (using 7" as a reference, I end up very close to the 8" mark in the rear). Now, move the ruler assembly to the front of the wheel, and note that measurement. The difference between these measurements is your toe spec. A greater number in the rear measurement than the front means that you have toe-out, and a larger measurement in the front than in the rear means you have toe-in.


To measure your camber specs, set your large L-ruler near the base of your wheel, and then use the smaller L-ruler to measure the distance from the bottom of the rim to the ruler, and the top of the rim to the ruler. The difference between the two is the amount of negative camber you have (the rear end doesn't go positive at rest position) in inches. You could be extra cool and use trig to calculate degrees...
*Adjust camber first and then toe. Otherwise you will be fiddling for hours on-end as each affects the other! Also, do gross adjustments, and then try to fine-tune.*
To adjust specs if they are wrong, or you are like me and like tinkering uselessly, you need to break the nuts loose, and don't go more than one whole turn off. The upper is an 18mm nut, and the lower is a 21mm nut. On the back side, near the differential, you'll find two bolt ends that are also eccentric. (YOU ADJUST USING THESE, NOT BY PRYING AT THE WASHERS. I learned the wrong way. Oops.) These are both 18mm bolts. Using your 18mm open-ended wrench, you can adjust them to bring them within spec using the "rules" I described above about which direction of the bolt does what to the alignment. You don't need to worry about which way you turn them to bring them to spec, as the suspension is still loaded and will always be resisting changes or certain settings. When you have hit your ideal spec (keep re-measuring after each adjustment), snug-up the nut, and torque it down to 79 ft-lbs, making sure that the eccentric bolt does not spin out of spec again. You have just aligned your rear end! Go for a drive and admire how that a$$ feels now!

Now, since I was just doing a rear alignment, I don't have any pictures of the front end. I'll edit this original post when/if I do, but it's much easier and more straight-forward than the rear (no camber adjustment, just toe). But, I can walk you through it, using the most precise language I can...
First, make sure the car is up on the aforementioned blocks or ramps. Now, jack the car up more using the front center jacking point located underneath the engine. It's surrounded by a large bowl shape divot in the underbelly pan. Make sure that the wheels get all the way off the ramp. Now carefully open the driver door (don't get in a car on a jack alone!), and using a level-like app in your phone, make sure that the steering wheel is perfectly level. I wedge my phone into the upper gap in the wheel, ensuring that it's centered in the wheel, and use the Compass app (iPhone brat here) to set it as level (swipe left to go to the built-in level tool). Carefully close the driver door, and then set the car back on the ramps (lowering it reasonably quickly helps with the next step).
With the car back on the ramps, open the doors, and jump and dance to your hearts content on each door sill until the ramps stop sliding along the garage floor, and the suspension stops making weird noises (it needs to settle). Do this on each side. Make sure the steering wheel hasn't moved. If it has, fix it so that it rests at-level.
The process for setting the laser and measuring your alignment is mostly the same.
If the measurement of the front (closest to the laser) of the wheel is to the outside of the ruler more-so than the rear (farthest from laser), then you have toe-in. If it's the opposite, you have toe-out.
To adjust the front, you use the tie rods. They work just like screws. With my Moog rod-ends, the pinch bolt uses a torx head bolt. Loosen the pinch bolt to free the threaded tie rod. Simply put, righty-tighty increases toe-in, and lefty-loosey increases toe-out. I had to use a pair of Vise-Grips to turn the rod the last time I adjusted them, as the hex wrench part of mine was stripped (screw you, All Tune and Lube!

).
That's all there is for the front. Keep checking the alignment after each full turn of the tie rod, and then use half turns and quarter turns to fine-tune the alignment to perfection. Now, just snug up the pinch bolt, set the car down, and you're all set.
With my Dinan camber plates and M3 control arms, I currently have the front end set to absolute maximum possible negative camber up front, and have 1/12-2/16" of toe-in (to compensate for abnormal wear). The steering is light, lively, and precise, and that's what really gets my going when driving. I hate heavy steering, it feels unnatural and unnecessary.
Thanks for the read, and I'll try to help out with any questions you may have (I'm obsessed with the forum, and it's unlikely you'll go unnoticed).
