Hello 1addicts!!
I think it is fair to say that its been over a decade and there is still no actual write up on how to open you headlights.
I think one of the main reasons is most people dont want to share their knowledge so they can make money off of offering the service.
To be honest its not hard and you shouldnt be intimated. Each light takes about 30-45min to open. you dont need an oven, but it can be beneficial. i personally just used a heat gun as it was easier to massage the channels when it came to cracking them open.
Items required
- Permaseal tool set (they are really beneficial for the underside of the lens. they cut right through the permaseal!)
- Flathead screwdriver. (this is used to pry the channel up during the heating process
- Wood chisels 1/4 & 1/2 (I found these tools really helpful to clean up the permaseal off the lenses and the headlight channels themselves, you get 90% of the surface clean! way better than using a flathead to scrape)
- Morimoto Permatrator (Another useful tool but you dont actually need it. just speeds up the process a little. it is a solvent that slowly changes the properties of the permaseal to become more butyl like. )
- Morimoto retro rubber (Butyl used to reseal the lights after work is all done!)
- Morimoto headlight sealing clamps or any clamp in general to hold the lens to the headlight during resealing.
Process
Either of these steps work i will be outlining the heathen method as i found it to be more effective and consistent.
- Oven
preheat oven to 350f or 175c. make sure you do not put your headlights in during the preheat procedure. you want them to be in at a consistent temperature for 6-8min. you will have to do this a few times as the lights cool down. follow procedure below for opening.
- Heat Gun
TAPE THE LENS you will almost 99% have a screw driver slide on you. you want to avoid this. if you baked them tape them after they have come out of the oven.
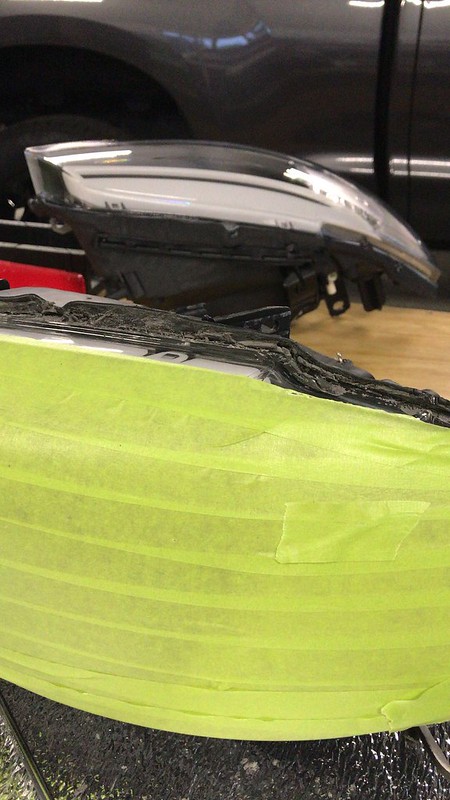 IMG_0863
 by
dan blythe, on Flickr
If you chose to purchase the permatrator inject it into the channel and into the permaseal itself. let it sit for an hour or so. you can continue to add as you work your way through the process.
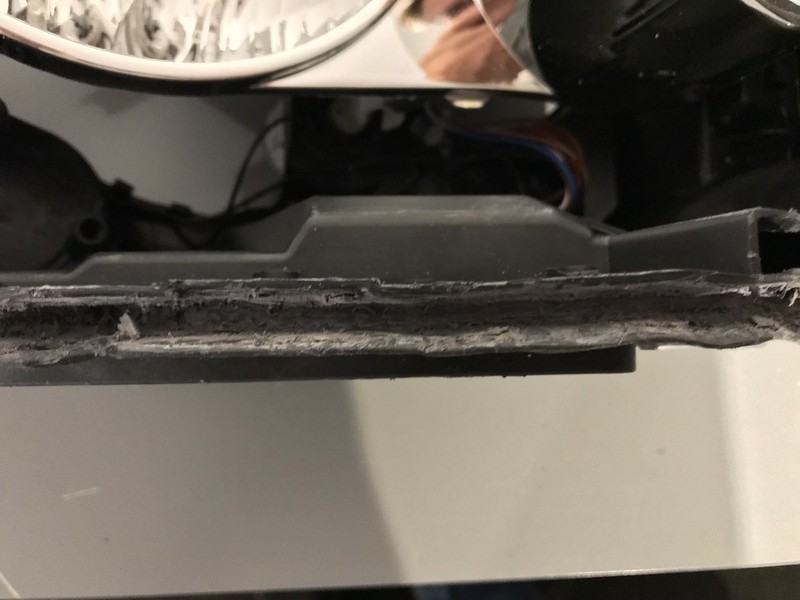
With your heat gun on high, gradually go over the top channel of the headlight, work small sections at a time dont heat it all up at once. Use your flathead to test for softness of the plastic. You dont want it to be too soft but it cant be too hard either or you end up risking splitting the plastic.
You will want to start in the middle of the headlight, most people recommend a corner however I found you put a lot more stress on the heated plastic in the corners and they end up stretching a fair bit and wrinkling when it comes time to flatten the channels back.
Once you have your heating method figured out use your flathead to pry UP on the channel. Do this on an angle and work your way down the headlight. if you pry directly up it will also result in wrinkling. You also dont need to bend it to 90 degrees, 45-60degrees is plentiful and you dont risk cracking the back of the channel.
Work your way around the headlight BUT leave the corner by the side marker! You can get close to the corner but no more than a 1/2 as you will definitely split it if you get closer and you dont want that. Also be careful around the clips.
 IMG_0972
 by
dan blythe, on Flickr
 IMG_0975
 by
dan blythe, on Flickr
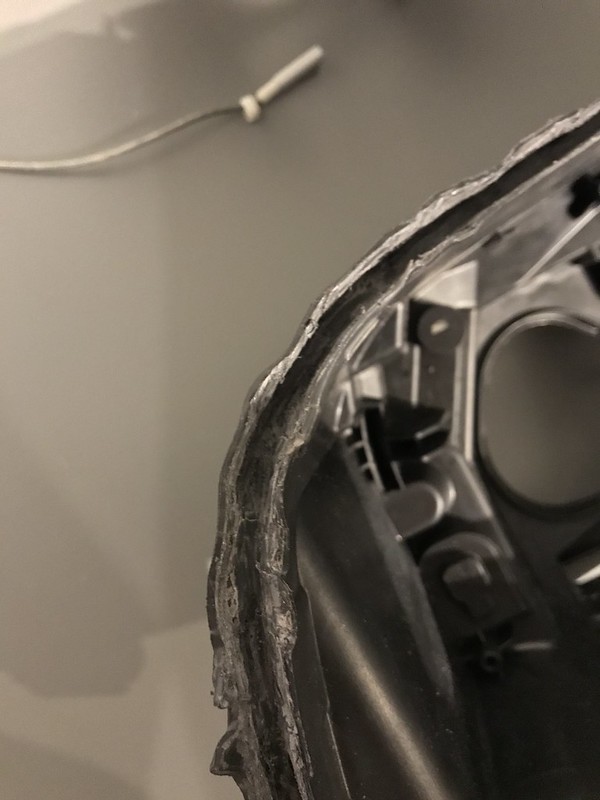
Once you have gone around the light and opened up the top channel you will now want to get under neath the lens to split the bottom portion of the permaseal.
This is by far the trickiest part. Heating the channel again, I started at the bottom of the light(to hide the initial opening spot), start by scraping out the permaseal with your flathead to expose the back of the headlight lens. you really want to get deep in there but go to far and you can puncture right through the back of the channel!
Once you have gotten a nice view of the back of the lens you will want to apply more heat and slowly insert you screw driver behind the lens and then angling it away from yourself so the tip of the drive is facing toward you, you will hear a few pops, this is the permaseal being broken from the lens and the bottom channel. (the lens may flex a bit dont worry as long as its warm it wont crack.)
Once you have done this you can insert a permaseal tool behind the lens and drag it around the headlight. You wont be able to use the tool for corners however, i recommend a screw driver on an angle.
Work your way around the lens once again. It will become noticeably easier as you work your way through. Once you have gotten to 1/2 away from the corner of the corner light lens you can stop.
Gently lift up and pull and the lens should pop right out of the corner!!
 IMG_0976
 by
dan blythe, on Flickr
 IMG_0980
 by
dan blythe, on Flickr
CLEAN UP
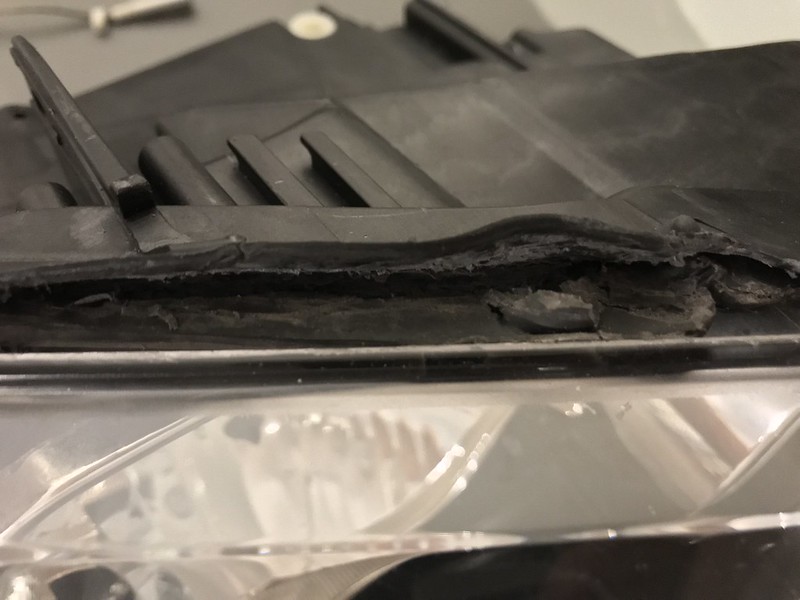
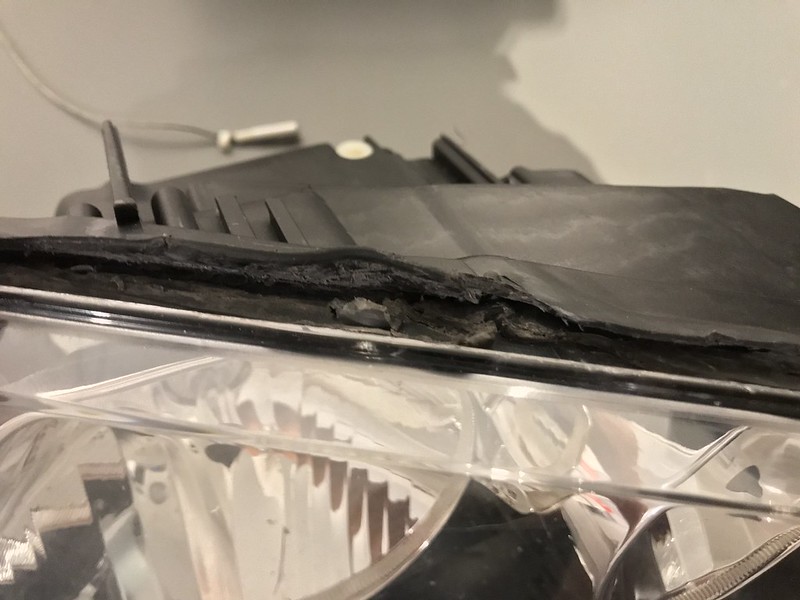
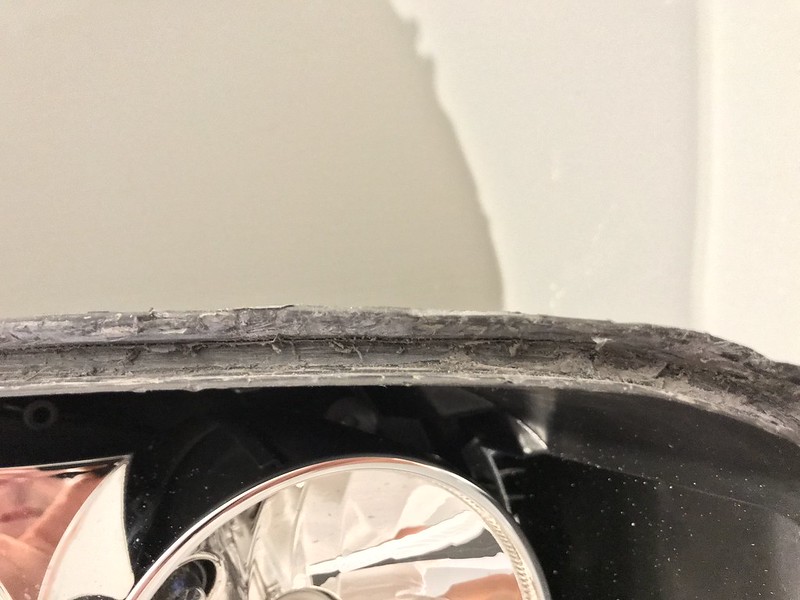
This is pretty straight forward, use a chisel or a screwdriver to clean the channels up, also the leftover permaseal on the lenses. Try and remove as much permaseal as possible. you dont need to fully remove it all but at least 90%. the butyl can fill in the rest.
Once you have scraped them out, heat the channels up again and do your best to restore them to how they previously were. they should look something like this..
 IMG_0978
 by
dan blythe, on Flickr
 IMG_0979
 by
dan blythe, on Flickr
 IMG_0977
 by
dan blythe, on Flickr
 IMG_0967
 by
dan blythe, on Flickr
MOD THEM
Im not going to get into the halos there are guides on e90post. if you are changing the corner marker or installing demon eyes its pretty straight forward.
I wont get too technical but there are clips on the back of the shroud to pop the corner marker. work your way towards the very corner.
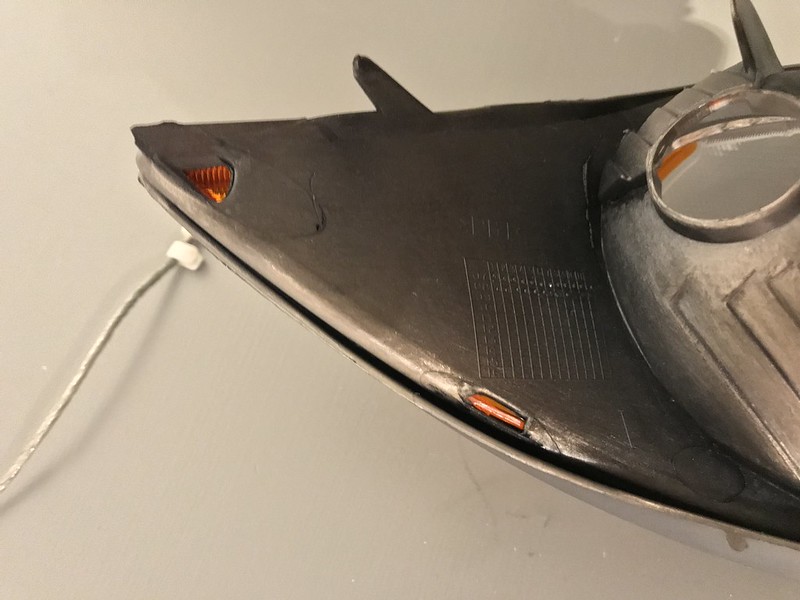 IMG_0968
 by
dan blythe, on Flickr
When installing demon eyes i used a d2s bracket for demon eyes, trimmed it down on either side. I then cut the clear plastic above the projector and slid the d2s bracket in-between the metal surround and the plastic bracket. it is a tight fit and secure. see the picture below.
 IMG_0892
 by
dan blythe, on Flickr
SEAL THEM
Run a strip of retro rubber around the light ( Dont start in a corner, start in the middle or partway up the side marker) , pushing it into the channel as you go. once you have laid it in you want to pre heat it with the heat gun on low gradually and consistently going around the light. Once again press it into the channel. This will set the butyl and will also prevent shrinkage when the light cools down after the lens is on.
when you have done the above steps Firmly press your lens onto your headlight. dont for them into the rubber you just want them to be set before they go in the oven.
preheat oven to 350f or 175c. make sure you do not put your headlights in during the preheat procedure. you want them to be in at a consistent temperature for 6min
Remove them from the oven, Press firmly again until they are bottomed out in the channel. clamp the lenses to the housings and wait for them to cool down! clean up the butyl and there you have it. no more $2000 headlight bills just what you pay for in materials!
I hope you all enjoy this little DIY and feel free to ask questions!
Acoustix
 IMG_0908
 by
dan blythe, on Flickr
 IMG_0906
 by
dan blythe, on Flickr