In my 2008 the automatic wipers and headlights had lost sensitivity compared to new. The wipers had become nearly useless.
Previously I'd used ISTA/D to reinitialize the rain sensor (which helped) but it had worsened recently. What I found was that the lens affixed to the windshield had become very cloudy and more opaque over the years. Likely due to the sun.
From what I gathered, there is no direct BMW replacement part for this lens (there is for the sensor) and that it likely came affixed to the windshield already. However, I found one on eBay (seller: autoku) for about $20 and gave it a try. The clarity of the plastic was immediately noticeable compared to the old one. And for $20, if it didn't work (which it did) I'd only be back where I started.
Below is a quick DIY. I've skipped over some detail as there are more DIYs on those topics for sure. I had a heck of a time finding information about the lens and if it could be replaced, so I'm hoping it proves useful for someone else. I wish I had taken more pictures for a detailed DIY, but there are plenty out there for effectively what amounts to removing and installing the rear view mirror.
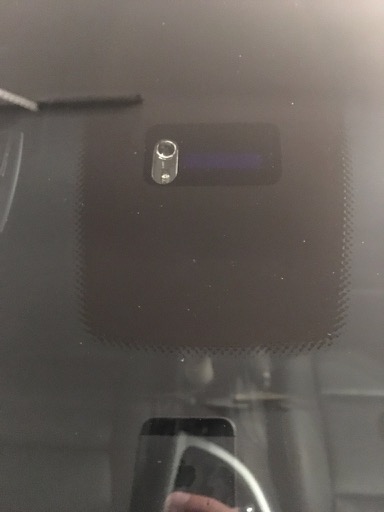
First, the lens is the purple part you see from the outside near the mirror. It is affixed to the windshield with a clear adhesive. The rain/light sensor (RLS) is clipped to the lens and is removable. My sensor was fine, just the lens had clouded.
To replace the lens- Remove trim around mirror by seperating it down the seam in the middle. It simply snaps apart and pulls away from the mirror.
- Unclip the connector near the top of the mirror arm. It pulls out a little to get a better grip.
- Remove the mirror and arm by slowly rotating it about 45-degrees clockwise. Do be careful and don't pull too hard.
- Unclip the connectors for the RLS sensor (black box) as well as the moisture sensor (small square below it). These can be a bit tough.
- The RLS sensor has some tabs on the top left and right that you push down. These slide down and release the pins on the lens.
- You can then wiggle the RLS off of the lens.
- I pried the lens off the windshield with a plastic trim tool (plastic putty knife would work too).
- Clean up the remaining adhesive. Straight rubbing alcohol worked very well.
- Apply to the new lens being careful to apply at an angle and work out any air bubbles. I found it easier to apply than anticipated, but did end up with a minor bubble I couldn't work out.
- More or less reverse the process to reinstall everything.
- Reinitialize the RLS with ISTA/D or INPA. This lets it adapt to the "new" windshield.
- I recoded the RLS with NCS Expert because ISTA speaks to the fact that the light sensor is only initialized after encoding. I don't know if this actually did anything, but for sure the above process specifically said it did NOT initialize the light sensor.
- Enjoy automatic wipers that actually work.
New lens installed.
On my old lens you couldn't see anything through the clear piece on the left. It was basically a white, milky blob.
 Old lens.

 New lens.

