Installed a fair few of these bushings and have made some improvements to the tool.
One of the main issues was the front two bushings were very difficult to remove. The tool needed a piece of wood to support the PVC pipe which made it deform and the pulling force wasn't straight. This led to many tool breakages if the bushings were stubborn. This all stems fro mteh fact that the bushings have a lip that covers the subframe so a regular pipe of the correct diameter cannot be used to pull out the bushing.
The rear bushings are much easier to remove and the PVC pipe is much more successful at removing that bushing. The only problem is sometimes the bushing is a little stubborn and the PVC pipe can deform and start to slip off the subframe. This can be alleviated by applying sideways pressure on the impact gun while the bushing is being pulled out, but ideally a metal tool is required.
The proper tool is crazy expensive but gives a good reference of the type of tool required. The bushings have a lip but have two cutouts where the special tool can mount to the subframe:
Koch Tools Part #: KT20312 or KT20436 would be suitable:
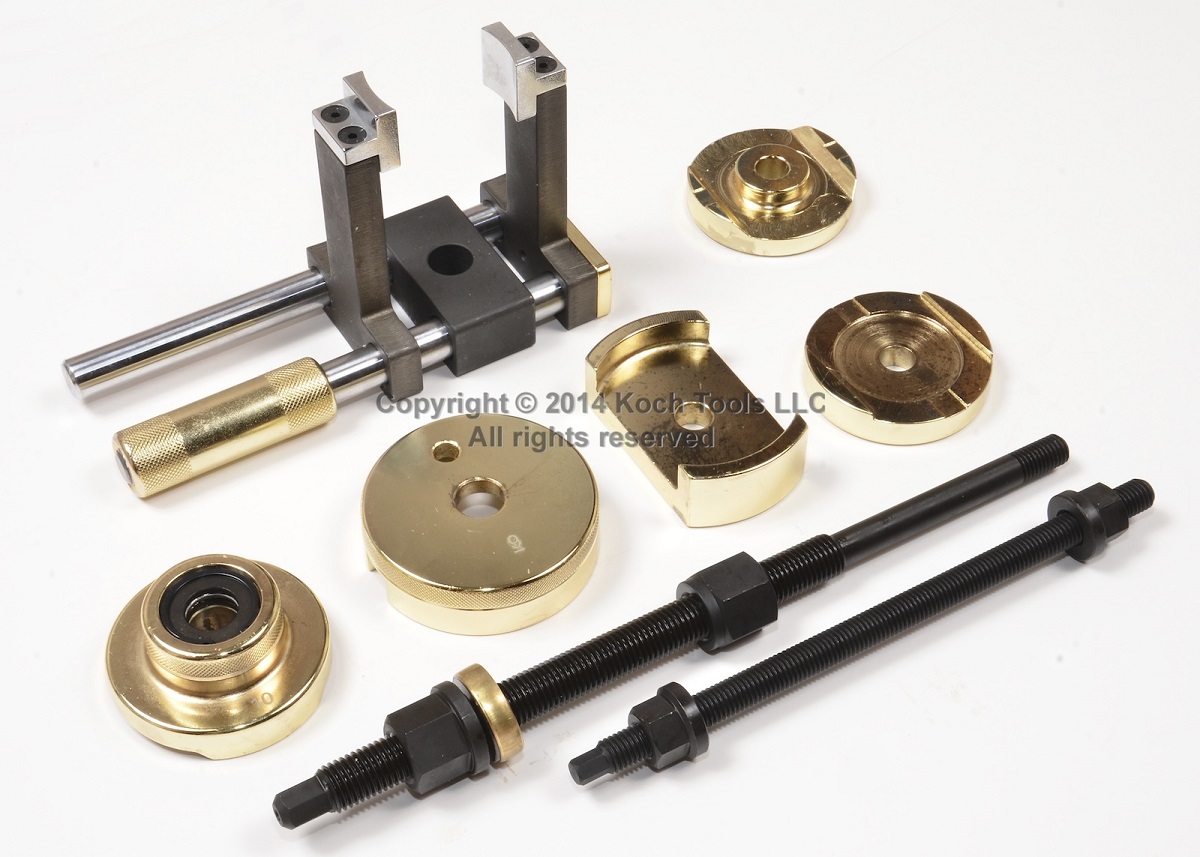
Much too expensive! List price is $300, great if you are running a business but its not really feasible for a DIYer
Heres what I have come up with:
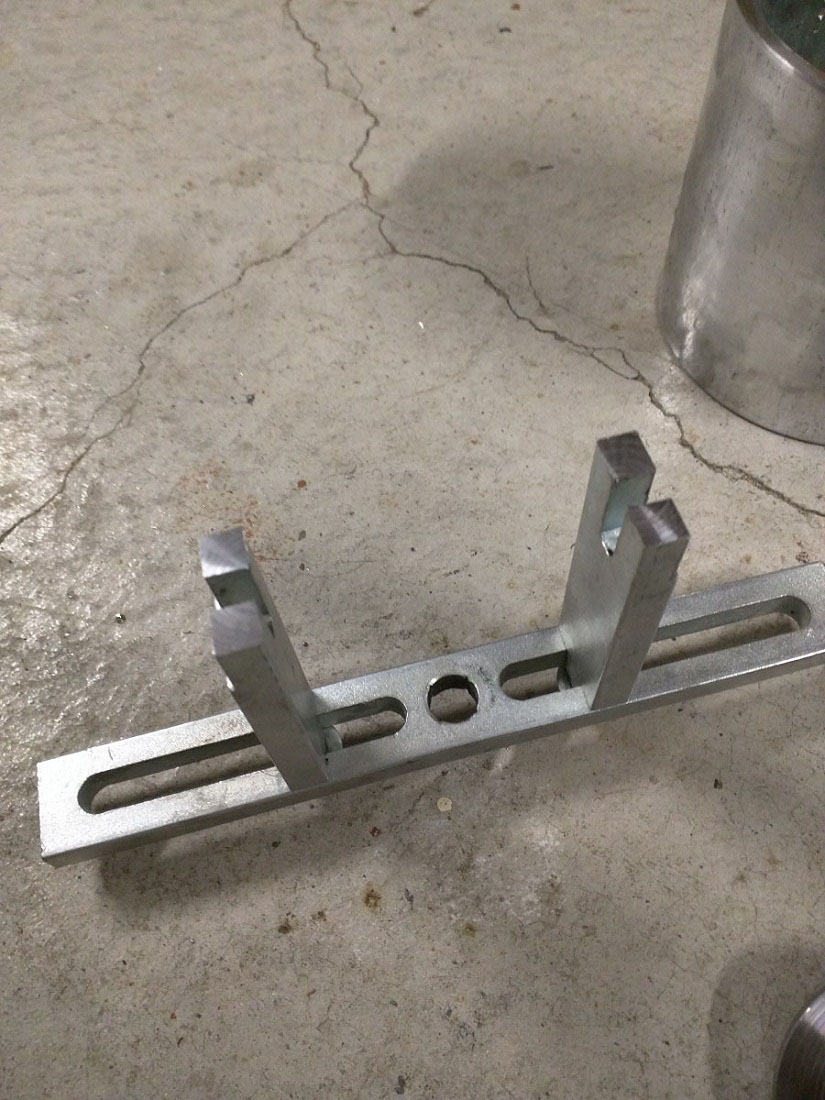
 1. Modified Fuel pump tool
Used for the front bushings, adjustable width to fit the subframe and small enough to fit in the bushing cutouts. The fuel pump tool has a 1/2 square drive that I have just drilled out with a 12.5mm drill bit. This tool is a forged piece and is a fairly strong part.
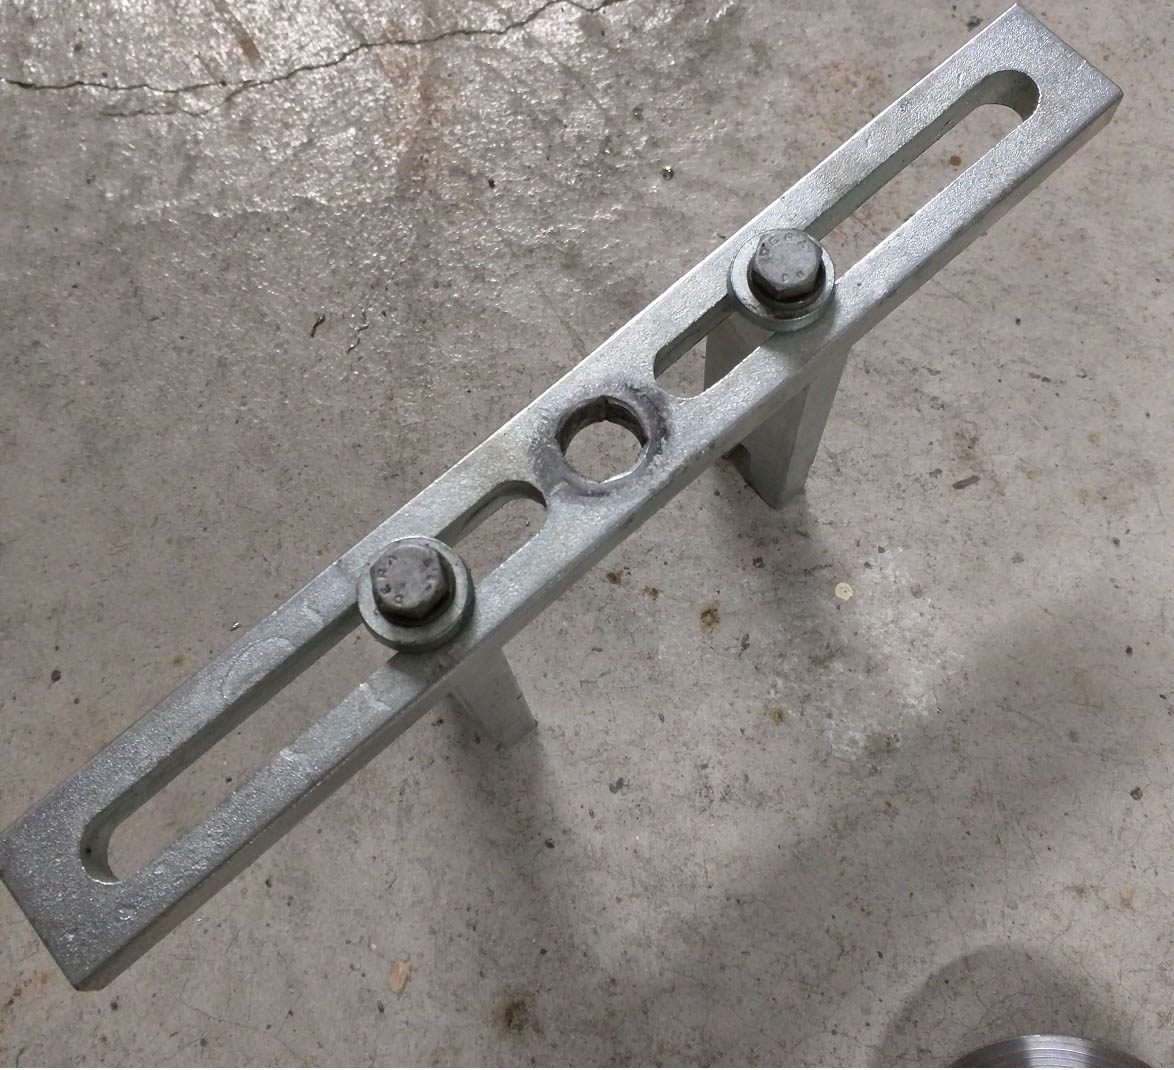
I have machined off the face of the legs so the edges are as sharp as possible (to avoid tool slippage). If no machine tools available, an angle grinder or bench grinder will do the same thing.
 2. High tensile M12 threaded rod with high tensile nut and M12 coupling nut

The M12 coupling nut (effectively a long nut) is tightened against a normal high tensile M12 nut. This fixes the nuts onto the threaded rod and is removable if the nuts ever need to be removed and reused. I found with the crappy bunnings galvanized threaded rod it would break easily. High tensile rod is much stronger, although even the high tensile rod can strip if not lubed up with heavy grease. Without the grease the rod will gall up and strip pretty easily.
These threaded rods are pretty much consumable items so its worth having a few backups. Ideally M14 or M16 rod would be better as the threads are larger and would be stronger.
3. M12 nut and washer
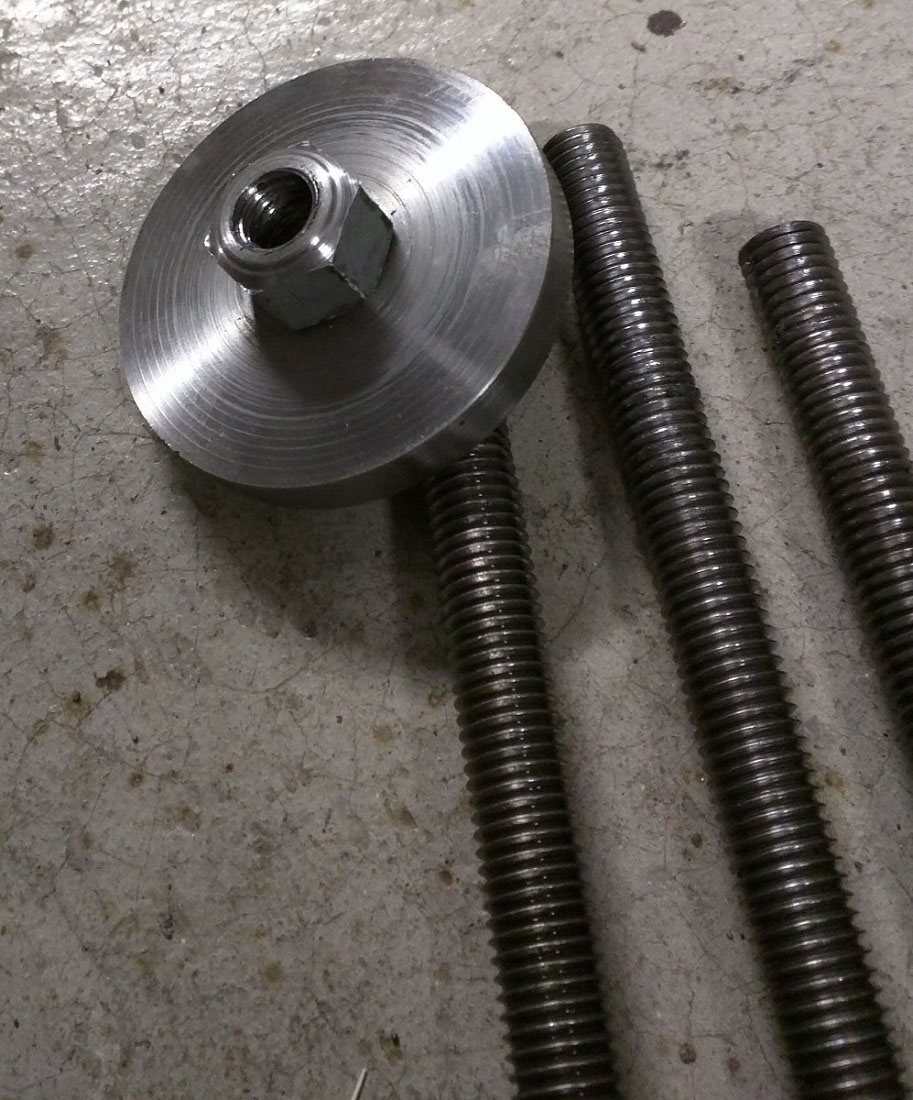
This is a custom part that has been machined on my lathe. I used one of the coupling nuts (shown in previous photos on the threaded rods). I machined half of the length coupling nut round, machined out a matching hole in a 10mm thick washer and press fitted them together. This ensures the nut is concentric with the washer, which reduces stress of the threaded rod. The coupling nut is much longer and allows for double the thread engagement vs the nut I was using before. The threads span from the top of the nut all the way to the bottom of the washer.
Press fitting them together means its quite snug, the nut must remain stationary, when the tool is in action the pulling force holds the washer against the subframe bushing, preventing it from spinning. This means you don't need to hold the top with a spanner until the bushing is almost fully out, making the precedure much easier.
The problem I had before is that the thread engagement of a single nut was that too much pressure was put on the threads, stripping them out easily.
4. 100mm galvanized pipe
Managed to source a short piece of metal pipe, its quite difficult to buy large pieces of metal in short lengths. This will ensure theres no deformation under pressure vs the PVC pipe. Although I am amazed at what the PVC pipe can do, this metal pipe will ensure no issues when removing the rear bushings. I machined the pipe to length and sanded off the galvanization to make it look nicer.
The barbell from the previous iteration of the tool is retained
Heres some pics of the tool assembled:
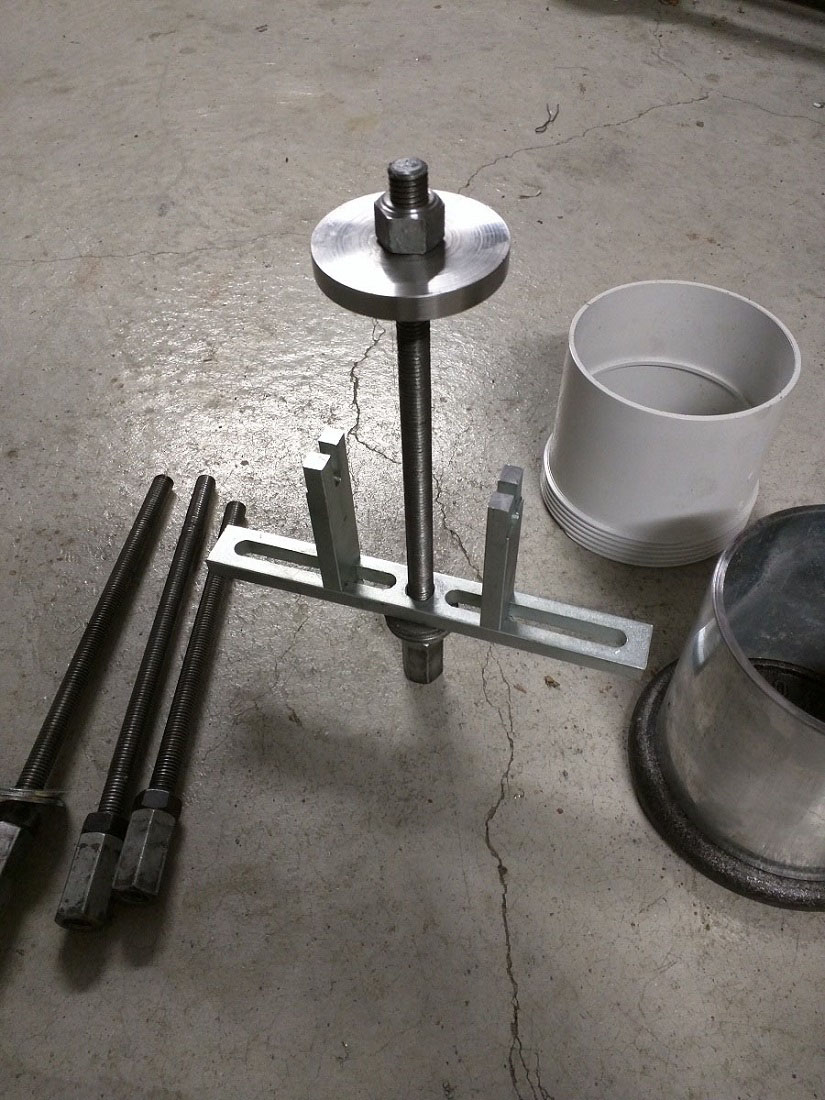

Heres a pic of the front tool in action:
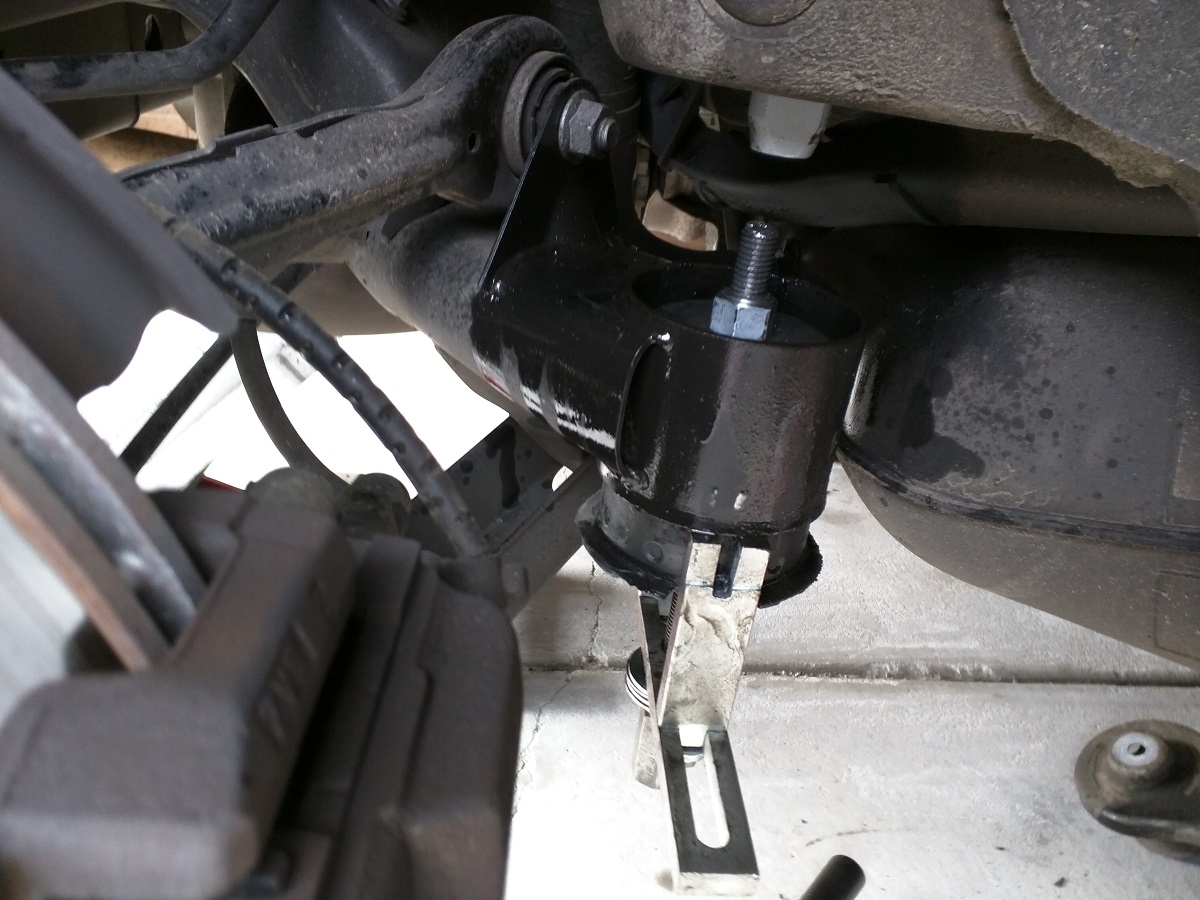
The fuel pump tool works amazingly well vs the PVC pipe and block of wood. Well worth the effort in making the new tool! The only issue was that the tool did bend a little from the force and on the 2nd bushing, the tool did slip off. Quite surprising since the tool appears to be forged.
I beleive this can be fixed by simply using 2x fuel pump tools stacked on top of each other. They could be bolted together for strength but I think I will just weld them together instead. I have ordered a 2nd fuel pump tool and will stack them up for strength weld them together and update the thread. While the fuel pump tool can be used for the rears I will stick to using the pipe for the rears since the force can be evenly distributed vs only 2 small contact patches.
Have not tried the metal pipe for the rear bushings yet, but I am confident it will be an improvement. The PVC pipe tool still has the advantage of not scratching the subframe vs metal tools though.