Over the weekend I got a lot more done on the wheels. First, I went to the store to get some supplies for anodizing the bolt heads:
- 6 pack of 9V batteries
- Etching solution (I used a powdered cleaner that contained Oxalic acid, but it didn't really work. I'll get a bottle of Whink rust stain remover to try again since others have had good results using this)
- Anodizing solution (Baking soda)
Building the anodizer is easy. I set up three containers in a row so I could easily transfer each bolts between the three. First was the etching solution, then clean water, and then the anodizing solution. In the container with the anodizing solution, I placed a stainless steel measuring cup connected to the negative battery terminal to act as the cathode. The positive battery terminal was then connected to the threads of the bolt. Voltage was adjusted by changing the number of batteries connected in series.
 Make sure to wear rubber gloves for this part; you will be working with water and electricity and you can shock yourself!!!
The process for anodizing titanium is fairly straightforward. First, etch the piece in your etching solution for a few seconds. Then, rinse in clean water, and finally dip into the anodizing solution until the color stabilizes. The color will vary based on the voltage applied. The way it works is that the electrolysis builds up an oxide layer on the surface of the metal. This layer is translucent, but as light passes through it, different wavelengths are reflected and refracted. Depending on the thickness of the oxide layer (which is controlled by the voltage applied), different wavelengths of light are allowed to reach our eyes, which are perceived as different colors. For example, below is a raw polished bolt, and bolts anodized at 9V, 27V, and 54V, from left to right:

I was mainly targeting the 9V and 54V colors to get a bronze or gold, respectively. I anodized a handful of bolts at each voltage and installed them on the wheel to get an idea of which I liked best.
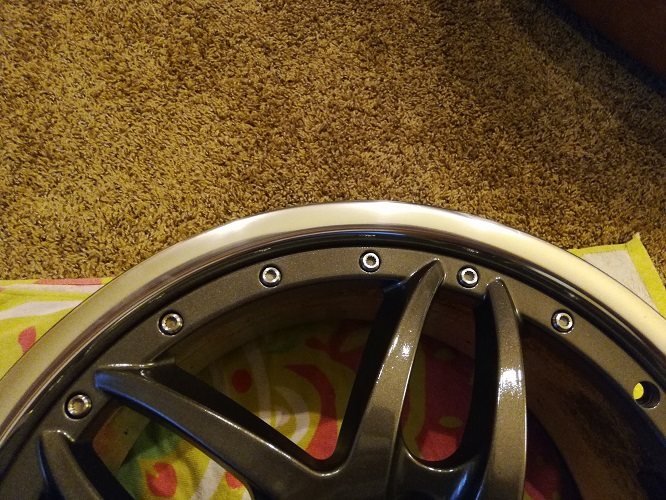
Raw polished:
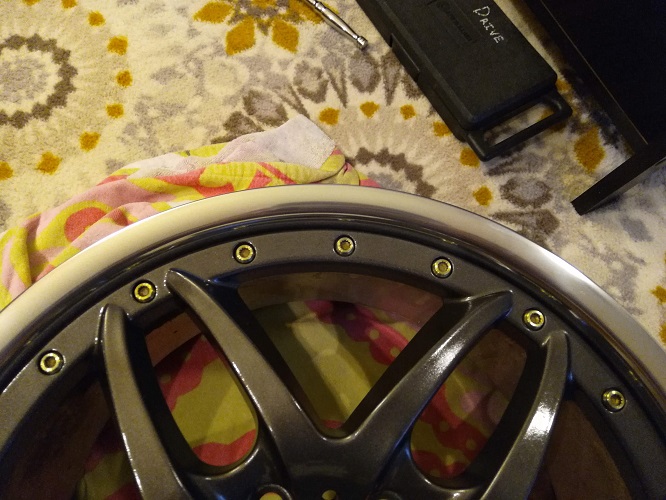
Gold anodized:
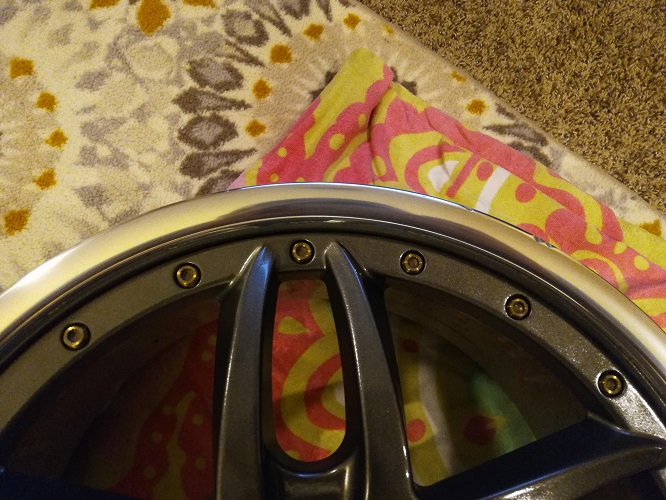
Bronze anodized:
Which one do y'all like best?
After all this work, I think I like the raw polished the best so far! I am going to try anodizing once more with a couple modification, however, to try to get some brighter colors since my first attempt left the colors a bit muted.
1. Add (2) 6V batteries to the setup. This will allow me to have voltage steps of 3V instead of 9V, which gives better color control.
2. Use Whink rust stain remover as the etching solution. The solution I used didn't remove the colors like it should, which tells me it wasn't really etching the surface prior to anodizing. Using the right solution should give better results.
3. Test different anodizing solutions. Borax, Trisodium phosphate, and ammonium-phosphate are all readily available and rumored to work well.