Tools Required
- Torx Driver with T-20 Bit
- 10mm Socket
- Interior Trim Removal Tools
Removing the pedal and glovebox trim
Begin by removing the trim that is above the pedals. There are 3 T-20 Torx screws (green arrows) and 1 push rivet (black arrow) holding the trim in place.

Next, remove the same trim near the glovebox. It has 1 push rivet and 2 T-20 screws.

I removed these pieces of trim completely, I do not know if it is possible to just remove the push rivets. You do not need to remove the glovebox nor do you need to remove the trim at the bottom of the steering wheel.
Removal of the Center Console
This can be done in no particular order, but I will start at the front and move toward the back of the console.
Begin by
removing the shift knob, shift boot and emergency brake boot.
With the Shift Boot removed,
remove the trim around the shift lever.
Remove the foam insulation around the base of the shift lever.

After you remove the foam insulation, you will see two 10mm bolts holding down aluminum L-Brackets. Remove them and set them to the side.

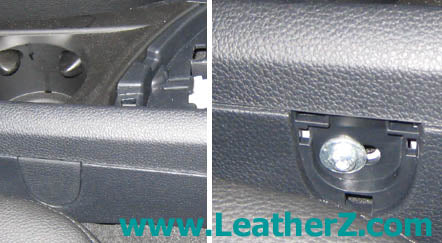
Along the passenger side of the console, there is a plastic cover. Move the seat so you have access to the cover and gently pry it off. Take care to not damage the surrounding console, but especially, do not damage the seat. With the cover removed, you will expose a T-20 screw. Remove it.

At the front of the emergency brake boot opening is another 10mm nut. Remove it.

At the back of the console, next to the iPod plug, is another cover. Remove it and remove the 10mm nut. Set both to the side.

Use an Interior Trim Tool to remove the iPod interface by prying it up. On the underside, you will need to disconnect the 3 plugs. Remove the interface and set to the side.

At the back of the armrest is a trim panel. You will need to remove the panel by prying at the indicated spot. The panel has a series of clips holding in place.

With the panel removed, remove the two 10mm nuts at the base of the armrest. There are 2 wiring harnesses you will want to disconnect from the console as well.
 Removing the console, for real this time
You now have all the fasteners removed and are ready to remove the console. Before you begin, you will want to pull the emergency brake handle all the way up. All the way. I wrapped the handle in painters tape to prevent any damage as the console is big and awkward. Put the car in 2nd or 4th gear.
To remove the console, lift at the rear as indicated and slide the front back. If you have the emergency brake up enough, you will not come in contact with it.
 Removing the Ashtray Trim Panel
To remove the ashtray trim, there are two Torx screws (T-20) that connect the center console to the bottom of the ashtray and the ashtray to the bottom of the ashtray trim. Remove the two T-20 screws:

With the Torx screws removed, you can remove the Ashtray Trim from the center console. At the front of the Ashtray trim, there are 2 “prongs” that extend out and under the HVAC stack. On the underside of each of these “prongs” are two press clips. Squeeze the press clips in and push to separate the “prongs” from the console. You will now be able to remove the Ashtray Trim panel. Take your time and if needed, you should look on the underside of the console for each clip.
Installing the Center Console
Installation is the reverse of removal.

