Hey guys - I came at the LCI Halogen wiring from a different angle that I wanted to share in case helpful for anyone.
I wanted the choice for both the side/brake combo filament bulb to run in addition to the LED bars or to pull the bulb and just run the LED bars or black out the rest a la Blacksport's suggestion so I wanted to do the "Jump" wire option (transfer power from Slot 2 to 1 - keeping power to both) instead of the "wire-moved-from-2-to-1-in-harness" route.
That being said I was nervous splicing any wire etc. on the wiring harness side and figured the bulb socket was easier to replace if I messed anything up, so I did a quick and easy mod to the socket itself.
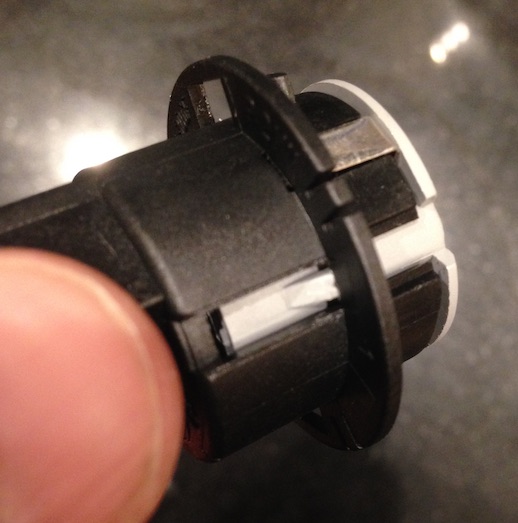
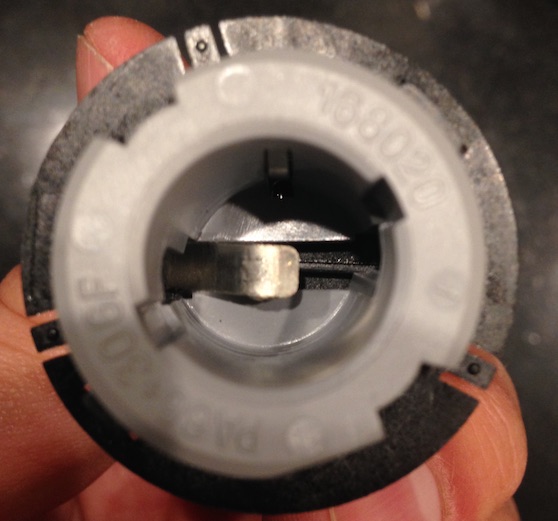
The first step is to remove the bulb socket - and bulb, and pry the two little fangs (grey) that hold the inner bulb socket in place.
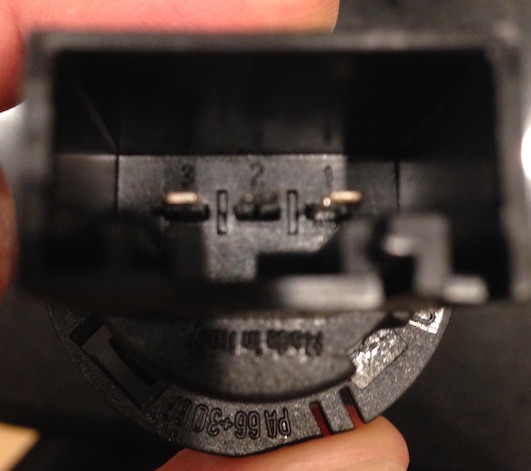
BEFORE you pull the inner socket out, you may want to put some kind of marking on the side of the outer socket so you know which side 1 vs 3 is on, without having to look at the markings
Next up - remember we are trying to link connection point 2 with connection 1 - so when you flip the socket over to work on it - it it will be apparent why it's important to know in advance which sides you're looking to connect without having to refer to the markings
It will also become really obvious how the 3 connection points work once you get the inner socket out. Also be CAREFUL about flipping the outer socket over once you have the inner socket out - as these metal contacts can now fall out (no big deal if they do, since it's also pretty straight forward how to put them back in).
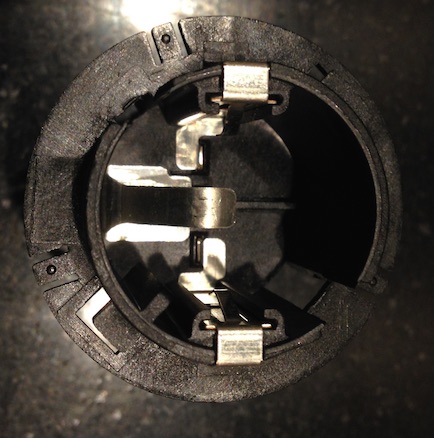
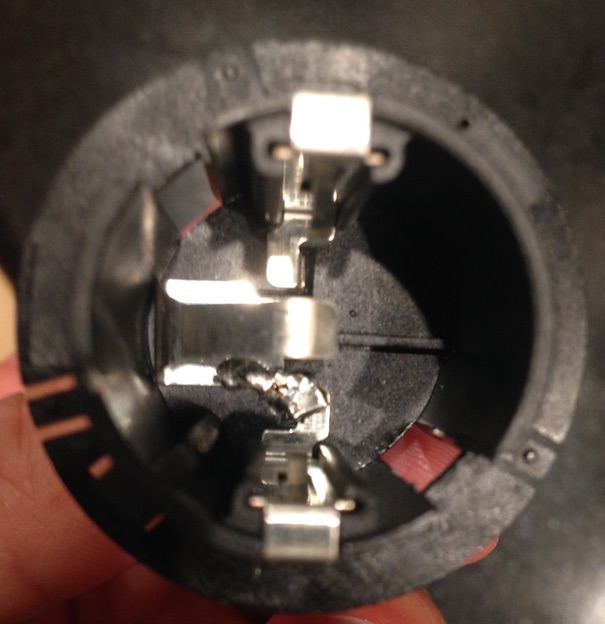
Since we know which sides we're looking to connect before we touch anything - we should be confident we're going to be connecting Wire 1 and 2. I'm pretty sure connecting 2 and 3 would be a really bad idea (power to ground???) so make sure you again know which side you're connecting. And from there it was easy to fit a little flux through the outer socket and connect the two contact points (1 and 2) internally using a soldering element.
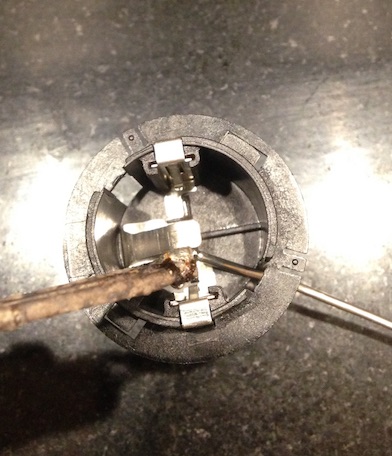
When it's done - it should look like this.. At this point hold everything in place (the contacts from sliding out) and flip it back over and for sanity check make sure again you've connected points 1 and 2 and NOT 2 and 3
Replace the inner socket - here's where it will sort of test your soldering skills, if you left too big a dimple, it might take a little massaging to get it all down. Worst case you may have to use the iron again to flatten out your solder job.
Once the job is smooth enough to get the inner socket clipped into place, work the bulb into the clip a few times just pressing in and out so it will seat itself in case the main bulb filament spring (the big prong) needs to settle again.
And that's it! It will function as though you have a jumper wire connecting 1 and 2 without any modification to the wiring harness side. Old lights will remain plug and play.
Now the question is - to continue running full stack of filament bulbs in addition to the led bars or use canbus error-free LED replacements and Blacksport's high temp paint dip trick? Although I also sort of wonder about those led bars as standalone brake lights being bright enough at night vs. their running mode
And then of course there's the rear fog lights which would be a HUGE loss ... (perfect for certain "conditions" ;]).
Anyhow, hope this write-up helps someone out! Cheers