


|
|
|
 |
| 09-28-2018, 08:03 PM | #1 |
|
Lieutenant
   
271
Rep 437
Posts |
DIY - Finally How To OPEN YOUR HEADLIGHTS!
Hello 1addicts!!
I think it is fair to say that its been over a decade and there is still no actual write up on how to open you headlights. I think one of the main reasons is most people don’t want to share their knowledge so they can make money off of offering the service. To be honest its not hard and you shouldn’t be intimated. Each light takes about 30-45min to open. you don’t need an oven, but it can be beneficial. i personally just used a heat gun as it was easier to massage the channels when it came to cracking them open. Items required - Permaseal tool set (they are really beneficial for the underside of the lens. they cut right through the permaseal!) - Flathead screwdriver. (this is used to pry the channel up during the heating process - Wood chisels 1/4” & 1/2” (I found these tools really helpful to clean up the permaseal off the lenses and the headlight channels themselves, you get 90% of the surface clean! way better than using a flathead to scrape) - Morimoto Permatrator (Another useful tool but you don’t actually need it. just speeds up the process a little. it is a solvent that slowly changes the properties of the permaseal to become more butyl like. ) - Morimoto retro rubber (Butyl used to reseal the lights after work is all done!) - Morimoto headlight sealing clamps or any clamp in general to hold the lens to the headlight during resealing. Process Either of these steps work i will be outlining the heathen method as i found it to be more effective and consistent. - Oven preheat oven to 350f or 175c. make sure you do not put your headlights in during the preheat procedure. you want them to be in at a consistent temperature for 6-8min. you will have to do this a few times as the lights cool down. follow procedure below for opening. - Heat Gun TAPE THE LENS you will almost 99% have a screw driver slide on you. you want to avoid this. if you baked them tape them after they have come out of the oven. 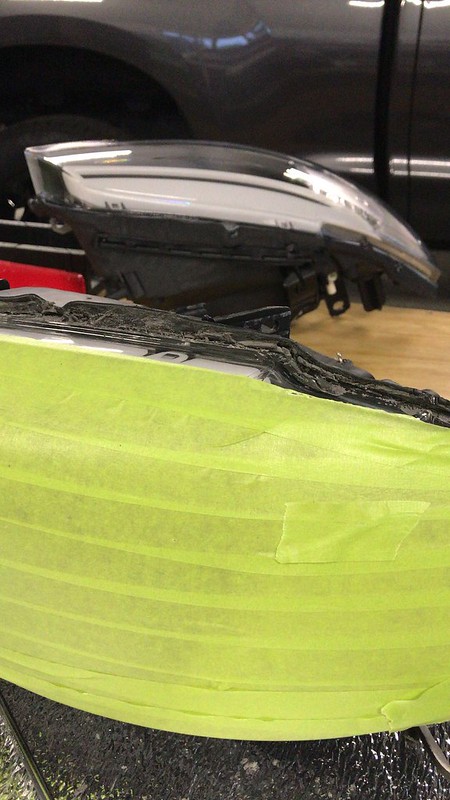 IMG_0863 by dan blythe, on Flickr IMG_0863 by dan blythe, on FlickrIf you chose to purchase the permatrator inject it into the channel and into the permaseal itself. let it sit for an hour or so. you can continue to add as you work your way through the process. With your heat gun on high, gradually go over the top channel of the headlight, work small sections at a time don’t heat it all up at once. Use your flathead to test for softness of the plastic. You don’t want it to be too soft but it can’t be too hard either or you end up risking splitting the plastic. You will want to start in the middle of the headlight, most people recommend a corner however I found you put a lot more stress on the heated plastic in the corners and they end up stretching a fair bit and wrinkling when it comes time to flatten the channels back. Once you have your heating method figured out use your flathead to pry UP on the channel. Do this on an angle and work your way down the headlight. if you pry directly up it will also result in wrinkling. You also don’t need to bend it to 90 degrees, 45-60degrees is plentiful and you don’t risk cracking the back of the channel. Work your way around the headlight BUT leave the corner by the side marker! You can get close to the corner but no more than a 1/2” as you will definitely split it if you get closer and you don’t want that. Also be careful around the clips. 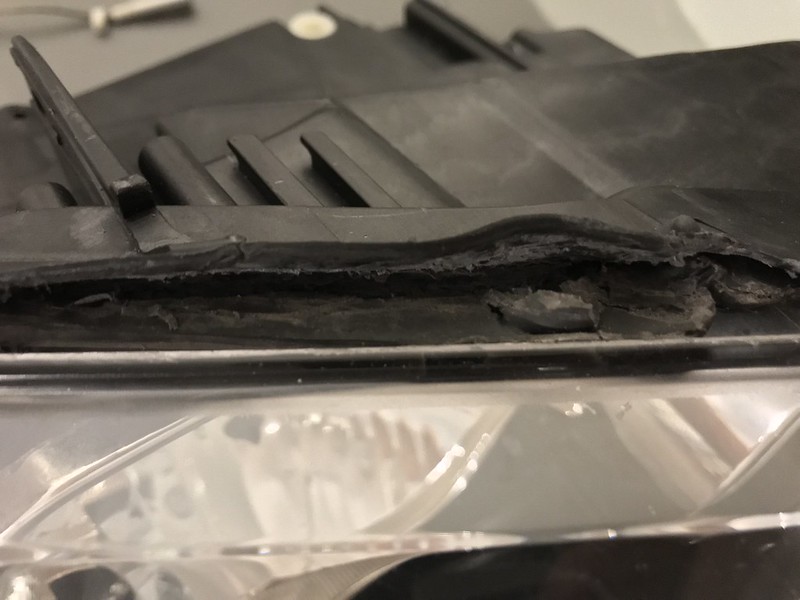 IMG_0972 by dan blythe, on Flickr IMG_0972 by dan blythe, on Flickr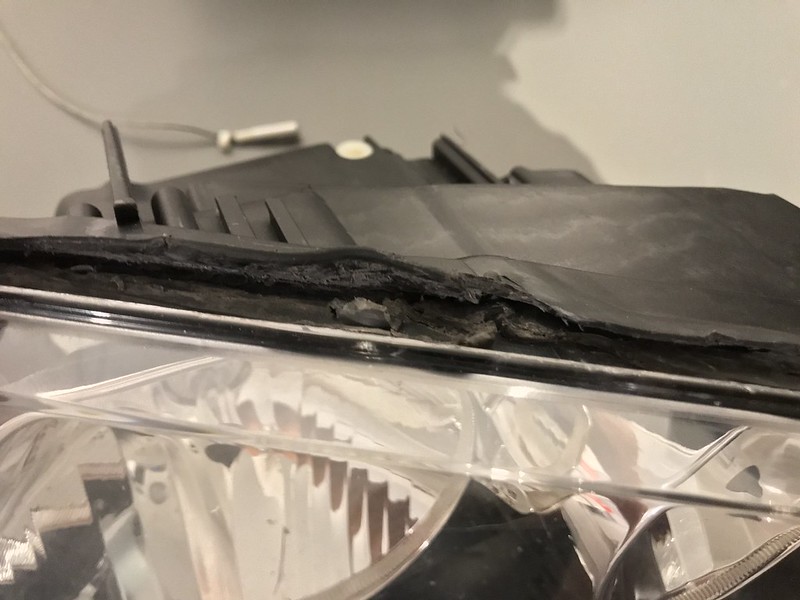 IMG_0975 by dan blythe, on Flickr IMG_0975 by dan blythe, on FlickrOnce you have gone around the light and opened up the top channel you will now want to get under neath the lens to split the bottom portion of the permaseal. This is by far the trickiest part. Heating the channel again, I started at the bottom of the light(to hide the initial opening spot), start by scraping out the permaseal with your flathead to expose the back of the headlight lens. you really want to get deep in there but go to far and you can puncture right through the back of the channel! Once you have gotten a nice view of the back of the lens you will want to apply more heat and slowly insert you screw driver behind the lens and then angling it away from yourself so the tip of the drive is facing toward you, you will hear a few pops, this is the permaseal being broken from the lens and the bottom channel. (the lens may flex a bit don’t worry as long as its warm it won’t crack.) Once you have done this you can insert a permaseal tool behind the lens and drag it around the headlight. You won’t be able to use the tool for corners however, i recommend a screw driver on an angle. Work your way around the lens once again. It will become noticeably easier as you work your way through. Once you have gotten to 1/2” away from the corner of the corner light lens you can stop. Gently lift up and pull and the lens should pop right out of the corner!!  IMG_0976 by dan blythe, on Flickr IMG_0976 by dan blythe, on Flickr IMG_0980 by dan blythe, on Flickr IMG_0980 by dan blythe, on FlickrCLEAN UP This is pretty straight forward, use a chisel or a screwdriver to clean the channels up, also the leftover permaseal on the lenses. Try and remove as much permaseal as possible. you don’t need to fully remove it all but at least 90%. the butyl can fill in the rest. Once you have scraped them out, heat the channels up again and do your best to restore them to how they previously were. they should look something like this.. 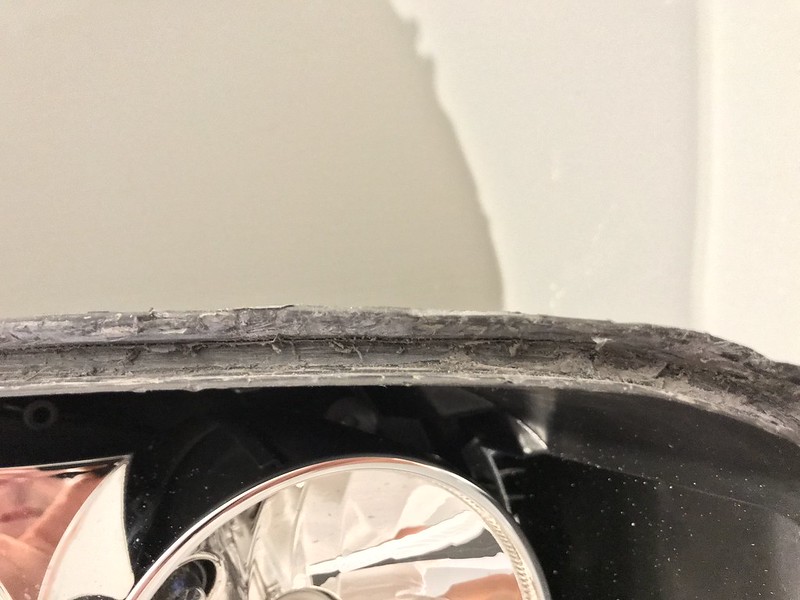 IMG_0978 by dan blythe, on Flickr IMG_0978 by dan blythe, on Flickr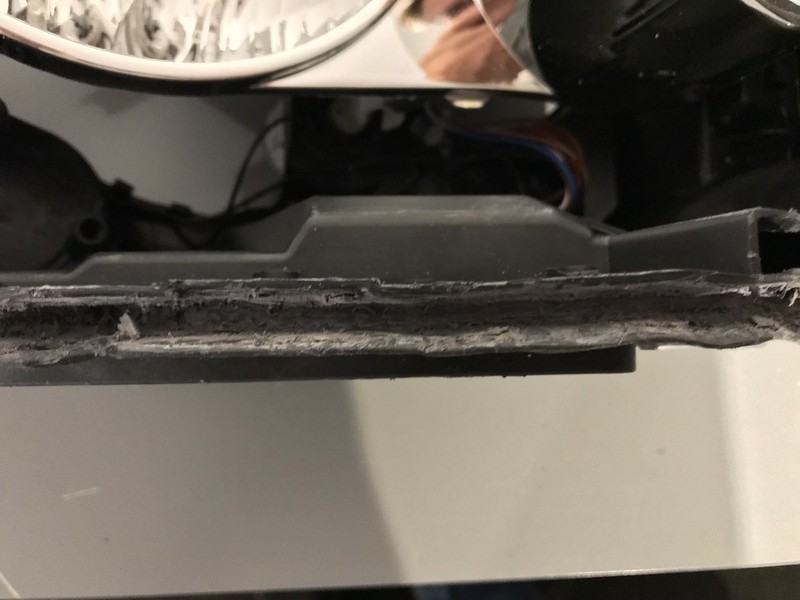 IMG_0979 by dan blythe, on Flickr IMG_0979 by dan blythe, on Flickr IMG_0977 by dan blythe, on Flickr IMG_0977 by dan blythe, on Flickr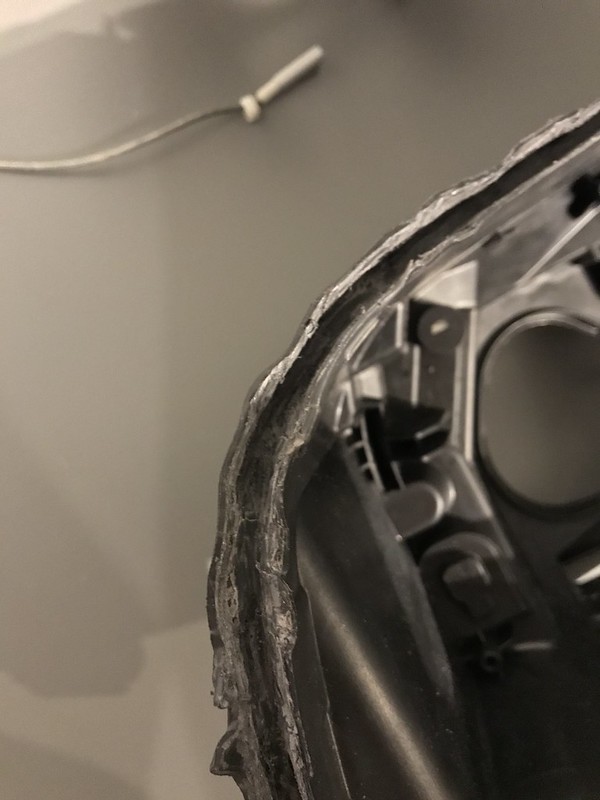 IMG_0967 by dan blythe, on Flickr IMG_0967 by dan blythe, on FlickrMOD THEM I’m not going to get into the halos there are guides on e90post. if you are changing the corner marker or installing demon eyes its pretty straight forward. I won’t get too technical but there are clips on the back of the shroud to pop the corner marker. work your way towards the very corner. 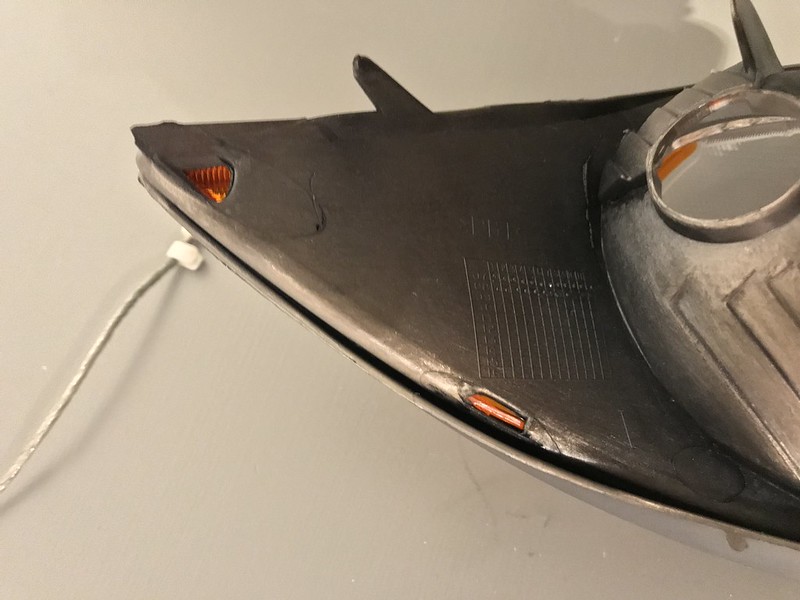 IMG_0968 by dan blythe, on Flickr IMG_0968 by dan blythe, on FlickrWhen installing demon eyes i used a d2s bracket for demon eyes, trimmed it down on either side. I then cut the clear plastic above the projector and slid the d2s bracket in-between the metal surround and the plastic bracket. it is a tight fit and secure. see the picture below. 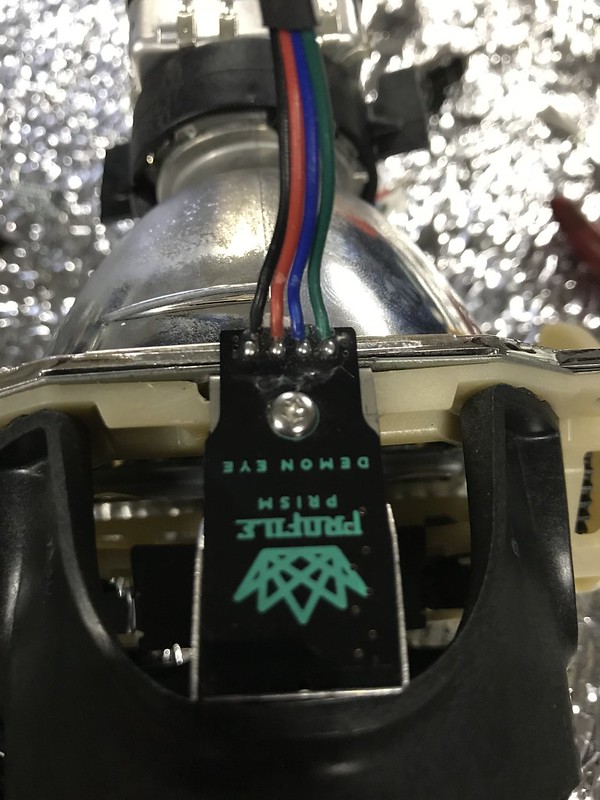 IMG_0892 by dan blythe, on Flickr IMG_0892 by dan blythe, on FlickrSEAL THEM Run a strip of retro rubber around the light ( Don’t start in a corner, start in the middle or partway up the side marker) , pushing it into the channel as you go. once you have laid it in you want to pre heat it with the heat gun on low gradually and consistently going around the light. Once again press it into the channel. This will set the butyl and will also prevent shrinkage when the light cools down after the lens is on. when you have done the above steps Firmly press your lens onto your headlight. don’t for them into the rubber you just want them to be set before they go in the oven. preheat oven to 350f or 175c. make sure you do not put your headlights in during the preheat procedure. you want them to be in at a consistent temperature for 6min Remove them from the oven, Press firmly again until they are bottomed out in the channel. clamp the lenses to the housings and wait for them to cool down! clean up the butyl and there you have it. no more $2000 headlight bills just what you pay for in materials! I hope you all enjoy this little DIY and feel free to ask questions! Acoustix 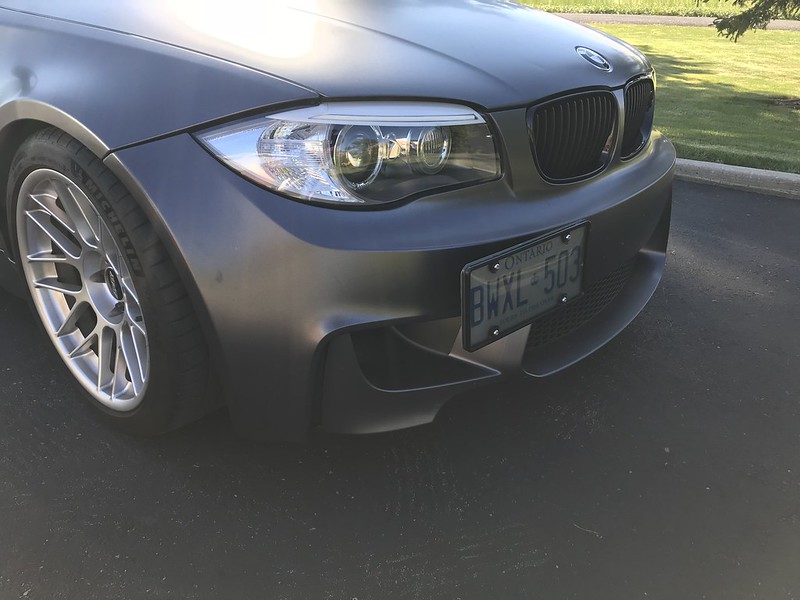 IMG_0908 by dan blythe, on Flickr IMG_0908 by dan blythe, on Flickr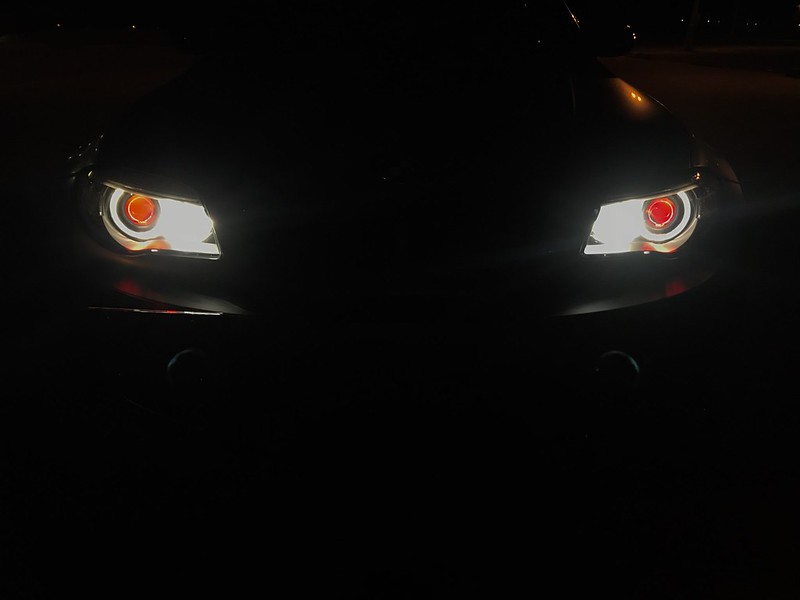 IMG_0906 by dan blythe, on Flickr IMG_0906 by dan blythe, on Flickr
__________________
 Last edited by acoustix; 09-28-2018 at 08:39 PM.. |
|
Appreciate
14
1and11910.50 gtjosh20.50 hellrotm4141.00 Gray_Panther1724.50 chosen13.50 Matticus913516.50 Furqwan3.50 houtan732.50 Dackelone10796.00 desertman1232234.50 Jmontans6.00 Z820.00 cerealwars200.00 TimCSquared33.00 |
| 10-02-2018, 01:20 PM | #5 |
|
Brigadier General
 
3517
Rep 3,722
Posts |
acoustix you rock! This is great, can't wait to do mine eventually lol
__________________
"Tobias" 2013 135i ///M-Sport 6MT • Pure Stage 1 • XDI 35 HPFP • 404whp/440wtq |
|
Appreciate
1
acoustix271.00 |
| 10-02-2018, 01:59 PM | #6 |
|
Loves me some MHD!

1911
Rep 1,753
Posts |
Yeah, me toooo
 I've been window shopping over on bavgruppedesign.com Lots of nifty shapes that fit, but I suspect I'll stick with the classic round halo's when I finally pull the trigger on a set
__________________
1and1
135i - E82.N54 2009 BSM - MHD / xHP / DCI, PR CP & 7.5" Race IC / N55 mid & Borla . . WL RSFI, Koni, Eibach & Dinan CP's, M3 CA's / EBC Red's & Firehawk 500's X1 - E84.N20 2013 MGM - JB4 - The Wife's, now with new turbo & ewg |
|
Appreciate
1
acoustix271.00 |
| 10-03-2018, 09:01 AM | #7 | |
|
Brigadier General
 
3517
Rep 3,722
Posts |
Quote:
__________________
"Tobias" 2013 135i ///M-Sport 6MT • Pure Stage 1 • XDI 35 HPFP • 404whp/440wtq |
|
|
Appreciate
1
1and11910.50 |
| 12-04-2018, 03:37 PM | #10 |
|
1Addict
3507
Rep 8,096
Posts |
Are there replacement covers available somewhere? I'd probably pass on this job except to install new lens covers.
__________________
Daily: E82 Mutt
Hauler: M57 Truck Looking for: 997/991 |
|
Appreciate
0
|
| 12-05-2018, 09:34 AM | #12 |
|
Major
 759
Rep 1,125
Posts |
|
|
Appreciate
0
|
| 12-05-2018, 03:24 PM | #14 | ||
|
New Member
8
Rep 19
Posts |
Quote:
As far as replacement lenses, I have not seen any available. Which is a bummer cuz mine have some scratches from the PO. Big thanks to acoustix for putting this together! Quote:
|
||
|
Appreciate
1
acoustix271.00 |
| 12-05-2018, 04:01 PM | #15 |
|
Loves me some MHD!

1911
Rep 1,753
Posts |
Bavgruppe has some lenses but none for the 1 series currently... could maybe shoot them an email and ask?
__________________
1and1
135i - E82.N54 2009 BSM - MHD / xHP / DCI, PR CP & 7.5" Race IC / N55 mid & Borla . . WL RSFI, Koni, Eibach & Dinan CP's, M3 CA's / EBC Red's & Firehawk 500's X1 - E84.N20 2013 MGM - JB4 - The Wife's, now with new turbo & ewg |
|
Appreciate
0
|
| 12-06-2018, 08:46 AM | #17 |
|
Sideways and Smiling
3037
Rep 2,860
Posts
Drives: In Exuberance
Join Date: Mar 2017
Location: Rosamond, CA USA
|
This is great info, I think I still have an old light to experiment on. I want to fit some angel eyes into my halogen housings. I think the Xenon lights look weird, and they're stupid expensive; halogen is so classy and cheap (I got a brand-new light for $63 on Amazon).
__________________
2012 BMW 328i 6-Speed Wagon | Deep Sea Blue with Grey Dakota Leather | Manual Swap, 330i Intake + Tune, 3.15 Helical LSD, Öhlins R&T
(SOLD) 2009 BMW 128i 6-Speed Coupé | Monaco Blue with Black Sensatec | chris_flies' 128i thread |
|
Appreciate
0
|
| 12-26-2018, 12:58 PM | #18 |
|
Lieutenant
   
271
Rep 437
Posts |
you can't buy replacement lenses, however you could just buy valeo euro headlights open and swap the lenses over it would probably be around 5-600us to do this. this is exactly what I did.
Boosted_135 they will have a bit of a wave to them but it all depends on how much time you spend fixing the channels. I will update you with a few pictures of the part you see in the engine bay.
__________________
 |
|
Appreciate
0
|
| 12-26-2018, 02:14 PM | #19 |
|
Lieutenant
   
271
Rep 437
Posts |
what you see with hood open
__________________
 |
|
Appreciate
0
|
| 12-26-2018, 02:24 PM | #20 | |
|
European Editor

10796
Rep 22,992
Posts |
Quote:
Consider that DONE! Nice work acoustix  Dack
__________________
|
|
|
Appreciate
3
|
| 12-26-2018, 03:43 PM | #21 |
|
Loves me some MHD!

1911
Rep 1,753
Posts |
Wow! That's so much better than I was expecting!
__________________
1and1
135i - E82.N54 2009 BSM - MHD / xHP / DCI, PR CP & 7.5" Race IC / N55 mid & Borla . . WL RSFI, Koni, Eibach & Dinan CP's, M3 CA's / EBC Red's & Firehawk 500's X1 - E84.N20 2013 MGM - JB4 - The Wife's, now with new turbo & ewg |
|
Appreciate
0
|
Post Reply |
| Bookmarks |
|
|