|
|
|
|
|
| 09-21-2008, 11:47 AM | #90 |
|
Collecting dust!

56
Rep 2,009
Posts |
|
|
Appreciate
0
|
| 09-22-2008, 05:45 AM | #91 |
|
Major
 
29
Rep 1,340
Posts
Drives: 2008 135i SGM MT
Join Date: Nov 2007
Location: Finksburg, Maryland
iTrader: (0)
Garage List 1995 Acura Integra SE [0.00]
2008 BMW 135i [0.00] 2006 Porsche Cayman S [0.00] 1999 Toyota 4-Runner [0.00] |
Those are the best looking grilles that I've seen on an AW 1er. :thumbup:
__________________
 2008 135i SGM |
|
Appreciate
0
|
| 09-22-2008, 08:16 PM | #92 | |
|
Collecting dust!
56
Rep 2,009
Posts |
Quote:
|
|
|
Appreciate
0
|
| 01-07-2009, 07:56 PM | #93 | |
|
Enlisted Member
 4
Rep 32
Posts |
Thanks AndyM for the DIY!
Quote:
There was a larger bend on the other end of the coat hanger to provide some grip/leverage. |
|
|
Appreciate
0
|
| 01-10-2009, 11:47 AM | #94 |
|
Lieutenant Colonel
 
326
Rep 1,805
Posts |
Thanks ^
__________________
-Nick
2018 BMW 440i - M Sport, Exec Glacier Silver Metallic/Coral Red Dakota Retired: '00 323i, '06 325Ci, '09 135i, '06 Z4M Roadster, '93 525i, '76 2002, '14 X1, '14 M235i, '16 X4, '16 435i |
|
Appreciate
0
|
| 01-11-2009, 07:43 AM | #95 | |
|
Private First Class
 7
Rep 139
Posts |
Exactly the technique I used last week - started looking thru my tools & realized I didn't have anything I could "modify" thus the coat hanger idea.
:w00t: Quote:
__________________
| JB3 :: BMS DCI :: BMS CDV :: RR Catless DP's :: Code3 FMIC | 420whp | 494 wtq - Map 8 on approx. 97 octane Euro Delivery - Munich | 10.24.08 @ 10:30am >> Dropped Off - Amsterdam | 10.31.08 @ 1:30pm :: 1469 mi. |
|
|
Appreciate
0
|
| 03-14-2009, 04:46 PM | #98 |
|
Practical Idealist

9
Rep 408
Posts |
Another thank you. As with most other folks, that first grill was a pain and the second was easy as heck.
I ended up using a slightly different set of tools which worked fine and were $9.95.  Also, since no one has posted a pic of the one on, one off with Montego... 
__________________
-f
2009 135 6MT Montego Blue Coupe, Sport, Prem, Cold, Nav, CA, iPod, Smartphone | Euro Delivery on 10/25/2008  |
|
Appreciate
0
|
| 03-14-2009, 06:06 PM | #99 |
|
aka 1013MM

1288
Rep 9,545
Posts |
I spent a day cussing at my grill and breaking some tools....surprisingly i did not break my car but I still wasn't able to change the grill out I'm giving up...
__________________
|
|
Appreciate
0
|
| 04-02-2009, 02:37 PM | #100 | |
|
Pirate
99
Rep 712
Posts |
Quote:
|
|
|
Appreciate
0
|
| 04-23-2009, 03:03 PM | #101 |
|
Captain
 29
Rep 769
Posts |
Just got mine today and installed them. The DIY was a big help! Thanks andy.
I decided to go with black with chrome slats since my car is jet black. I'll see how I like it, maybe I'll switch to all black, we'll see. Edit: added cell phone pic. I think I may switch to the black slats after all. 
__________________
 Last edited by scorcherjf; 04-23-2009 at 06:35 PM.. |
|
Appreciate
0
|
| 06-14-2009, 10:49 PM | #102 |
|
Captain
60
Rep 694
Posts
Drives: BMDUBS
Join Date: May 2009
Location: CA
|
like every other person that posted, first one was scary as s#!t, Thanks for the instructions!
__________________
 |Shadowline Grills|Hotchkis Front Sway Bar|DIY CF Black Fabric Trim|Carbon Fiber Trunk Spoiler|Black O.Z Ultraleggeras|BMW Performance Exhaust|M-Sport Bumpers w/ Fogs|Shadowline Diffuser|CSR Eyelids|BMW Performance Shifter/Boot and Handbrake|AFE stage 2 intake|Koni FSD + Eibach Pro-kit|///M mirrors|Blackline LCI| |
|
Appreciate
0
|
| 07-15-2009, 11:36 AM | #104 |
|
Major
120
Rep 1,002
Posts |
Ok so i've tried really hard to get this grill off without any success..
Can get the top clips off easily, but the bottom ones are really hard.. Maybe I am not understanding the instructions properly, but I have just ended up with a mauled bottom clip if anything.. (stupid "techie") I tried to use a coat hanger, didnt work, went and bought a right angle tool, didnt work (before it broke that was - grip slipped off..) Took it to BMW, they had no clue how to get it off.. The technician was fiddling around with a screwdriver and I see he has mauled the clip trying to get it off (bottom one) Could someone perhaps explain it a bit better (how to get the bottom clips off). BMW told me to come in on Sat and they'll take my bumper off for me to get the grills out.. :/ Thanks. |
|
Appreciate
0
|
| 07-15-2009, 01:00 PM | #105 |
|
Major
120
Rep 1,002
Posts |
Ok so i think i figured it out now.. Fixed the tool (superglue) and tried on the right grill (non-mauled)
Works fine.. Sigh.. The idiot BMW techie was pushing the bottom clip down on the left grill with a screwdriver, now i cant lift it up to straighten it out anymore. It stuck bending downwards (both clips) So now I dunno how to flatten it out again to get it up with the right angle tool..  FML FML |
|
Appreciate
0
|
| 07-16-2009, 06:31 AM | #106 |
|
Major
120
Rep 1,002
Posts |
Ok so if anyone cares i managed to fix the clips by unscrewing the torq screws, pulling the bumper back, and squeezing my hand + rubber glove down there.
managed to get a nice grip and get the clip back to normal. have taken the grills off and sprayed the chrome outline with plastidip.. |
|
Appreciate
0
|
| 07-16-2009, 07:35 AM | #107 |
|
Major
120
Rep 1,002
Posts |
Results!!!!! :
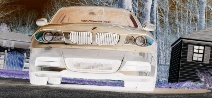
Before:  After:    Needs a few more coats on closer inspection but I had to snap them back in quickly as I had to go somewhere. Will do that on the weekend.. Its good for now tho  Thanks a lot for the DIY! Couldn't have done it myself without it! |
|
Appreciate
0
|
| 09-01-2009, 02:25 AM | #108 |
|
エアーマンが倒せない
288
Rep 2,037
Posts |
Thank you, AndyM for this DIY.
__________________
|
|
Appreciate
0
|
| 09-02-2009, 04:46 AM | #109 |
|
Private

6
Rep 95
Posts |
Once I got to the garage and looked under the hood, I didn't understand this DIY at all. You show how to unhook the bottom clips but not with the grill on the car... there's no room!
Anyway, instead of spending too much time trying to wrap my head around how the hell you accomplished this amazing feat, I decided to just remove the front bumper, and the entire installation took no more than 15 minutes. I would highly recommend that anyone having trouble installing their grills or understanding this DIY to just remove the front bumper. Basic procedure: 1. Remove the 4 Torx screws from the top (by the way, in case you didn't know, this can be done easily without a Torx driver by grabbing the outside edges carefully with a good needle nose pliers). 2. Remove the 9 or so screws from the bottom (all dark grey, easy to find, all towards the front). 3. Remove the 3 screws in the front of each wheel well (2 are dark grey, 1 is silver, may need to turn wheels to access easily). 4. Stick a splitting tool (I used a spatula from the kitchen) in the crack between the fender and the bumper (the one between the headlight and wheel well) BELOW the rubber piece and wedge that SOB apart (there are 2 'catches' to loosen) 5. Remove the headlight washer covers. Use the spatula to lift up the washer cover a bit, then pull it up with your fingers, grab the fat part of the nozzle *gently* with a pliers, and unclip the cover. 6. Lift the bumper off the little rubber stop up by the Torx screws and the bumper will come right off, allowing you to swap grills easily. 7. Put it back on! The only 'hard' part is when you put the bumper back on, it can be a little tricky to get the headlight washer covers back on. The nozzles are spring loaded with some serious tension, so what I did was grab the nozzle with a needle nose pliers by one of the two little nubs at the end, pulled it out most of the way, then carefully grabbed the fat part of the nozzle with another pliers, dropped the first pliers, and clipped the cover back on. You just have to be careful not to let the spring send the pliers flying into the paint! Go slowly and carefully for this part and the rest is easy as pie. Here's proof:
__________________
2009 135i 6MT /// Jet Black \\\ Savanna Beige /// Premium \\\ M-Sport /// Active Steering \\\ Heated Seats /// Premium Hi-Fi \\\ iPod/USB adapter
 |
|
Appreciate
0
|
Post Reply |
| Bookmarks |
|
|