

|
|
|
|
|
| 04-25-2010, 03:49 PM | #1 |
|
Colonel
 131
Rep 2,408
Posts |
Vishnu Methonal Kit 135i Specfic DIY
Vishnu Meth Kit 135i Specific Install
Tools needed Wire Crimps (or pliers) wire connections wire cutter wires screwdriver Sauder heatshrink tubing electrical tape 4 #6 bolts with 2 washers each 5 3/8 bolts with 2 washers each Drill and drill bits from 1/8" to 1/2" 10 wrench metal clothes hanger I tried to make this install as easy as possible while at the same time trying to maintain a factory look. This install will take a good days work depending on your skill level and attention to detail.It is easy to do and I think anyone that knows how to sauder can do. I will also take no responsibility when you work on your car and you do so at your own risk. Start by opening your trunk and removing the center section by just pulling up. Now take the 10 wrench and undo the negative terminal on the battery and set it on the ruber cross brace in the trunk. No there will be 3push fitting holding each side down. 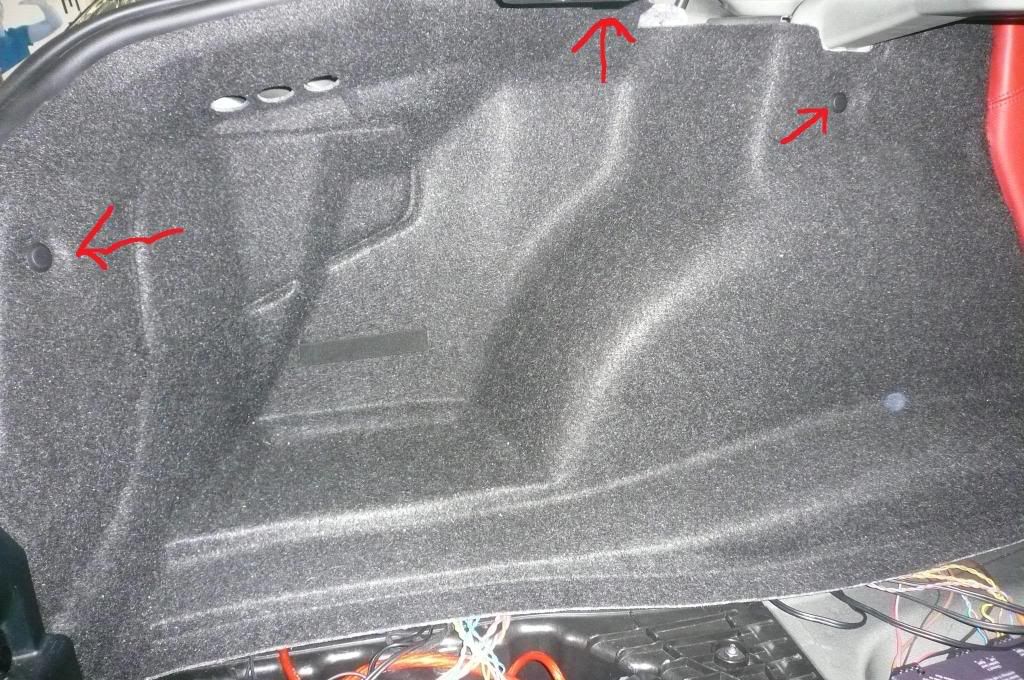 Remove these fittings by putting a screw driver under the center section and pry it up then you will be able to remove the larger diamter fiting. Also remove the weather stripping on the trunk simply by pulling up on it. 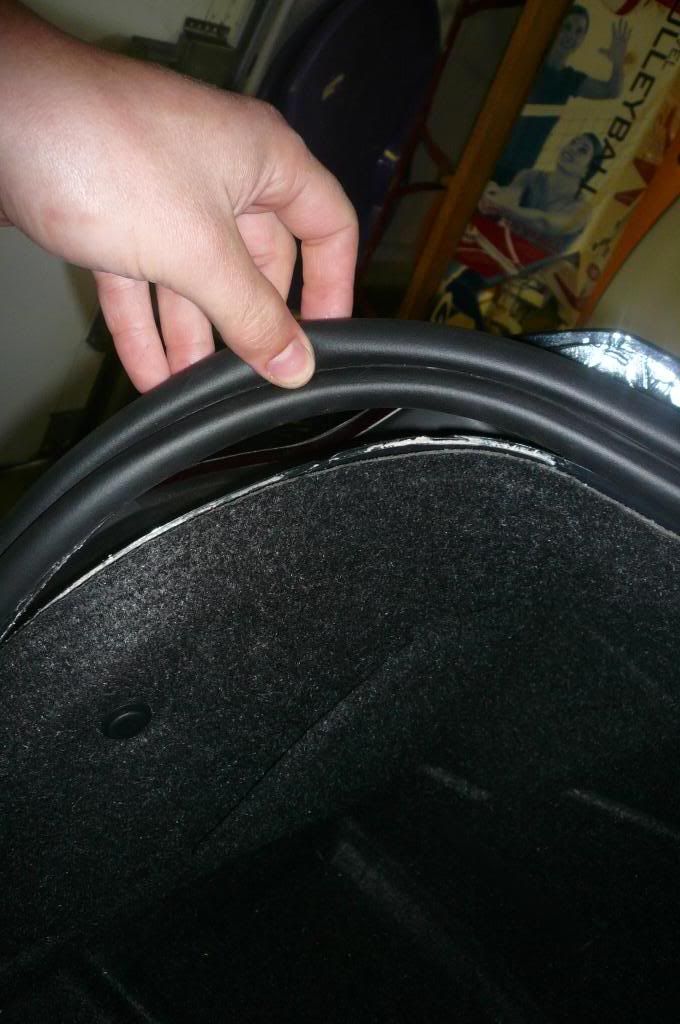 Now fold go to the back seat and remove the rear seat (this is optional but makes the next steps easier) you do this by pulling up on the front of the seat and the clips will give way and you can pull it out. Now grap the top of the side bolster (near the top of the seat belt) and pull and this will come undone, do this to both sides. 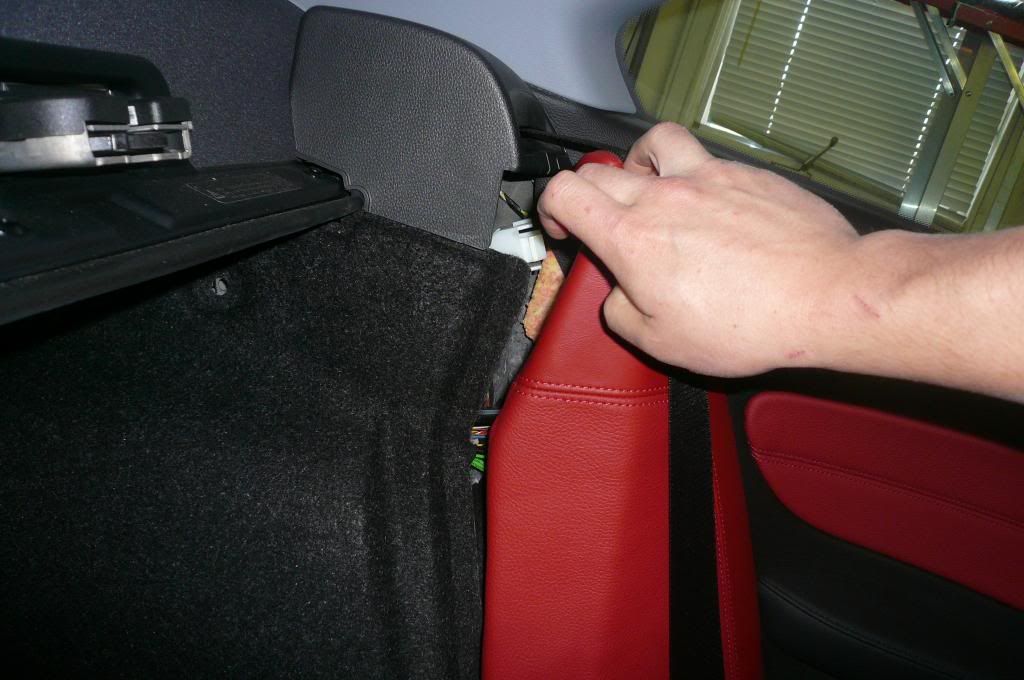 Take the right bolster completely out by keep pulling forward and then up. You can now take out to two inner sides of the trunk. Now take the pump that is attached to the wiring harness and cut the positive and negative wire from the pump to the harness this needs extended (make sure you leave a good 6-8" on the pump. Measure out new wire so that is able to reach from one side of the trunk to another. On one end of the new wire put on either a male or female connection (dependent of what you will put on the pump). Once the connectors are put on sauder each wire one to the positive wire and one to the negative wire on the harness make sure to put on the heat shrink tubing before you sauder (either mark these new wires as positive or negative or use different color wires). While we are on the harness you will also want to extend the postive and ground wires (they have the ring connectors already on them) by a good 8-10 inches. You are now done modifing the harness. For those that still have the factory amp you will want to remove this and place it right next to the battery like I have my pdx-5 in this picture. 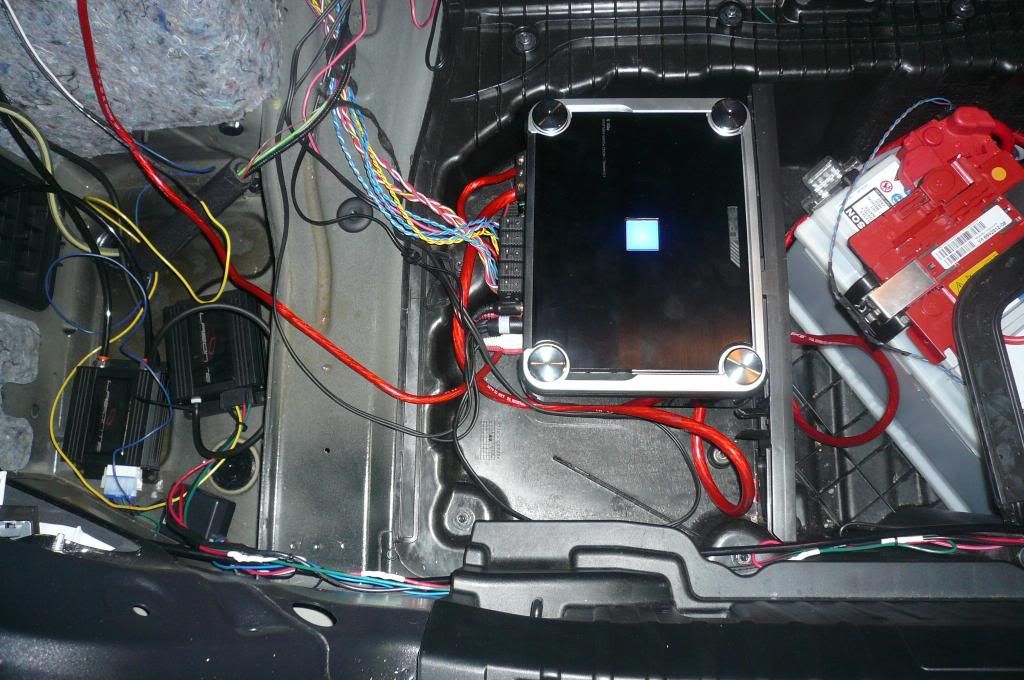 Now place the two controllers in the spot were the old amp sat but please remove the amp bracket. Dont put on the adhesive on the controlles yet. 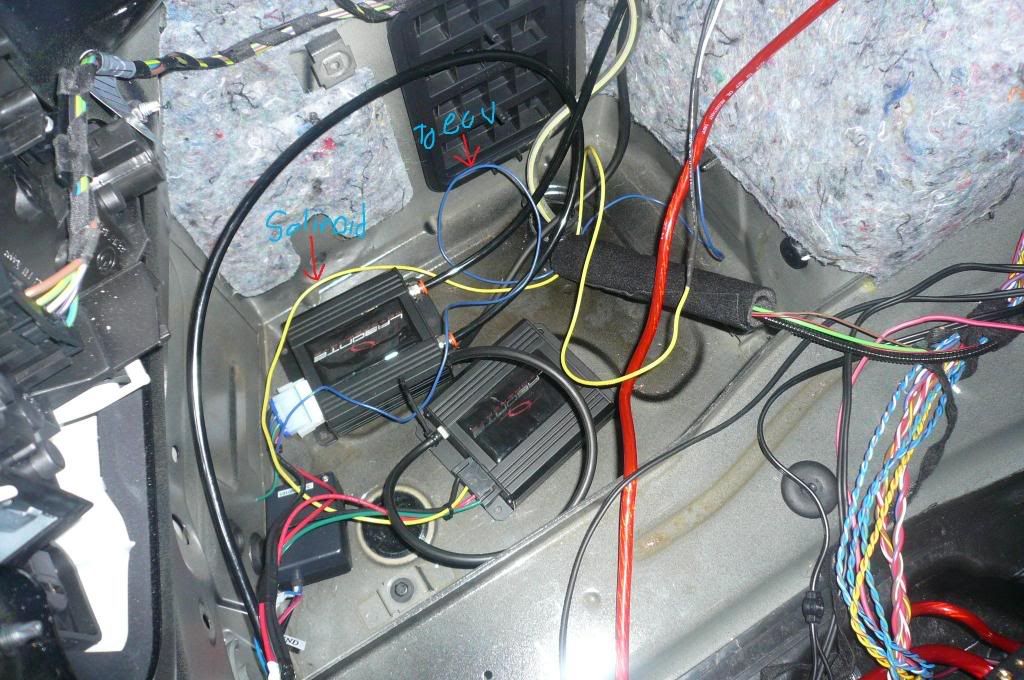 Now leave the yellow wire (solenoid) and the blue wire (progressive) in the driver side hand compart ment and route all the other wires underneath the plastic enclosure that contains the lock. You will want to run it under the little bump in the side and will have to pull it out in the middle and run it back in the other little bump on the other side all the way to the passanger side compartment. Also leave the positive and negative connections in the middle so you will be able to connect them to the battery. 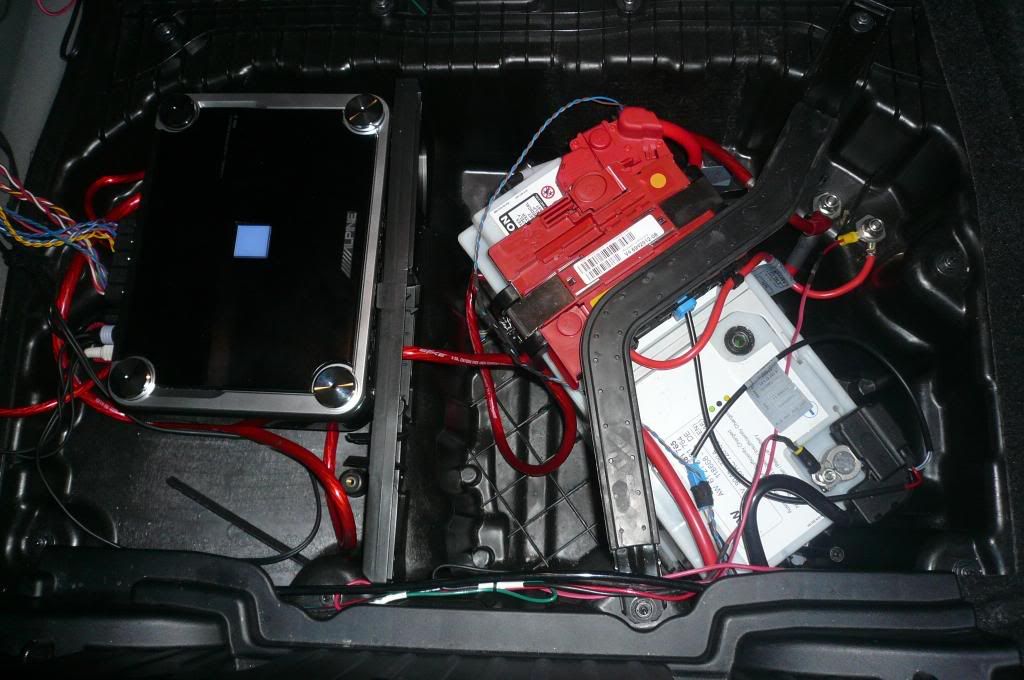 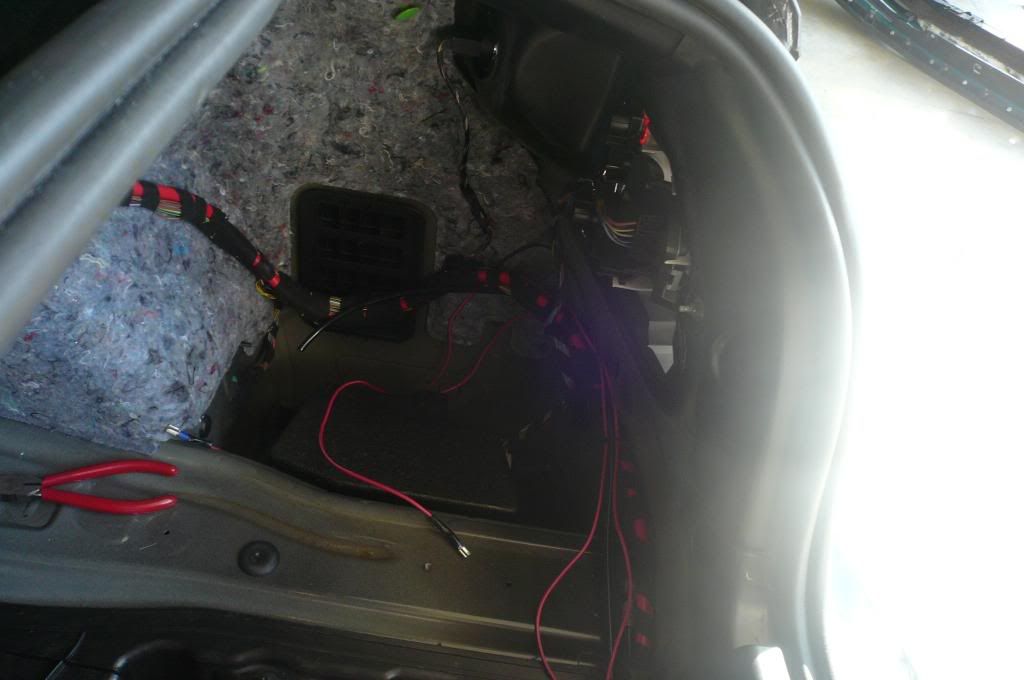 I decided to run all my lines inside this is not only easier since you can do everyhing with your car on the ground and if there was a leek it wouldn't be dumped on a hot exhaust which could then lead to a fire. If you want to run your lines under the car skip the next two paragraphs.Lets start in the front of the car by taking off all the cowling in the engine bay (just like you were about to install a tune). After this is complete you are going to want to take off the plastic cover underneath the steering wheel it is attached by 3 bolts and one push connection. 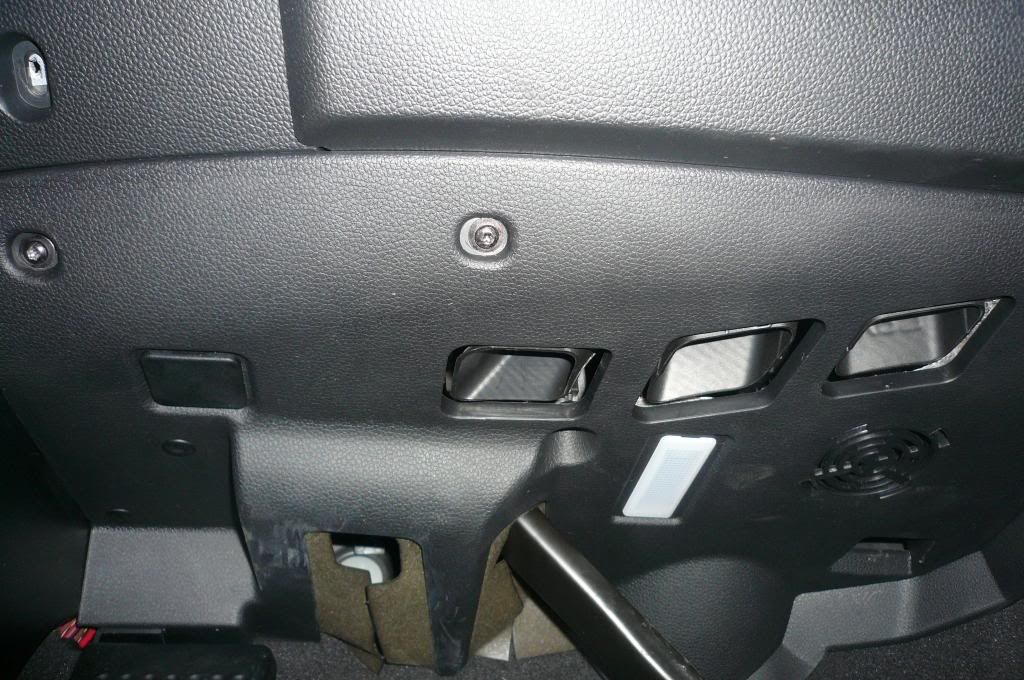 Now we are going to take the side panaling off this is attached by two bolts and a couple clips. First take off the weather stripping that is on the door jam take off the bolt that is holding the hood release lever this will reveal another bolt behind it remove this and slowly pry this cover off all thats holding it on is clips. 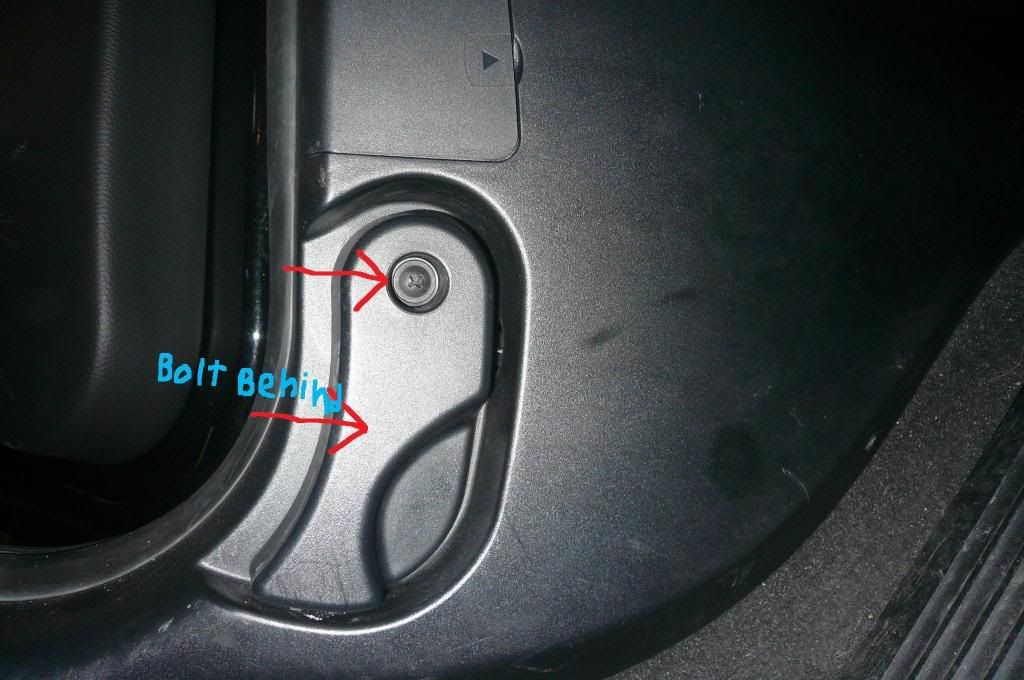 It is now time to remove the plastic door skid this is removed by just prying up on one end and working your way down its held on by a couple clips. Now lets remove the driver rear seat side panel do this by removing the door weather stripping that is covering this panel now just pry on the panel from the driver side door and it will pop loose.  Now its time to route the meth line, the two free (white and black) lines, and the white boost tubbing. *Do not cut any lines until it is all ran* Start off by tappin off the ends of the boost and methonal lines. Then collect all the lines and tap the front of them together. 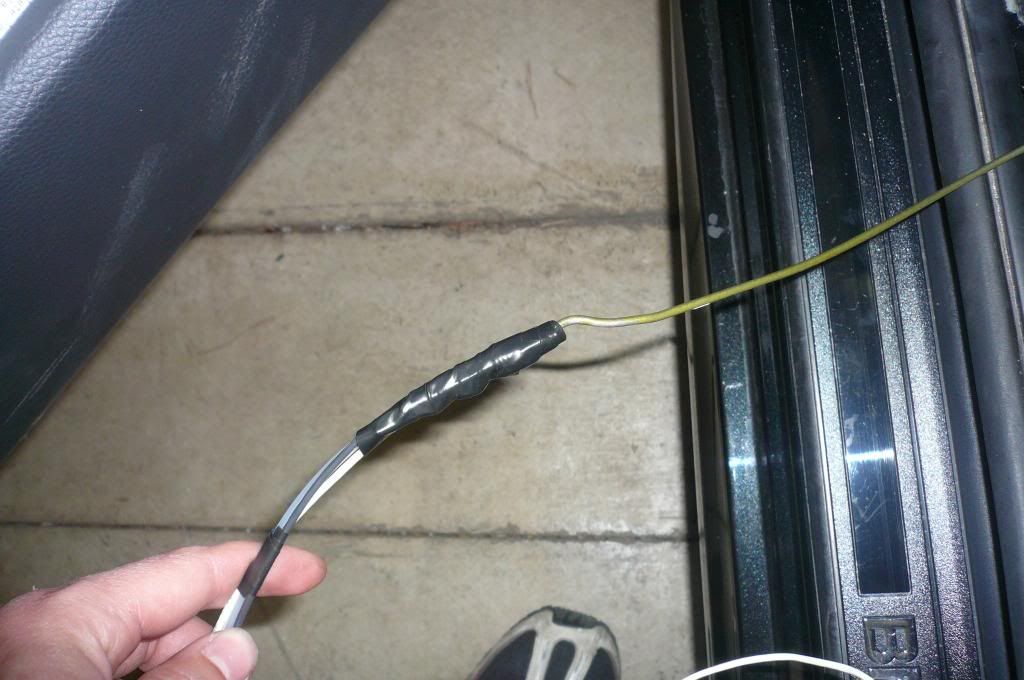 Route the line from the trunk to the engine compartment. Start routing the line between the metal bracket in the trunk then behind driver side rear interior trim. 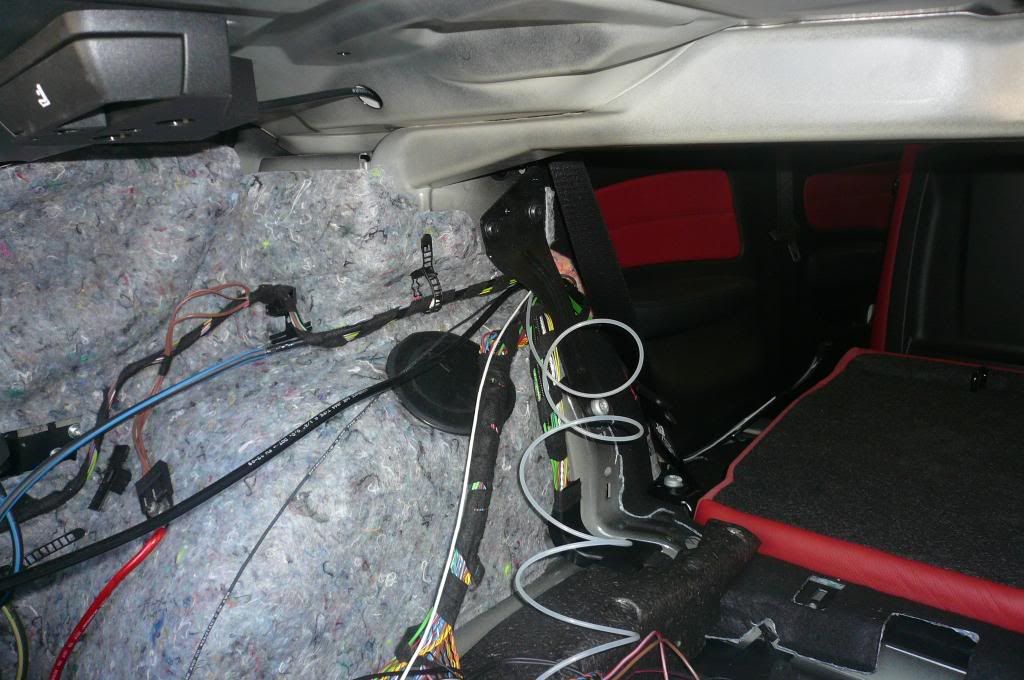 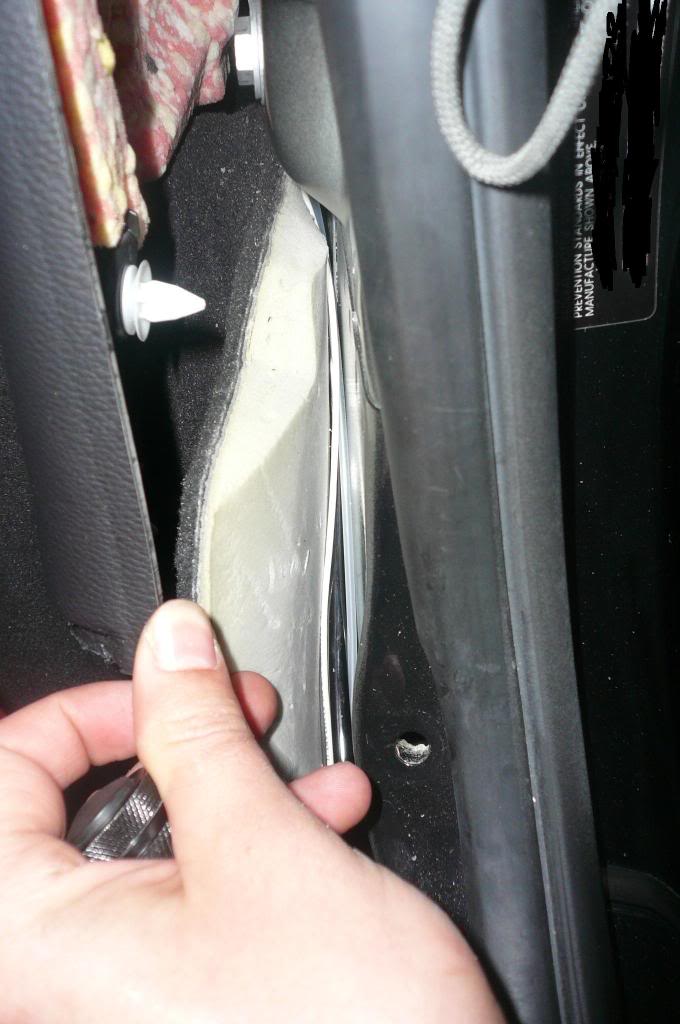 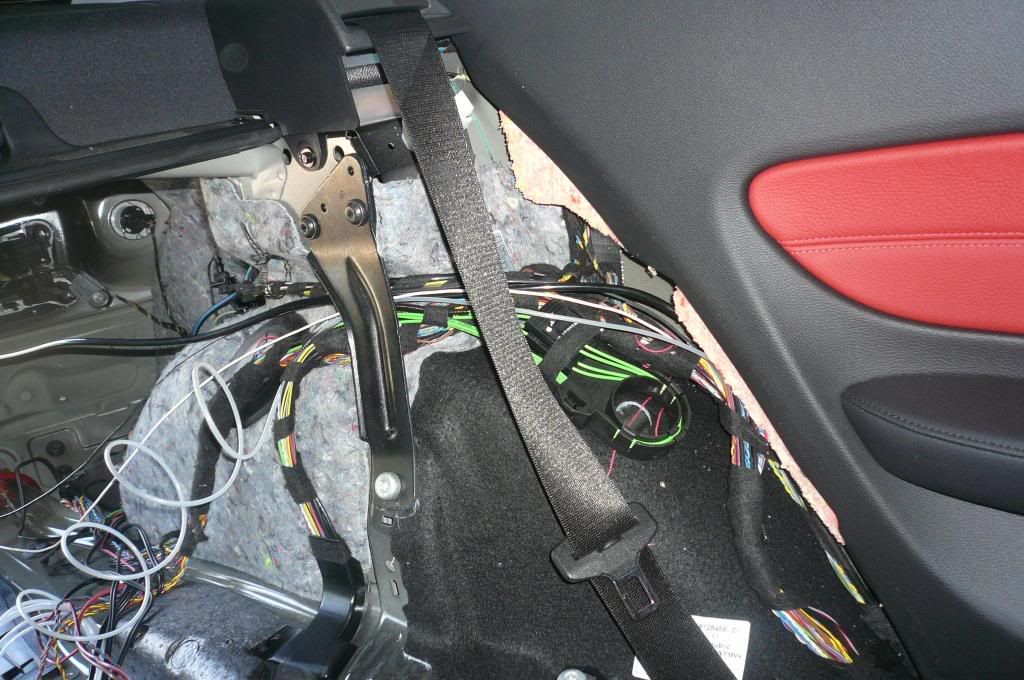 Then lift the carpet off of the door sill and tuck the lines down next to the exisiting electircal lines.  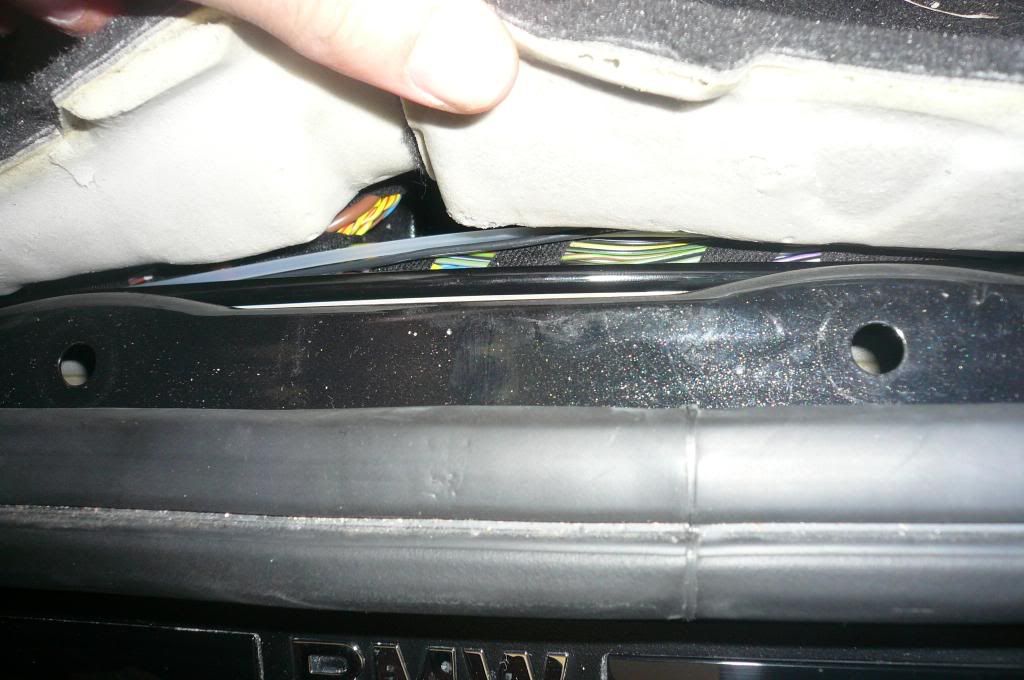 Now look up under the steering column and you will see this. 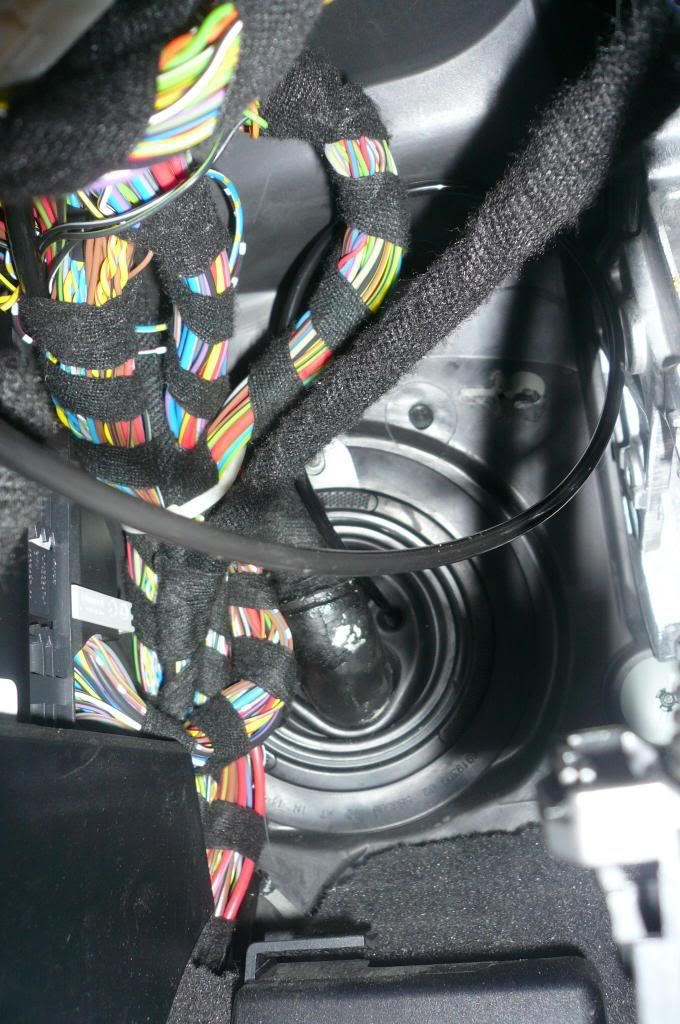 There are two empty holes in the rubber grommet run the meth line alone through the right one and the rest of the lines through the top one. Start by puncuturing two holes in these with a screwdriver. Then tape the meth line to your clothes hanger and lube up the top of the tap so it will slide through easier. The clothes hanger will come out here. 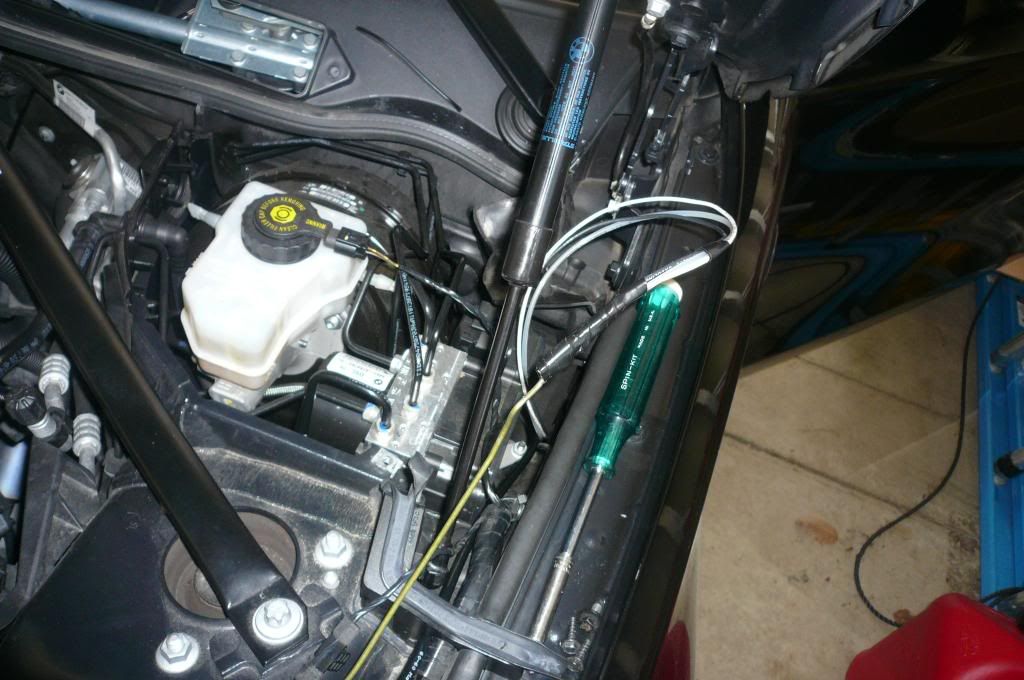 Take the tap off the meth line and do the same thing to the other lines but through the top hole in the grommet. Now you need to route one electrical line to were you are going to place your solinoid and the other to the computer (it doesn't matter which one just make sure you write it down). Follow this guide to tap the line into the ecu (http://www.vishnutuningforum.com/for...ead.php?t=1041) Route the boost line to the vacuum line that is either attached to your bov or diverter valves. Cut the vacuum line in half and use the tee to put them together. Then cut a 4" piece of the included vacuum line and attach it the the T and the boost line tie both ends off with the included zip ties. Pull enough methanol tubbing into the engine bay that you can route it to the charge pipe elbow. Now go back to the trunk and route all the lines to the passanger side trunk where you set the two controllers in before. 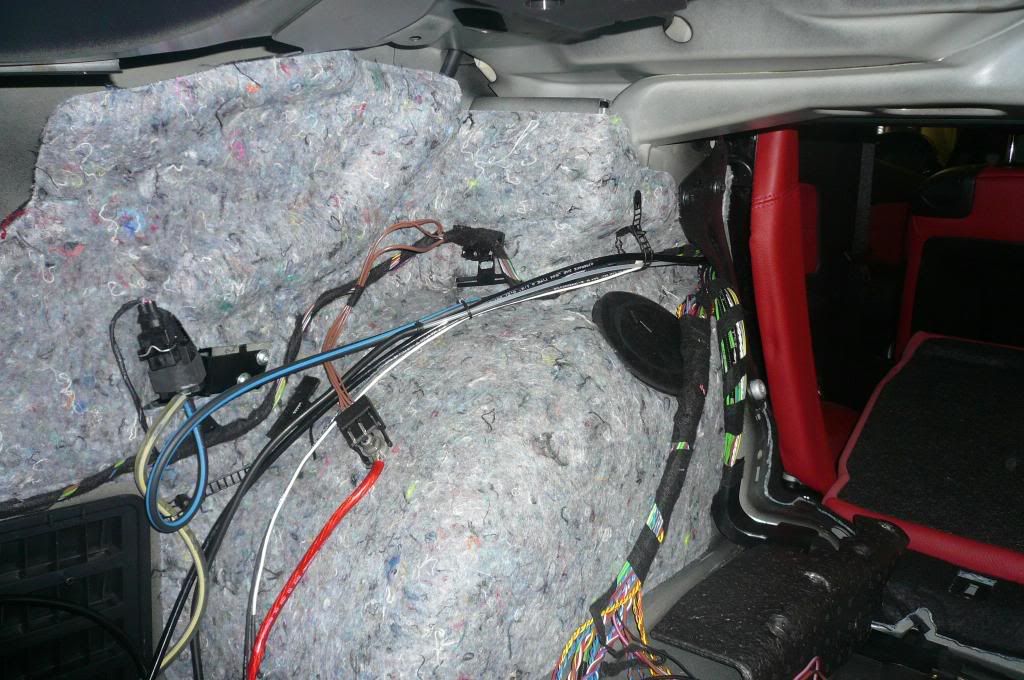 Make you sure you have enough slack and then you can cut the methonal line it then goes into the controller but make sure you plug this end in the one marked out. 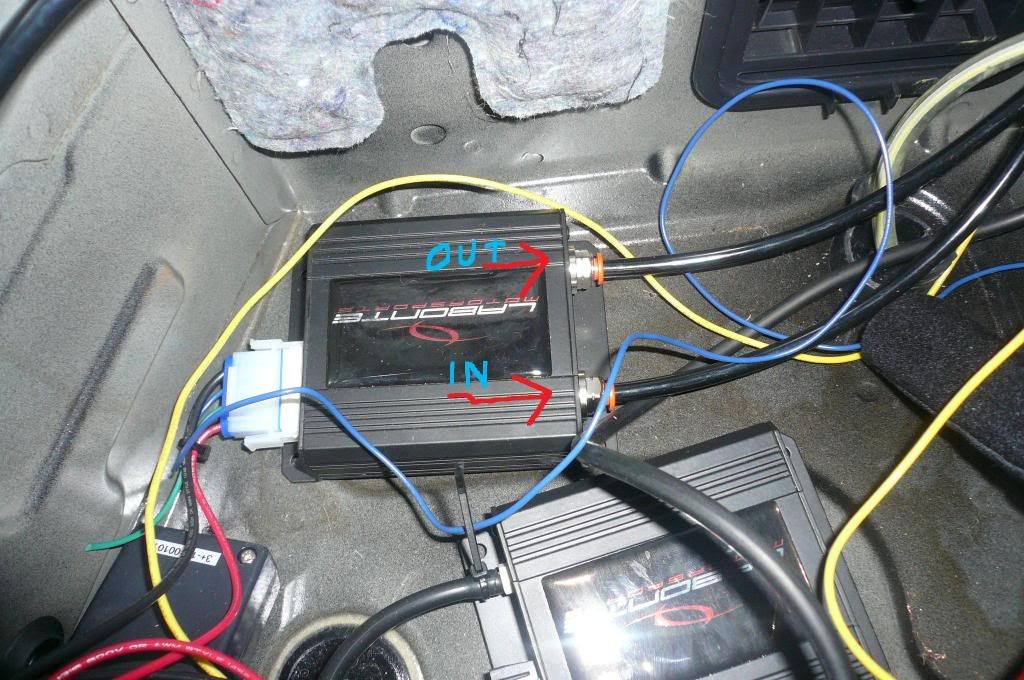 Then connect the rest of the included vacuum line to the boost line and put it on the other controller and tie both ends down with a zip tie. Now connect the methonal line to the IN (look at the above picture) on the controller and route it along the same path as you routed the wiring harness. Make sure you leave enough slack in each compartment because it will have to loop up in order to connect to the pump (these lines don't like to make sharp bends.You should have at least 20" of line left after this and then you can cut it. Sauder the yellow solinoid line to the line you ran to the solinoid and the blue prgoressive wire to the wire you ran to the ecu. Now its time to assemble the tank and the pump. Take the passanger side trunk liner off to the side with the container and the pump. Place the pump and the tank here and mark the holes with a magic marker. 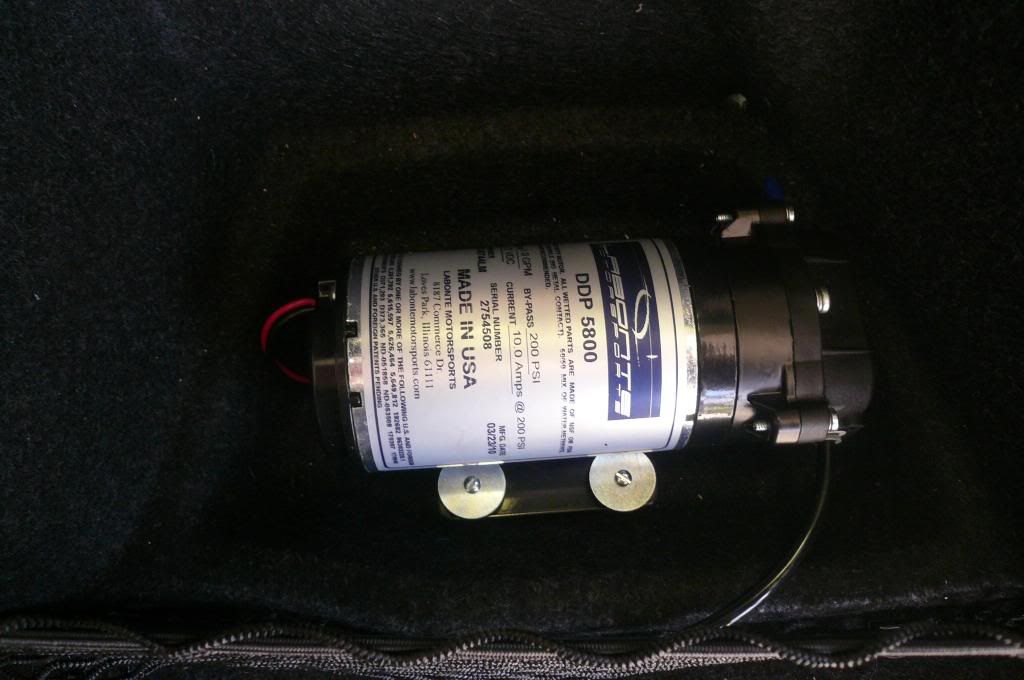  Then remove the tank and pump and drill out the holes that you marked. Now take the hardware that you bought and attach the tank and the pump to the interior. Now attach the remaing meth line to the tank and the pump. Also Route the pump lines through the hole you cut and attach the connectors to them. 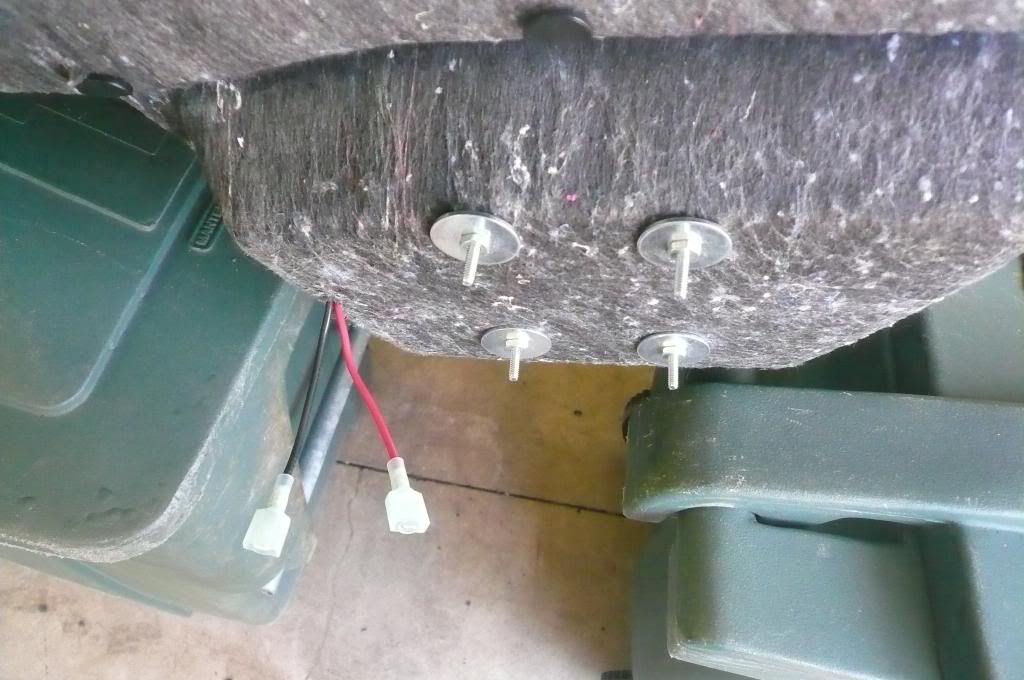 You can now reinstall this into the car lie it face down in the trunk and connect the pump wires to the harness. Then lift it upright and start to push the liner back into its place at the same time take the methonal line and place it through the hole in the side of the liner and connect it to the pump. Now its time to install the solinoid and the meth elbow. I had the cpe charge pipe so I had to cut the pipe quite a bit to get it to fit. For those of you with the standard charge pipe you are just going to want to remove the charge pipe and cut off the clamp that attaches the elbow. Just take the two silicone couplers and the charge pipe and bolt everything down. Now you can connect the methonal line to the elbow. Once the line is connected find a good place to put the solinoid, the closer to the nozzle the better. Attach the solinoid wire to the soilinoid, I used connectors but you could sauder everything together. Then take the negative from the soilinoid and ground it to a bolt nearby. Now cut the methonal line near the solinoid and connect the solinoid to the line. You can now zip tie everything together and out of the way. This is how my engine bay turned out. 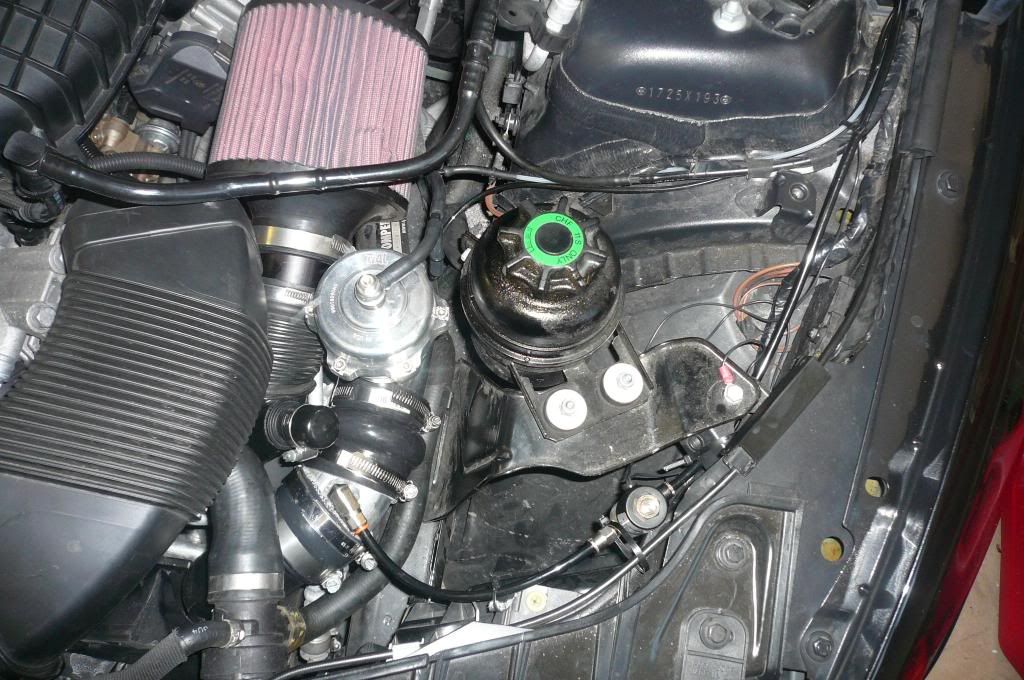 You can now put back together the engine bay and the interior of your car. Head back to the trunk and reconnect the battery then connect the positive and negative wire to the battery. 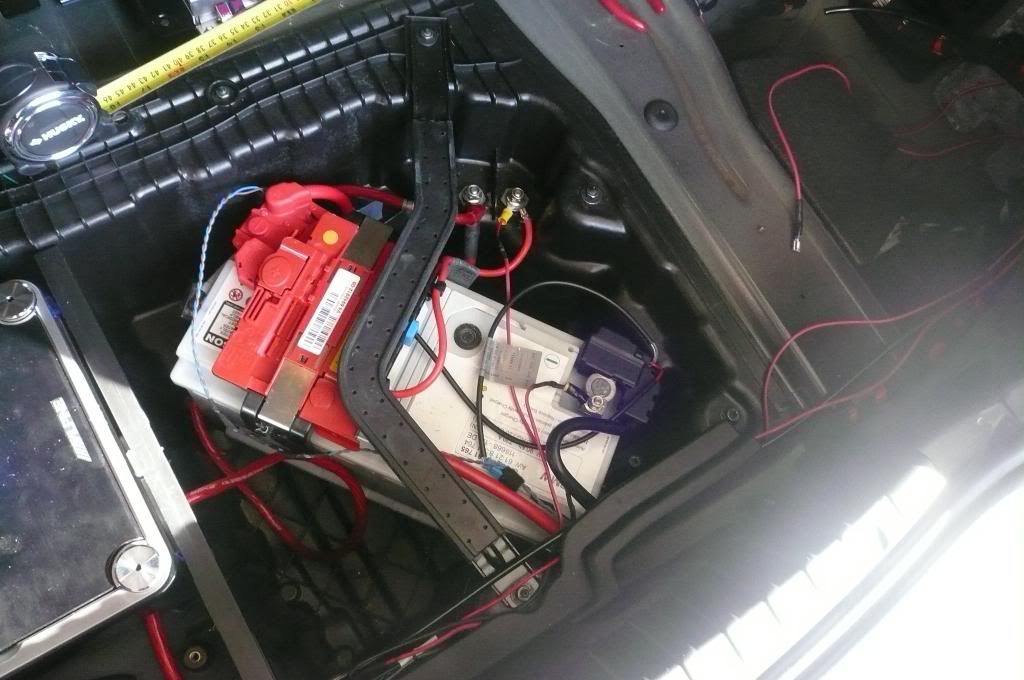 You can now fill up the tank you will need some sort of hose and a funnel, this is what I used. 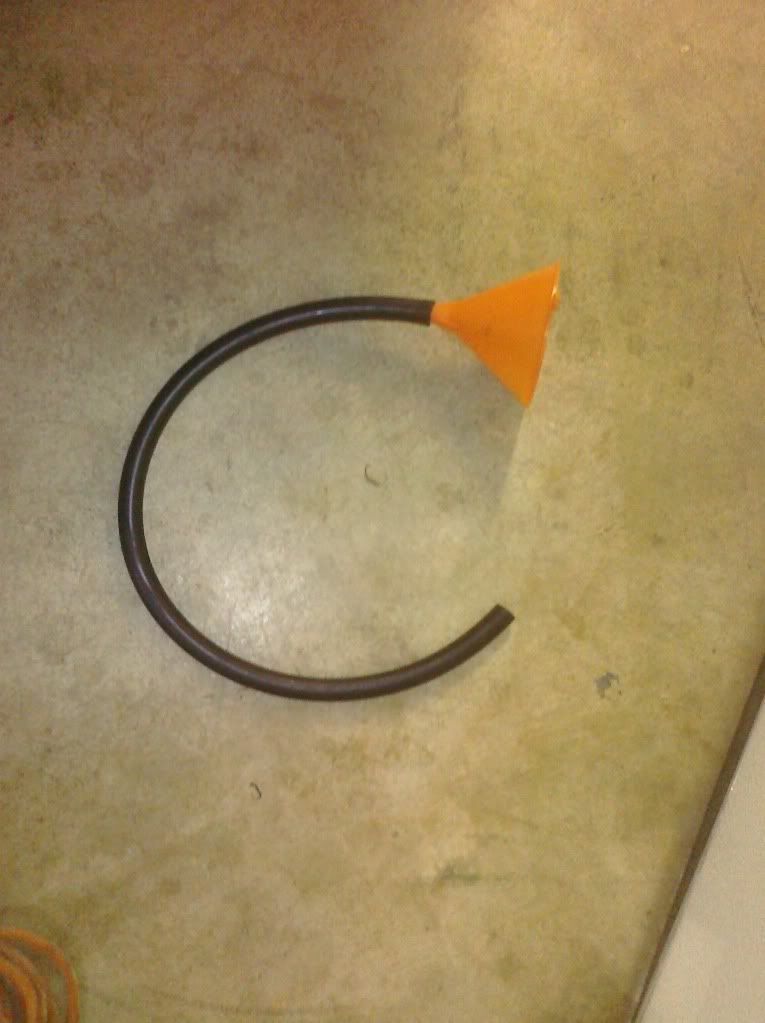 In order to prime the pump turn the pump on with the keep fob and then take the boost controller and turn the start boost to max and the 100% boost to the minimum. You will here the pump then just this a couple more times and she is all primed and ready to go. You can now put the rest of the trunk liner in. This is what the finished product should look like. 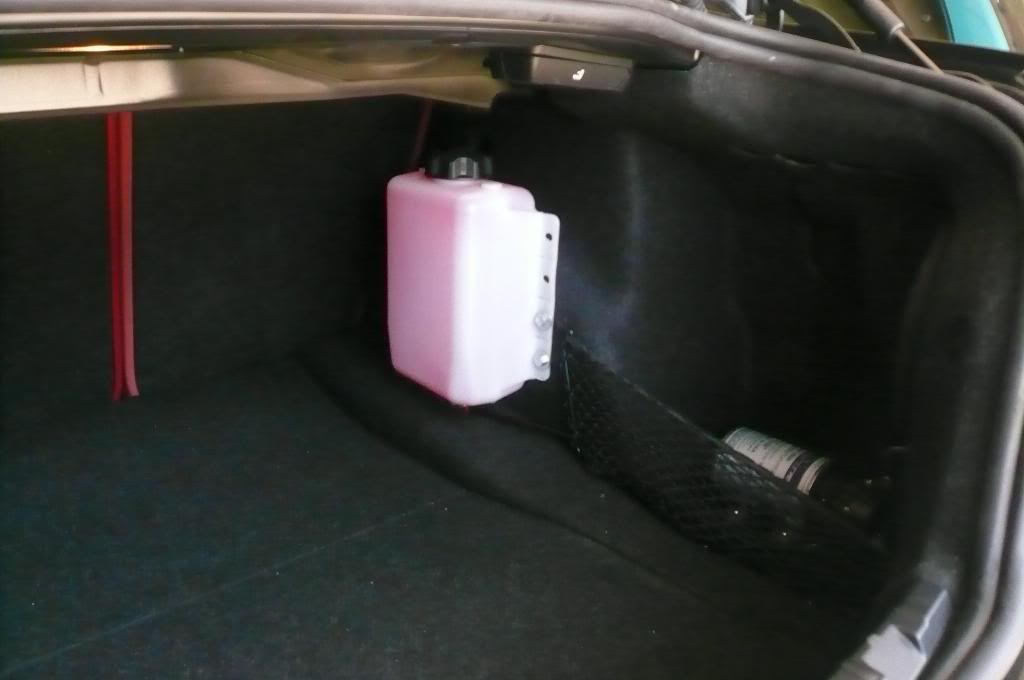 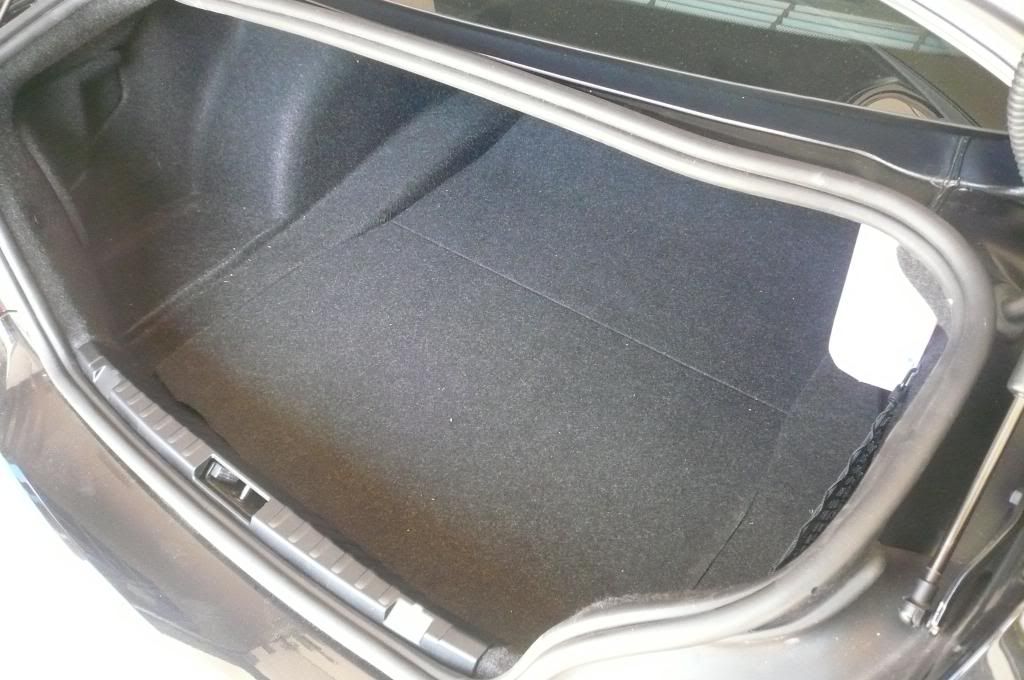 |
| 04-25-2010, 07:17 PM | #2 |
|
Colonel
121
Rep 2,037
Posts
Drives: 2008 135 blk, blk, step
Join Date: Jan 2009
Location: Atlanta, GA
iTrader: (0)
Garage List 1994 Porsche 968 Cab [0.00]
2017 AMG GTS [0.00] 1994 Porsche 968 Coupe [0.00] 1977 Mercedes 450SE ... [0.00] 2008 135 [8.00] |
Very, very nice. I'm a year or so from going to meth, at least I hope to hold off that long. I'm leaning towards this kit or using the windshield washer tank.
With this kit I was hoping I could put the tank where Shiv does over the pump. It looks like it will be tight there. Did you try to fit the tank over the pump?
__________________
Injen, RR OCC, MadDad Whisper, donut spare, 19x8.5et43fr 19x9.5et45r Volk LE37's, rear fenders rolled/pulled, PSS4S 225/35fr 255/30r, KW V1's, AR coated catless dps, Cross strutbar, CF grills and license plate holder, iCarbon diffuser, ETS black anodized FMIC, M3 control arms, Quaife, ER chargepipe, ForgeDV's, Topspeed Custom Tune, V3sims, Braille, Andrey_GTA rear hub mod, Ebay Mstyle front bumper and performance style side skirts.
|
|
Appreciate
0
|
| 04-25-2010, 07:21 PM | #3 | |
|
Colonel
131
Rep 2,408
Posts |
Quote:
|
|
|
Appreciate
0
|
Post Reply |
| Bookmarks |
|
|


