

|
|
|
|
|
| 07-31-2023, 12:17 PM | #1 |
|
Private First Class
 
45
Rep 198
Posts |
DIY - Update your K+DCAN Cable
Good Day,
so recently i tried to update my GM Gearbox on my E82 125i. I have the bimmerlabs 130i tune, so I wanted the gearbox to also be 130i spec. I have a generic cable. with the most recent DATEN V69 files from: https://mega.nz/folder/p8ogBDbB#PxqHv9rSuQ7g7sCM7GwWtQ i thought i was good to go. After updating the daten with bmw tools, everything worked. With winkfp i got error 2086 - signature. Research pointed to the cable. With no access to an ICOM Cable, i needed to update. I managed to get the cable updated and now it's basically a bimmergeeks spec cable that loaded the updated 130i gearbox file to the car and had no signature errors. I TAKE NO RESPONSIBILITY IF YOU CABLE BRICKS, OR THE CABLE DOES NOT WORK ON YOUR CAR. This update worked on my car. this was the blog i followed: http://blog.obdii365.com/2021/07/09/...nced-firmware/ along with this youtube video: https://www.youtube.com/watch?v=SB_jauAcuz0 PDF LINK i also used: https://www.sf**************/files/f...ediabaslib.pdf Things needed: your cable an Arduino - i bought an UNO R3 jumper cables soldering iron depending on your cable SOFTWARE: ARDUINO - https://www.arduino.cc/en/software AVRDUDESS - https://www.arduino.cc/en/software FIRMWARE - https://github.com/uholeschak/ediabaslib/releases drivers: if the arduino drivers do not work: usually if there's a chinese chip on the Arduino, the ftdi drivers do not like these chips: https://www.wch.cn/downloads/CH341SER_ZIP.html under the device manager, if CH340 is shown, it will still work. see here for win 8-11 https://forum.arduino.cc/t/ch340-dri...ws-11/965947/9 This is the pin layout of ATMEL MEGA 162 chip that is in most of our cables: 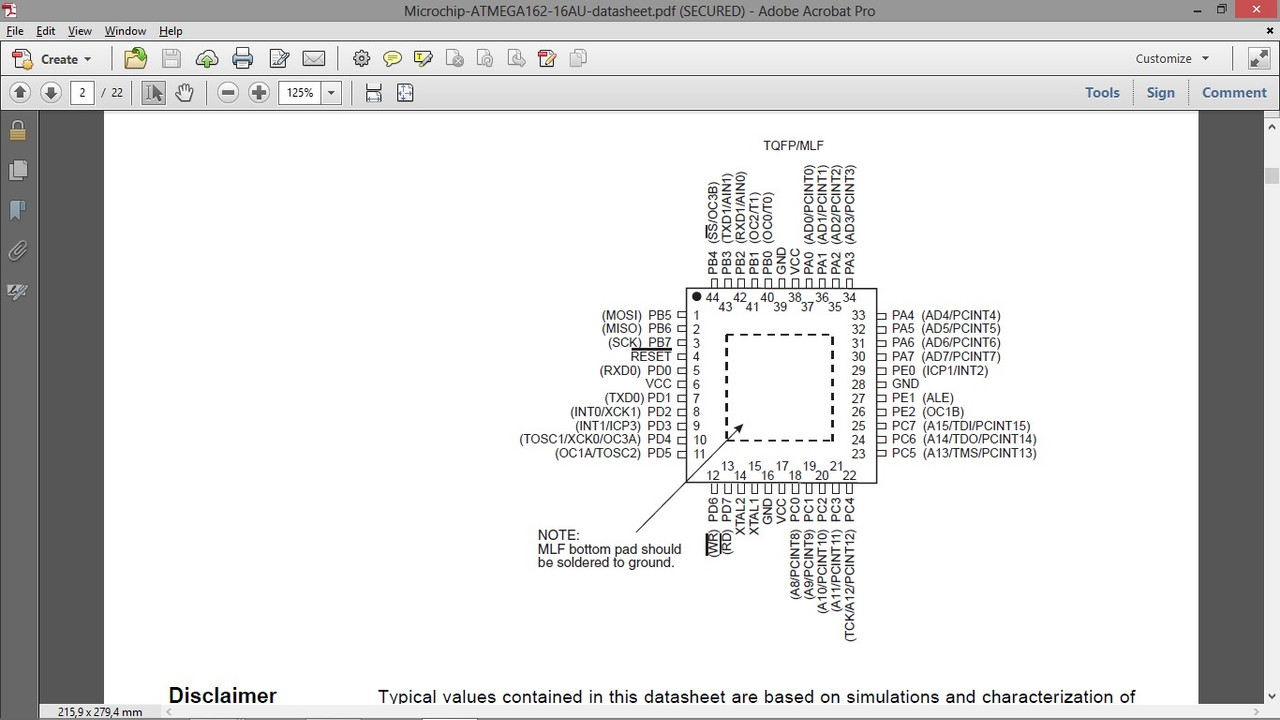 we need to connect to pins 1-4 on the chip. depending on your board, you can either solder to the pins, or if your board was like the 2nd cable i bought, it had 6 pin holes you could connect to. screenshot from youtube link: 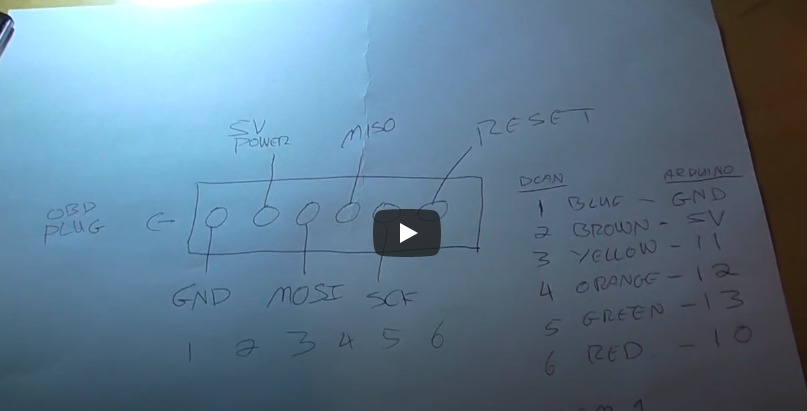 you need to jump from the pins or pin holes to the arduino. On the Arduino you use: (POWER SIDE OF BOARD) POWER - 5V GND - CAN USE HERE OR DIGITAL SIDE (DIGITAL SIDE OF BOARD) GND- CAN USE HERE OR POWER SIDE 13 - SCK 12 - MISO 11 - MISI 10 - SS - RESET 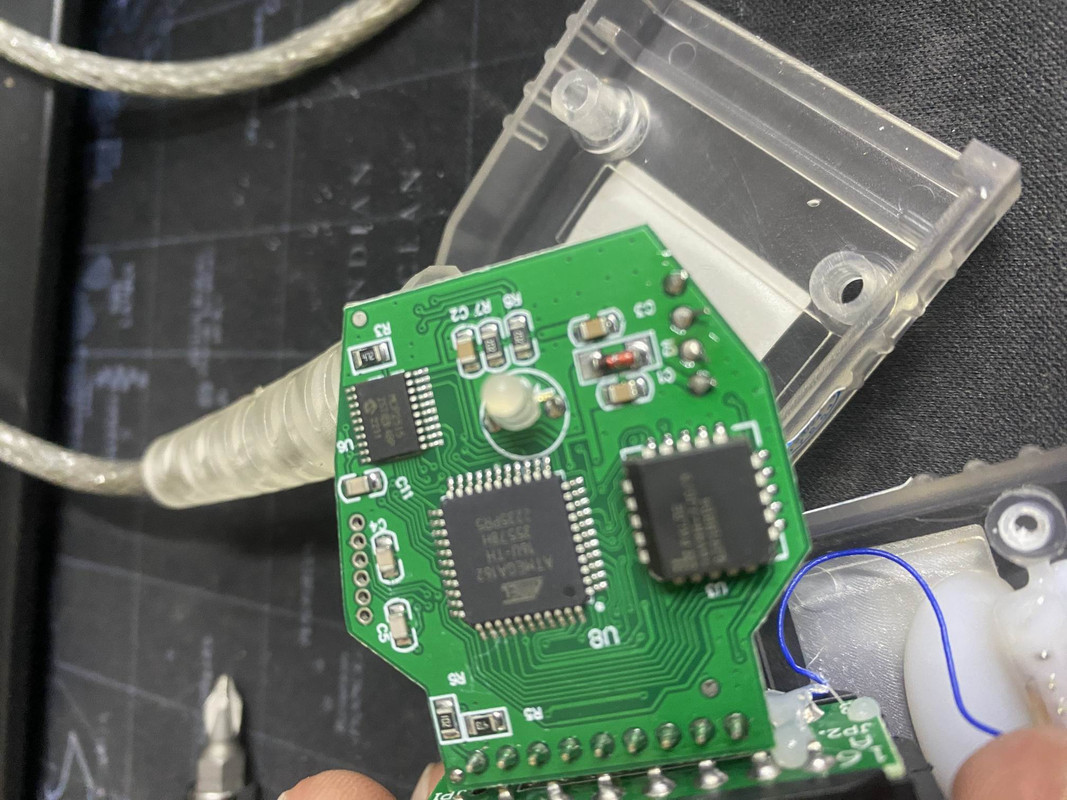 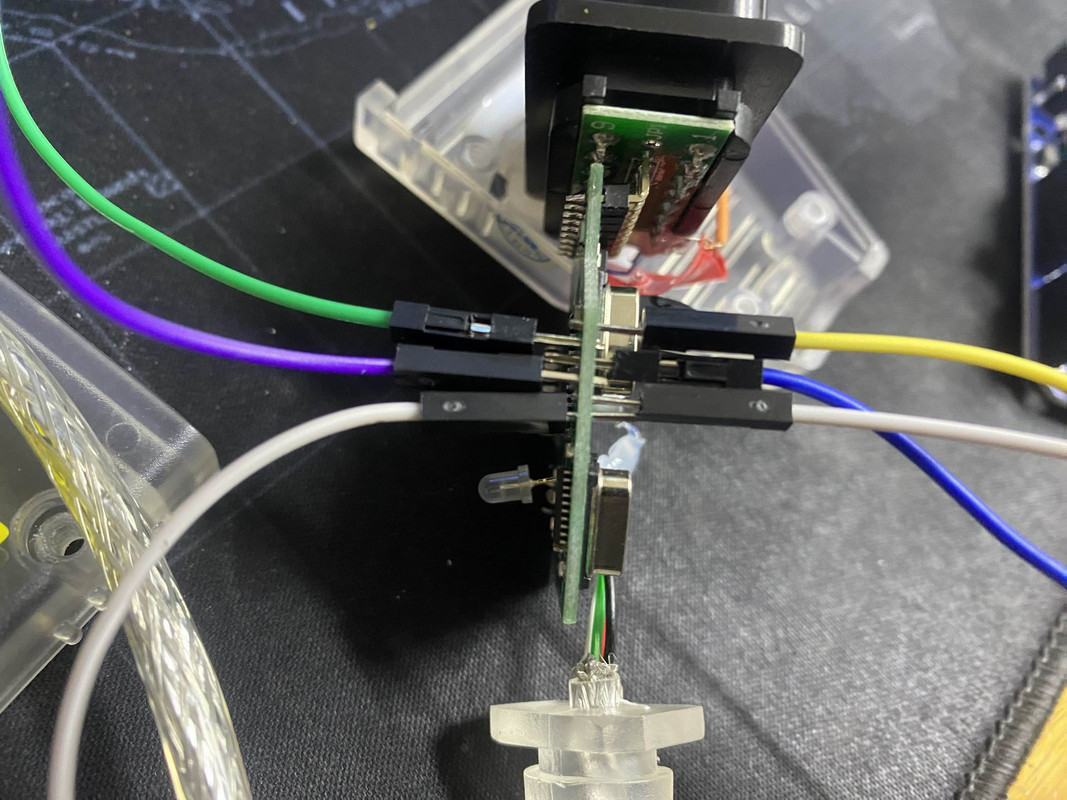 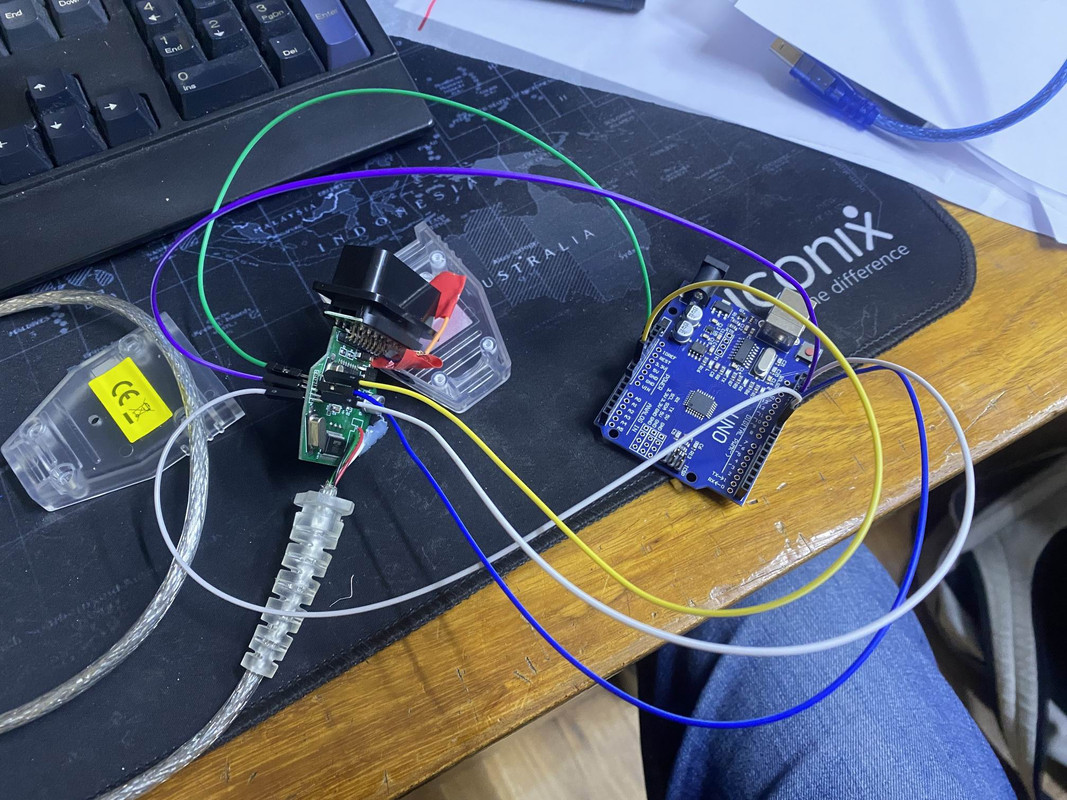 Once you have connect the cable and arduino to the pc. you have to make sure the board is connected. open the arduino app. have to check 'upload' box under 'show verbose output during' . You will get it in Arduino IDE\File\Preferences  then TOOLS - PORTS - where the usb is connected to TOOLS- BOARD - Select the board you have. then FILE - EXAMPLES - ARDUINO ISP - ARDUINO ISP this should load to the screen. click the tick to verify and then the arrow to write to the board Arduino can now be closed. now with AVRDUDESS: Programmer (-c): Atmel AVR ISP Port (-P): COM PORT YOU NOTED ABOVE (COM 5 in this example) Baud rate (-b): 19200 Bit clock (-B): blank Presets: Default Options: Uncheck all (none selected) Fuses lock bits: L : 0xFD H : 0xDC E : 0xF9 Set Fuses: CHECKED LB: BLANK Once the AVRDUDESS options have been set: 1. Click the detect button at the top right corner to verify the Arduino can communicate with the USB Cable microcontroller. If everything is connected properly, it should detect and specify the chip in the terminal window and populate the MCU (-p) options with the correct microcontroller. if the chip is not detected - check the connections/soldering next under fuses: click WRITE A terminal message should come up showing that it is complete. next, load the Combined.hex file from its folder location to the FLASH section: FIRMWARE - https://github.com/uholeschak/ediabaslib/releases 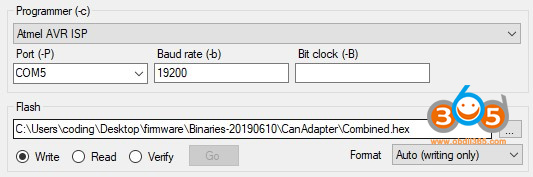 make sure: FORMAT - AUTO (WRITING ONLY) IS SHOWN then - click GO The led on the usb cable might light up - mine did not once done, you should have a 100% message in the terminal window and now your cable is up to date. THING I LEFT OUT: after installing - drivers - making sure the PORT on your device manager cannot think of anything else for now. Enhanced firmware benefits: Able to flash the following BMW ECUs without corruption: M3/M5/M6 DME (MSS6X) E6x M5/M6 SMG (GDSMG3) E9x GM Auto (GM1912) Additional benefits include: Faster CAN communication (block size 0 and no separation time). Allows configuration of CAN mode all the time, not only after power on. Allows configuration of the CAN parameters (block size and separation time) Correctly displays the ignition status (only available for K-line mode). Contains a bootstrap loader that allows firmware update without opening the device. Reduced power consumption due to use of sleep mode.
__________________
"Life moves pretty fast. If you don't stop and look around once in a while, you could miss it...."
Ferris Bueller  Last edited by golfer23rm; 07-31-2023 at 12:20 PM.. Reason: some photos did not show - removed |
Post Reply |
| Bookmarks |
|
|


