|
|
|
|
|
| 08-16-2008, 12:12 PM | #1 |
|
Lieutenant General
 
2146
Rep 10,176
Posts |
UUC Front Swaybar Install
Done!
Here's the teaser pic, while I resize and format the rest of the pics. :biggrin: Last edited by larryn; 08-26-2009 at 03:08 PM.. |
| 08-16-2008, 12:51 PM | #2 |
|
Lieutenant General
2146
Rep 10,176
Posts |
Okay! Let's describe this process:
First, You'll need: 2 Jackstands 1 Jack Lithium Grease 8mm Ratchet 13mm Ratchet 16mm Ratchet 13mm Wrench 16mm Wrench 17mm Wrench Torquewrench This will take about 2 hours, total Removing the old Swaybar: 1. First, Loosen the lug bolts on both front wheels. 2. Jack up the car from the rear side jack pad. The main purpose is to get a jack stand under the front pad on that same side. Lower the jack (and remove it) so that the front is off the ground on your side because of the one jack stand. 3. Use the jack to raise the car from the center jacking point up front [pic 1], which is now accessible because the car is up on one jack stand. Once the front is a good bit off the ground, put the other jack stand on the opposite side, and you should also be able to raise the jack stand on the initial side for more work room under the car. Carefully lower the jack so that the front of the car is off of the ground on the jack stands only. Your 1er should look like mine in Pic 2 4. Remove both front wheels. 5. Use a 8mm socket (I used it on a drill... [pic 3] makes things a LOT easier) to take out the EIGHTEEN FREAKING SCREWS that hold the bottom pan on. [pic 4] Remove the plastic plastic pan, and slide it further under the car. You should have access to the swaybar now. [pic 5] 6. Using a 16mm socket and a 17mm wrench, remove the upper end link nut and disconnect it. Do the same to the other side. [pic 6] 7. Using a 13mm socket, remove the four bushing holder nuts. [pic 7] 8. Remove the swaybar, endlinks attached. <Continued> |
|
Appreciate
0
|
| 08-16-2008, 01:08 PM | #3 |
|
Lieutenant General
2146
Rep 10,176
Posts |
Installing your new Swaybar:
1. First, let's compare the two front swaybars. Notice that the UUC one is a bit thicker, but more importantly, the stock bar (black) has a pinched smaller radius middle point. [pic 1] 2. Take your white lithium grease from your nightstand :wink: [pic 2] and pack it in the UUC bushings pretty well. You want this stuff oozing out a bit. [pic 3] 3. Slide the stock metal 2-hole bushing clips over the UUC bushings, and take it over to the car. 4. Position the new swaybar on the car, making sure you inserted it the correct way, and the ends of the bar ar over the steering link. (it's pretty obvious) 5. Using the four 13mm nuts from when you unbolted the bushings with, bolt the new swaybar in. It's okay to tighten it down these nuts most of the way, but leave them a little loose for now [pic 4]. Notice the grease oozing out. This is good. 6. Unbolt the old endlinks from the old sway bar.. you need those two nuts. 7. There are a left and a right stock end link, and each has the bolt heads facing different directions. So, adjust your adjustable end links ot be the same length, with the bolt heads facing the correct ways. [pic 5 and pic 6] 8. Install the end links in the car, and bolt them down to 31 ft-lbs 9. Tighten the four bushing bolts down the rest of the way. There is no torque settings that i have for those bolts, but you can strip these pretty easily.. don't do that! :wink: 10. Replace the plastic undertray... with those EIGHTEEN FREAKING SCREWS. :biggrin: 11. Mount the wheels, and trace your steps backwards to get the two jack stands out. 12. Torque your wheels back to 86 ft-lbs YOU ARE DONE!! Go take a Ride! |
|
Appreciate
0
|
| 08-16-2008, 07:12 PM | #5 |
|
Señor Member
16
Rep 452
Posts |
You seem to have used a lot of that grease before today.....
Nice install series - thanks Larryn. How does it drive?
__________________
Monaco Blue/Savannah Beige 135i |
|
Appreciate
0
|
| 08-16-2008, 09:48 PM | #7 |
|
Major

77
Rep 1,376
Posts
Drives: 1988 M3, 1990 M3, 1998 M3/4
Join Date: Oct 2006
Location: Oklahoma City, OK
iTrader: (7)
Garage List 1998 BMW M3/4 [10.00]
2011 BMW M3 Sedan [9.28] 1988 BMW M3 [9.40] 1990 BMW M3 [10.00] 2008 BMW 135i - sold [0.00] 2003 BMW M3 - sold [0.00] |
cool, I'm chomping at the bit to order the front and rear. How big of a difference did it make?
__________________
1988 BMW M3 - Hennarot/Black
1990 BMW M3 racecar - Diamond Schwarz/Black 1998 BMW M3 - Alpine White/Mulberry 2011 BMW 328i racecar - LeMans Blue/Black |
|
Appreciate
0
|
| 08-16-2008, 10:06 PM | #8 |
|
Lieutenant General
2146
Rep 10,176
Posts |
I don't want to give my impressions before I have a good chance to drive a bit with this installed. I'll do that in a few days, or maybe even a week from now, after my first autocross with it installed.
|
|
Appreciate
0
|
| 08-17-2008, 06:46 AM | #9 |
|
Santa Fe Concorso
103
Rep 2,984
Posts |
Nice DIY, Larry, thanks for taking the time to share. Noticed you set the adjustment to full stiff, you devil.
 Can't wait to hear the results from the autocross on the 24th.
__________________
Santa Fe Concorso - The Southwest's Premier Automotive Gathering.
|
|
Appreciate
0
|
| 08-17-2008, 11:20 AM | #10 |
|
BMW ONE
15
Rep 630
Posts
Drives: 93 RX-7 R1, 135i
Join Date: Feb 2008
Location: New England
|
Nice Larry, this is going to be must have mod for track junkies
__________________
135i - Alpine White - Black Leatherette - 6-Speed - Sport Package - Aluminum trim - 6FL
|
|
Appreciate
0
|
| 08-18-2008, 05:54 PM | #12 |
|
Private First Class

4
Rep 120
Posts |
I need to be educated a little bit. I understand that a bigger front bar will take away some of the wallowing feeling in the front. But won't it cause it to push even more?
I've read that the 1's are hard to get rotated. Won't this exacerbate that? Sorry if I'm asking a question where everyone else knows the answer, I'm just trying to learn. |
|
Appreciate
0
|
| 08-18-2008, 06:12 PM | #13 | |
|
Santa Fe Concorso
103
Rep 2,984
Posts |
Quote:
More front grip will assist with rotating the car (i.e., adding front grip while rear grip stays the same (more or less). These are greatly simplified explanations but the principals are there.
__________________
Santa Fe Concorso - The Southwest's Premier Automotive Gathering.
|
|
|
Appreciate
0
|
| 08-20-2008, 10:04 PM | #14 |
|
Lieutenant Colonel
 
323
Rep 1,804
Posts |
It's nice to know the 1er has a center jack pad. Late model E46's don't and it's such a pain to get the car up on jackstands.
__________________
-Nick
2018 BMW 440i - M Sport, Exec Glacier Silver Metallic/Coral Red Dakota Retired: '00 323i, '06 325Ci, '09 135i, '06 Z4M Roadster, '93 525i, '76 2002, '14 X1, '14 M235i, '16 X4, '16 435i |
|
Appreciate
0
|
| 09-02-2008, 05:56 AM | #15 |
|
Major

24
Rep 1,058
Posts |
larryn, what was the sizeable issue?
Any other feedback? Thanks :smile:
__________________
Current: 135i Auto, Le Mans Blue - w/ Bridgestone RE-11 rears, GP Thunder 7500k angels, & "golf tee" mod plus a few M3 suspension bits and pieces...
|
|
Appreciate
0
|
| 09-09-2008, 05:39 PM | #16 |
|
Lieutenant Colonel
323
Rep 1,804
Posts |
What was the problem...?
__________________
-Nick
2018 BMW 440i - M Sport, Exec Glacier Silver Metallic/Coral Red Dakota Retired: '00 323i, '06 325Ci, '09 135i, '06 Z4M Roadster, '93 525i, '76 2002, '14 X1, '14 M235i, '16 X4, '16 435i |
|
Appreciate
0
|
| 09-09-2008, 06:56 PM | #17 |
|
Lieutenant General
2146
Rep 10,176
Posts |
The end of the stock sway has a nice hook on it, and I wondered why. Now I know. The UUC sway has a fairly straight return.
When you set the bars to full stiff, the end of the swaybars, which normally point towards the back of the car, are able to "hyperextend" with the end-link, and flip up so that they point straight up. Not only do you get horrendous banging, but it also immediately cuts through your ABS sensors (pulsers @ $70/ea), and also snaps at least one of your hydraulic brake lines.  I was lucky to be warned by a bagillion dashboard lights, and I slowed from 60mph on 95N in CT via downshifting as I got into the brakedown lane and used the hand brake for the last 5mph. Nothing like losing your brakes on the highway though. Was weird, i didn't panick at all. just threw my blinker on and worked my way into the brakedown lane, downshifted a few times and handbrake... Rob Levinson at UUC is making a plate for me to mount on the end of the bar, that will allow for for lowering the mounting points for the end link. I'm not sure if that's the long term solution. I have new ABS pulsers that I installed, replaced the brake line, rebled the system, and repositioned the swaybar at the middle setting. It's been fine like that for a week. |
|
Appreciate
0
|
| 09-09-2008, 07:50 PM | #18 | ||
|
Brigadier General
121
Rep 4,070
Posts |
Quote:
:eyebulge: Wow...well I am glad you are ok and nothing bad happened on the highway(other than the mechanical damage of course). So you are not saying that we shouldnt get the swaybars, but merely stating that we should NOT set them to FULL STIFF...am I right in making that assumption?
__________________
 Quote:
|
||
|
Appreciate
0
|
| 09-09-2008, 08:17 PM | #19 |
|
Lieutenant General
2146
Rep 10,176
Posts |
Correct. Do not set them to full stiff. They seemed to work great at autocross though, they make the best sways around, IMO, and I know they are working on this issue right now.
|
|
Appreciate
0
|
| 09-10-2008, 07:52 AM | #21 |
|
Lieutenant General
2146
Rep 10,176
Posts |
Definitely not the same company as Whiteline, but the bushings are yellow on both. UUC's bushings used to be red, but are now that yellow color, with a ribbed, hard plastic sleeve.
|
|
Appreciate
0
|
| 09-22-2008, 05:17 PM | #22 |
|
Lieutenant
 
21
Rep 513
Posts |
hard plastic sleeve might cause an issue later down the road if it coating the poly bushing...in anycase the Audi TT front sway bar caused an issue where it would sound like a nasty old bed breaking up and down..the fix was to remove the plastic that cover the sway bar where it sat into the actual bushing and replace bushings with poly..and grease them up and no worries....
__________________
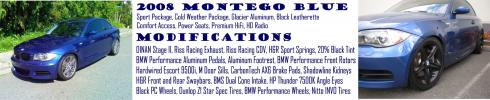
09 135i montego blue 6speed..RR catch can,CDV,DCI intakes,stett charge pipe and tial bov, the above mods are not installed on my car, i just want to seem cool
Devils own water/meth dealer-PM me for info former car/ 2001 audi TT ~290bhp :w00t: |
|
Appreciate
0
|
Post Reply |
| Bookmarks |
|
|