

|
|
|
|
|
| 05-09-2008, 06:33 PM | #1 |
|
Happy 1er
32
Rep 137
Posts |
Valentine 1 Radar Detector Install/Accessing Fuse Panel
I have seen quite a few methods online for doing this (not on a 135 though), BMW makes it extremely difficult to get to the fuse panel (in comparison to other cars) so I figured I would document the procedure to save some other folks some time.
I am locating the V1 at the top of the windshield and running the power from the fuse panel. The V1 will be on the accessory fuse and will behave as if it were plugged in to the cigarette lighter, without the messy looking wires. First we need to get to the fuse panel it is BEHIND the glove box, FYI: if you see bitched up plastic, that was Fields BMW of Winter Park, not me. 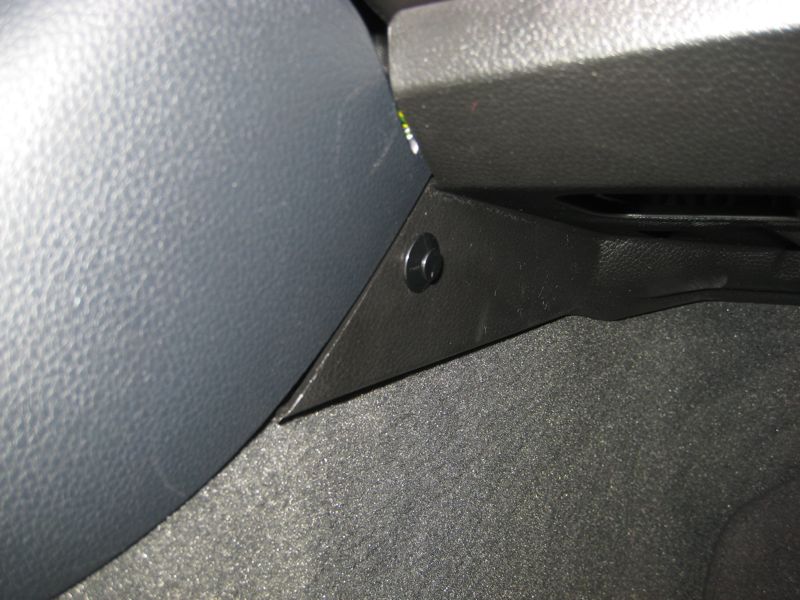 Pull the little center thing out: 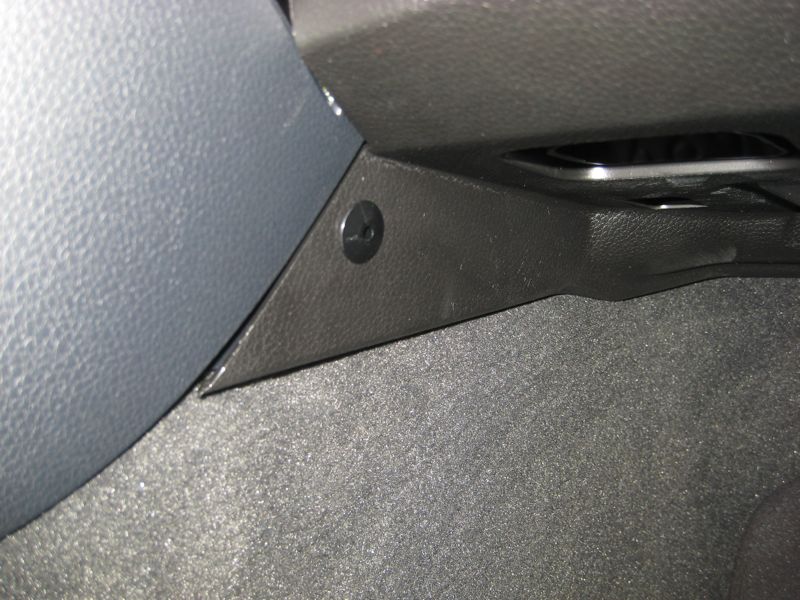 You should have all seen these guys before: 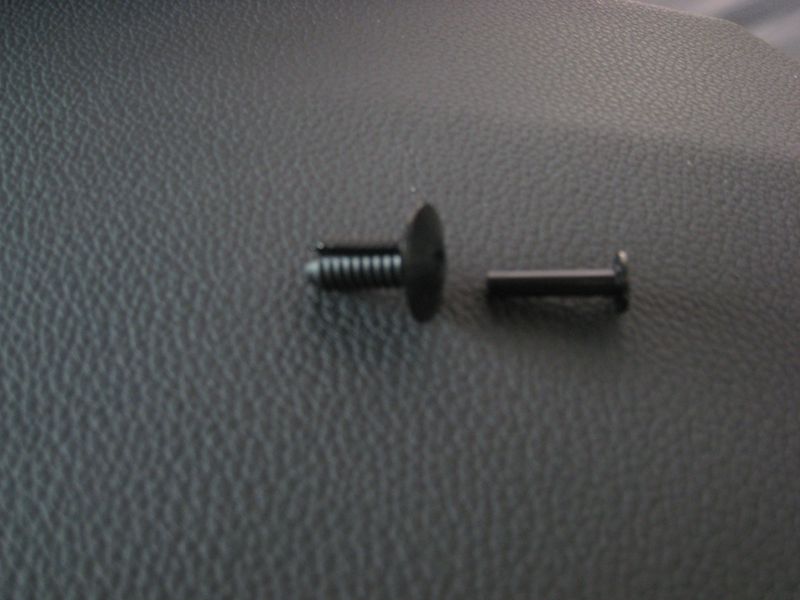 Then unscrew the 2 screws holding up the panel blocking access to the glove box screws, after you have that out the panel should drop down, be careful, there is still a wire connected for the light, disconnect this by pressing a small screw driver into the release tab. 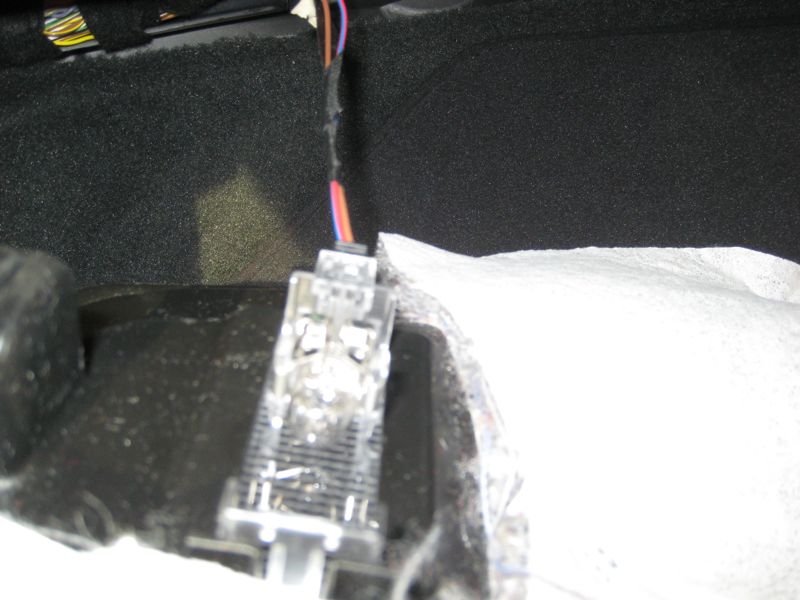 With that panel out of the way you should have plenty of access to the glove box screws:  Unscrew all four of these. Inside the glove box you will need to detach the gas (?) shock / soft opener: 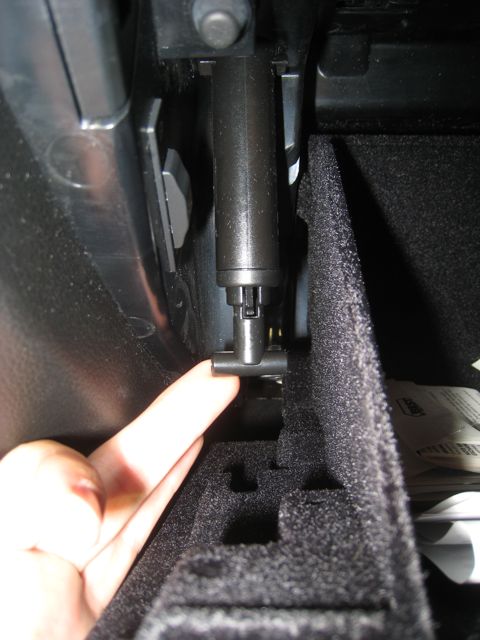 Then press the tabs to allow the glove box to come past its operating range, there is one on each side: 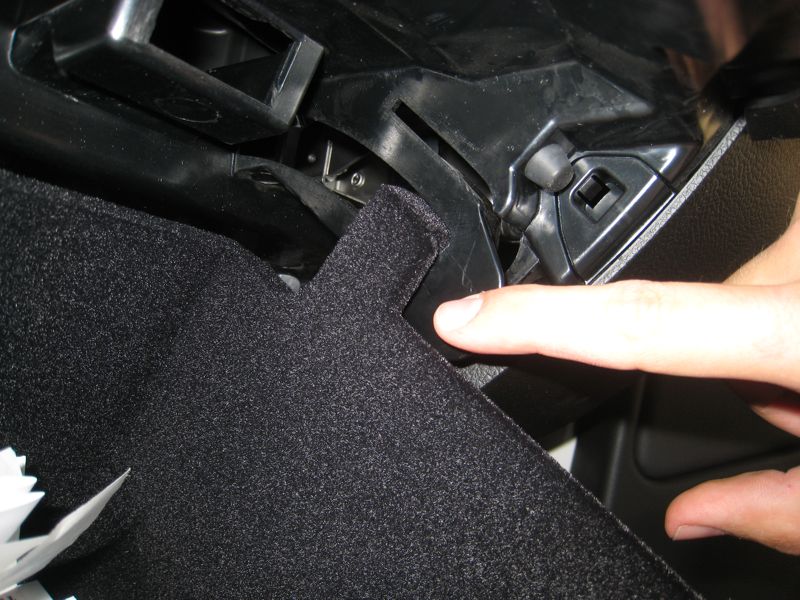 Once both sides are free the glove box will come out easily. Now we finally get some info on the fuse panel in this little card hidden behind the glove box: 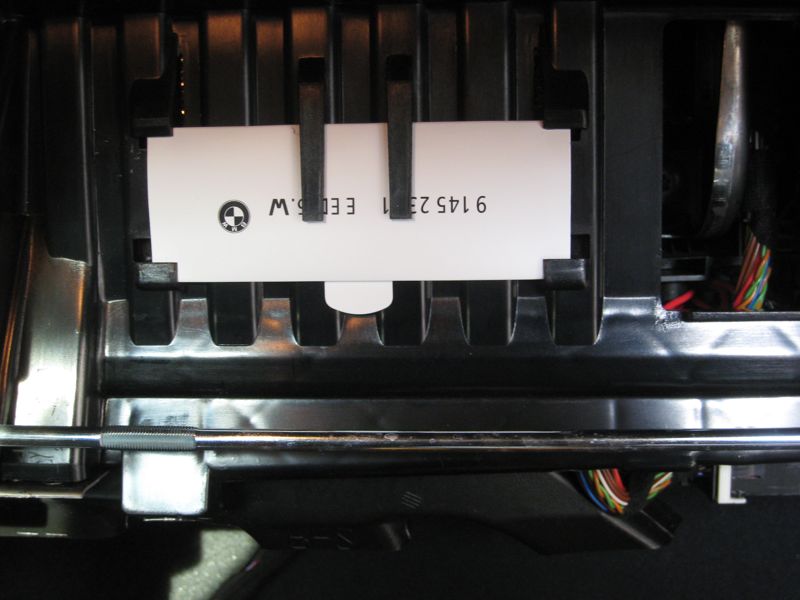 Remove that for light reading, you will refer to it to locate the correct fuse for installation: Here is a view of the dash with not glove box: 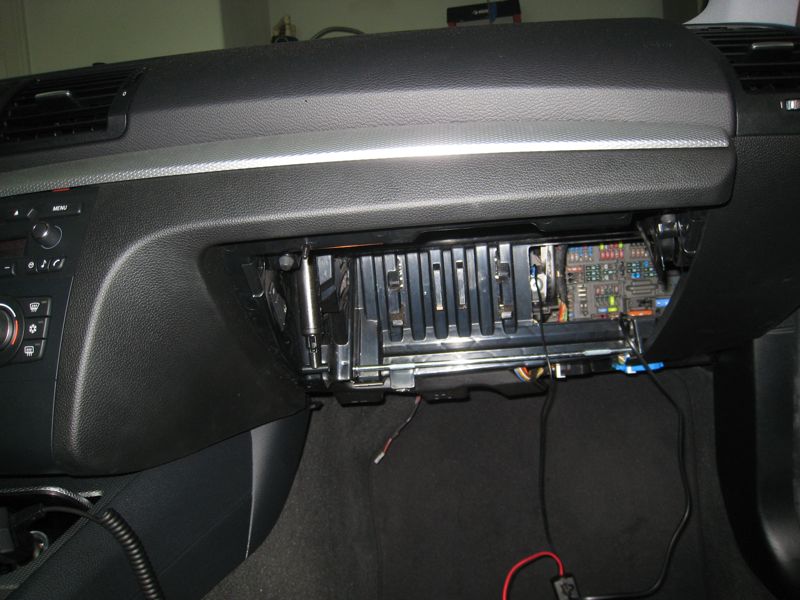 I am using fuse 08, the accessory fuse, and tapping into it with one of these guys, available at an auto parts store near you: 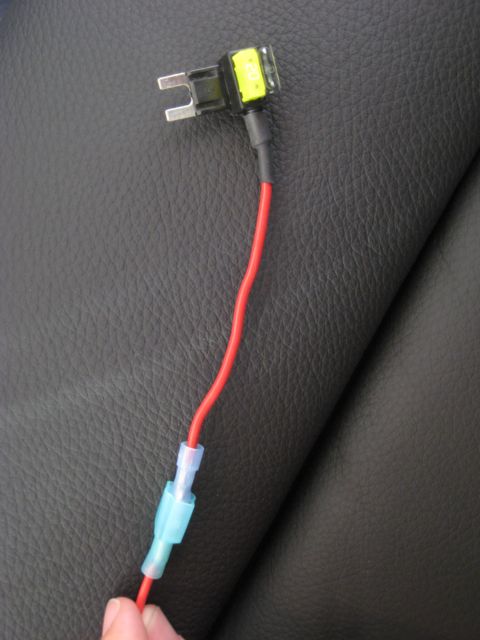 No easily available Ground in the fuse panel that I saw, so I used a body ground which is available via a piece of metal, unscrew and sandwich the terminal under the screw: 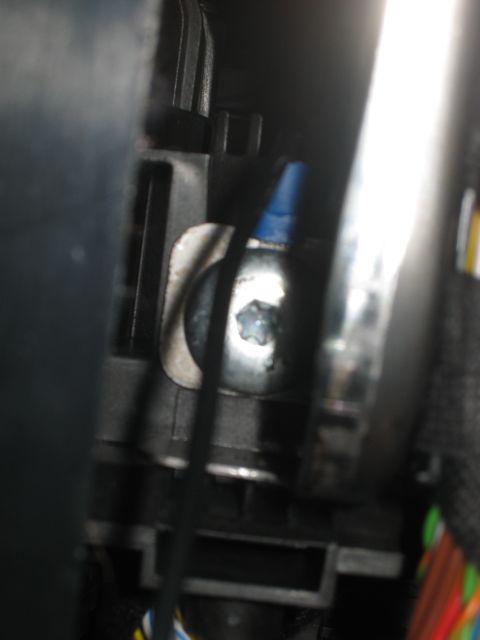 I ran my power wire for the V1 out the side here: 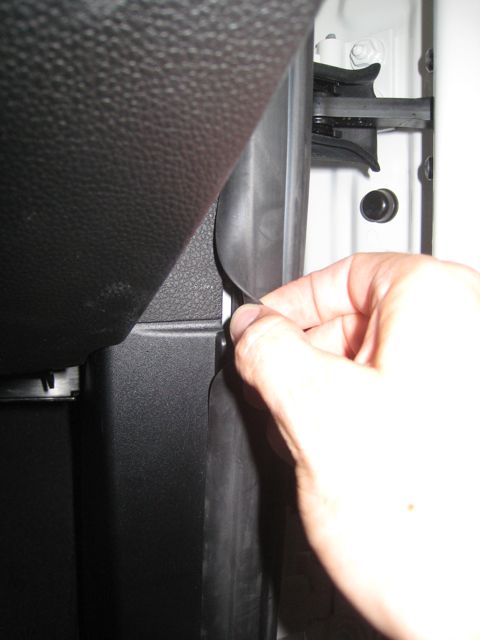 then up the A pillar, across the windshield and down the rear-view mirror, all under the weatherstrip or behind the headliner: 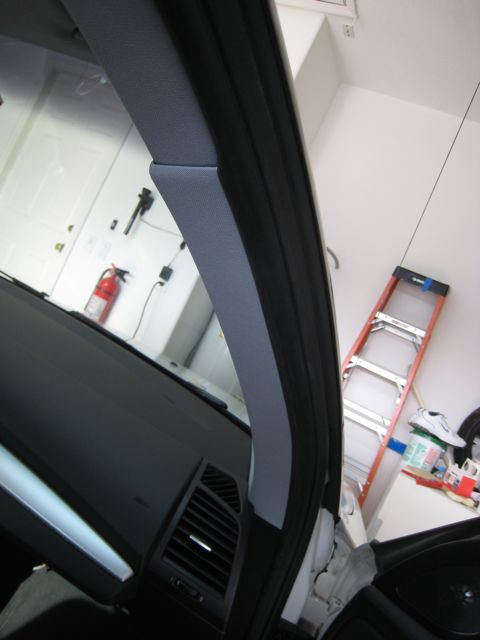 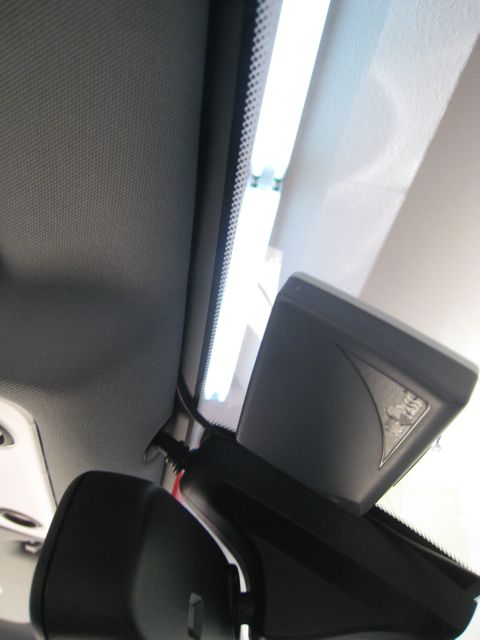 Finally: 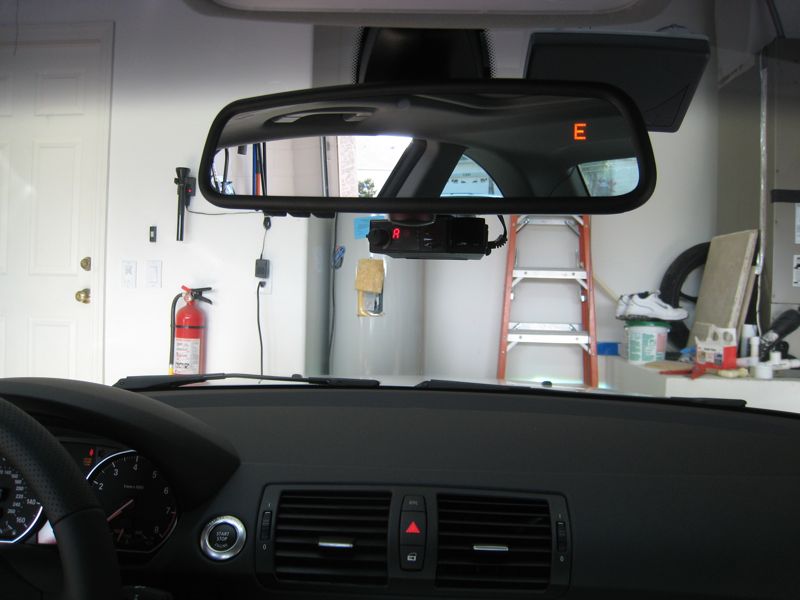 Here is a page with more pics, including the shots of the fuse panel info card. Now put everything back together, don't forget to reconnect the little footwell light, and tie those wires up neatly so they don't rattle around. As always, if you don't understand, ask questions before you attempt this, you could probably manage to cause damage to you and your car even if you execute this perfectly, so do this at your own risk. Sorry to cut it short, running out for a graduation dinner for a friend. Kyle UPDATE: One member has suggested you do not need to remove the glove box, just drop it (see below). Other have suggested it is easier to do the sunroof wire. As stated there are many methods of doing this, but the 135 fuse panel version (which is how I wanted to install, for reasons stated in posts below) did not have a DIY, so I figured I would document for the community. Additionally, I don't know what the behavior of the detector is on the sunroof power, with the above method the detector behaves as it would on the cigarette lighter, which is, when the ignition is off, the detector is off, that makes most sense to me. I would presume the sunroof power is available if accessory power is on but ignition is off, which is not optimal operation IMO, but a small nuisance at most. |
| 05-10-2008, 07:47 PM | #2 |
|
Señor Member
16
Rep 452
Posts |
Thanks Kfiducia! That is a really nice writeup and pictures series. Nice alternative to the wire-tap at the sunroof. This should be added to the DIY index.
__________________
Monaco Blue/Savannah Beige 135i |
|
Appreciate
0
|
| 05-10-2008, 10:36 PM | #4 |
|
Traveler
8
Rep 173
Posts |
Nice write-up.
I did not remove the glove box when I installed my V1. I just dropped it down out of the way to access the fuse panel.
__________________
135i SGM, Grey w/Grey Poplar interior.
|
|
Appreciate
0
|
| 05-11-2008, 12:18 AM | #5 |
|
Happy 1er
32
Rep 137
Posts |
Using the suction cup mount.
I could not get the glove box out of the way enough to access comfortably without removing, if you can, that saves about 10 minutes and some risk of losing screws, I like to have plenty of room to access the area and get my hand in to route the wires. Good to know its possible to drop it out of the way without completely removing. Yeah, maybe a mod can move this to the DIY, i realized after I posted it, it qualifies as a DIY rather than just sharing info about the dismantling and fuse information. BTW, a copy of that fuse info card is located on the picture page i linked to above. |
|
Appreciate
0
|
| 05-11-2008, 02:54 PM | #6 |
|
Second Lieutenant
 2
Rep 292
Posts |
What's wrong with using the sunroof option and has anybody gone that route yet? It only took me 15 minutes to do that on my E46 and I'd never done it before.
|
|
Appreciate
0
|
| 05-11-2008, 04:28 PM | #7 | |
|
Second Lieutenant
13
Rep 249
Posts |
Quote:
That said, I personally did the sunroof option with my Valentine :wink: |
|
|
Appreciate
0
|
| 05-11-2008, 07:17 PM | #8 |
|
Major General
 
903
Rep 9,034
Posts |
On the E9x, there was a risk of breaking a tab that was part of the headline, which mean: if you break the tab, you need to buy a new headliner.
Not sure what it's like on the 1. |
|
Appreciate
0
|
| 05-11-2008, 09:28 PM | #9 |
|
Donkey Kong King
90
Rep 1,129
Posts |
Just finished my install using this helpfull DIY. The install is very easy. Couple things to add- The screws are torx/star screws, the fuse adapter is a mini fuse adaptor. I ran 2 wires up the side molding, (One for the V1, one for my concealed display unit).
I mounted my V1 on the passenger Visor with the visor clip, and installed my concealed display unit on the bottom of the mirror. Works great. Thanks for the DIY and pics, made the install very painless..... |
|
Appreciate
0
|
| 05-12-2008, 02:14 AM | #10 |
|
Happy 1er
32
Rep 137
Posts |
john, glad i could help.
in response to the sunroof question: i have had issues in the past with dealers saying that something i did caused a problem with the car, for instance, the dealer said an aftermarket radio caused the wiring harness in my last car to melt - never mind the fact that none of the fuses were blown. they still felt the need to argue with me on electrical theory. (turns out the car was hit by lightning :-O) SO, unless i can make my modifications and remove them without permanently altering the car, i tend to find other options. ALSO, it tried pulling the sunroof panel and it would NOT come out without more pressure than i felt it could handle without damaging something. i did try pretty hard before giving up, but this method provides for a clean, removable installation with little to no risk of accidental damage. |
|
Appreciate
0
|
| 05-12-2008, 10:00 AM | #11 | |
|
Second Lieutenant
2
Rep 292
Posts |
Quote:
|
|
|
Appreciate
0
|
| 05-19-2008, 03:10 PM | #14 |
|
Brigadier General

1758
Rep 4,664
Posts |
I wired my detector in my E92 to a white/green wire found in a bundle near the sunroof. It's quicker and easier if you are putting your detector near the rear view mirror.
|
|
Appreciate
0
|
| 05-23-2008, 07:35 PM | #15 |
|
Señor Member
16
Rep 452
Posts |
Thanks again for this DIY kfiducia. I did it this morning, took me about an hour (mostly running in and out of the house for tools and drinking coffee).
I agree w/ not making any permanent mods to the electrical system, which is why I chose this installation method. I would add to this instruction set that you need to add 2 fuses to your "add-a-fuse" to complete your circuit (as you pictured), even if you are using an in-line fuse (a la Escort hardwire kit). Also prepare to dislocate your elbow to get to the fuse panel, which is about 6 feet behind the glovebox. WTF? :thumbup:
__________________
Monaco Blue/Savannah Beige 135i |
|
Appreciate
0
|
| 05-24-2008, 02:37 AM | #16 |
|
Private First Class
 1
Rep 117
Posts |
Will the V1 fit above the rear view mirror on the driver's side? Or is there not enough room there? Kind of like how you have your EZ-Pass on the passenger side, can the V1 fit on the other side?
|
|
Appreciate
0
|
| 06-15-2008, 10:51 PM | #17 | |
|
Private
 5
Rep 65
Posts |
Quote:
Reference: Windshields are like putting sunglasses on your laser detector. And some windshields are darker than others. |
|
|
Appreciate
0
|
| 06-16-2008, 12:39 AM | #18 |
|
Bring Bail Money
12
Rep 492
Posts |
I spent some time reading about laser detection and the consensus from those not actually selling laser detectors is that what you actually get is notification that you've been busted, not detection with time to react. There are some products for sale that are supposed to mitigate this a bit like coatings for your headlights that absorb laser signals allowing some time for detection and slowing down (about 5 seconds at 70MPH) and I'm considering those. Otherwise it probably doesn't really matter if you're behind the tint or not.
-Spook |
|
Appreciate
0
|
| 06-18-2008, 12:37 PM | #19 | |
|
Private
5
Rep 65
Posts |
Quote:
I've had my V1 for 3 years now and it's been well worth the money! |
|
|
Appreciate
0
|
| 06-27-2008, 11:18 AM | #21 | |
|
Enlisted Member
 4
Rep 48
Posts |
Quote:
|
|
|
Appreciate
0
|
| 06-27-2008, 12:10 PM | #22 | |
|
Bring Bail Money
12
Rep 492
Posts |
Quote:
I haven't encountered laser yet, just radar. V1 is splendid for that. And I'm certainly not looking for an argument, just education. I'm just confused on the technical side of how we can detect and evade laser traps. -Spook BTW.. amazing DIY kfudicia. Totally professional looking. Thank you very much for putting in so much effort for our benefit. |
|
|
Appreciate
0
|
Post Reply |
| Bookmarks |
|
|


