

|
|
|
|
|
| 07-07-2020, 01:33 PM | #89 |
|
Colonel
 
123
Rep 2,200
Posts |
Oil pressure drops in high G is the main reason I have stuck with 200tw and no aero. I am adding a splitter to address understeer and cooling issues with oil, water and brakes I'm hoping I dont start seeing psi drops from it.
__________________
You only need two tools in life - WD-40 and Duct Tape. If it doesn't move and should, use the WD-40. If it shouldn't move and does, use the duct tape.
Driving e82, e72, e85, R53 Gone but not forgotten.. 1974 2002, many various 3s. |
|
Appreciate
0
|
| 07-10-2020, 12:03 PM | #90 |
|
Colonel
123
Rep 2,200
Posts |
anyone know the oil flow direction on the stock oil filter housing?
adding a blockoff plate and real thermostat, tired of the oil never warming up on the street does anyone know if I can just stick a AN10 valve on the line and close the flow? I'm not sure how the oil flow routes internally on this housing if there's a blockage like that
__________________
You only need two tools in life - WD-40 and Duct Tape. If it doesn't move and should, use the WD-40. If it shouldn't move and does, use the duct tape.
Driving e82, e72, e85, R53 Gone but not forgotten.. 1974 2002, many various 3s. |
|
Appreciate
0
|
| 12-12-2020, 08:15 PM | #93 |
|
Supreme Galactic Commander (one galaxy over...)

672
Rep 1,778
Posts |
Just installed amg6975 old setup. Went from my parallel setup to series, like most. Parallel is technically more efficient, but this was a turnkey series setup that would give a significant cooler upgrade.
  New Accusump routing is simpler. 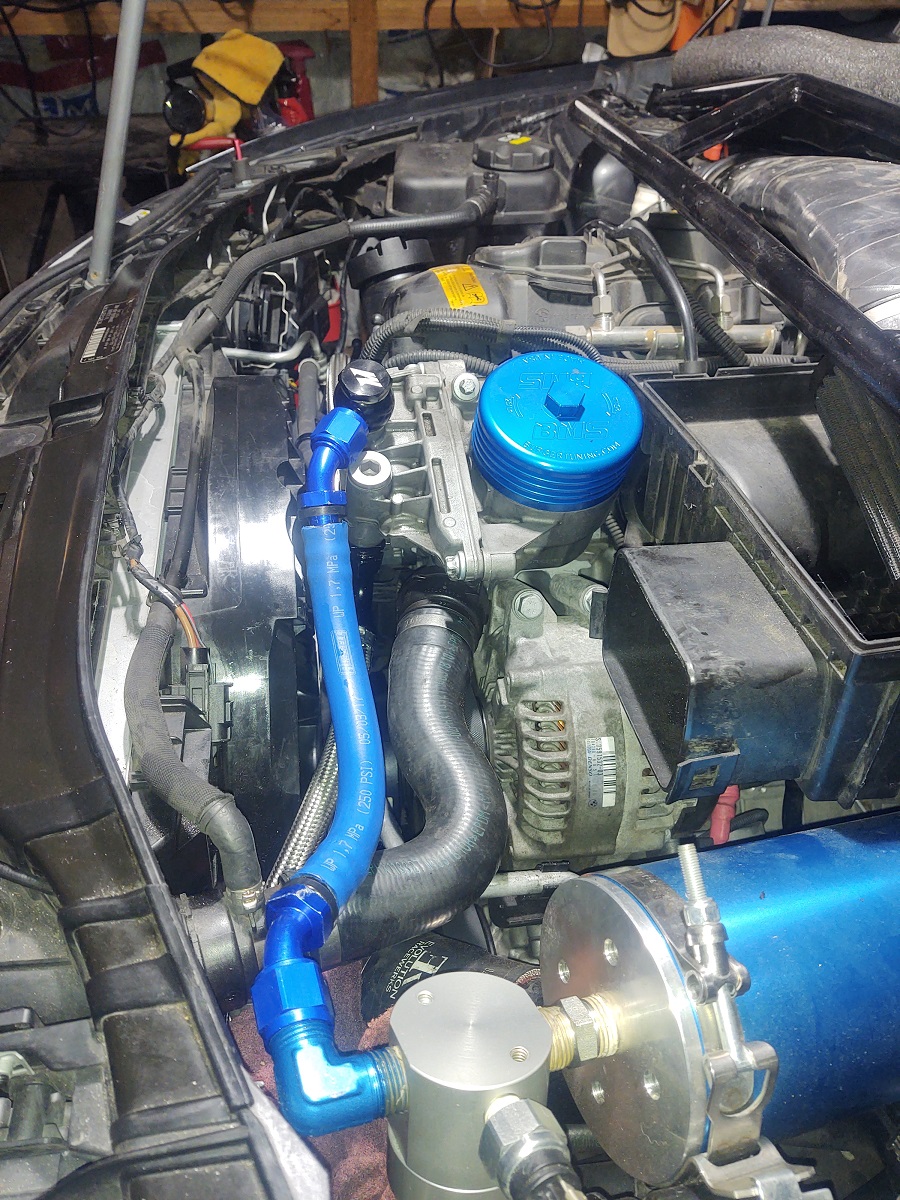
__________________
Best,
Andy  '12 E82-PS2,Stoptechs,Clubsports+M3 bits,Accusump,Wagner DP+EVO III FMIC,ERCP,BMS Intake,Mason Strut Bar,Wedge Tune |
| 01-30-2022, 02:13 PM | #94 |
|
Colonel
707
Rep 2,448
Posts |
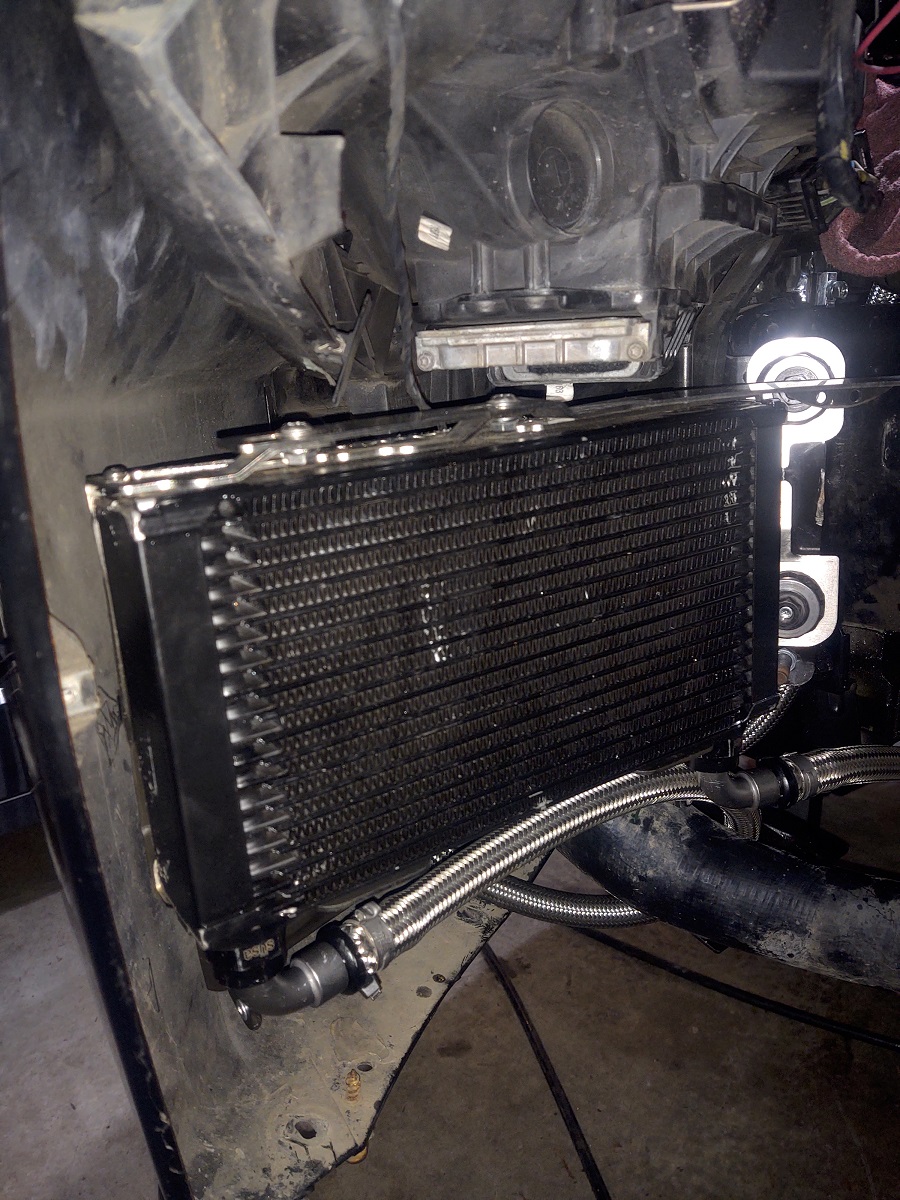
Long over due update. After going through many potential options, learning from all the info shared here, and bugging AndyW, JPuehl, and @chris stokes, I sold out and purchased the ER sports oil cooler on Black Friday. The price was too good to pass up. Basically $550 shipped, with their shroud. Chris was ordering one as well so that made me feel even better about my purchase since I wasnt taking the plunge by myself.
As expected, quality of the materials is top notch. The install was a little challenging because there is basically one orientation where the cooler will fit. They literally used all of the available space. A couple times I thought I had everything perfect only to find a bulge on my bumper the next day haha. A couple of things I didnt love were with the oil lines at the oil filter housing. First, in the e series n55 135i, there is a hard AC line in the way which I am guessing is different on the n54. That was resolved by removing the support bracket for the line and bending the line down and towards the pulleys. Wasnt expecting to do that for a product that has been out for so long and surprised it hasnt been mentioned before. Second, one of the AN fittings at the oil filter housing is a 45 degree. Probably the right fitting for the n54, but for the n55, with the AC line out of the way, it would be better if both lines had straight AN fittings. Also, ER was always responsive via email and phone as I worked my way through the install. So nice to be able to call a phone number and actually speak to someone which is rare today. I dont have any real world performance improvements for now, but no leaks and everything seems good so far. Here are a few pictures in case it helps anyone.
__________________
|
|
Appreciate
1
AndyW672.00 |
| 03-31-2022, 03:45 PM | #95 |
|
Colonel
707
Rep 2,448
Posts |
Adding a link to another oil cooler setup by AndyW , https://www.1addicts.com/forums/show....php?t=1910188
__________________
|
|
Appreciate
0
|
| 04-08-2022, 07:46 AM | #97 | |
|
Brigadier General

827
Rep 3,856
Posts |
Quote:
Let me know if you're interested! |
|
|
Appreciate
0
|
| 04-08-2022, 08:56 AM | #98 |
|
Brigadier General
827
Rep 3,856
Posts |
Like others, I've been hitting limp mode on track with my 128i consistently so finally decided to do get an oil cooler installed. I looked at a few guides on here and talked to a couple people who were very helpful, however I'm just not patient enough for all this and after I put it all together I had a leak from the cooler port (I didn't tighten enough), I decided to give it to a shop I trust to have them finish the work. They ended up going with a stock 135i oil filter housing with the stock thermostat, TMS Oil Cooler Line Fitting Adapter for the stock housing, and running the 10AN lines to the cooler under my driver front headlight to the cooler. All is good now.
Anyways, I figured I'd share some tips from my experience doing this project, as it was a first for me doing any sort of working with stainless AN lines, AN fittings, custom fabrication, etc. I went the route of starting with a Setrab Series 6 16 row cooler, it fits nicely in the middle of the front air dam. You could get a wider one, but no taller for where I mounted it. I had to dremel the plastic bumper support below the kidney grilles to get it all to fit properly and drill two large holes for the ports and secured it all via a mounting bracket from Setrab as well as a ton of zip ties and a few screws. It's been solid for about 5 months now being driven all winter. Two main takeaways from this: 1. One thing I didn't realize was how much of a pain working with stainless steel line and AN fittings was (my first time doing this). It's quite stiff and you'll need gloves due to how sharp it can be. Doing it again, I'd 100% go with the rubber push loc hose and fittings, just make sure whatever hose you get is rated for the temperatures the oil will be, I went with something that could handle up to 300 degrees for the SS line. If you go the stainless route, you'll need something to cut it (some sharp shears are what I used from amazon), and possibly a vice to attach the 10AN fittings. I found it easier to not use a vice however. Also, get AN wrenches that are designed for these fittings, your life will be so much easier! I could not find the correct size wrenches I needed from Home Depot so ended up going with a spanning wrench and another wrench that was pretty close. I wouldn't recommend, but in the end the hoses I built looked pretty darn good and weren't even the part that leaked, it just took a lot longer to do than I originally thought. Once you do a couple fittings, you'll get the hang of it, but I'd still rather go with the rubber hose. 2. Make sure everything is tight and torqued properly!. I couldn't fit a torque wrench in where I was working, nor did I have one that could deal with accurate lower torque settings. I've also never dealt with AN fittings so I basically guessed at how tight everything should be which I'm usually pretty good at. This was my downfall as a tiny leak started after driving for about 10 miles or so after I put the whole bumper back on (that's when I called it quits and gave it to a shop). 3. Important to note if you have the N51 with a Secondary Air Pump. If you route the lines like I did below, the hoses for the SAP are right in the way of where you route the lines, so keep that in mind. I put one line on top of the hose, and one line below so they sort of squeezed the SAP hose a bit. I don't think this is good for long term, as the SS line would surely rub through the rubber SAP hose. This is another reason I like that the shop went directly under my driver headlight and avoided this. So here is the setup I did myself, I'll get a few pics of what the shop did later: Last edited by chris82; 04-08-2022 at 09:07 AM.. |
Post Reply |
| Bookmarks |
|
|


