

|
|
|
|
|
| 04-18-2018, 06:34 PM | #1 |
|
Brigadier General
 
3475
Rep 3,722
Posts |
I'm not going to go into too much detail since I followed ChrisFix's instructions to a T along with the instructions for the paint I used. I'll link the video at the bottom of the thread and go over the basics.
This was on my wife's Mazda 3 but I'm not on any Mazda forums (not cheating on you guys) and wanted to share to show this is possible and doable for a newbie with zero bodywork skill. Damage was caused by a rouge poll in a parking garage, she never stood a chance  Goal of the project was to prevent rust and try to get the car looking a little better without blowing, at the very least, her $500 deductible at a shop. I also wanted to do it in a way that wouldn't impair a professional from fixing this "properly" in the future, if we became interested in that. Stuff used:
Total cost for everything expendable: $80 (not including cost of reusable tools) Here's what I started out with - you can tell how far in it was pushed and how much creasing there was in these pictures: 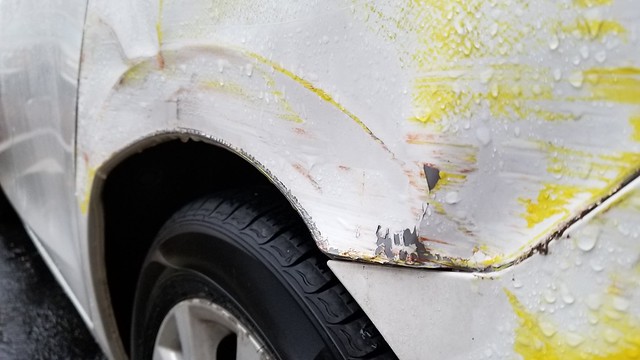 Mazda3DentFix Mazda3DentFix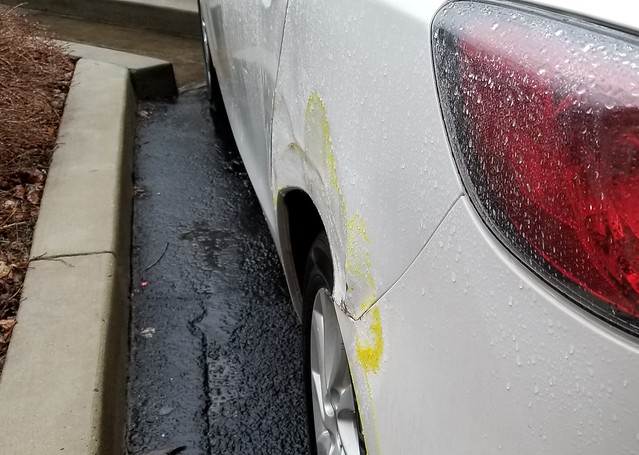 Mazda3DentFix Mazda3DentFix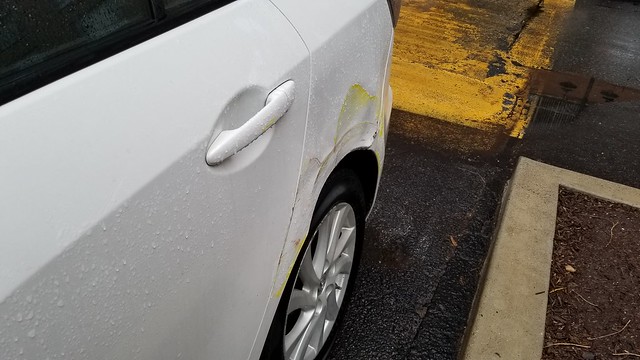 Mazda3DentFix Mazda3DentFixFirst step was using the wire brush to get down to bare metal. Then using the heat gun and hammer with a long screwdriver I did my best to pull the dents and reshape the metal in a way that it wouldn't pop back or move when touched. 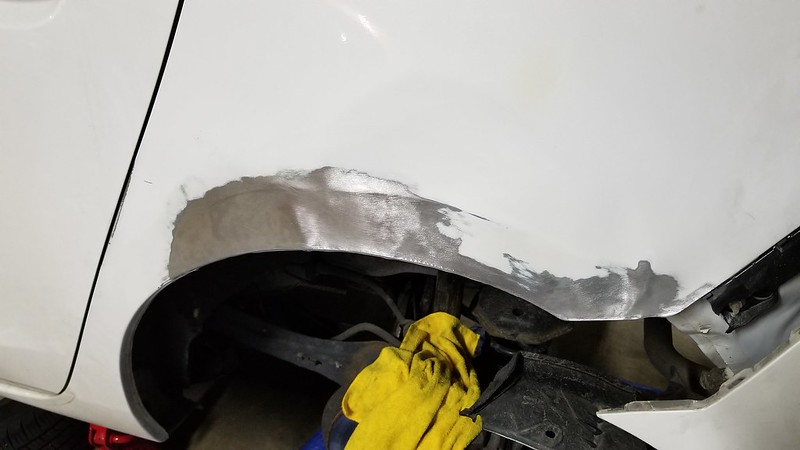 Mazda3DentFix Mazda3DentFixAfter that, it was time for the fiberglass body filler to get enough material to have a strong backer and fill the dents. Then after sanding down some of the glass I did the first layer of bondo, followed by sanding. Then more bondo. Then more sanding. Then more bondo again, followed by additional sanding, and then sanding some more. Finally, sanding again.... and then a little more. All to try and get the shape of the body back and correct the lines that were gone or creased. 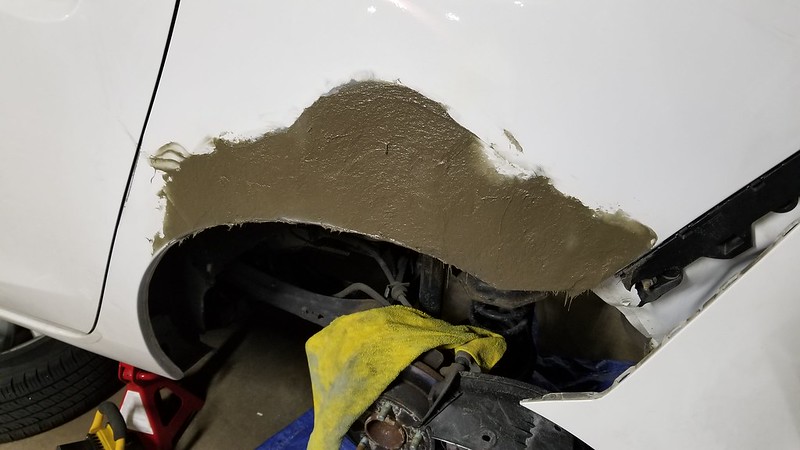 Mazda3DentFix Mazda3DentFix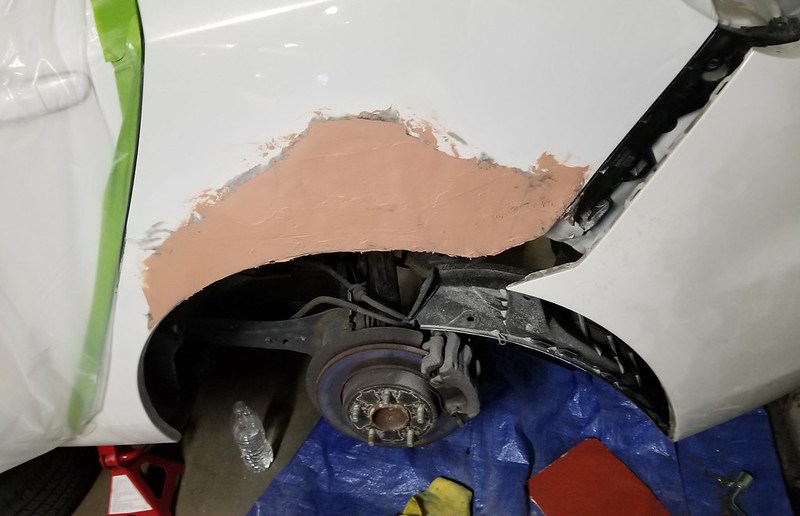 Mazda3DentFix Mazda3DentFix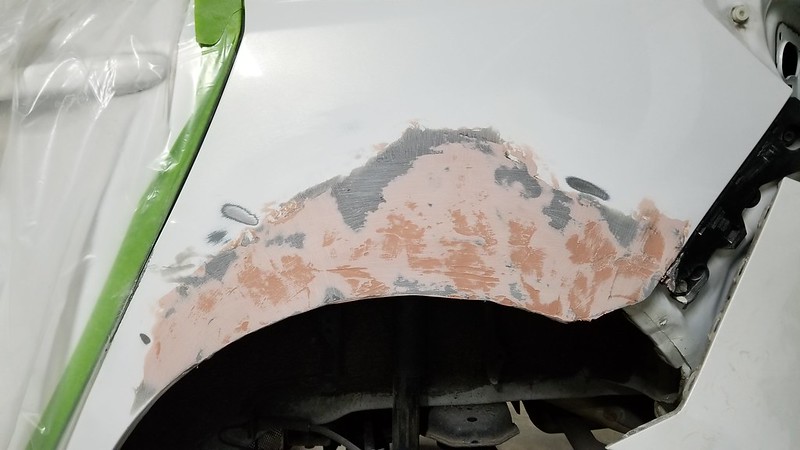 Mazda3DentFix Mazda3DentFix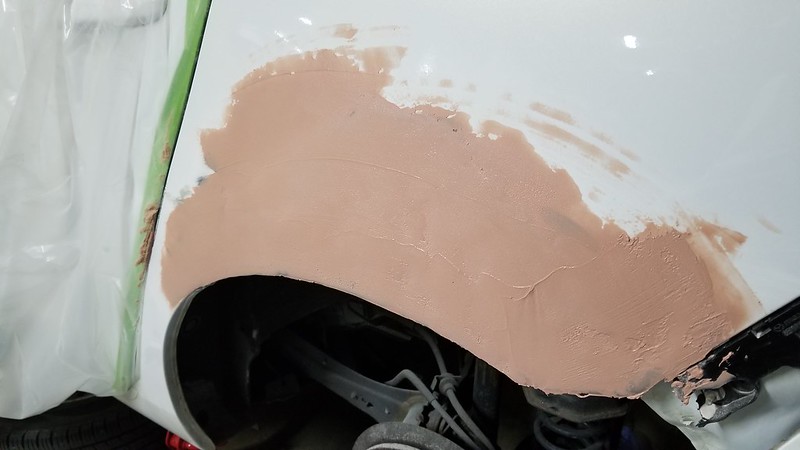 Mazda3DentFix Mazda3DentFix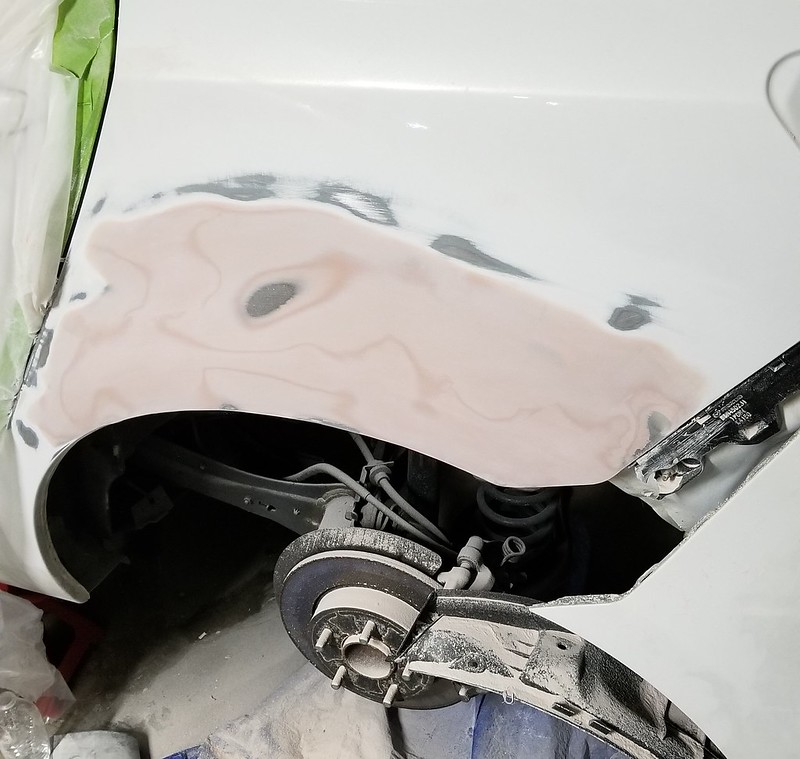 Mazda3DentFix Mazda3DentFix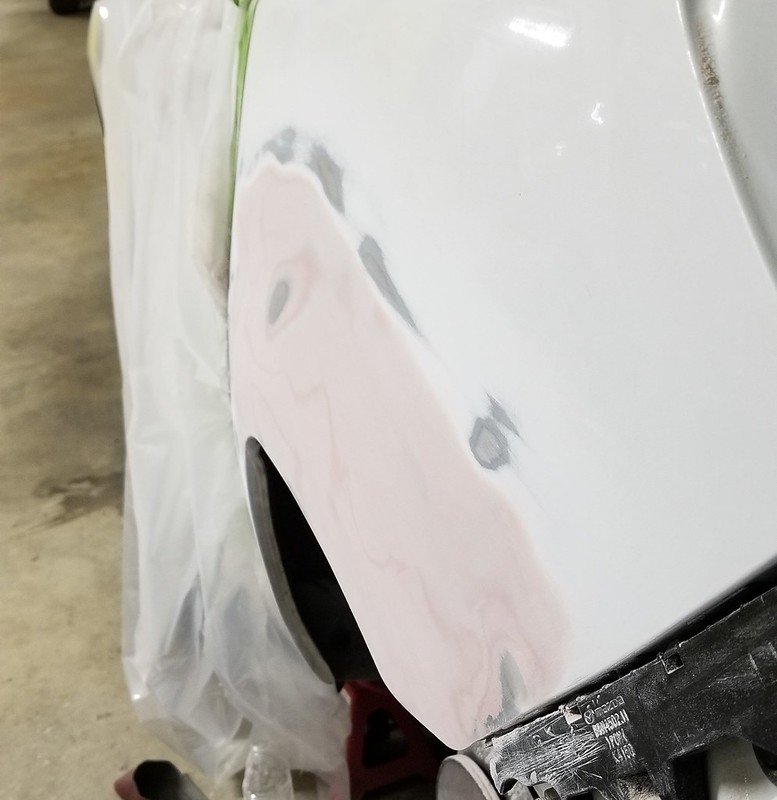 Mazda3DentFix Mazda3DentFixEventually, when I decided I needed to stop sanding or I would be at risk of becoming part of the car, I decided to start the painting process. WHICH MEANT... more sanding. This time with a higher grit in prep for the paint. A couple coats later and I was wet sanding the primer to prep for paint. 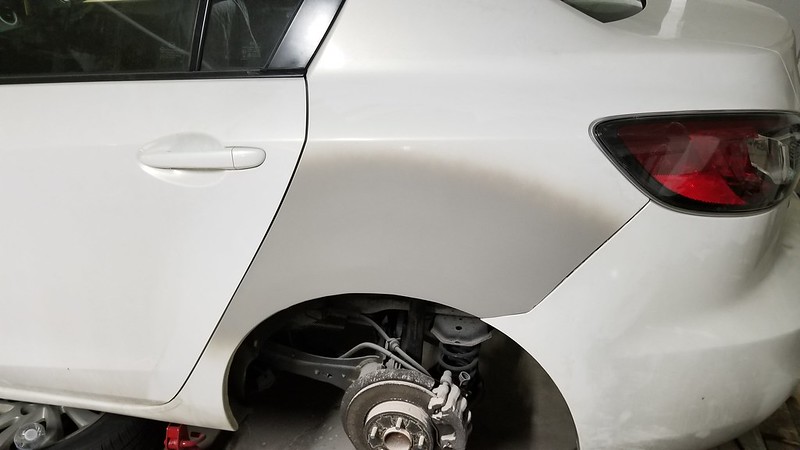 Mazda3DentFix Mazda3DentFix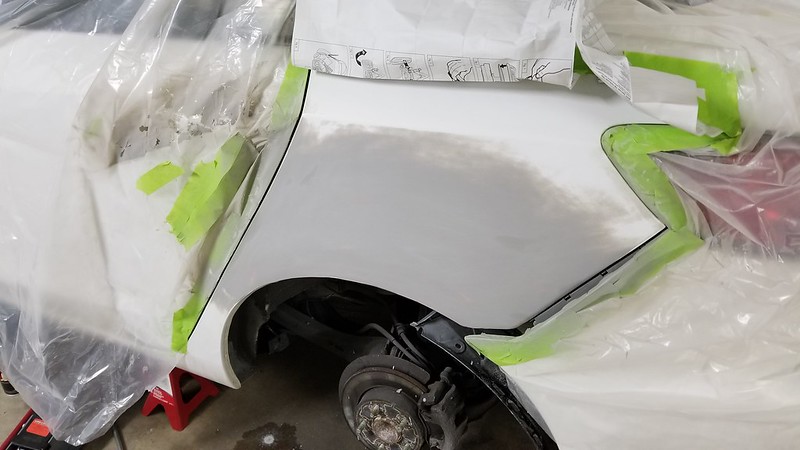 Mazda3DentFix Mazda3DentFixThe paint came in 4 stages:
This next picture is after just one decent coat of groundcoat. After a couple more coats I added the flake, and then sat around for half an hour as it dried. 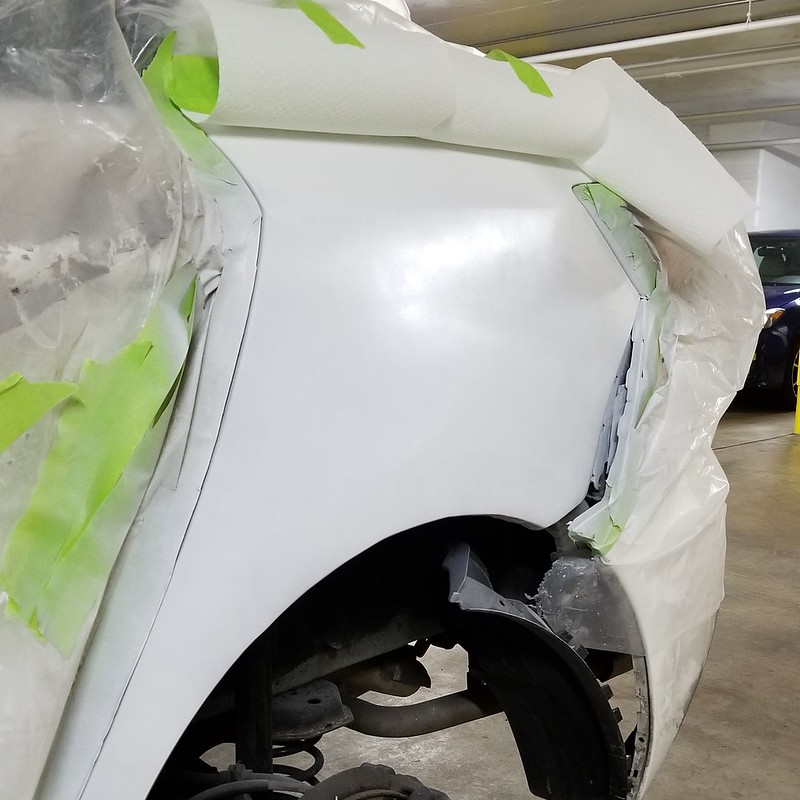 Mazda3DentFix Mazda3DentFix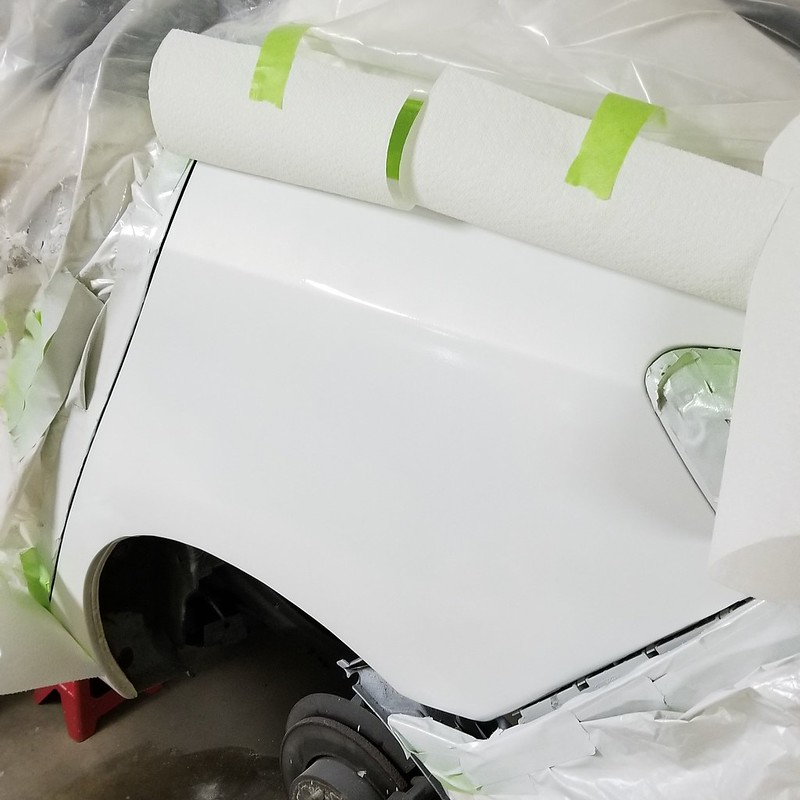 Mazda3DentFix Mazda3DentFix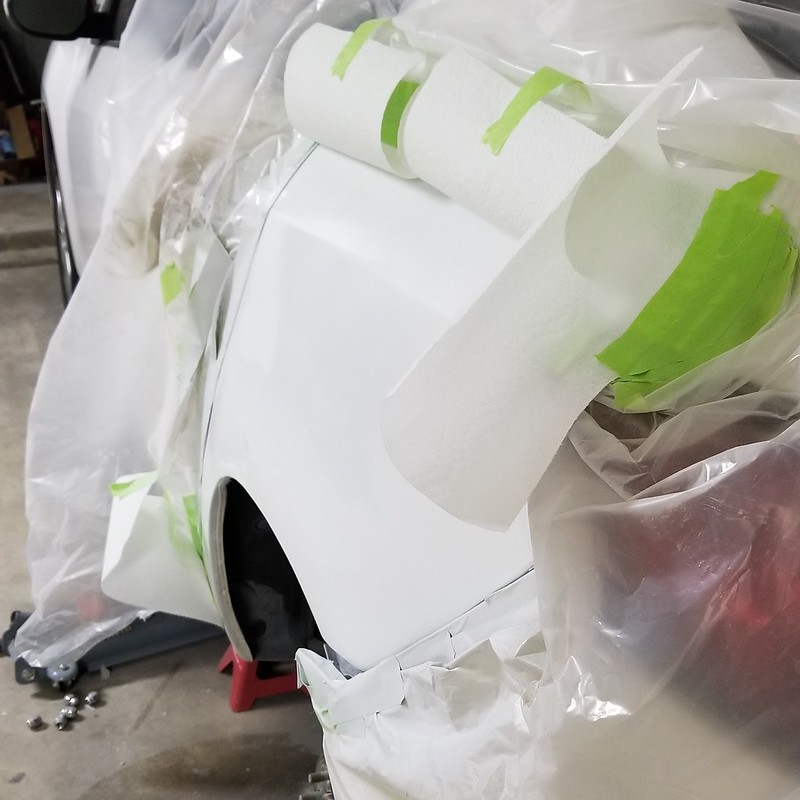 Mazda3DentFix Mazda3DentFixFinally I applied the clearcoat and let the car sit overnight before peeling away all the protective plastic and tape to reveal my work. If you look close or were told the car was damaged you'd be able to pick out some inconsistencies in the body filler, but for $80 and having never done anything like this before I'm extremely happy with the results. The paint is fixed, the body is 90% better, the seams are sealed and painted, and there's no chance of rust now. I still need to wet sand and polish the clearcoat once it fully hardens to bring out the flake and glossiness. The paint matches pretty decently despite the bumper being a bit faded. The car is filthy still since I have to wait to wash it but it looks pretty good even before polishing! 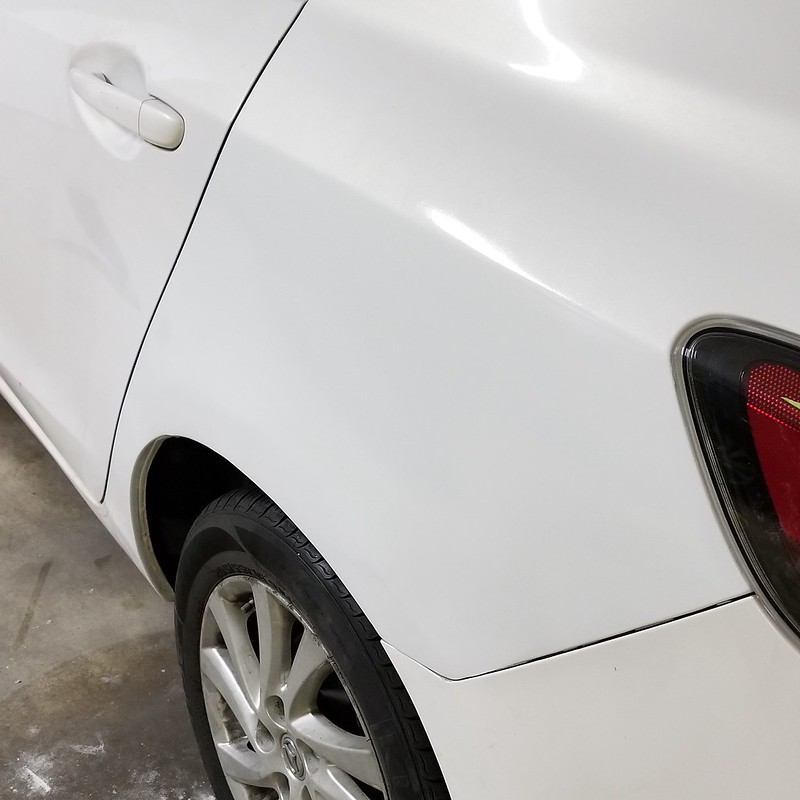 Mazda3DentFix by Matt Steele, on Flickr Mazda3DentFix by Matt Steele, on Flickr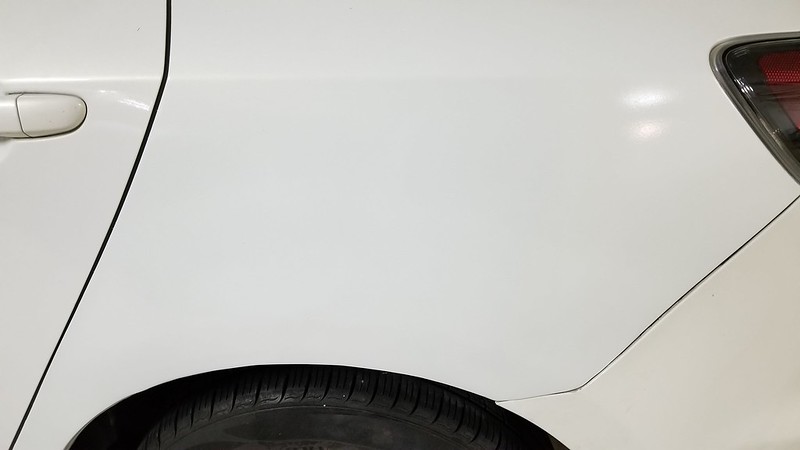 Mazda3DentFix by Matt Steele, on Flickr Mazda3DentFix by Matt Steele, on FlickrHere's ChrisFix's video on how to fix rust that I used as a guideline for this project, I don't think I would have even considered attempting this if I hadn't watched his video first.
__________________
"Tobias" 2013 135i ///M-Sport 6MT Pure Stage 1 XDI 35 HPFP 404whp/440wtq |
| 04-18-2018, 10:09 PM | #2 |
|
BMW Cool Aide!
903
Rep 841
Posts |
Not bad at all, especially for a first timer. Though you didn't do it totally the pro way, the white paint and your willingness to work has made it look pretty good. I would love to see multiple angles in daylight.
__________________
|
|
Appreciate
0
|
| 04-19-2018, 08:09 AM | #3 | |
|
Brigadier General
3475
Rep 3,722
Posts |
Quote:
__________________
"Tobias" 2013 135i ///M-Sport 6MT Pure Stage 1 XDI 35 HPFP 404whp/440wtq |
|
|
Appreciate
0
|
| 04-19-2018, 08:14 AM | #4 |
|
Colonel

1299
Rep 2,093
Posts
Drives: '11 135i M Sport
Join Date: Dec 2013
Location: Delmarva Peninsula
|
Awesome job! Looks like it matched the door perfectly. Time to repaint the rear bumper!
Regardless great job for doing this in a DC parking garage.  
__________________
|
|
Appreciate
1
Matticus913474.50 |
| 04-19-2018, 08:15 AM | #5 |
|
Lieutenant
 118
Rep 463
Posts |
Nice job, can't underestimate the need for sanding. And more sanding.
Did you use the paint out of a gun or from color matched aerosols ? I'm curious because I repainted the front bumper on my A3 after the clear coat failed in epic fashion and I got a great finish with just aerosols. And sanding.
__________________
2008 E88 N54 135i / Cashmere Silver / Beige leather / VRSF catless DP's / BMW Performance Suspension / Whiteline inserts / Aluminum charge pipe and aftermarket BOV |
|
Appreciate
1
Matticus913474.50 |
| 04-19-2018, 08:33 AM | #6 | |
|
BMW Cool Aide!
903
Rep 841
Posts |
Quote:
    Great quality, but not cheap! 2 cans of primer, 2 cans of color and 2 cans of clear were $98.
__________________
|
|
|
Appreciate
0
|
| 04-19-2018, 11:25 AM | #7 | |
|
Brigadier General
3475
Rep 3,722
Posts |
Quote:
__________________
"Tobias" 2013 135i ///M-Sport 6MT Pure Stage 1 XDI 35 HPFP 404whp/440wtq |
|
|
Appreciate
0
|
| 04-19-2018, 12:54 PM | #8 | |
|
Lieutenant
118
Rep 463
Posts |
Yeah, that's who I used for my Audi. Hardest part for me was getting the clear coat to provide the deep shine - never quite managed it. Even used a DA polisher on it but still looked kinda patchy....and I didn't sand enough.
Quote:
__________________
2008 E88 N54 135i / Cashmere Silver / Beige leather / VRSF catless DP's / BMW Performance Suspension / Whiteline inserts / Aluminum charge pipe and aftermarket BOV |
|
|
Appreciate
0
|
| 04-19-2018, 02:06 PM | #9 | |
|
Brigadier General
3475
Rep 3,722
Posts |
Quote:
__________________
"Tobias" 2013 135i ///M-Sport 6MT Pure Stage 1 XDI 35 HPFP 404whp/440wtq |
|
|
Appreciate
0
|
| 04-20-2018, 06:51 PM | #10 | |
|
Lieutenant
118
Rep 463
Posts |
Quote:
__________________
2008 E88 N54 135i / Cashmere Silver / Beige leather / VRSF catless DP's / BMW Performance Suspension / Whiteline inserts / Aluminum charge pipe and aftermarket BOV |
|
|
Appreciate
1
Matticus913474.50 |
| 04-21-2018, 06:59 AM | #11 |
|
1Addict
3231
Rep 7,890
Posts |
Thought I was coming in here to see a massive dent on your 1er. Made me happy that it was the beater. Regardless, looks like you did a decent job. Beats paying someone to do it.
__________________
|
|
Appreciate
1
Matticus913474.50 |
Post Reply |
| Bookmarks |
| Tags |
| dent, fix, paint, repair, rust |
|
|


