|
|
|
|
|
| 10-25-2011, 12:13 PM | #1 |
|
European Editor

10759
Rep 22,992
Posts |
Spark Plug replacemnt on my 135i N54...
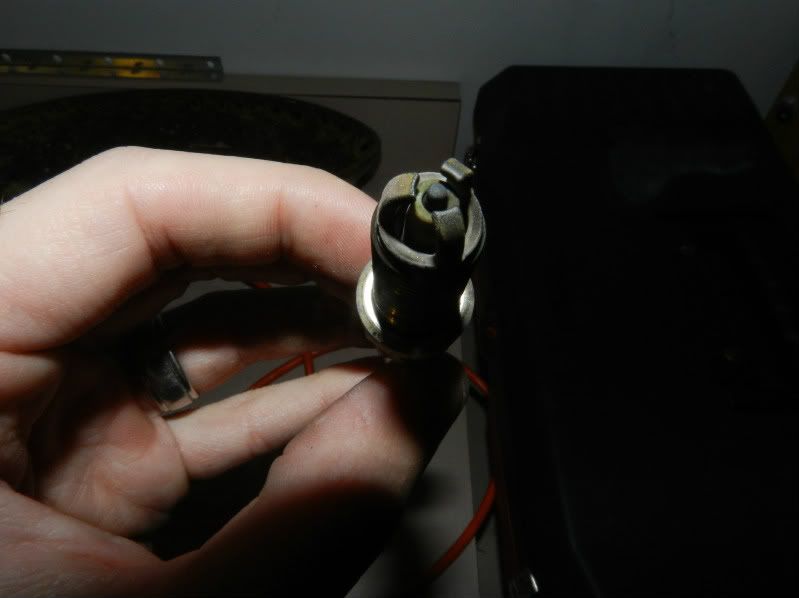
Spark plug socket - Hazet #4766-2 (14mm 12pt 3/8 drive) 25 euros 3/8 drive extension 30cm long Torque wrench (low strength) 23 NM(!) Hex wrench 5 mm Magnetic telescopic pickup 8mm ¼ drive (cowl cover) 6 spark plugs BMW 12 12 0 037 244 BOSCH ZGR6STE2 The spark plugs should be changed every 45K miles. IF your car is still under warranty BMW NA will change them for you. I live in Germany though, and here we must pay for ALL services. Nothing is free in Germany, except the autobahns(at least for now)!! lol I decided to buy my spark plugs from BMW, mainly because I have read that some members have had misfire issues with equivalent BOSCH plugs. The spark plugs say BMW/BOSCH on them. BMW list price is 17 euros each, I paid 13 euros from my friends at my BMW Zentrum.  The spark plugs need to be torque to 23Nm. I bought a low spec 3/8’s torque wrench from Gedore: 5 – 50Nm specs. Install them dry without any anti seize. Also install them with a cold engine. Here are my DIY photos… Btw... I found this DIY over on the e90 post very helpfull... 335i - change spark plugs after 16000 miles http://www.e90post.com/forums/showthread.php?t=142679 Open hood, Remove: pollen micro filter (6 x 8mm bolts) Remove 2 x 8mm bolts (one in each corner of the black metal tray that the pollen filter sits in. Remove sensor(s) on each corner of tray. Now pull out the tray - front part raises - rear unclips out of slot Remove 4 x 5mm allen (chease head/impulse) bolts on engine valave cover. The left rear bolt is tricky to get access too. Use a long 1/4 inch ratchet extension. Also use a telescopic magnetic to "catch" the bolt from falling into the engine inner bowls. Now you can unclip the coil pack (do one at a time!) Gentley pry up on the top of the coil pack to release the electrical connection. Then I used a short 1/2" extension to pull straight up gently and SLOWLY. You don't want to break a coil pack! Then use your special 14mm 12point spark plug socket to unscrew the plugs. ONE at a time. Then install a new plug (dry no - anti seize), hand tighten then use your torque wrench set to 23Nm. use your megnetic pick up tool to catch the 5mm allen bolt incase it comes off of your 1/4 ratchet drive. use a short 1/2 drive ratchet extension to pull the coil pack(s) STRAIGH UP with force. SLOWLY and gently pull them straight up! Last edited by Dackelone; 10-26-2011 at 07:24 AM.. |
| 10-25-2011, 12:14 PM | #2 |
|
European Editor
10759
Rep 22,992
Posts |
more...
coil packs part number... UPDATE: Cobb has made this cool video showing you basically how to change your plugs & coils... Last edited by Dackelone; 10-26-2011 at 07:29 AM.. |
| 10-26-2011, 07:06 AM | #6 | |
|
European Editor
10759
Rep 22,992
Posts |
Quote:
BMW AG says to change the spark plugs at 67K kms and then every 60K kms. Here is a decall/label from a 335i with the PPK... |
|
|
Appreciate
0
|
| 10-31-2011, 03:51 PM | #8 | |
|
European Editor
10759
Rep 22,992
Posts |
Quote:
I put my new plugs in dry (w/o anti-seize). I can sleep at night just fine. |
|
|
Appreciate
0
|
| 11-02-2011, 06:53 AM | #9 |
|
Colonel
 
40
Rep 2,334
Posts |
nice job
|
|
Appreciate
0
|
| 11-02-2011, 07:38 AM | #10 |
|
Major
 199
Rep 1,457
Posts |
Good job on write up - Your spark plugged looked nice for 65k.
__________________
|
|
Appreciate
0
|
| 11-04-2011, 11:32 AM | #13 | |
|
European Editor
10759
Rep 22,992
Posts |
Quote:
I think changing the plugs every 40K miles is fine. Even with a tune or hard use. I would also make sure your air filter is clean and no sand or rocks in the filter housing. 135i air filter replacement DIY... http://www.1addicts.com/forums/showt...air+filter+diy Dackel |
|
|
Appreciate
0
|
| 11-06-2011, 09:46 PM | #14 |
|
Brigadier General

90
Rep 3,731
Posts
Drives: BMW S1000XR
Join Date: Jun 2011
Location: Gilbert, AZ
|
Nice write up....will be changing mine if BMW does not cover it under maintenance next year.
__________________
 BMWCCA member |
|
Appreciate
0
|
| 02-05-2012, 11:04 AM | #18 |
|
Private
 2
Rep 54
Posts |
Thanks for the excellent write-up, I have 4 of 6 done, and I have a question for those of you that have done this. What did you guys do with the little bit of metal flakes/dirt thats down in the channel after you remove the old plug but before you put in the new one?
It would be very difficult to photograph so that's why I'm not posting a picture, but I worry that it might affect the seal of the spark plug washer to the head? My vacuum isn't narrow enough to get down there, but I could rig something up. Did you guys worry about it? I haven't done anything about it, but I'm starting to question if I should have. I also found that a mouse had been chewing on one of my coil wires, which is ridiculous because this car is a daily driver. Thanks for your help! |
|
Appreciate
0
|
| 02-05-2012, 01:21 PM | #19 | |
|
European Editor
10759
Rep 22,992
Posts |
Quote:
As for your mouse damage... be carefull, espcially under the engine(belly pan) where the wires for the O2 sensor and oil level sensors are. These rodents can do major damage. The Germans hang toilet bowl cleaners under the engine hood or even have these electronic boxes that "chirp" high freq that drive these chewing annimals away. |
|
|
Appreciate
0
|
| 02-05-2012, 01:42 PM | #20 | |
|
Private
2
Rep 54
Posts |
Quote:
I fired the car up without the engine cover on, and I can't believe how loud the engine was without that cover and the associated foam. I build Hondas for a living, and our little 4's do not have any sound deadening like that around the engine, and they do not make anywhere near that amount of noise. I know I'm talking about completely different ends of the spectrum for engines, but wow. For it's part, the foam does a great job blocking the noise. I need to try and find the pin removal tool for our coils so I can pull the wires and get some heat shrink around them. One wire is kind of bad, the rest just have little grooves. I tried cutting spirals into the heat shrink, but when heated they just unraveled. I think they'll be ok for the time being, because I think the damage probably happened two years ago when I lived next to a cornfield and drove my S2000 a lot more frequently. I've never seen any mouse droppings at my new house, so my guess is it's been like that for 2 years. That's at least what I'll tell myself so I don't worry too much. Thanks again for the write-up. It worked great! Now it's time to go downtown for the Super Bowl. Go Giants! |
|
|
Appreciate
0
|
| 02-05-2012, 02:10 PM | #21 | |
|
European Editor
10759
Rep 22,992
Posts |
Quote:
I did the exact same thing and had the same reaction to the loud ticking noises. I guess it is because our engines are direct injection while most engines are not. Without that foam pad the noise is so much louder! lol Btw... I think AMP probably makes the electrical pin(out) tool you are looking for. But even SnapOn or the like should make a compatible pin removal tool. |
|
|
Appreciate
0
|
| 03-01-2012, 07:09 PM | #22 |
|
Private
2
Rep 54
Posts |
Spark plugs replaced
I figured I'd post a couple pics of my plugs since I waited a little longer than I should have to change them. I could lie and say I was a perfectly responsible owner and changed them at 45k miles, but instead they had 58000 miles on them. I find it convenient that I had my car in to the dealer with 43k miles, and they didn't do them then, or say anything about it, but oh well. They all were very uniform, which was slightly re-assuring, but I'll let the pictures do the talking.
 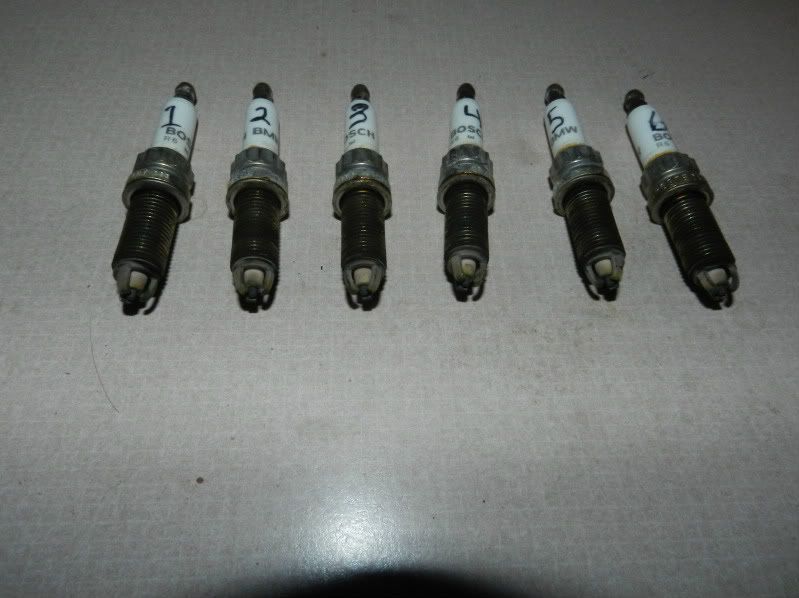 I also didn't really notice an increase in power or how it ran after the change, but I think I'm also due for the fuel injector reprogram or recall. I feel ever so slight hesitations on normal driving sometimes, but have never gotten a light or anything. Crank times are getting up there too so maybe a second HPFP as well. |
|
Appreciate
0
|
Post Reply |
| Bookmarks |
|
|