

|
|
|
|
|
| 07-06-2017, 08:55 PM | #1 |
|
Brigadier General
 
3475
Rep 3,722
Posts |
(Reposting this here since it's just in the general section) I've had a variation of one of these CD-mount phone holders for many months now - the one linked above being my current model. I'm a huge fan of them since they take up very little space, put my phone in a perfect location, and since I never use CD's/DVD's it removes zero functionality for me. The next step in this idea process was getting an S7 Edge, which has built-in wireless charging (way before the iPhone 7, pssh  ). ). 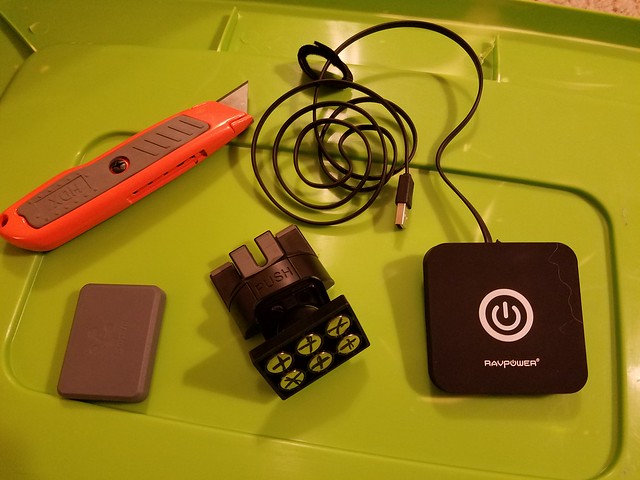 20160916_195311 by Matt Steele, on Flickr 20160916_195311 by Matt Steele, on FlickrSooooooooo the butchery has begun. I snagged a cheapo wireless charger with decent reviews off of amazon. They all work on the same basic principles so I looked for one with a single-coil design for compact size and preferably an easy-to-crack case. I hit the jackpot since the one I ordered is super cheap ($8!!!) but also has a soft rubbery case that I could easily cut the coil out of. It took all of 20 seconds to get the coil free from the case. 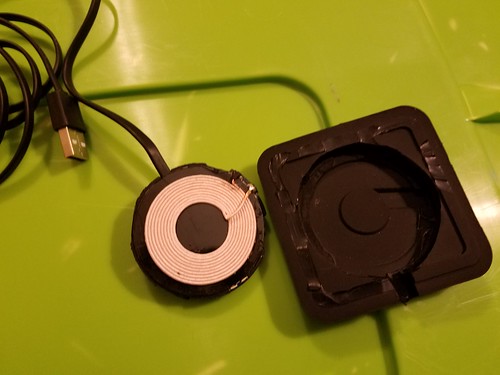 20160916_195346 by Matt Steele, on Flickr 20160916_195346 by Matt Steele, on FlickrThe Coil itself is not much bigger than the original mounting plate on its own: 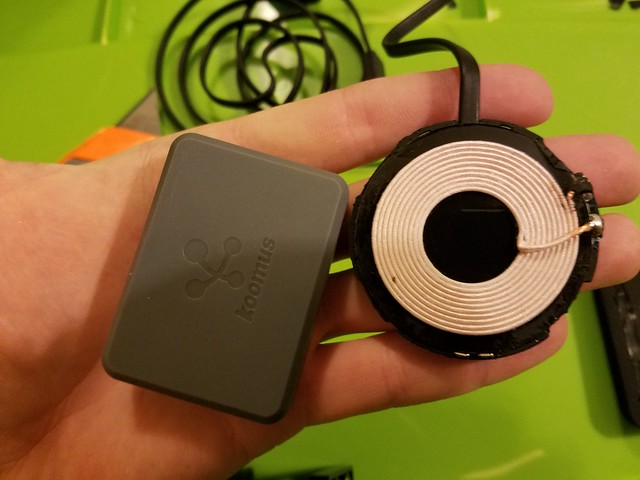 20160916_195407 by Matt Steele, on Flickr 20160916_195407 by Matt Steele, on FlickrWoo! We're in business. Coil is free and my CD-mount is cut up and ready for whatever I want to glue to it. Next step is making a new case for the wireless charger. My first attempt at this used a blue plastic electrical outlet box, it was a miserable failure and will not be further mentioned.  The goal here is to use the hardcore neodymium magnets from the CD-mount to hold the phone, while the wireless charger....charges. So I needed a piece of plastic that was about the size of a deck of cards to hold the charging coil and mount the magnets. This was surprisingly difficult to find but I found some "homemade soap" molds (thanks Michael's) that were the perfect size (the upper right mold in the link) and made of rather stiff, yet workable plastic. Update: "HOLD ME BACK BRO." 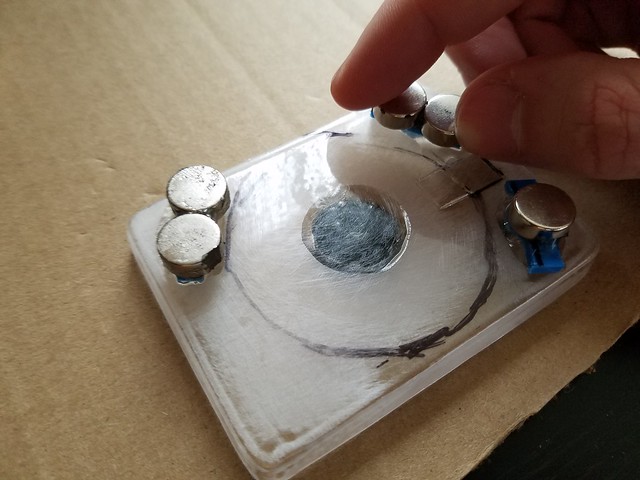 20160919_181352 by Matt Steele, on Flickr 20160919_181352 by Matt Steele, on FlickrThese little magnets pull like crazy. I figured out my layout and started epoxying the magnets to what would become the inside of the case. I had to hold the magnets back from each other for about 8 minutes before they wouldn't drift toward each other. All magnets on and coil in place. I decided not to epoxy the coil and simply place it in the middle, so if I ever want to re-use it I can take the case apart without damaging the coil. Note the little window for the cable to pass through. 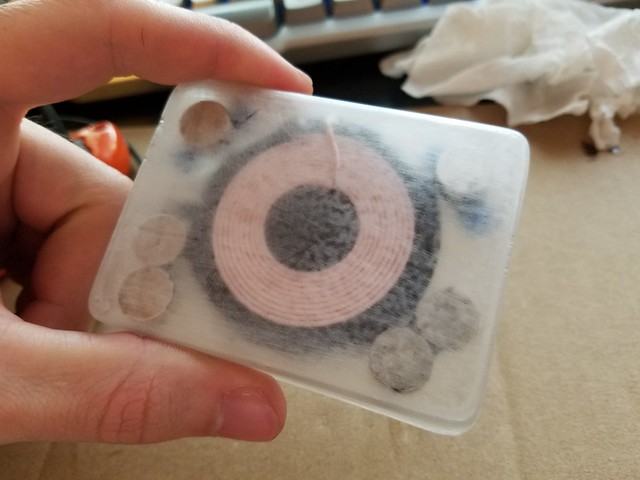 20160919_185510 by Matt Steele, on Flickr 20160919_185510 by Matt Steele, on FlickrAll put together and the top part of the case has been attached. Actual thickness of the whole unit is less than half an inch! I'll trim back the sides once everything is totally dry. 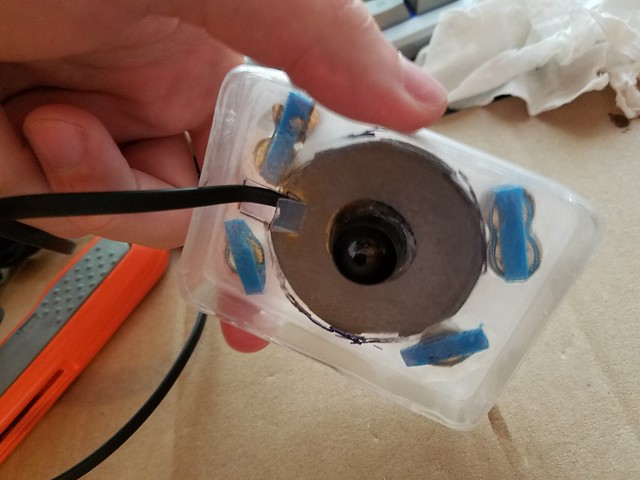 20160919_185514 by Matt Steele, on Flickr 20160919_185514 by Matt Steele, on FlickrBack view, "vent/window" for the cable, and the cup mount for the cd-mount arm. Aaannnd arm/cd mount attached! All that's left is paint and microsuction tape for the face to help the phone stick. 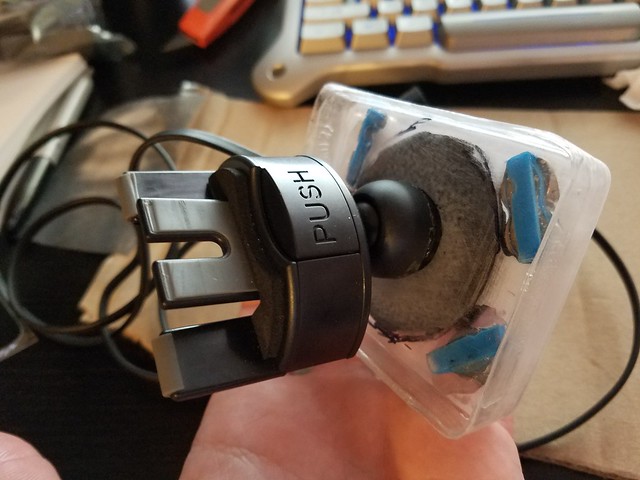 20160919_190512 by Matt Steele, on Flickr 20160919_190512 by Matt Steele, on FlickrTotal project cost me $31: Qi Charger: $8 Plastic: $8 CD Mount: $15 It's actually thinner than the original car magnet mount, so my phone sits farther from the shifter, and it charges at a better rate than I expected. Overall very happy with it. Painted up and microsuction tape applied!  20160923_092409 by Matt Steele, on Flickr 20160923_092409 by Matt Steele, on Flickr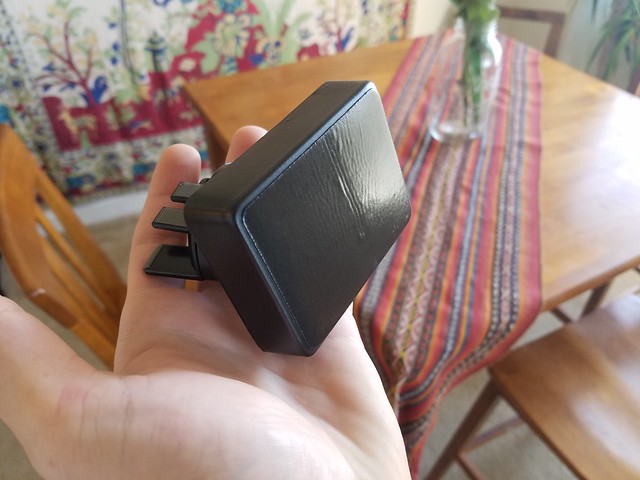 20160923_092358 by Matt Steele, on Flickr 20160923_092358 by Matt Steele, on FlickrIn car shots! With my hand on the shifter in 5th gear you can see there is plenty of clearance: 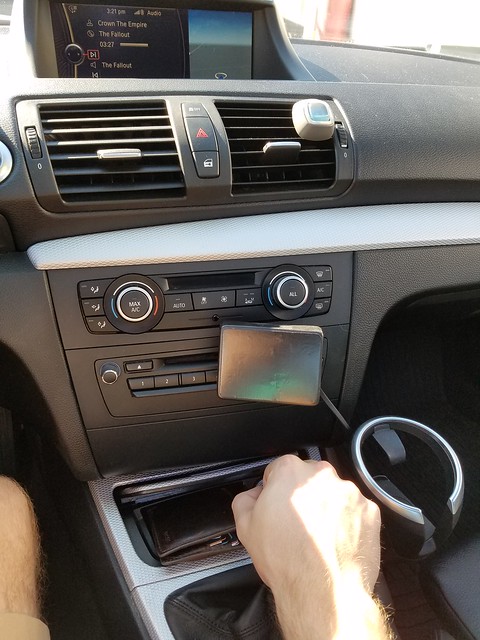 20160923_152204 by Matt Steele, on Flickr 20160923_152204 by Matt Steele, on FlickrAnd an overall shot: 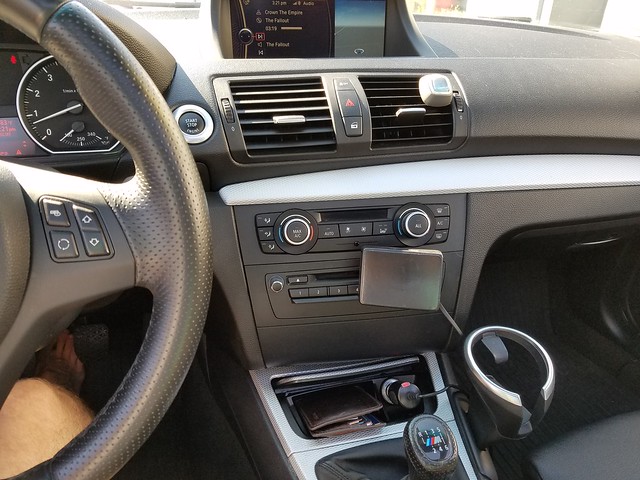 20160923_152155 by Matt Steele, on Flickr 20160923_152155 by Matt Steele, on FlickrUpdate on this (7/6/17), I've had the charger in my car for nearly a year now and it still works perfectly! I use an Omaker usb charger in the cigarette port under the arm rest, it has three USB slots and this only takes up one (I use the 2.4a slot). It will keep my phone charged even while running Google Maps/nav and Spotify over Bluetooth with the screen on - that's a lot of load to keep up with. If you plug other devices into the USB adapter it will not be as powerful but will still keep the phone from dying. Looks just as good as dayay one and any time the microsuction tape starts to get less sticky I can just wipe it off with a damp napkin and it's good to go.  20170706_210802 by Matt Steele, on Flickr 20170706_210802 by Matt Steele, on Flickr
__________________
"Tobias" 2013 135i ///M-Sport 6MT Pure Stage 1 XDI 35 HPFP 404whp/440wtq |
| 07-13-2017, 07:47 AM | #2 |
|
Enlisted Member
 5
Rep 43
Posts |
Do you use a case on your phone? And are those magnets strong enough alone to hold the S7e and not interfere with charging? Can you post some pictures with the phone in please?
 |
|
Appreciate
0
|
| 07-13-2017, 10:16 AM | #3 | |
|
Brigadier General
3475
Rep 3,722
Posts |
Quote:
The magnets are really just there as extra support since the microsuction tape does 90% of the work holding the phone, I don't think the magnets were even necessary in hindsight. They do not interfere with charging one bit! I'll try to get some pics of my phone on the mount for you 
__________________
"Tobias" 2013 135i ///M-Sport 6MT Pure Stage 1 XDI 35 HPFP 404whp/440wtq |
|
|
Appreciate
0
|
| 07-13-2017, 11:18 AM | #4 | |
|
Enlisted Member
5
Rep 43
Posts |
Quote:
|
|
|
Appreciate
0
|
| 07-13-2017, 11:31 AM | #5 | |
|
Brigadier General
3475
Rep 3,722
Posts |
Quote:
For your power, you can get a fuse tap and use the accessory fuse. There's a DIY on that here: http://www.1addicts.com/forums/showthread.php?t=211933
__________________
"Tobias" 2013 135i ///M-Sport 6MT Pure Stage 1 XDI 35 HPFP 404whp/440wtq |
|
|
Appreciate
0
|
| 07-17-2017, 09:29 AM | #6 | |
|
Enlisted Member
5
Rep 43
Posts |
Quote:
. |
|
|
Appreciate
0
|
Post Reply |
| Bookmarks |
| Tags |
| charger, custom, mount, phone, wireless |
|
|


