

|
|
|
|
|
| 08-28-2020, 02:52 AM | #1 |
|
Supreme Galactic Commander (one galaxy over...)

697
Rep 1,784
Posts |
Accusump install
I decided to pull the Accusump install into a separate thread...
So, after reading about some N55 engine self-destructions and tracking my oil pressures on the track, I became convinced that I needed some kind of oil starvation solution to mitigate this issue(pressure was dropping into the 20s on sharp and/or long left handers with high G's. Our idle oil pressure is 40 psi). I didn't do a baffled pan because, one, I didn't find consistent data that they were dramatically effective, and two, I didn't want the hassle of dropping the subframe to get to the pan. Enter the Accusump. This is a solution already in use by many full-fledged race cars and is relatively inexpensive (I got everything needed for about $700 but that includes about $75 in parts I ended up not using as I changed the design). The Accusump is a two volume tank with a moving piston in the middle. One side you press to 7-10# with air, the other side is for oil and should be attached as close to your oil galley as you can get it. I attached it to a return line from one of my oil coolers. The system also includes an electrically controlled valve (EPC) and a pilot valve that you can get it varying setpoints (I got the 55-60# one for reasons I will discuss below) The principle is that it always allows oil to fill it to whatever max oil pressure it sees, so, based on some calculations I did using Boyle's law, with 10# on the air side, at 40# of oil pressure (idle), it will fill to 2 1/4 quarts and at 80# (near max for N55) it will fill to 2 5/8 quarts. What causes it to vent oil to the system is the EPC which is controlled by the pilot valve. So, for the setup I chose, if pressure sensed in the oil system falls below 55#, it will energize and open, and will de-energize when pressure again goes above 60# (and refill, since it will *always* fill). My logs from a recent track day indicated that, without the Accusump, oil pressure was less than 55# ~15% of the time on a typical 20-25 min session. Both valves are electrically actuated and need to be wired to your car. First decision was location. I blatantly copied bbnks2 but decided to step up from the zip-tie method. The location is nestled right above the charge pipe. The 3 quart Accusump is LARGE and basically fills that space. A 2 quart is the same diameter so the incremental cost of going longer for more oil capacity seemed like an easy choice. I elected to move my PS tank over to make extra room. 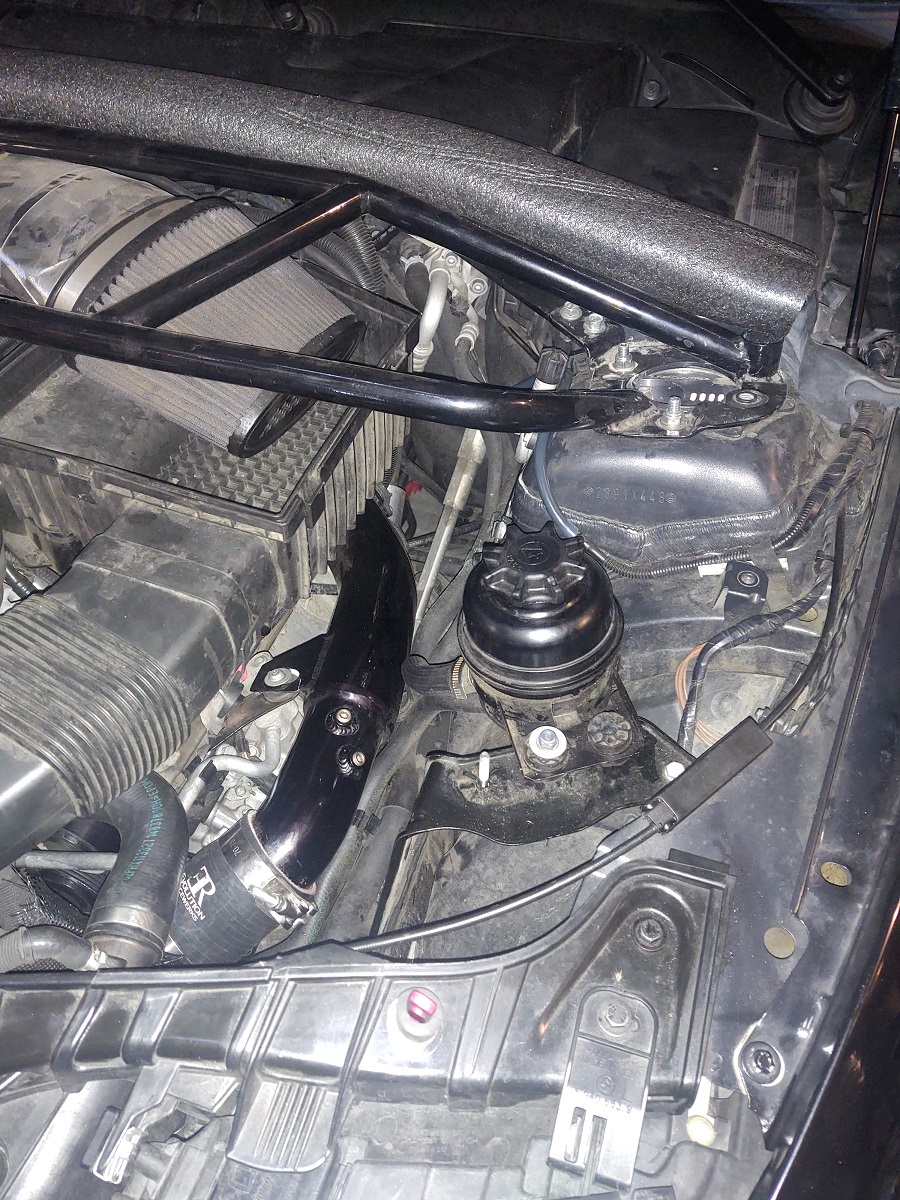 Next issue was the groud wire stud on the inside of the drivers side wheel well. The Accusump will be touching it, either permanently or occasionally, depending on how you center it, and, in my view, hitting the metal cylinder repeatedly with a sharp object seemed like a bad idea, both for cosmetic and long-term functionality reasons. The choice was either to relocate the stud, or somehow blunt the end. I tried a rubber piece that was the upper half of an air system cap, but it slipped off easily during motion, so I ended up simply putting a plastic nut on the end of the stud so it would at least be softer than the tank and wouldn't scratch. It also provides some support. Time will tell if this ends up being a sufficient mitigator to prevent damage. 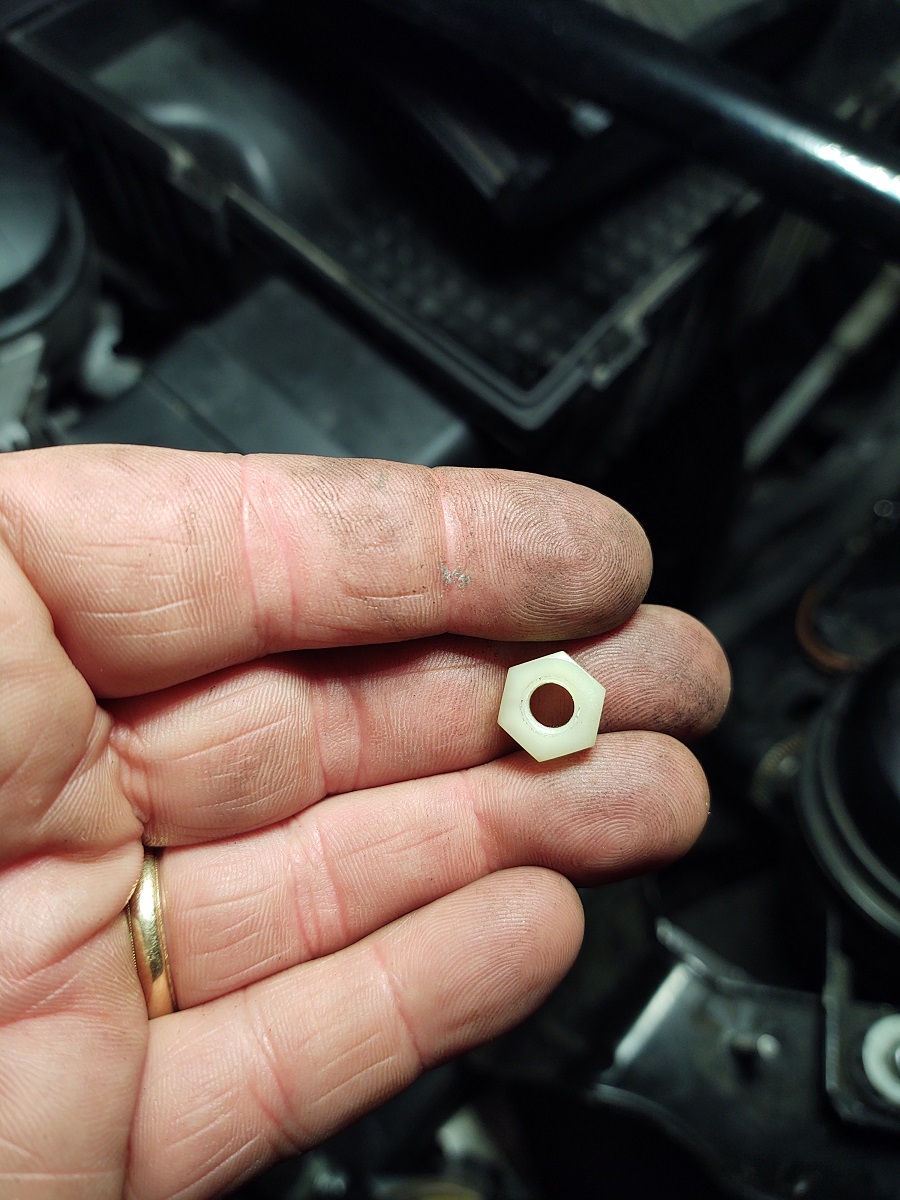 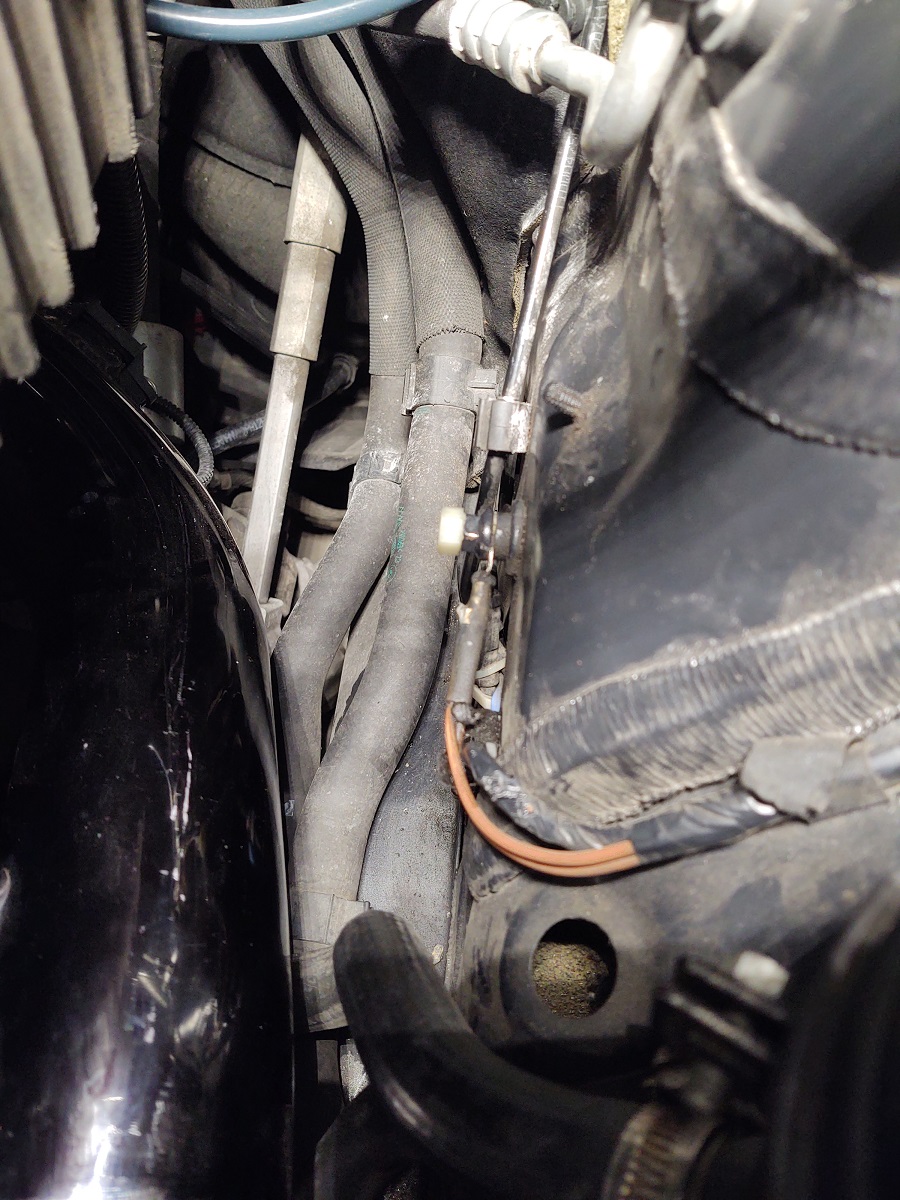 I ordered the Canton mounts and elected to attach the front one to the PS mount and leverage my Mason strut bar to provide a support for the rear of the Accusump. 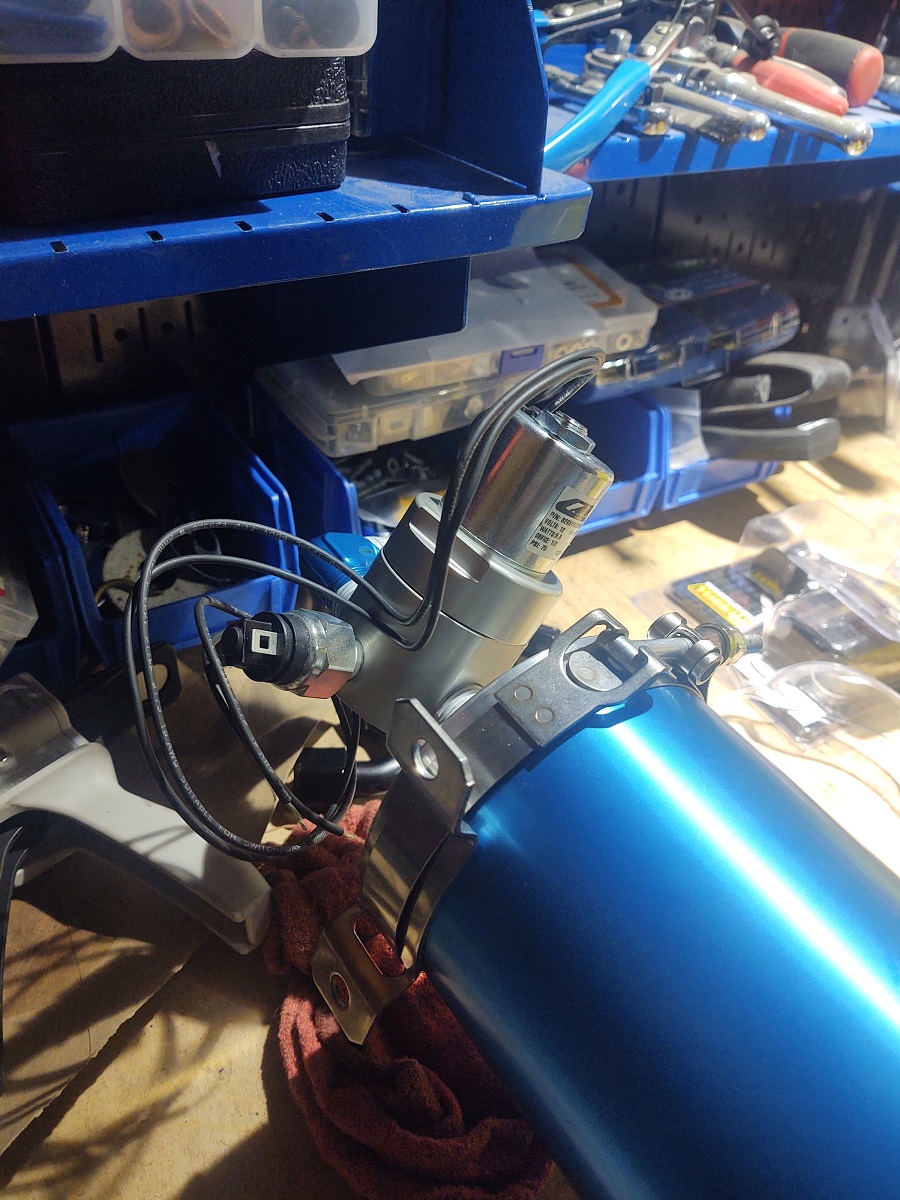 Astute observers will note that the EPC is installed backwards in this pic...didn't figure that out until testing...lol. Pro-tip...really look at the pics in the instructions! One of the challenges with the front mount was that it needed the PS bracket to be taller, for a proper fit. I decided to leverage the stud on the PS bracket that was going unused due to me moving the PS tank. I considered an eye bolt first, but I happened upon this strange shaped piece of metal in one of my various "extra parts" buckets and realized I could use it as a "grabber" to hold the upper part of the front Accusump bracket. I have no recollection for what it was originally for, but it does a great job. The pics tell the story. 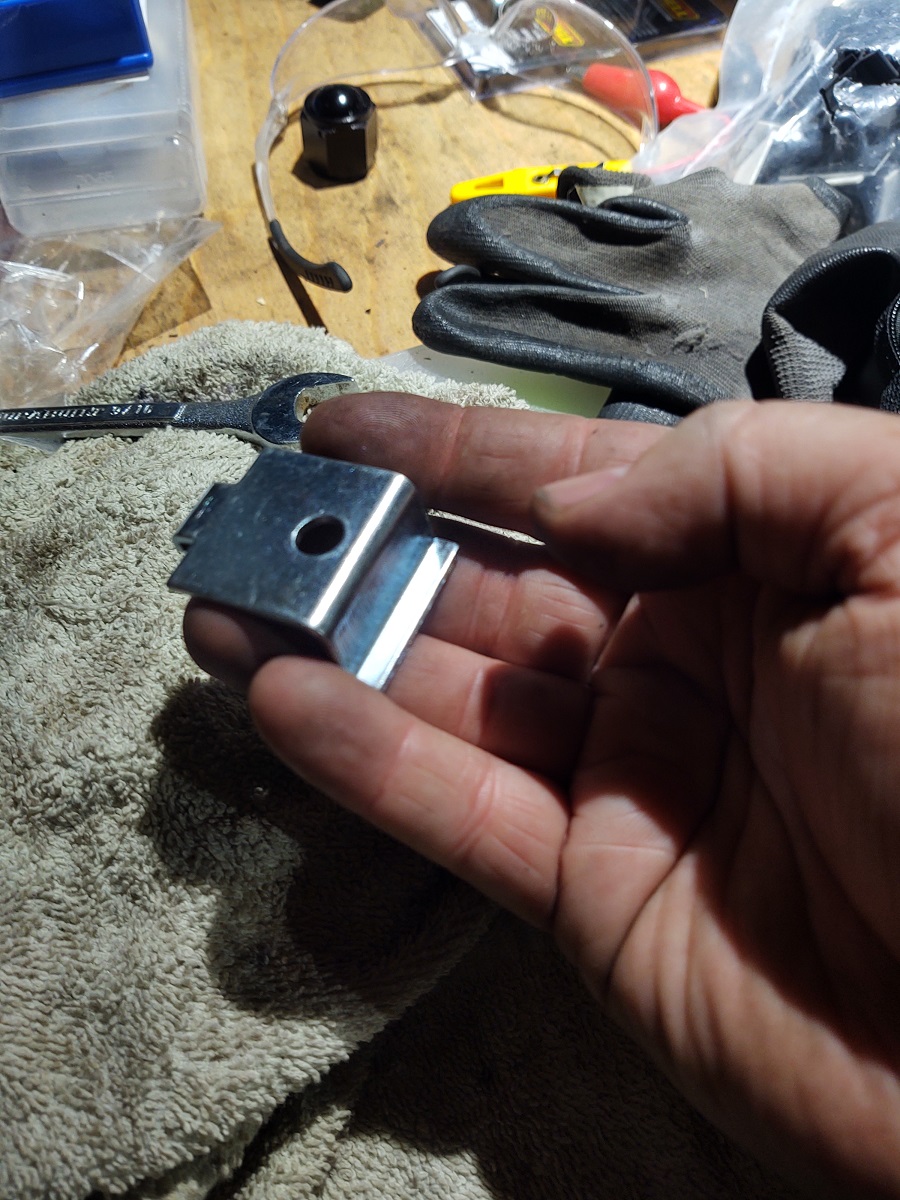 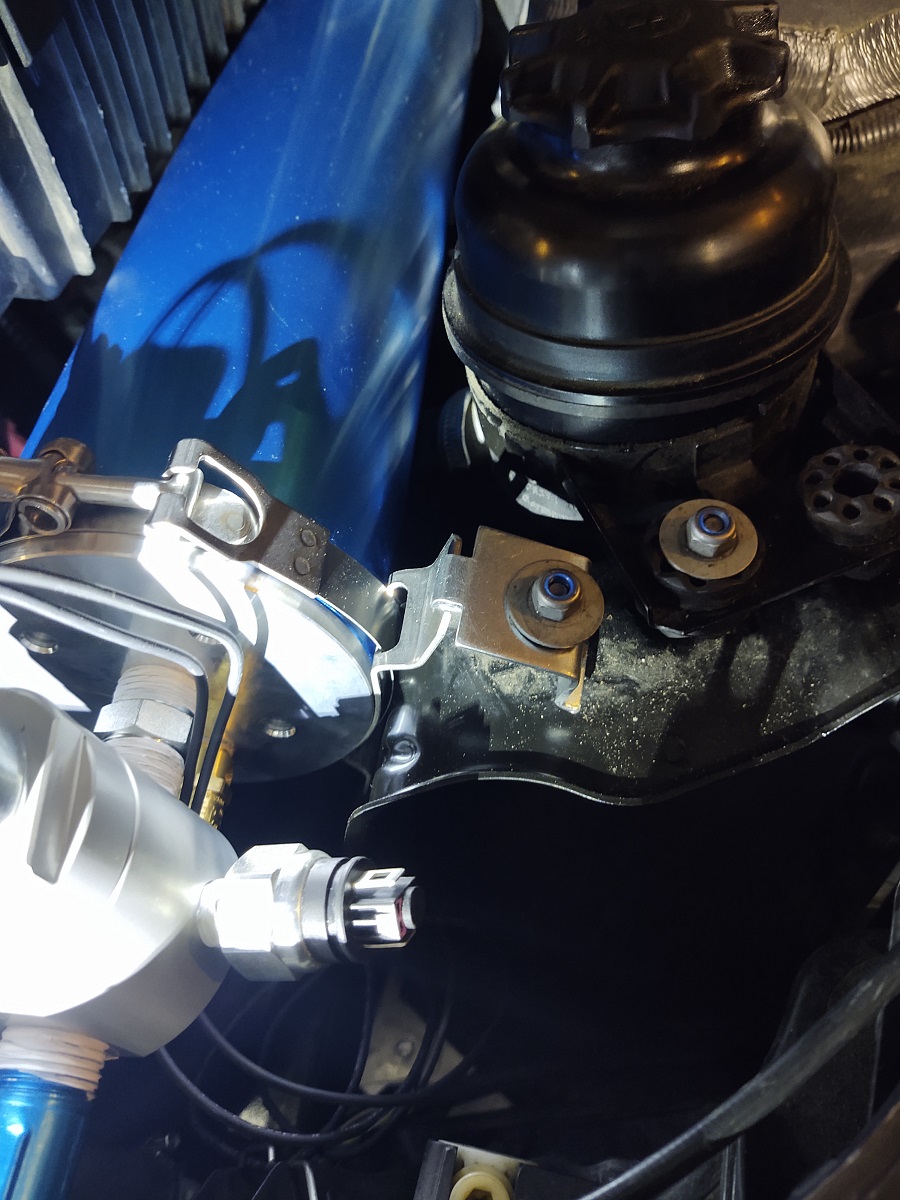 BTW, I didn't even have to remove the PS bracket to drill the hole for the bottom part of the Accusump bracket. This setup worked great.  For the rear, I elected to leverage my Mason strut bar to suspend the rear of the Accusump. I also found a rubber "tiedown" in a spare parts bin and leveraged that, plus a set of u-bolts to support the rear. It also enables me to fairly easily remove the Accusump, if I needed to for maintenance or something. I forgot to measure the Accusump bracket hole width before going to the hardware store...so I guessed and it was a little small..but I used my vice and stretched the u bolt out and it worked fine. 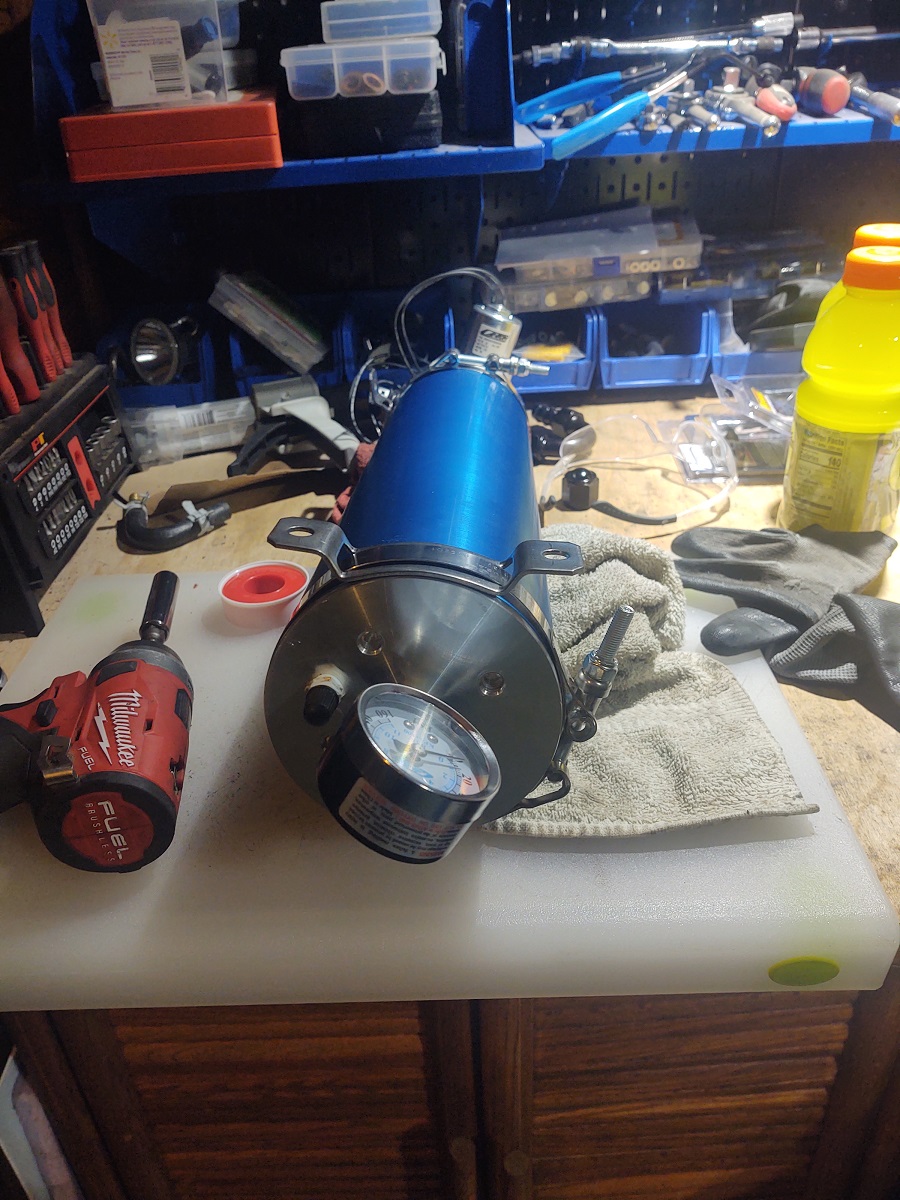 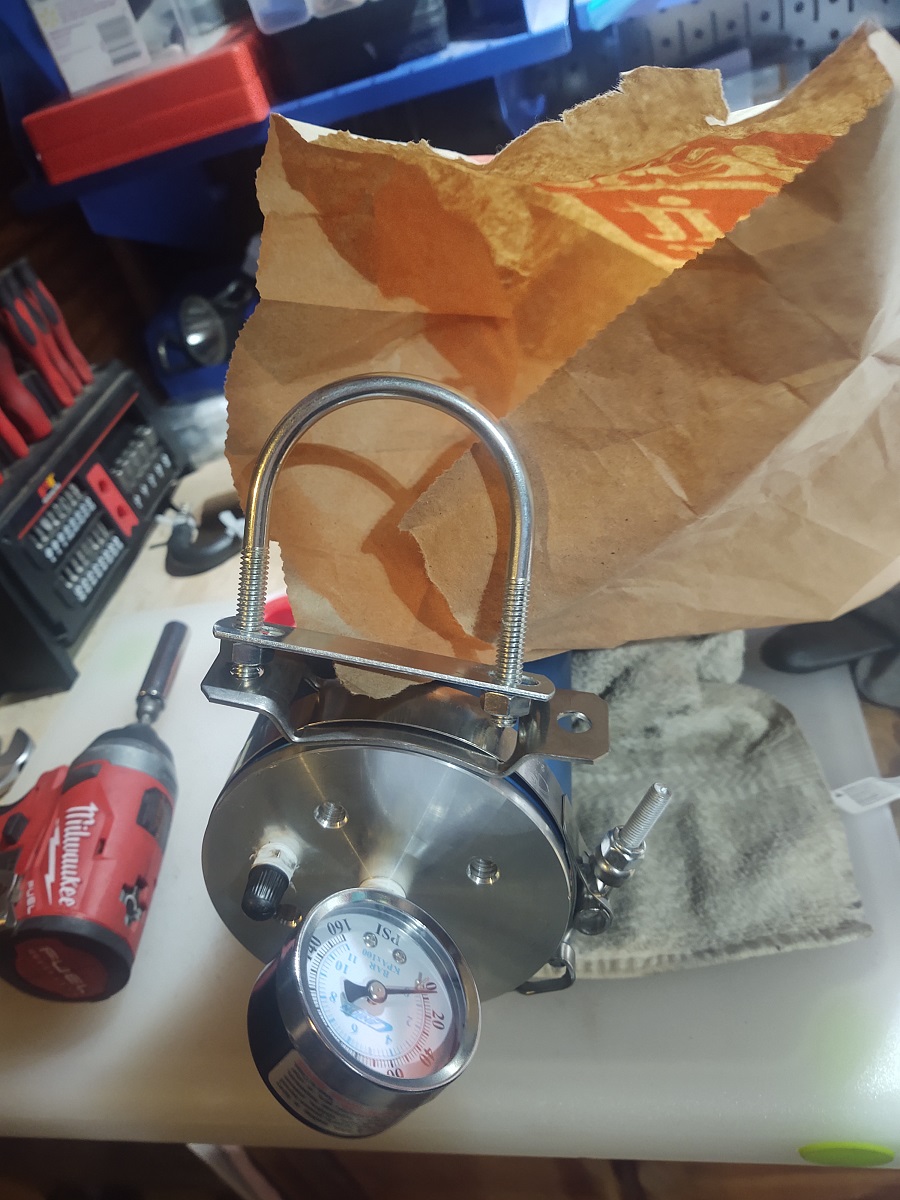 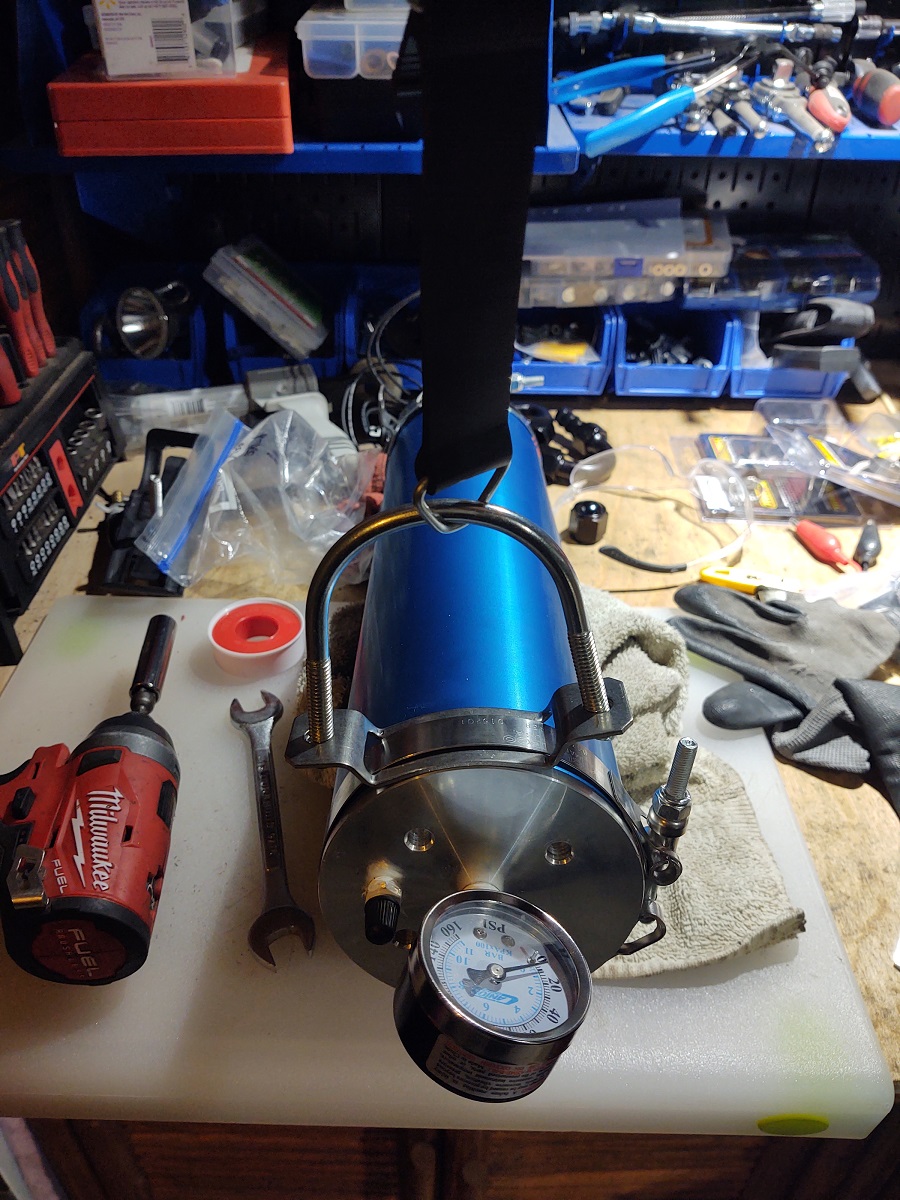 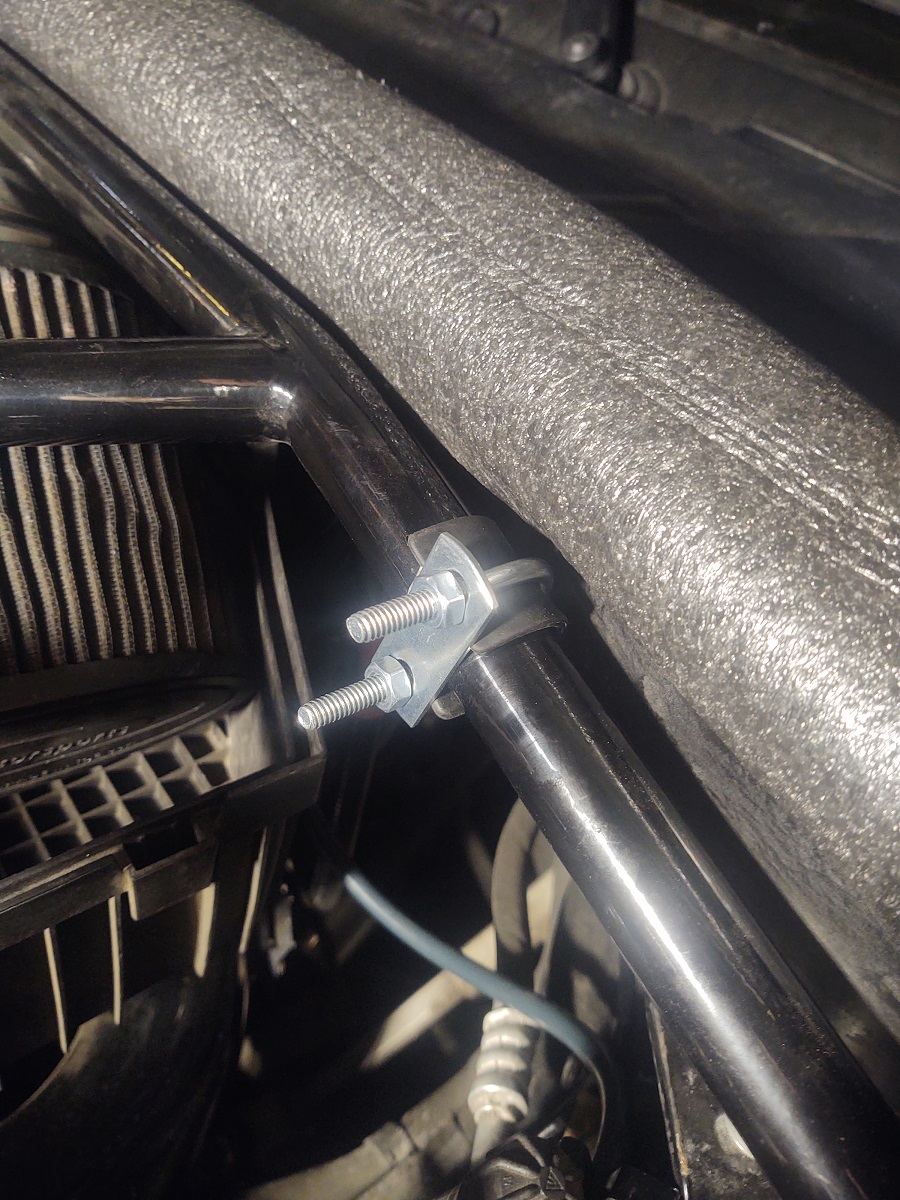 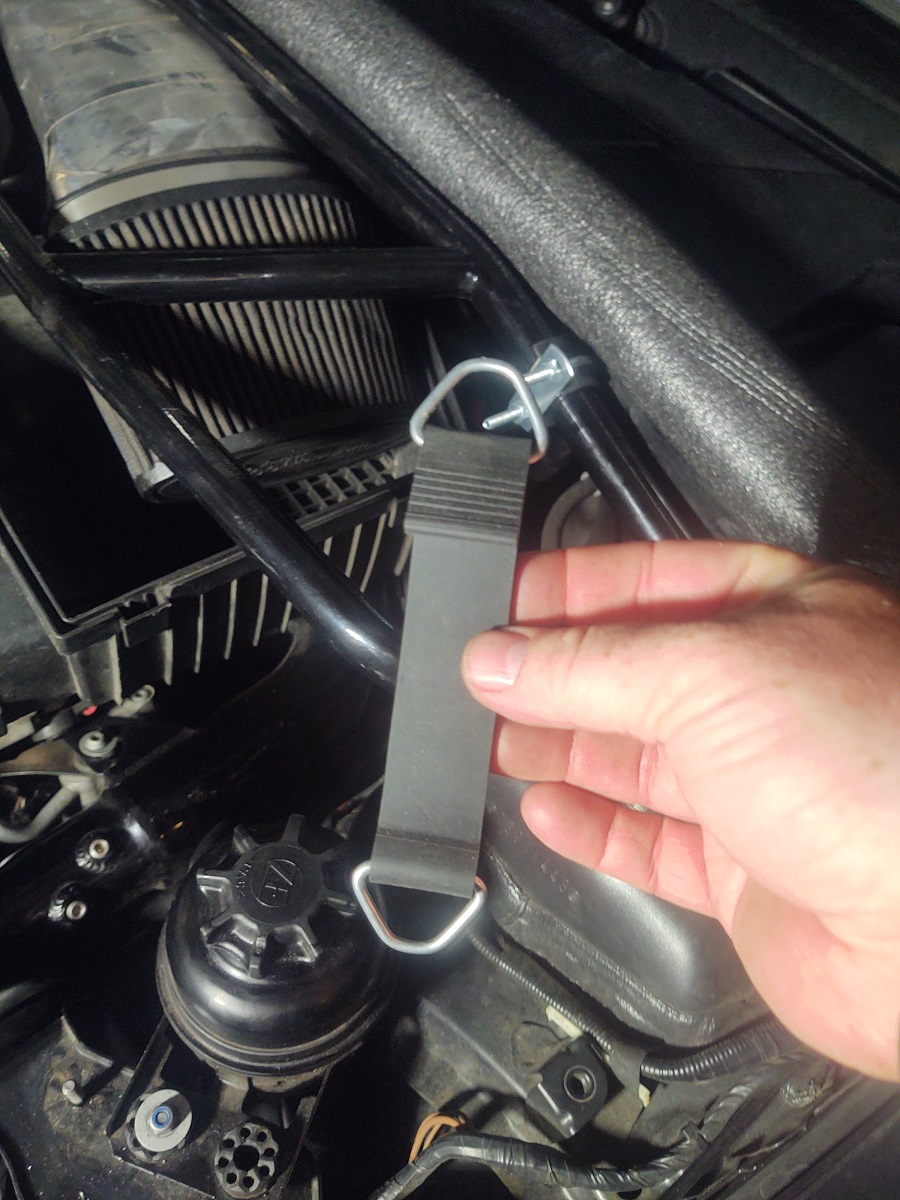 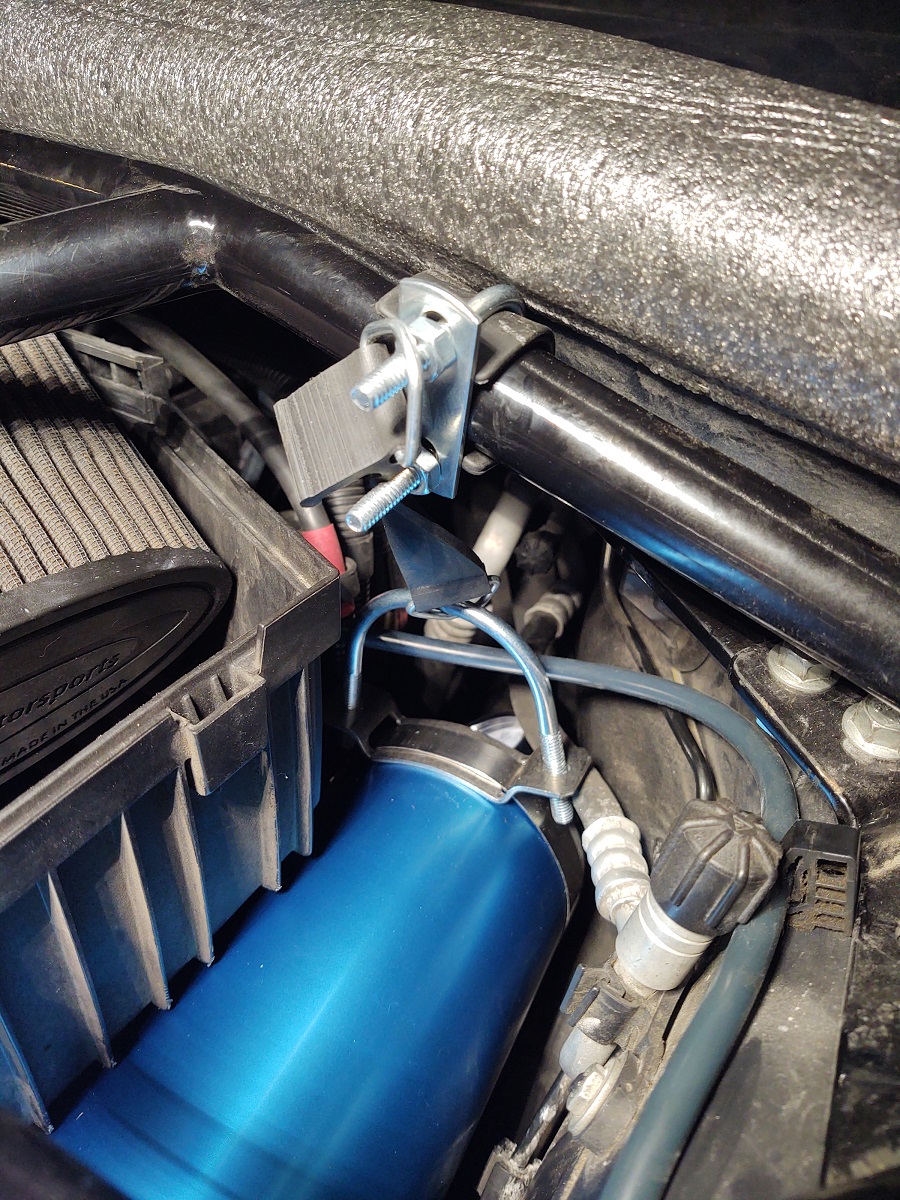 I did put a rubber cap on one side of the u-bolt as it would rub on the AC fill line otherwise. 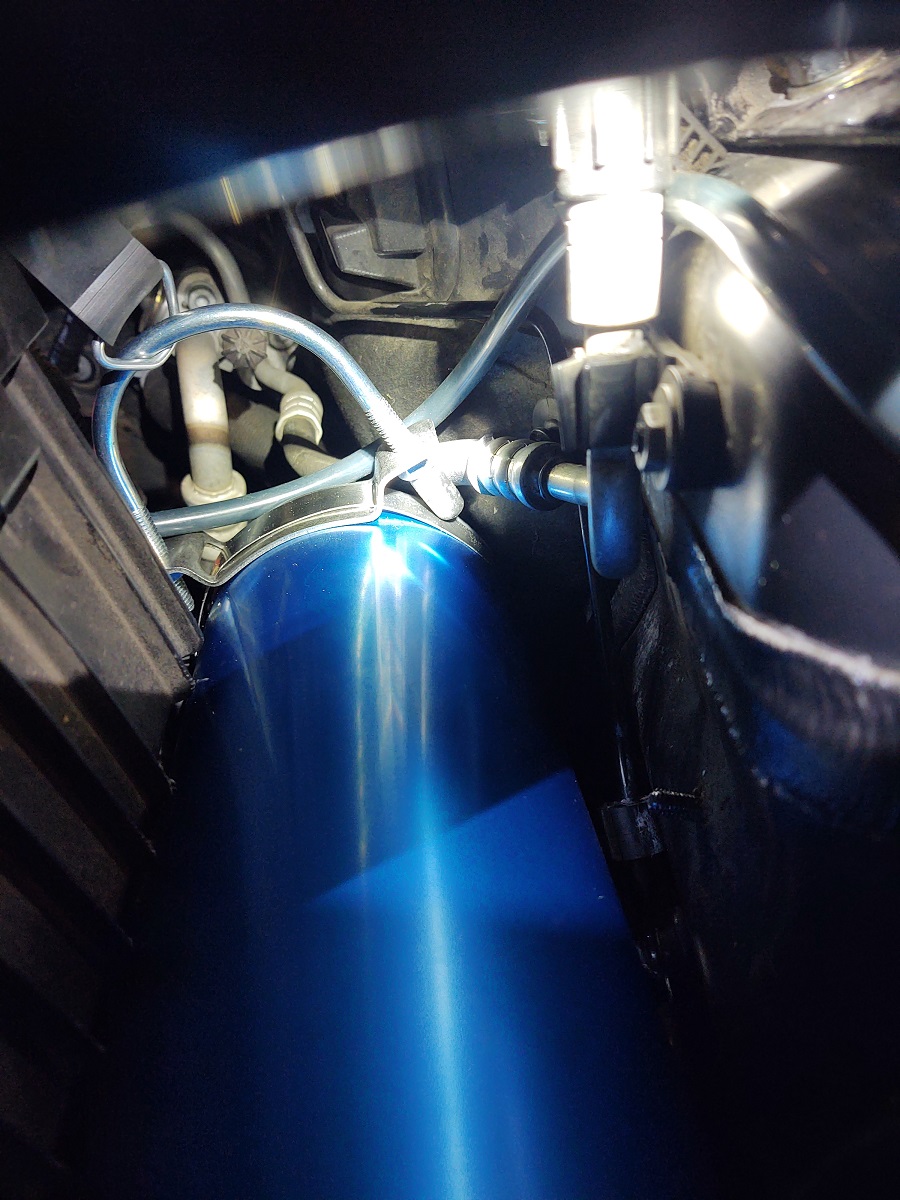 Here is a pic with the EPC installed correctly and the second version of the coonnection hose. This version prevented re-installation of the intake so I changed to two 45 degree fittings and got everything to work. I ended up with a number of extra AN-10 fittings and hoses due to trial and error on this project...lol.  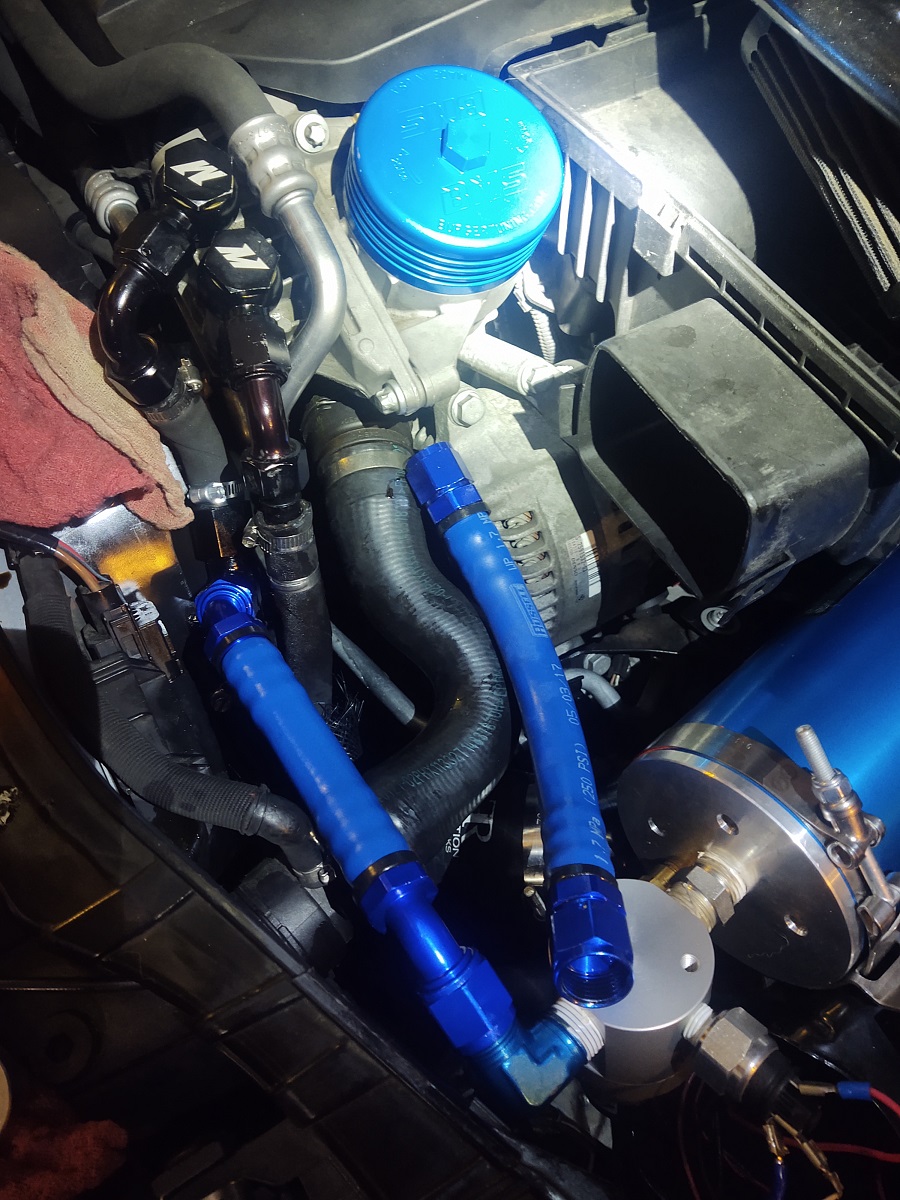 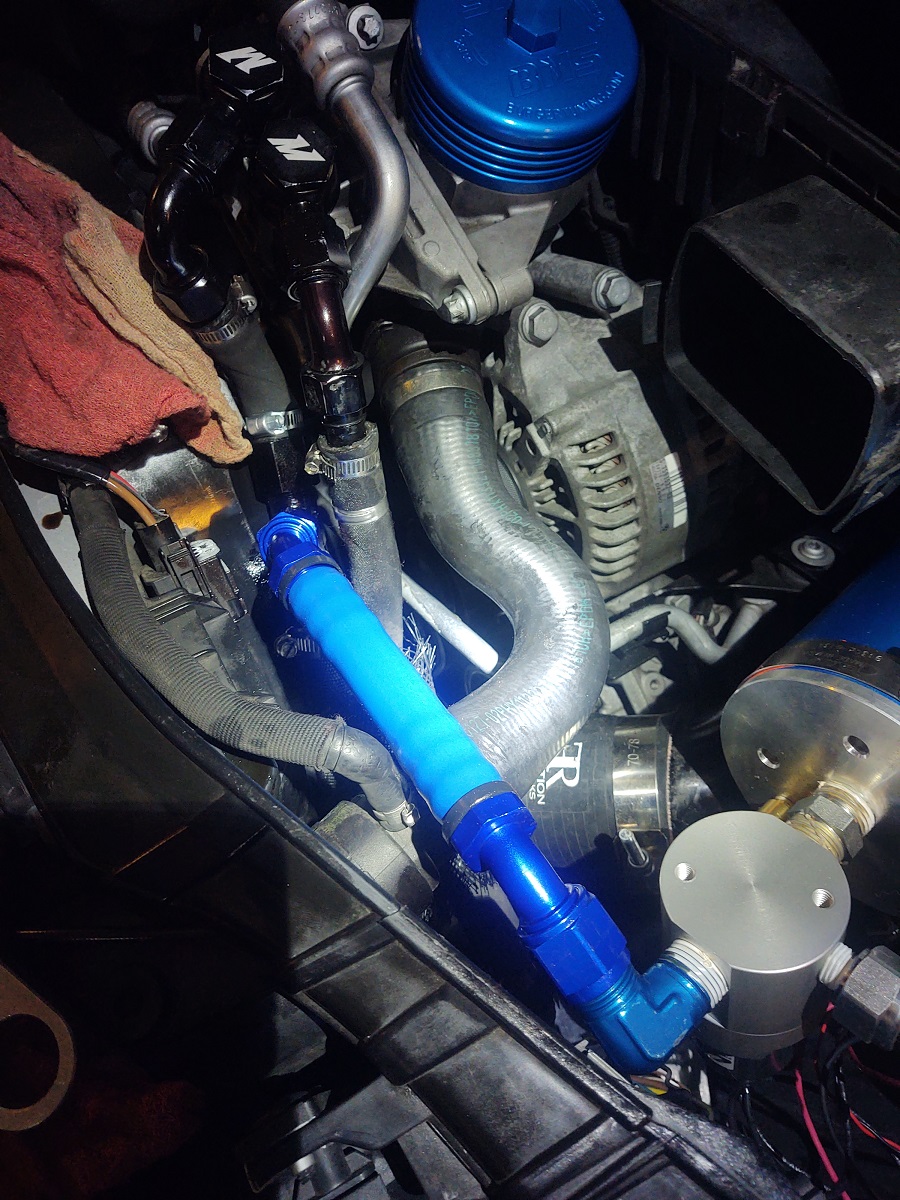 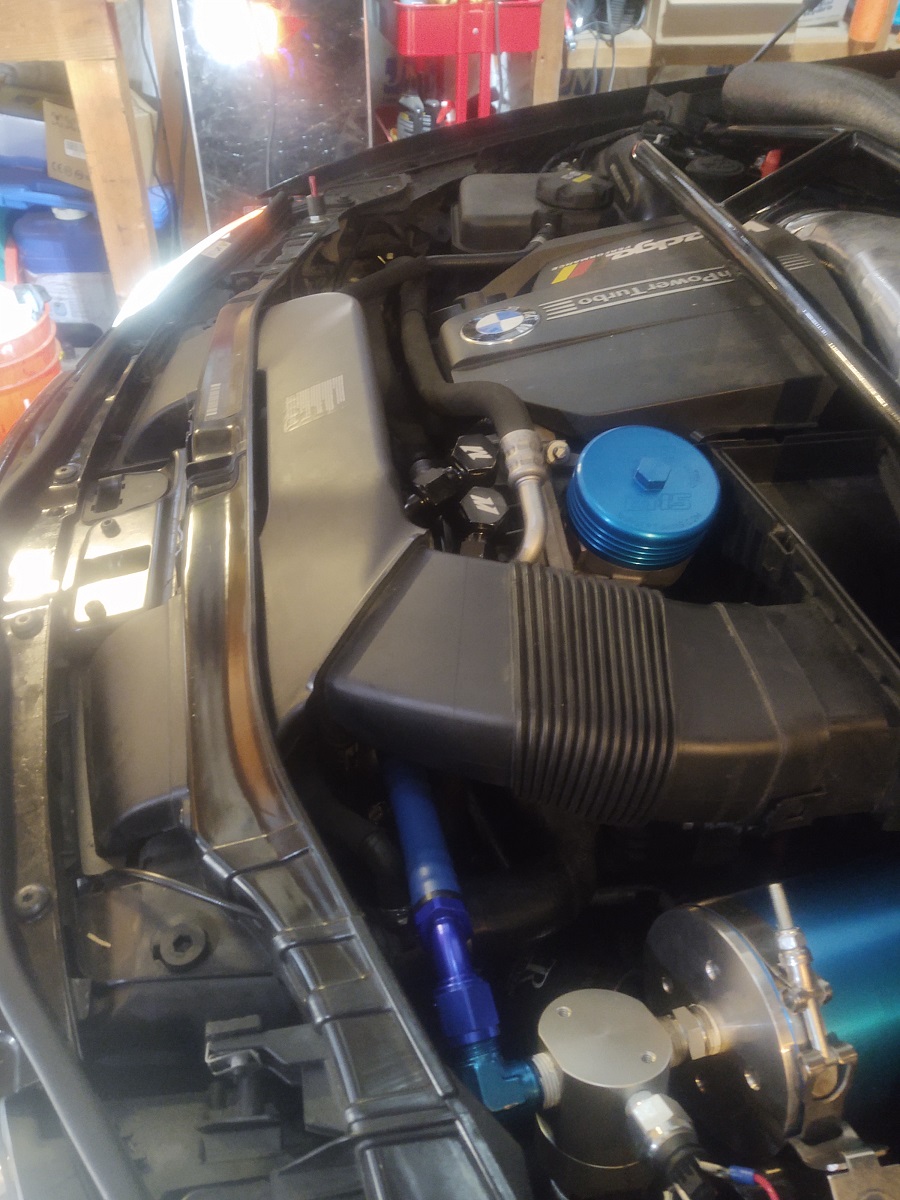 To get power, I elected to not go to the effort of routing anything into the fuse box and instead, got a fuse wire from NAPA and wired up to the starter cable wire bolt here (yellow cable is fuse cable). I then routed and zip tied the wire along the back of the engine and around to the PS bracket. 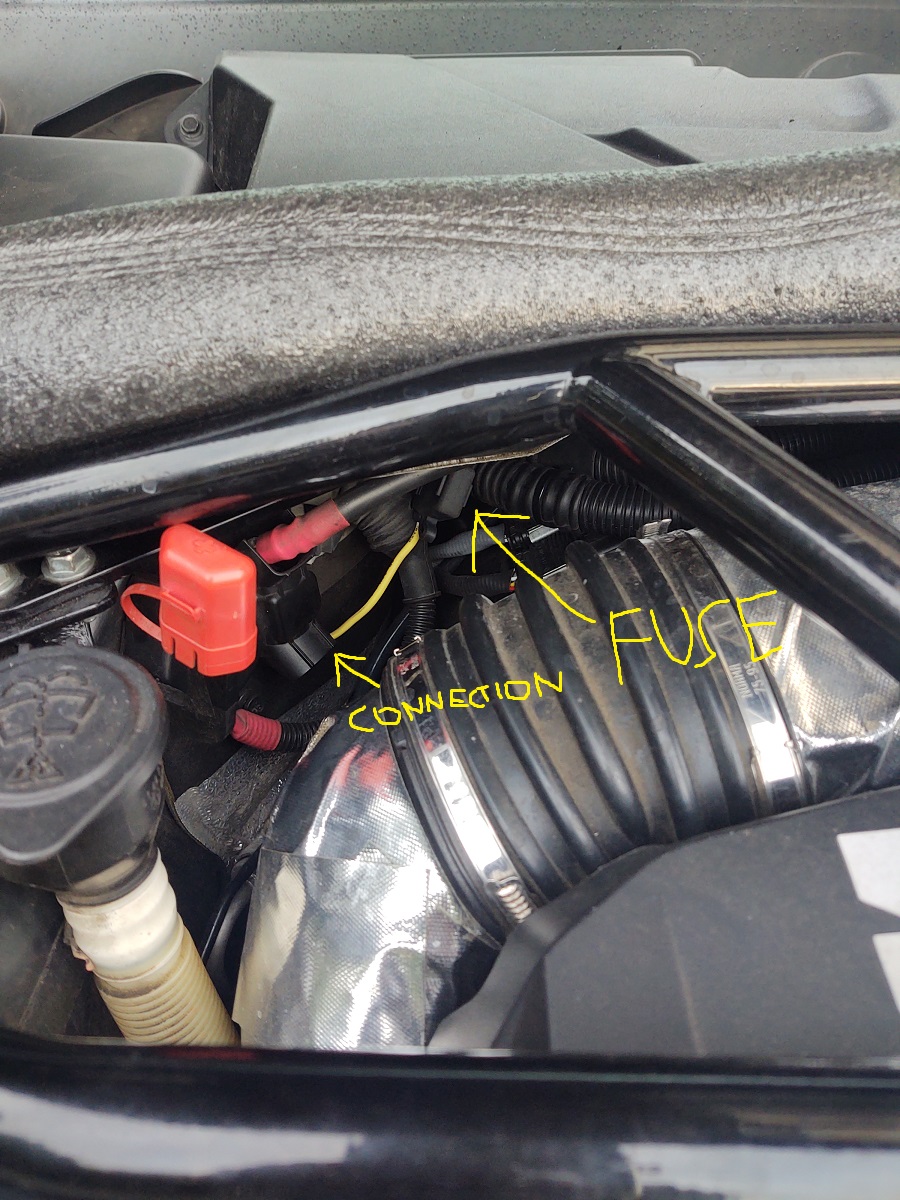 Since power was hardwired, I elected to install the manual switch provided with the Accusump on the PS Bracket. It routes to a remote relay switch that is velcroed below it that is controlled by a FOB so I can control when the EPC is online from the drivers seat. I will note that bbnks2 use a nice manual switch installed in the center console. I was too lazy for that so I opted for the wireless remote option. This remote ability to turn off power to the EPC is necessary if your chosen control valve pressure setting is above your idle pressure, otherwise, if you leave it powered on, at any pressure below the setpoint (for me 55#), the EPC will remain energized and will likely burn out as it is not intended to be continuous duty. I manage this by keeping the system completely off via the manual switch during DTD driving. At the track, I flip the switch on. Right as I enter the track, I push the On button on the FOB to enable the EPC. During the cooldown lap I use the FOB to turn power to the EPC off. 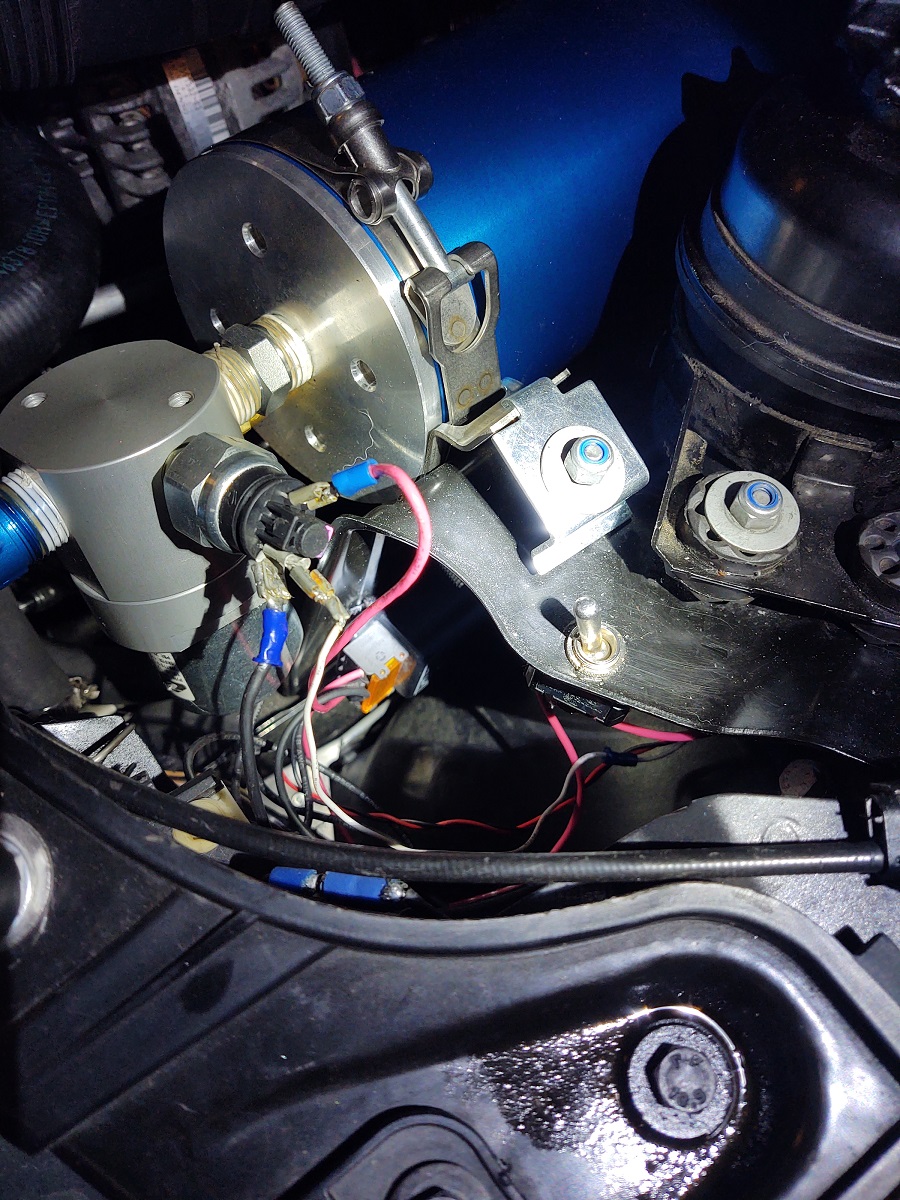 I also leveraged my Siebon hood and the fake vents it has at the rear edge to install indicator LEDs that are visible from the drivers seat through the vent slats. One is for power indication (i.e. manual switch is on), the other indicates when the EPC is energized. 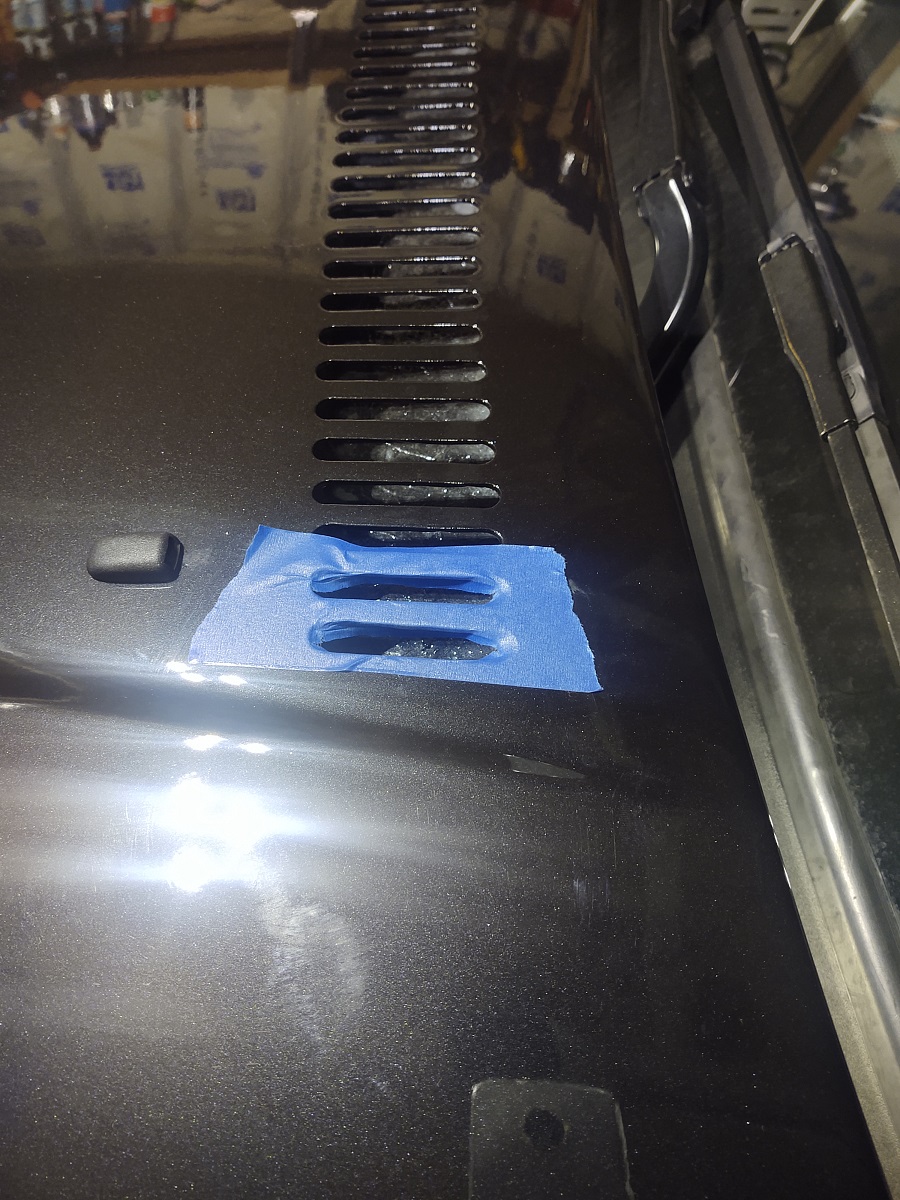 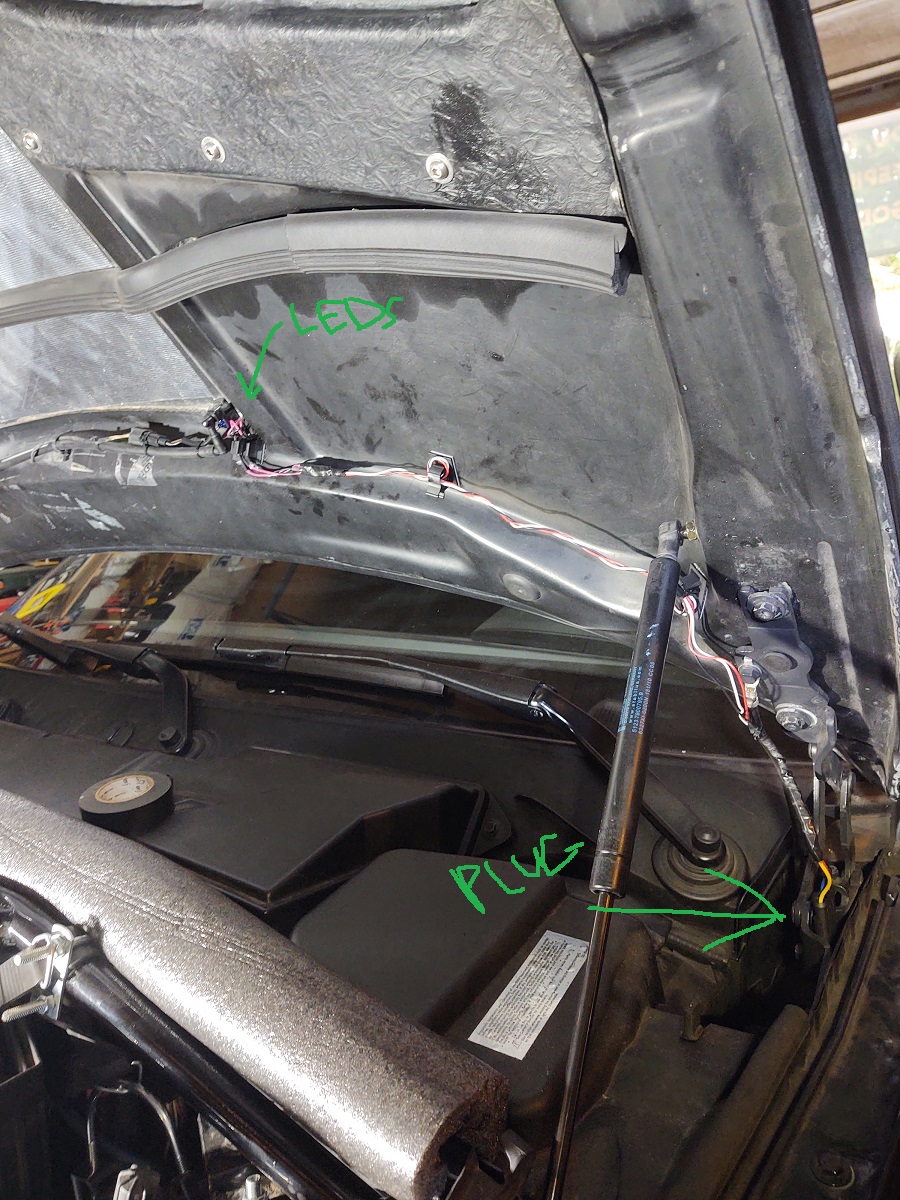 Here is a video of the LEDs from the drivers seat. The first batch of LED's I got were defective and burned out after a short period of time. Summit replaced them and the blue one burned out again, so I have two greens now. I was able to test the system last track day and it performed well. Oil pressure never went less than 40# whereas on a previous track day it had been less than 40# 5% of the time. Ultimately, this system is relatively inexpensive insurance and was fairly easy to install.
__________________
Best,
Andy  '12 E82-PS2,Stoptechs,Clubsports+M3 bits,Accusump,Wagner DP+EVO III FMIC,ERCP,BMS Intake,Mason Strut Bar,Wedge Tune |
|
Appreciate
7
tracer bullet3441.00 houtan719.50 spidertri456.00 JPuehl104.50 PcarDefector64.50 st-pierre13.50 chris82835.50 |
| 08-28-2020, 08:22 AM | #2 |
|
Second Lieutenant
 184
Rep 221
Posts |
Very nice!
|
|
Appreciate
2
AndyW697.00 tracer bullet3441.00 |
| 08-28-2020, 11:58 AM | #3 |
|
Colonel
 720
Rep 2,463
Posts |
Nice job brother and thanks for taking the time to share the information. This is on my to do list one day. Life has me embarrassingly behind in my car world, as I still need to do an oil cooler upgrade haha. It will all get done one day and this will be a massive help.
__________________
|
|
Appreciate
1
AndyW697.00 |
| 09-25-2021, 10:25 AM | #5 |
|
Lieutenant
124
Rep 475
Posts
Drives: 2009 Crimson Red 135i
Join Date: Mar 2008
Location: Sterling, Va
|
Any more reports on how this works on track?
I see it happen a lot in left hand turns and under braking with the N54. Mechanical auto meter gauge to the right of the steering wheel is oil pressure. -Joe |
|
Appreciate
1
chris82835.50 |
| 09-25-2021, 10:46 AM | #6 | |
|
Supreme Galactic Commander (one galaxy over...)
697
Rep 1,784
Posts |
Quote:
__________________
Best,
Andy '12 E82-PS2,Stoptechs,Clubsports+M3 bits,Accusump,Wagner DP+EVO III FMIC,ERCP,BMS Intake,Mason Strut Bar,Wedge Tune |
|
|
Appreciate
0
|
| 09-25-2021, 12:37 PM | #7 |
|
Second Lieutenant
184
Rep 221
Posts |
If I understand correctly, your second LED for the ECS energizing is when the sump is deploying? If so, how often do you see the LED turning on during a lap?
|
|
Appreciate
0
|
| 09-26-2021, 10:27 PM | #8 | |
|
Supreme Galactic Commander (one galaxy over...)
697
Rep 1,784
Posts |
Quote:
__________________
Best,
Andy '12 E82-PS2,Stoptechs,Clubsports+M3 bits,Accusump,Wagner DP+EVO III FMIC,ERCP,BMS Intake,Mason Strut Bar,Wedge Tune |
|
|
Appreciate
0
|
| 09-27-2021, 09:11 AM | #9 |
|
Lieutenant
124
Rep 475
Posts
Drives: 2009 Crimson Red 135i
Join Date: Mar 2008
Location: Sterling, Va
|
Andy - my guess is it's back EMF from the solenoid that's burning out the LED. I think a diode needs to be used to prevent it. Need to google, cuz I'm having the same issue with a different solenoid project.
-Joe |
|
Appreciate
1
AndyW697.00 |
| 09-27-2021, 02:42 PM | #10 | |
|
Captain
1497
Rep 791
Posts |
Quote:
Google "why does an led need a resistor". |
|
|
Appreciate
1
AndyW697.00 |
| 09-27-2021, 02:45 PM | #11 | |
|
Captain
1497
Rep 791
Posts |
Quote:
|
|
|
Appreciate
1
AndyW697.00 |
| 09-27-2021, 02:46 PM | #12 | |
|
Supreme Galactic Commander (one galaxy over...)
697
Rep 1,784
Posts |
Quote:
And found this discussion with a quick google search... https://electronics.stackexchange.co...d-as-indicator
__________________
Best,
Andy '12 E82-PS2,Stoptechs,Clubsports+M3 bits,Accusump,Wagner DP+EVO III FMIC,ERCP,BMS Intake,Mason Strut Bar,Wedge Tune |
|
|
Appreciate
0
|
| 09-27-2021, 03:00 PM | #13 | |
|
Supreme Galactic Commander (one galaxy over...)
697
Rep 1,784
Posts |
Quote:
__________________
Best,
Andy '12 E82-PS2,Stoptechs,Clubsports+M3 bits,Accusump,Wagner DP+EVO III FMIC,ERCP,BMS Intake,Mason Strut Bar,Wedge Tune |
|
|
Appreciate
0
|
| 09-27-2021, 06:21 PM | #14 |
|
Lieutenant
124
Rep 475
Posts
Drives: 2009 Crimson Red 135i
Join Date: Mar 2008
Location: Sterling, Va
|
Yeah - mine has a resistor in series to limit current - that's not it. Looks like you may need a Schottky diode in series with the LED. I *think* the voltage may go reverse when the solenoid closes, and that's what causes the LED to burn out. Not 100% on this yet.
|
|
Appreciate
0
|
| 09-27-2021, 10:36 PM | #15 | |
|
Supreme Galactic Commander (one galaxy over...)
697
Rep 1,784
Posts |
Quote:
I think I'll do both. Put a resistor in series and the shunt diode across the solenoid.
__________________
Best,
Andy '12 E82-PS2,Stoptechs,Clubsports+M3 bits,Accusump,Wagner DP+EVO III FMIC,ERCP,BMS Intake,Mason Strut Bar,Wedge Tune |
|
|
Appreciate
0
|
| 09-28-2021, 01:08 PM | #16 | |
|
Captain
1497
Rep 791
Posts |
Quote:
|
|
|
Appreciate
1
AndyW697.00 |
| 10-02-2021, 11:38 PM | #17 |
|
Supreme Galactic Commander (one galaxy over...)
697
Rep 1,784
Posts |
So, I added the diode across the solenoid and it looks like it is working fine now. Thx for the help! I should have remembered this though...feeling kinda sheepish.
__________________
Best,
Andy '12 E82-PS2,Stoptechs,Clubsports+M3 bits,Accusump,Wagner DP+EVO III FMIC,ERCP,BMS Intake,Mason Strut Bar,Wedge Tune |
|
Appreciate
0
|
| 10-03-2021, 08:58 AM | #18 |
|
Lieutenant
124
Rep 475
Posts
Drives: 2009 Crimson Red 135i
Join Date: Mar 2008
Location: Sterling, Va
|
Andy - after the accumulator install, does the electric oil level read 'max' when the accumulator is full? Is that how you know you're at the correct level?
-Joe |
|
Appreciate
0
|
| 10-03-2021, 10:30 AM | #19 | |
|
Supreme Galactic Commander (one galaxy over...)
697
Rep 1,784
Posts |
Quote:
When I do oil changes, I activate the FOB so the oil in the accumulator vents to the sump. When I refill, I add two additional quarts (so about 8 quarts) above a standard refill. Then I start the car and verify the accusump has pressurized (about 80-100# on cold start). Then I check oil level via the car and adjust as necessary.
__________________
Best,
Andy '12 E82-PS2,Stoptechs,Clubsports+M3 bits,Accusump,Wagner DP+EVO III FMIC,ERCP,BMS Intake,Mason Strut Bar,Wedge Tune |
|
|
Appreciate
2
bbnks21219.00 PcarDefector64.50 |
| 10-13-2021, 08:39 PM | #20 |
|
Colonel

124
Rep 2,205
Posts |
is everyone using the 24-006 or shorter 24-016 ? small difference in width but the 24-016 is quite a bit longer, 16" vs 22"
I cant ignore my oil pressure drops anymore and I want to run 100tw
__________________
You only need two tools in life - WD-40 and Duct Tape. If it doesn't move and should, use the WD-40. If it shouldn't move and does, use the duct tape.
Driving e82, e72, e85, R53 Gone but not forgotten.. 1974 2002, many various 3s. |
|
Appreciate
0
|
| 10-13-2021, 10:34 PM | #21 | |
|
Supreme Galactic Commander (one galaxy over...)
697
Rep 1,784
Posts |
Quote:
__________________
Best,
Andy '12 E82-PS2,Stoptechs,Clubsports+M3 bits,Accusump,Wagner DP+EVO III FMIC,ERCP,BMS Intake,Mason Strut Bar,Wedge Tune |
|
|
Appreciate
0
|
Post Reply |
| Bookmarks |
|
|


