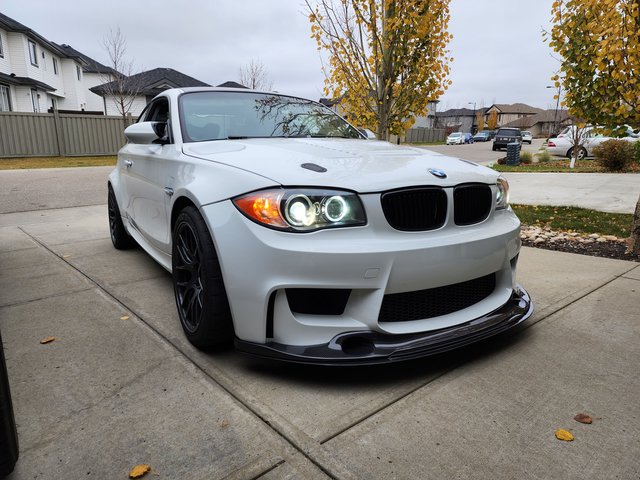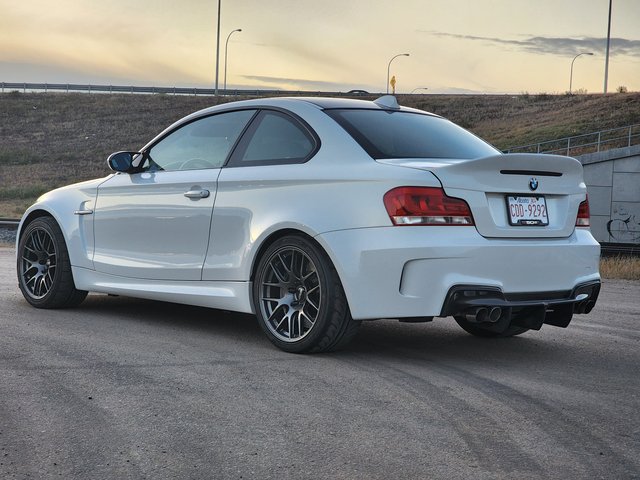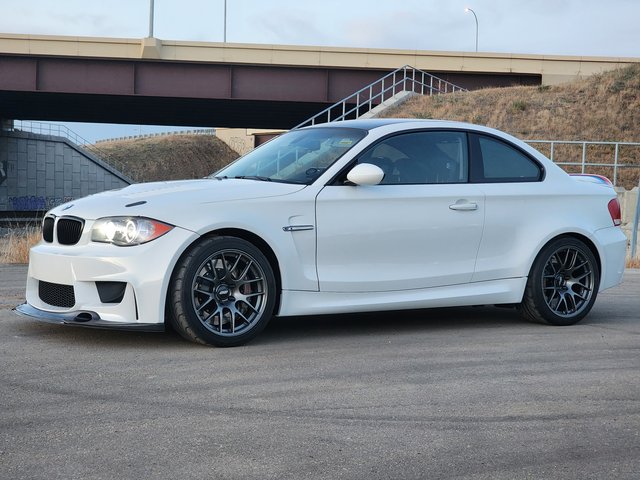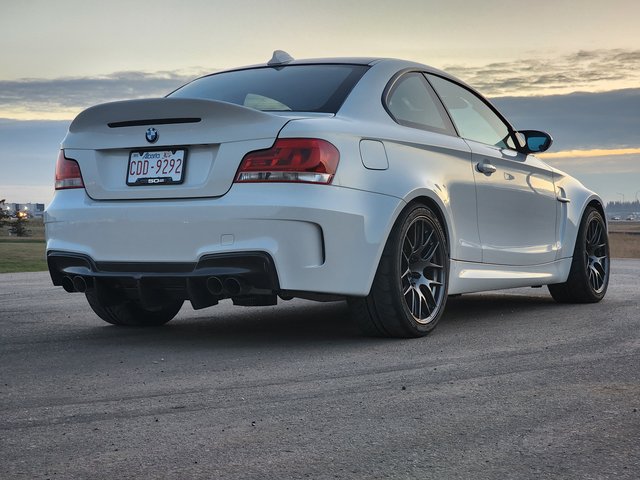




|
|
|
|
|
| 08-14-2024, 06:49 PM | #1 |
|
Enlisted Member
 70
Rep 40
Posts |
135is -> 1M CSL/GT4 build
I've been coming to the forum for information for years and have come to a point where I want to contribute.
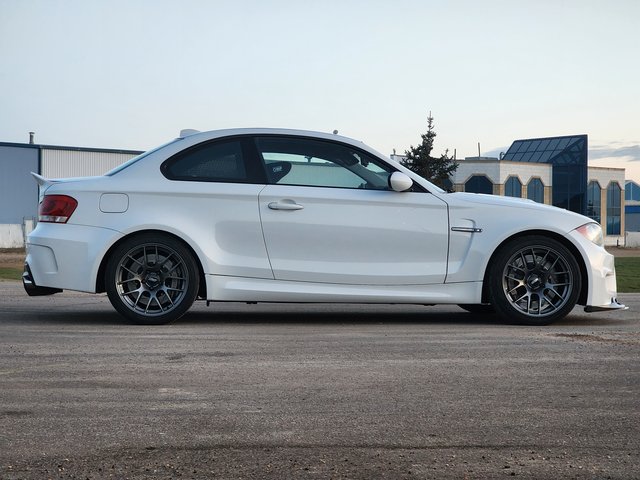
I started of with a 2008 135is that I bought with 143000km (~89000miles) in April 2019. The original idea was to have a car capable of doing club sport level or equivalent road course racing. Once I bought the car I knew that someday I wanted to make it look like a 1M... not knowing exactly how deep that rabbit hole was, along with making it a reliable track car. I had done a bit of research on the N54 engine and the E82 platform before making the purchase so I had some good idea of what I'd need to do straight of the bat before I took it to the track. The upgrades that were done before I purchased it:
With the above mods and an MHD tune from Ken and Wedgeperformance from the previous owner, I imagined the car was making around that 500-550hp on pump fuel. Here are some pictures of the car at the time of purchase. Last edited by Latebeemer; 08-14-2024 at 07:41 PM.. |
| 08-14-2024, 06:56 PM | #2 |
|
Enlisted Member
70
Rep 40
Posts |
First trouble
The first thing I had to do when I got the car was to stop a fuel leak. It turned out that someone decided to drill a hole in the tank somewhere during the transportation process across Canada to steal whatever fuel was in it. I ran out of fuel as I picked it up from the transporters.
|
|
Appreciate
0
|
| 08-14-2024, 07:15 PM | #3 |
|
Enlisted Member
70
Rep 40
Posts |
Next big thing
After a couple track days there was a pressing need to make some more changes to the heat management.
Parts installed at this point:
|
|
Appreciate
1
tracer bullet6189.00 |
| 08-14-2024, 07:40 PM | #4 |
|
Enlisted Member
70
Rep 40
Posts |
Issues continue
Another track day or two later there were some more things that came up:
I changed the Vanos valves with new OE parts along with the Injectors to OE index 12 ones. I also did spark plugs with Bosch plugs along with Bosch coil packs. I added some Ground Control camber plates to add some more negative camber to try and resolve the tire rollover. ECS Tuning Stainless Steel braided brake lines (front, "middle" and rear) |
|
Appreciate
1
tracer bullet6189.00 |
| 08-21-2024, 08:15 AM | #5 |
|
Colonel
 

1452
Rep 2,152
Posts
Drives: '11 135i M Sport
Join Date: Dec 2013
Location: Delmarva Peninsula
|
Looking good so far!
__________________
|
|
Appreciate
0
|
| 03-12-2025, 02:32 PM | #6 |
|
Enlisted Member
70
Rep 40
Posts |
Time came for more upgrades
Around the middle of 2020 I pulled the 1er into the garage I had at the time to change out a few parts I've been collecting up to this point.
The major parts were:
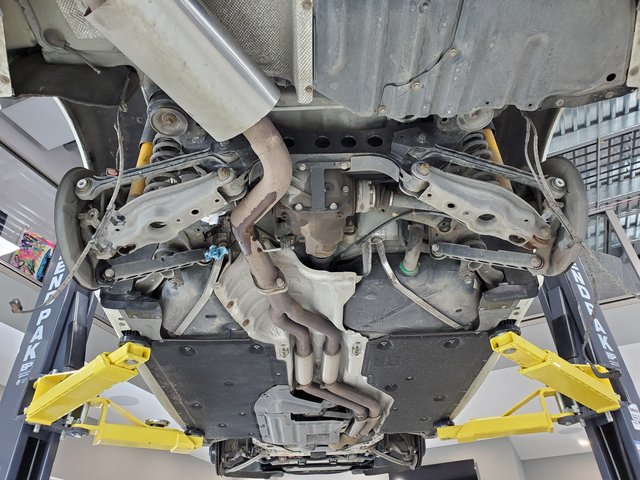 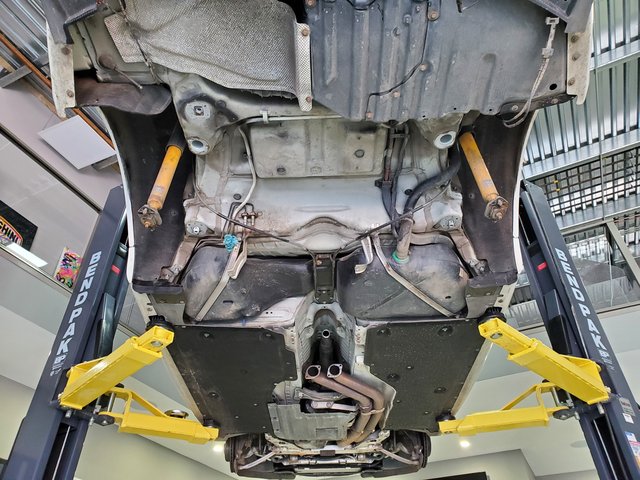 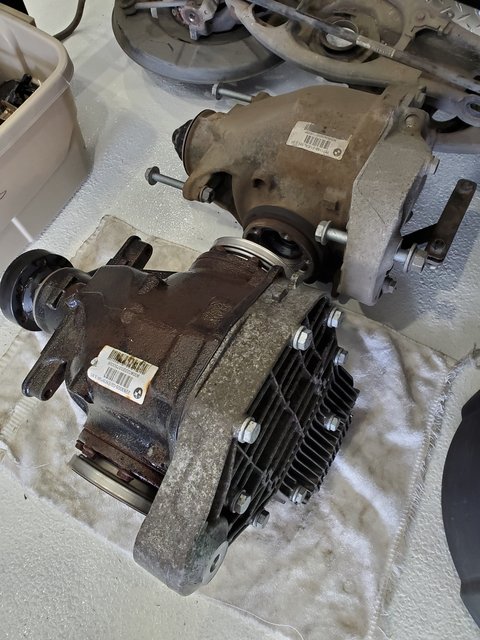 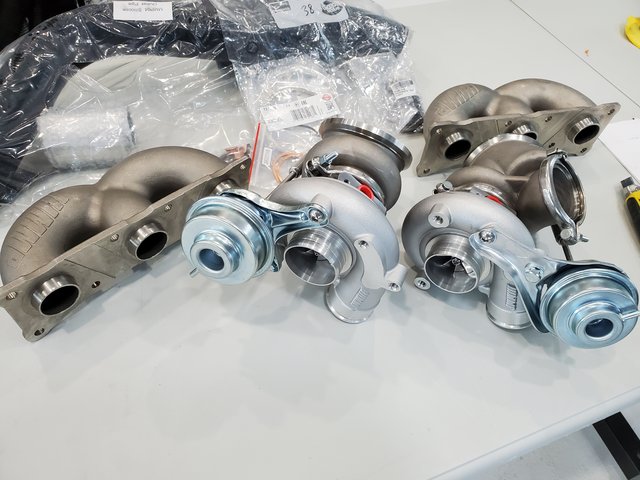 I also wanted to try out these bushings to see what a difference it makes, and I was surprised at how much less squishy the front axle felt under braking. 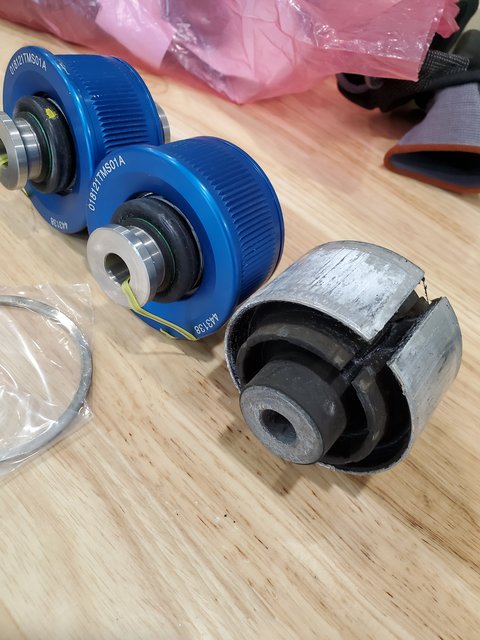 While I was busy, I decided all the bushings or mounts that don't absolutely need to have some give had to go. 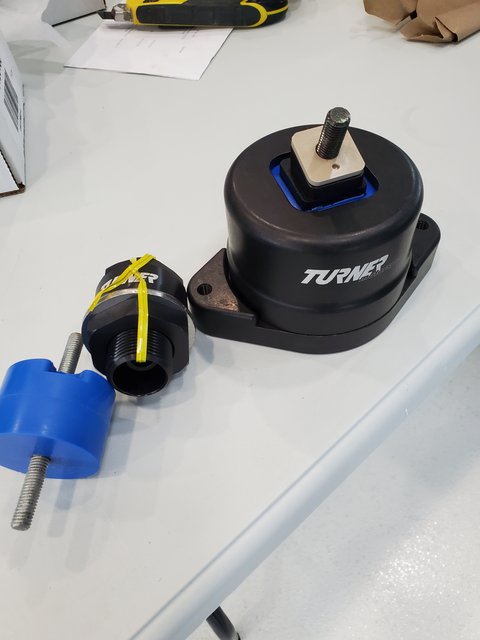 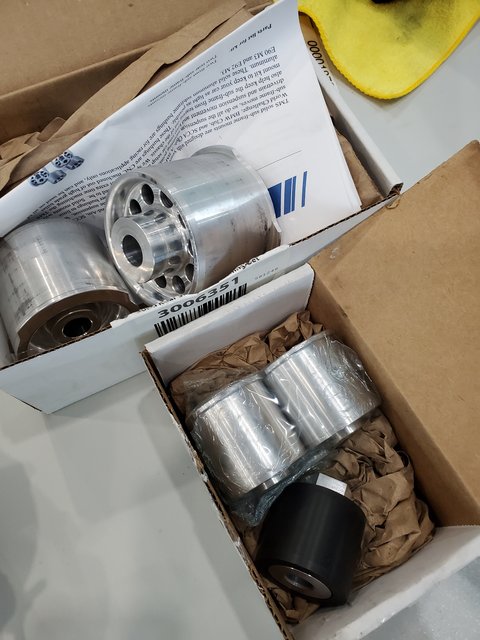 I had to refurbish the M sport brakes (Brembo) because as you guys may know, these have a type of Nylon on the crown of each pod and they don't like the heat caused by track days. I replaced all the pods, front and rear with Stoptech ones that they make specifically for these calipers. 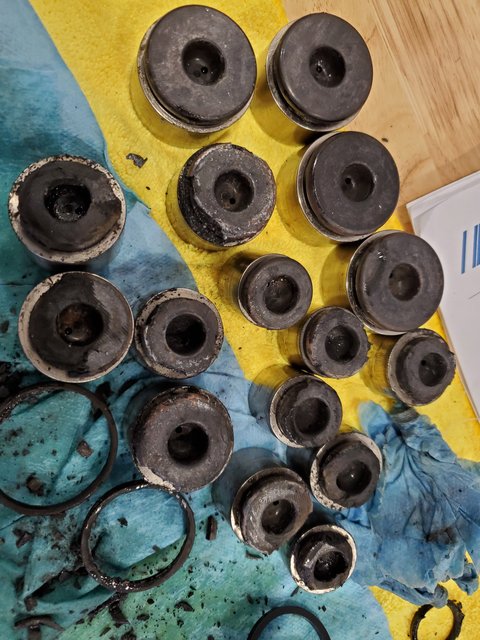 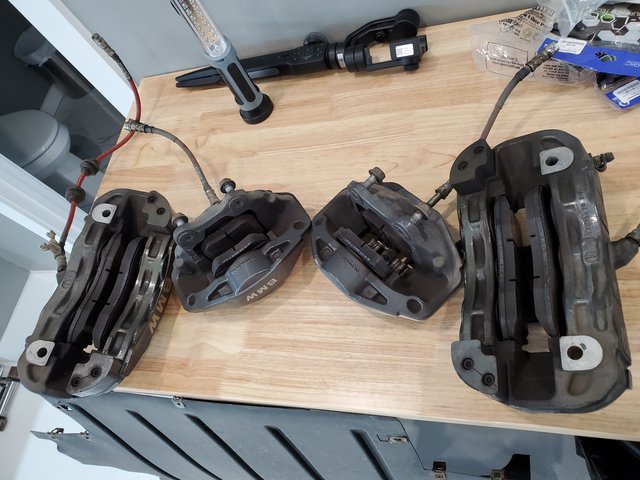 I had them vapor honed so I could repaint them. 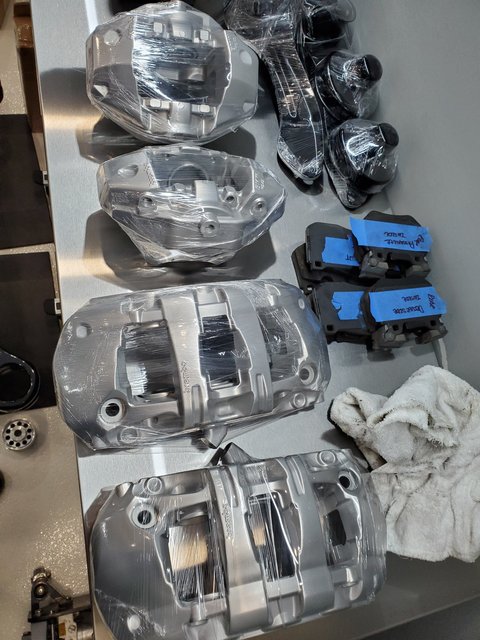 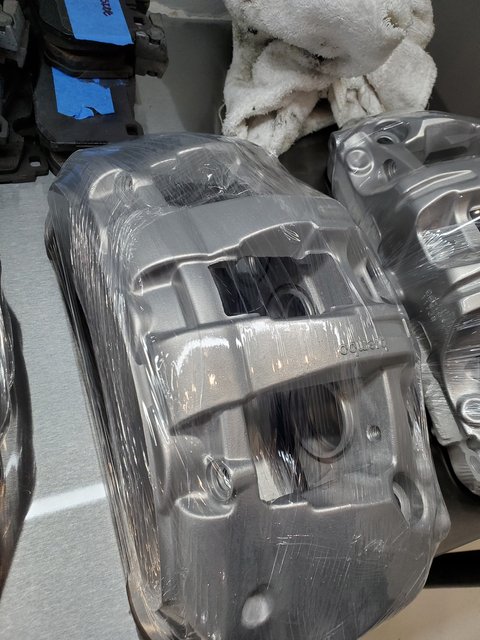 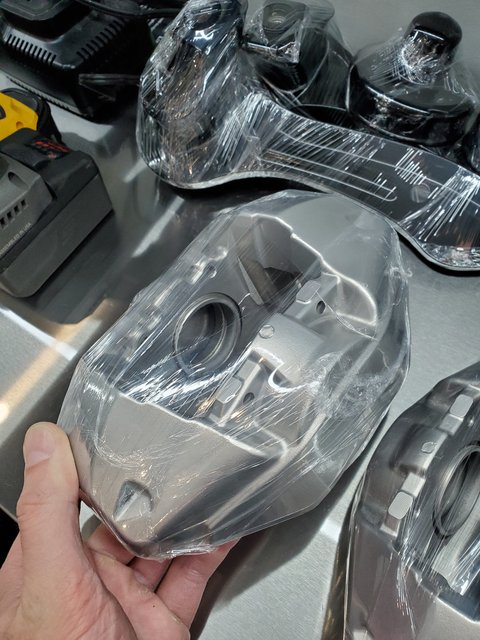 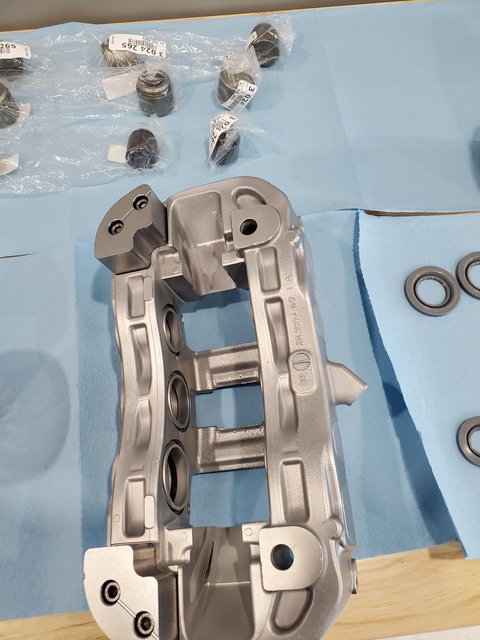 Then my wise a$$ thought it would be a good idea to install an M3 steering rack, and when I installed in on the car I realized that there is a big difference between where the tie rods ends pick up on the knuckle/upright between the M3 and the 135i. Naturally I did what one does in a situation like this, you buy the M3 knuckles/uprights. 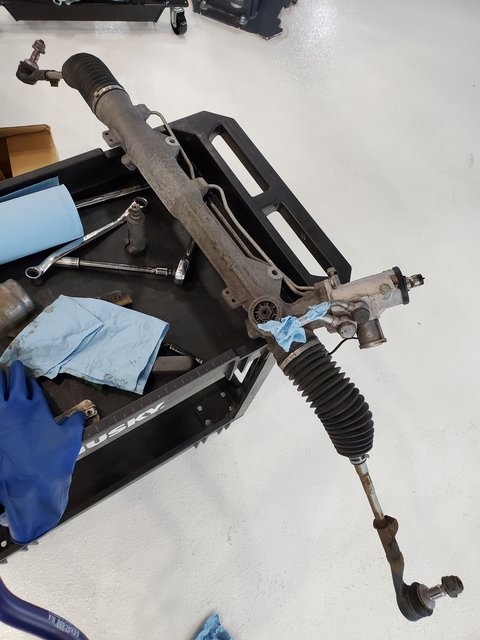 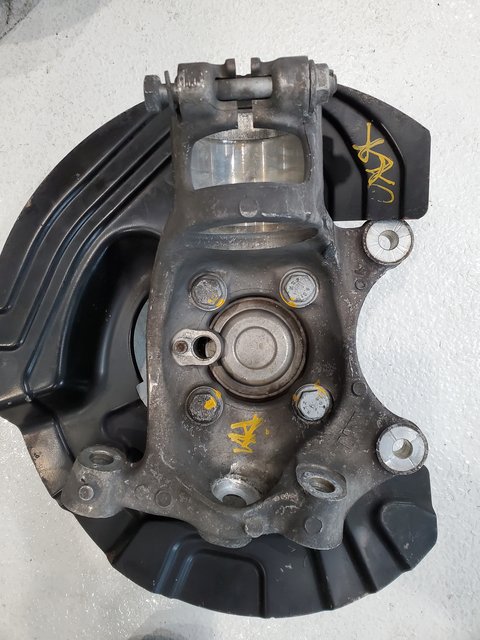 And as you can expect, the 135i M Sport brembos didn't fit the M3 knuckle. 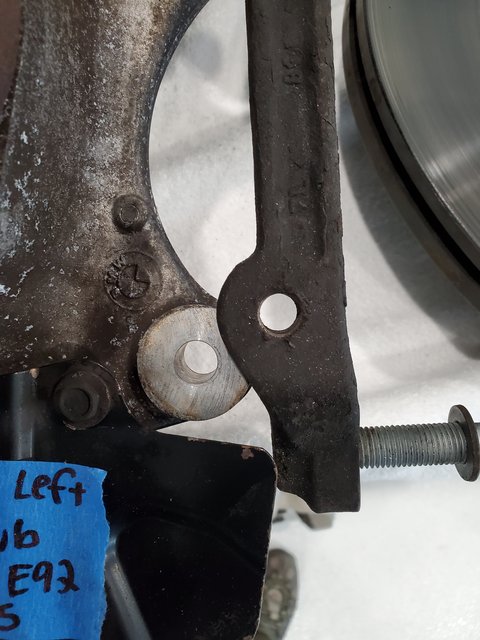 All that time and money was wasted on the 135i calipers, and now the next natural step is to order a big brake kit from Stoptech. Why Stoptech, well a buddy of mine has a race shop and could get me a good deal on the trophy range so I went with it. It being 2020 I had to wait a while before those would show up. So I pressed on with other things. I had the rear subframe powder coated and it came in, so here we go installing it. Some parts: 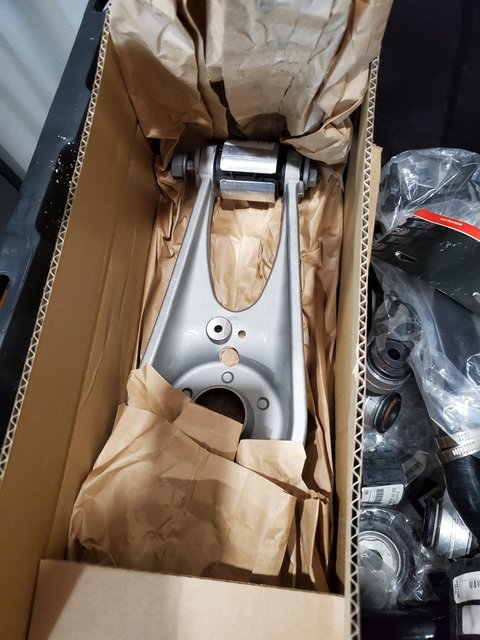 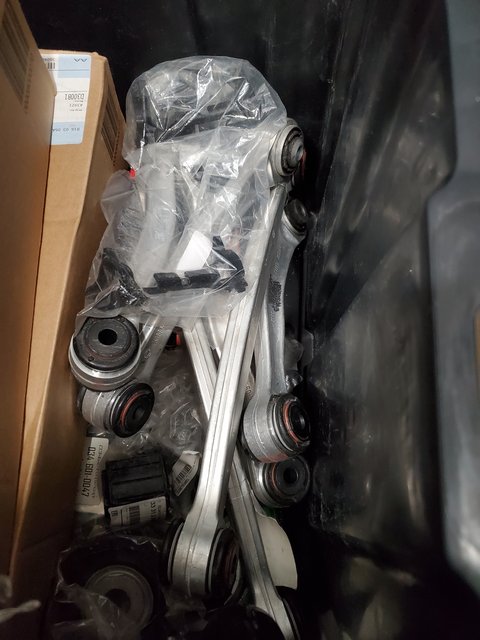 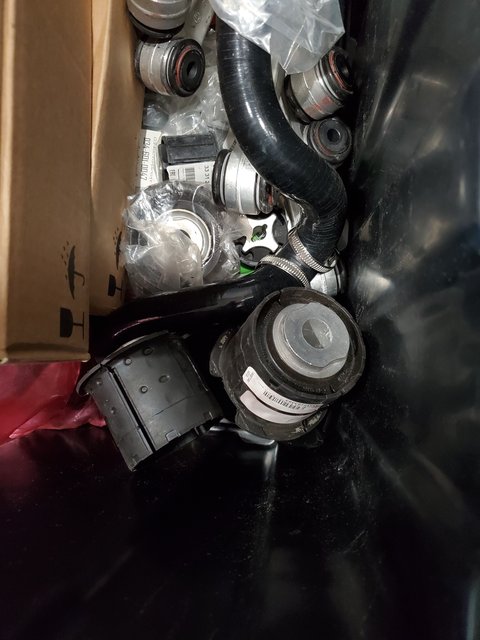 The subframe: 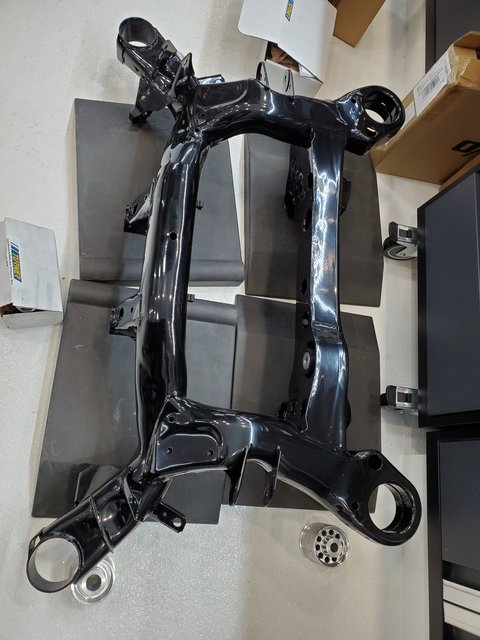 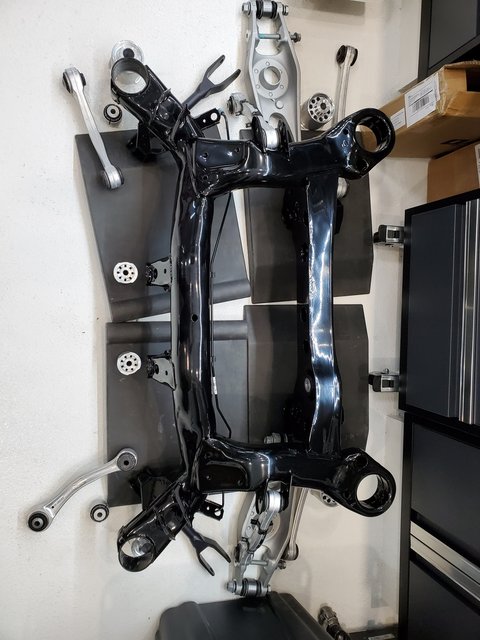 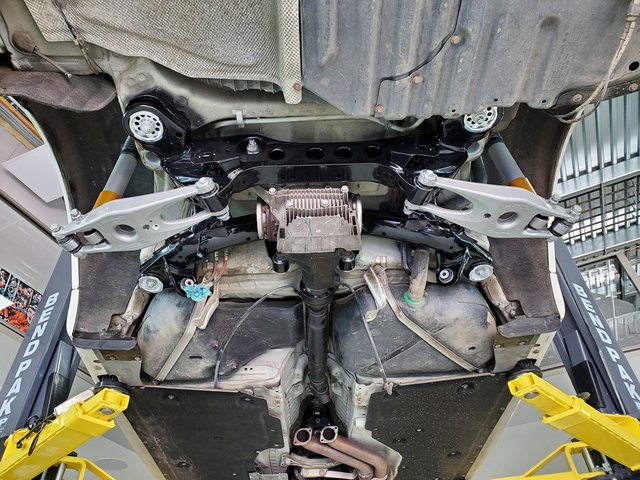 And like an idiot, I didn't do enough research before I sent the subframe out for coating else I would have realized that there is a difference between the 135i subframe and the M3 one, and the differences are substantial, the M3 one is heavier because it is beefier in many areas the 135i one is not and some of the geometry is also quite different. 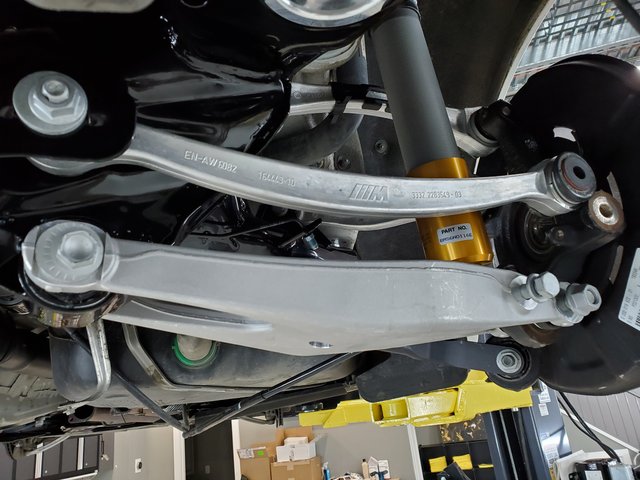 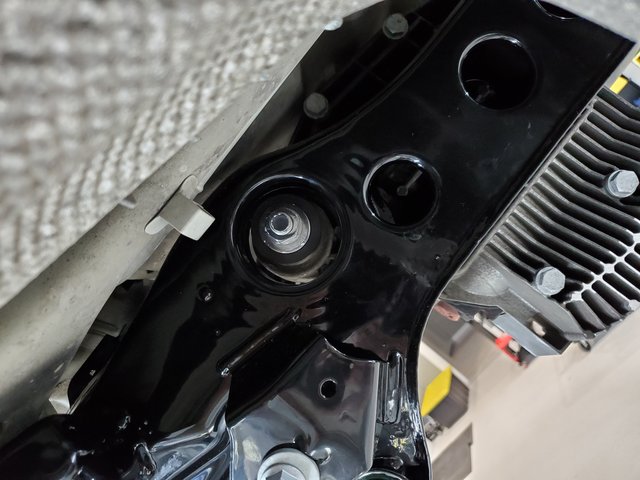 I ordered the M3 subframe, got it coated and then built it all up. 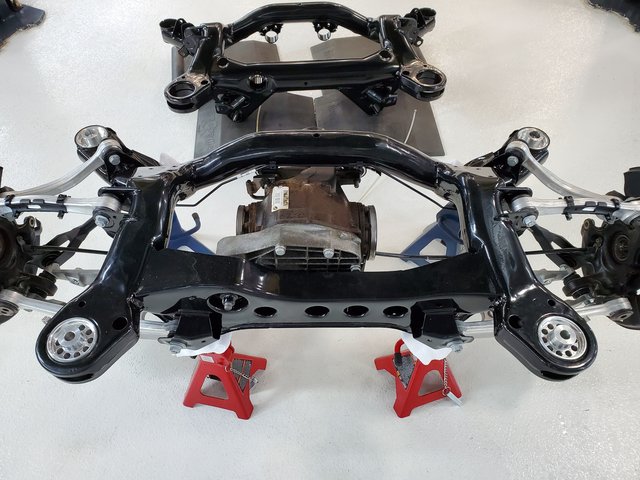 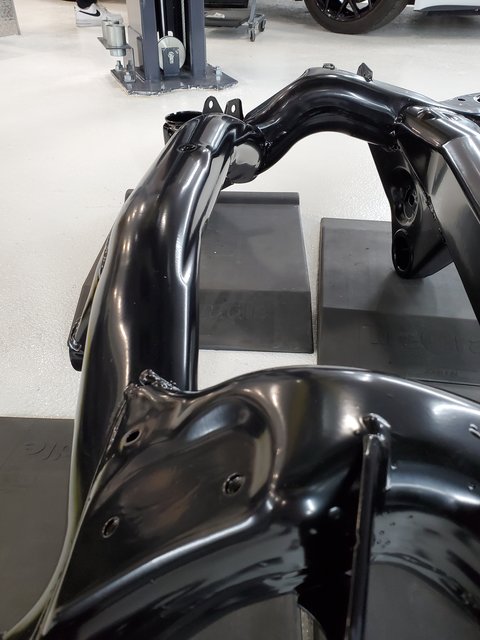 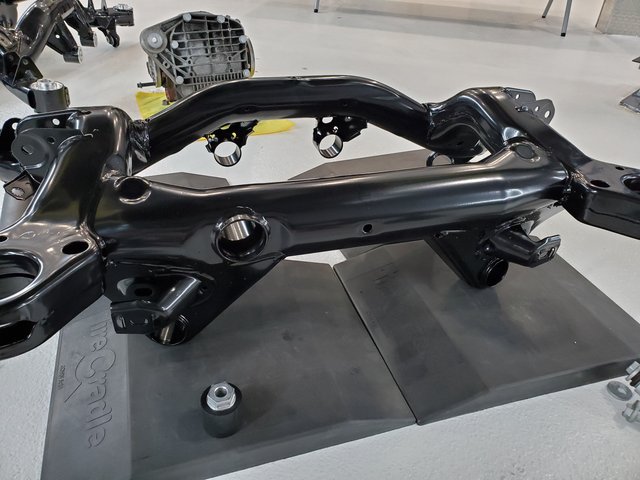 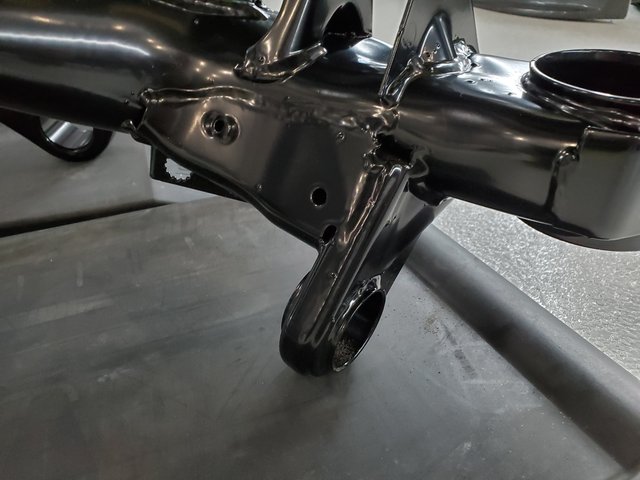 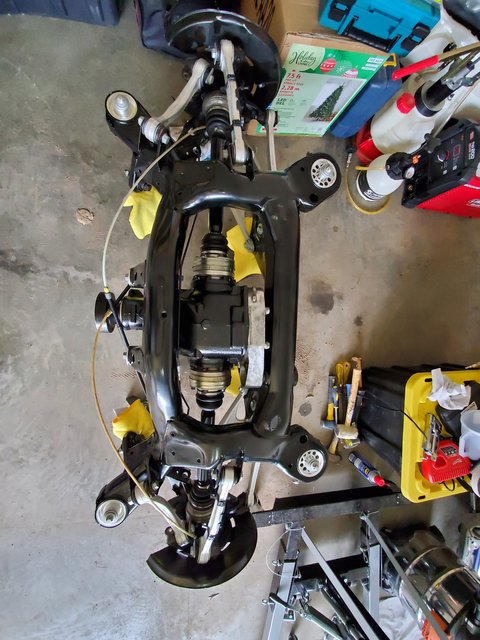 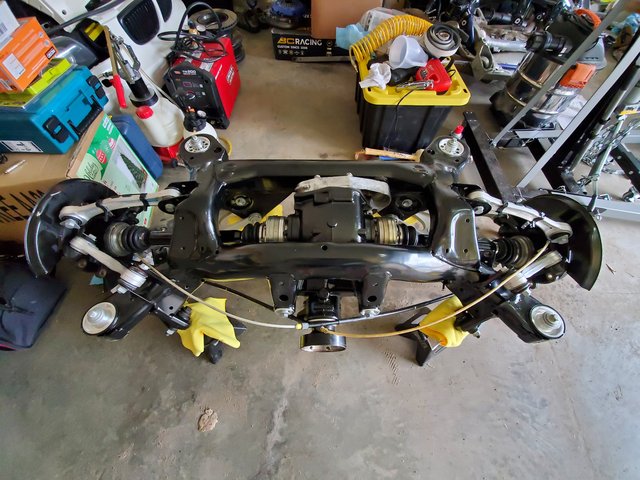 Last edited by Latebeemer; 03-12-2025 at 02:33 PM.. Reason: added to the list of major parts |
|
Appreciate
3
|
| 03-12-2025, 03:24 PM | #7 | |
|
Слава Украине!


3377
Rep 2,716
Posts |
Quote:
__________________
|
|
|
Appreciate
0
|
| 03-12-2025, 03:47 PM | #8 |
|
Enlisted Member
70
Rep 40
Posts |
Upgrade parts install continued
Major parts installed:
Some fabrication work I did:
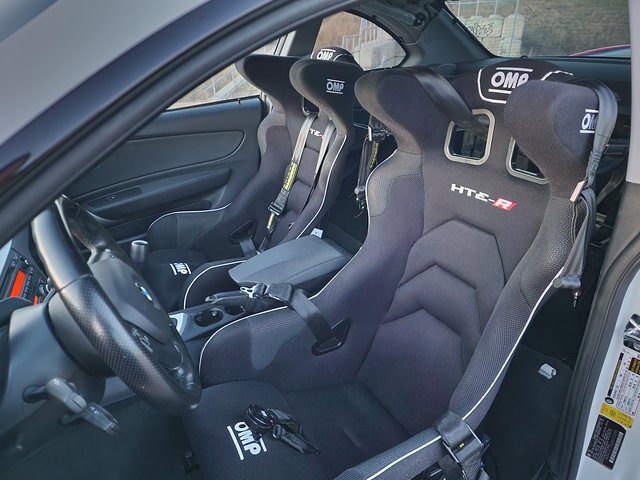
First order of business was to install the subframe onto the car. 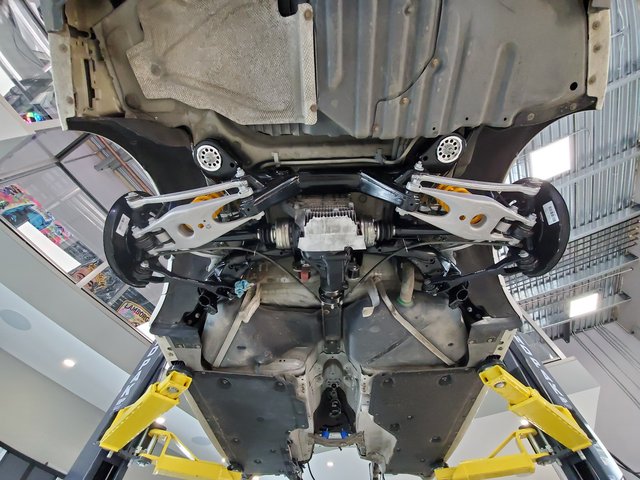 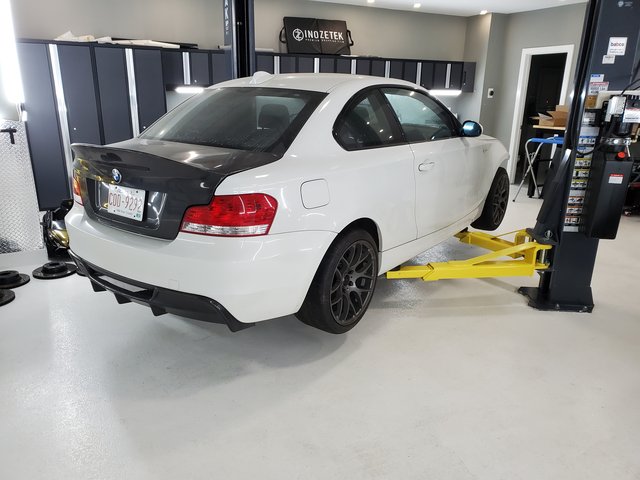 Next up, the Stoptech BBK came in. 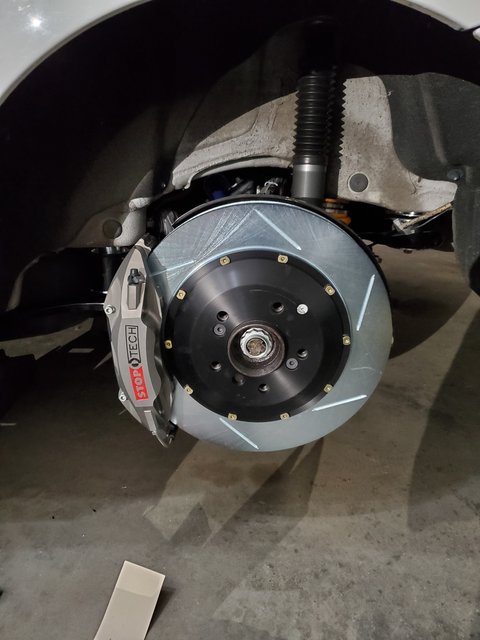 And the snowball will always snowball as projects go, now that I have the BBK the rims I had no longer fit, in went an order for Apex wheels. 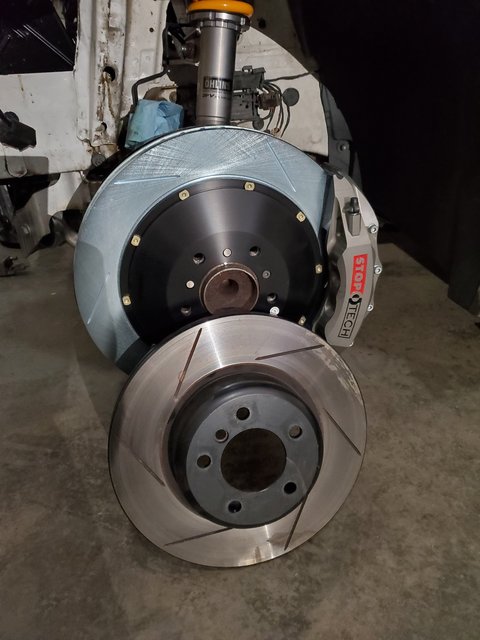 This image is the clearance of the rear caliper to my old wheels 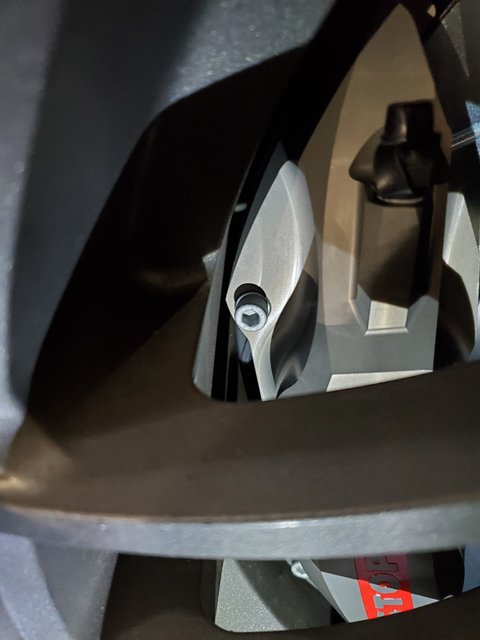 Then the next thing crept up which I truly didn't expect, the brake lines from the M3 BBK didn't fit the 135i hardline position. The solution was to order and replace the two front hard brake lines from the ABS pump to the termination brackets in the wheel well which also needed to be replaced with M3 specific ones along with the shock bracket also M3 specific. The stock 135i hardlines terminate at the bracket pointing upwards and the M3 downwards, the angles are also slightly different. I'm assuming that the stock ride height are different enough between the 1 series and 3 series and the M3 that the M division decided to change these out. 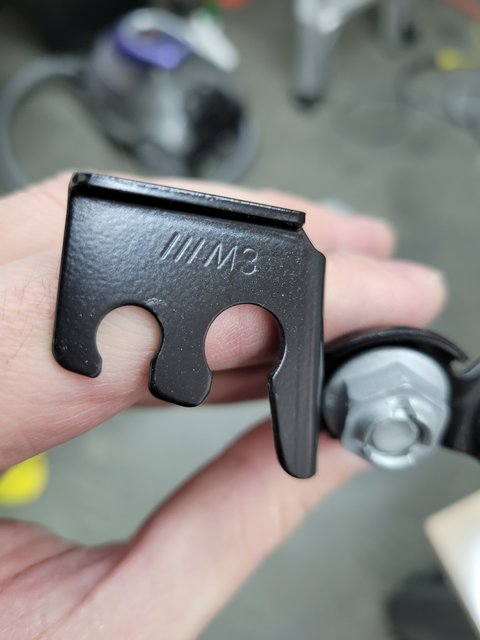 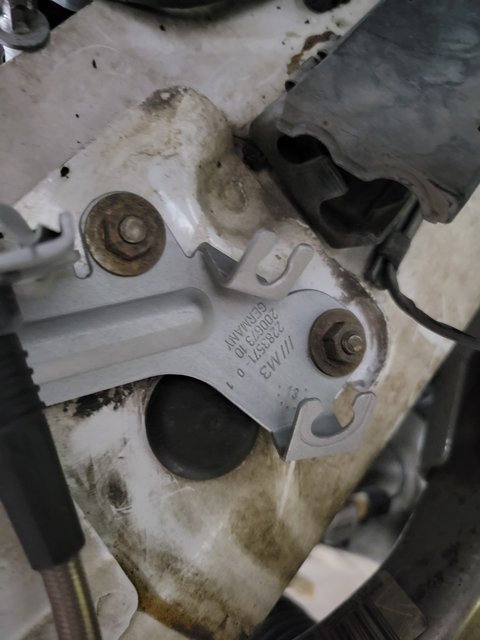 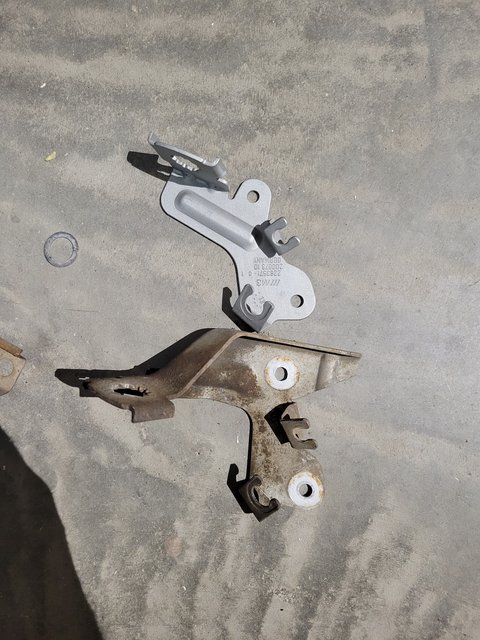 This is the hard line difference on the driver's side: 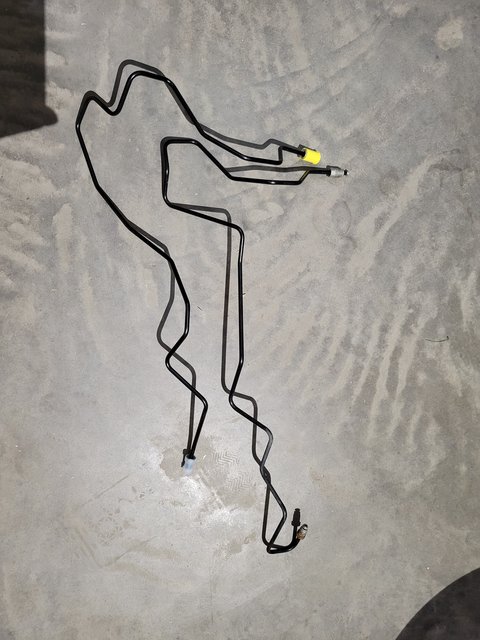 Sway bars were also installed along the line, the M3 rear sway bar doesn't fit the 135i subframe without rubbing. 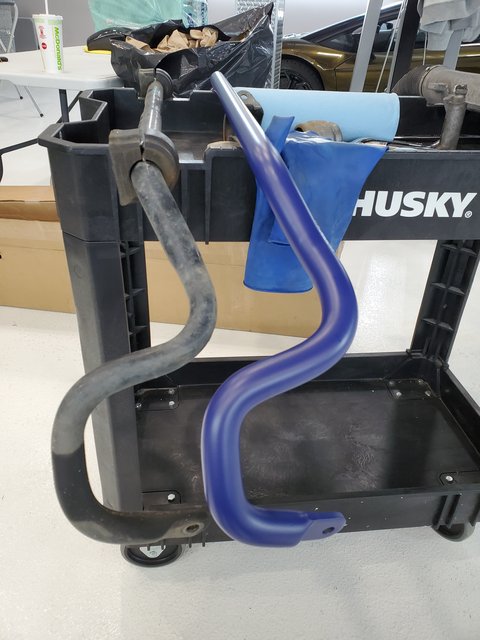 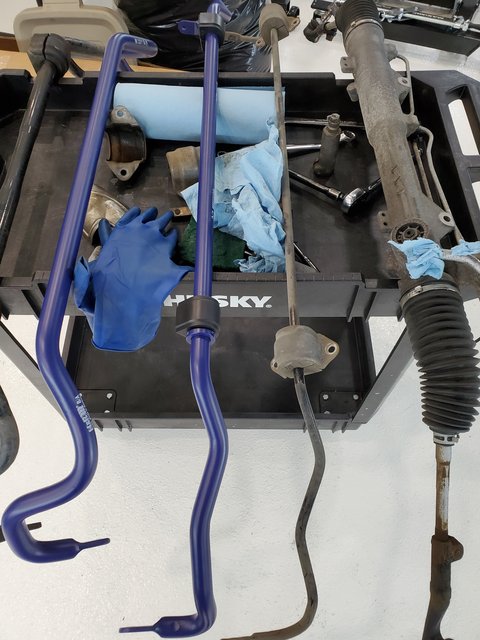 I bought a used M3 driveshaft and had the front portion shortened to suit. 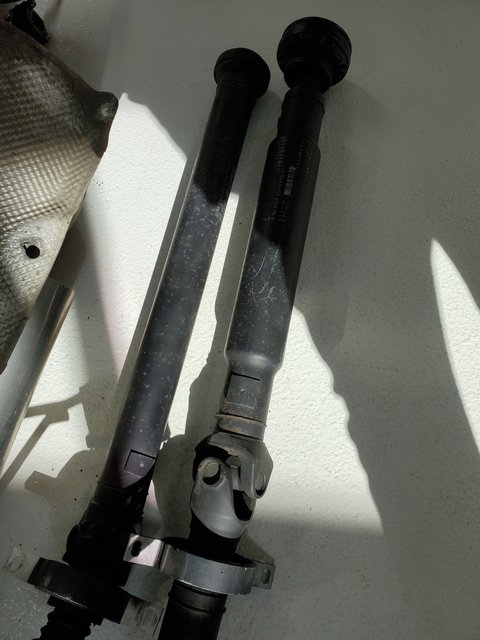 This was the reason I pulled the 1er into the shop in the first place. The turbos on her at the time was Franken Turbos, which came with the car when I bought it. The symptom for this was that the car would sometimes come on boost and other times not at all... 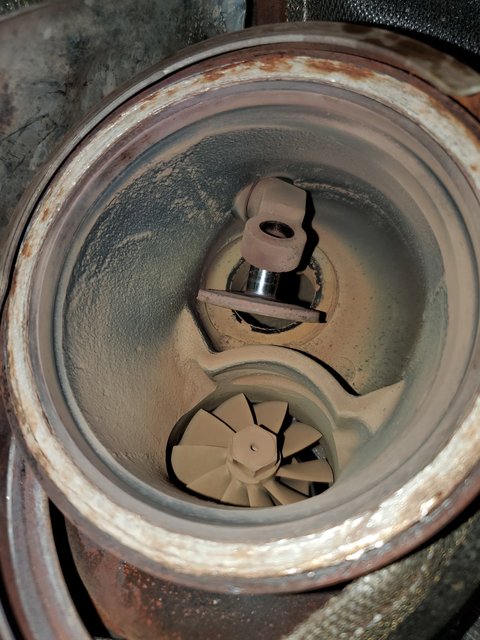 I changed the big end bearings while I had the engine out, also thought it would be smart before installing the new MMP 1K turbos and going to the track. It was a good idea, the bearings were on the way out. 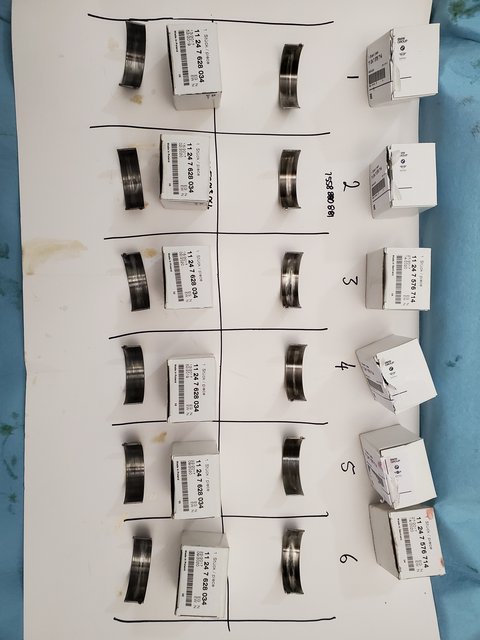 Oil pan baffle up next up. 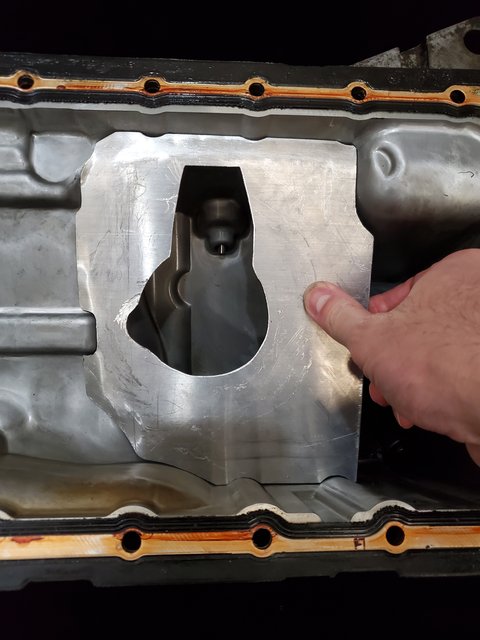 my goal with this was to stop the oil from rushing forward under heavy braking and from sloshing out to the passenger side during left handers. 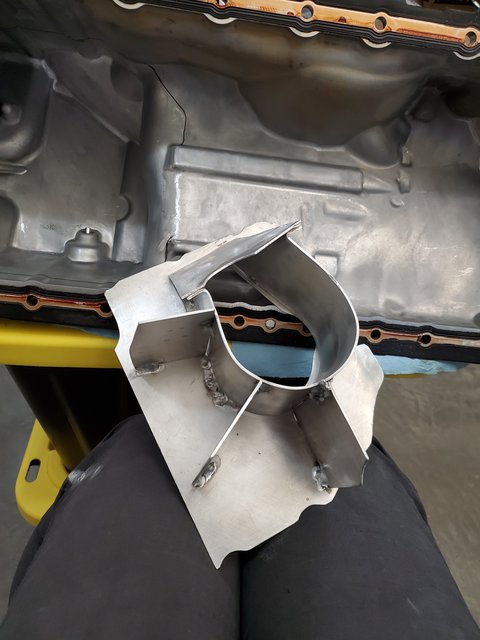 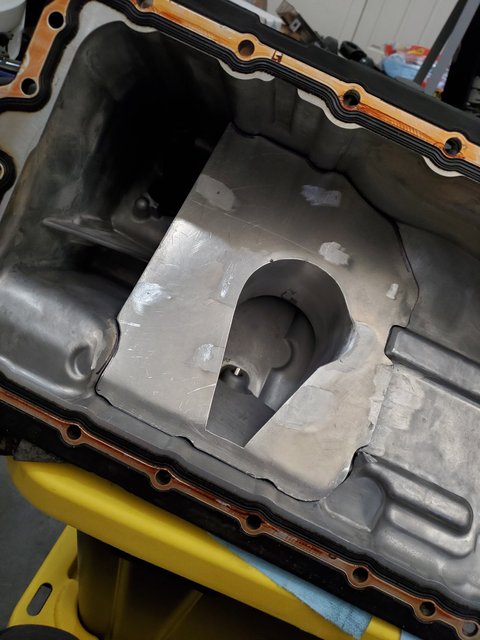 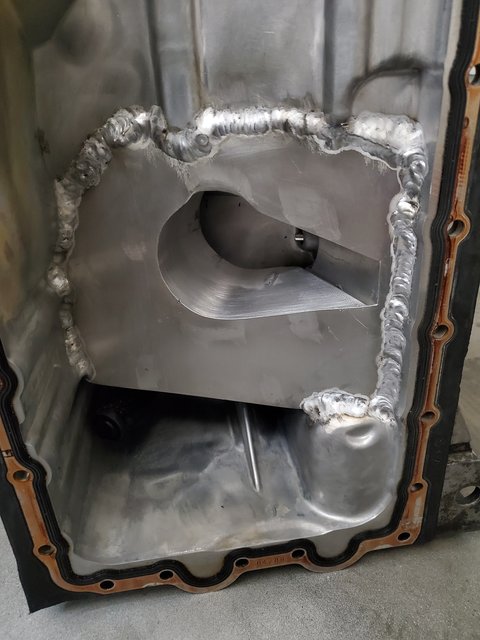 Wagner intercooler 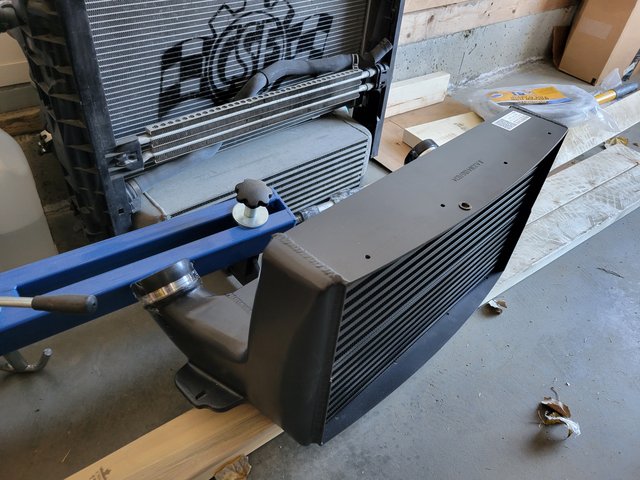 MMP 1K Turbo modifications. I don't like how the aftermarket sells products that don't really fit or rub everywhere and don't really do a better job even though you spend a substantial amount on cash on some of the things. The turbo inlets are the biggest culprits for me on this platform. All aftermarket solutions are half a$$ed. I wanted to make a system that will not restrict the turbos and will be reliable so I came up with this. 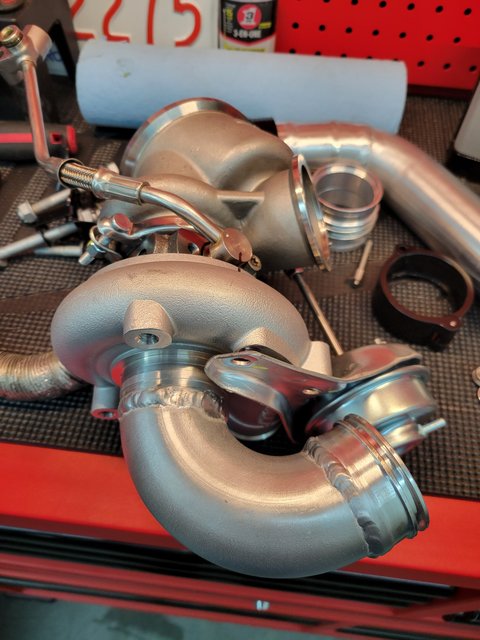 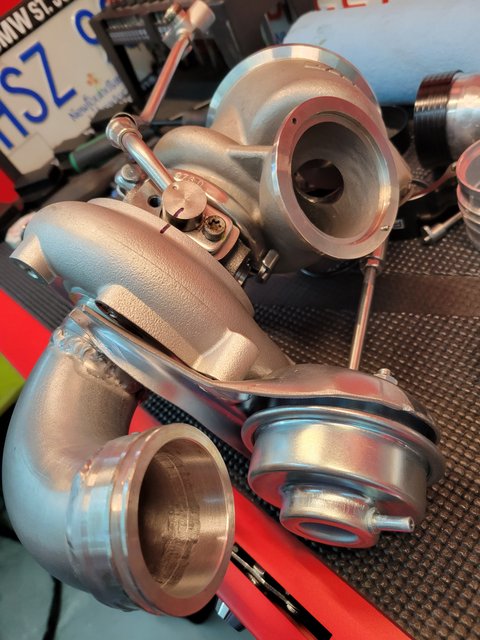 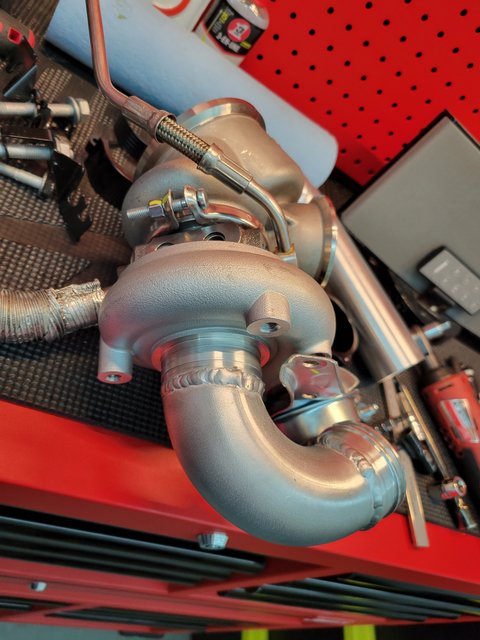 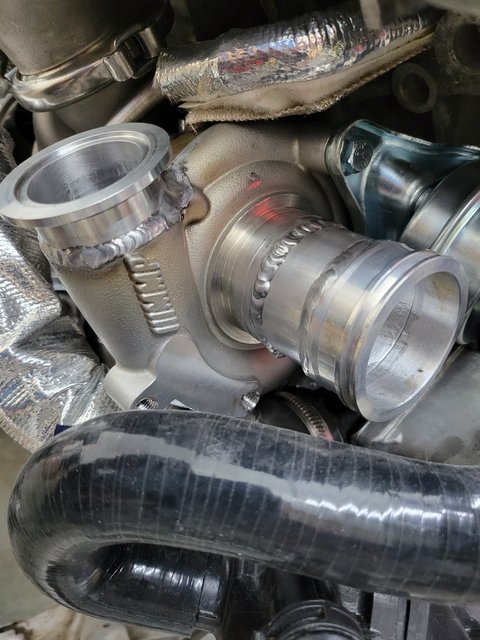 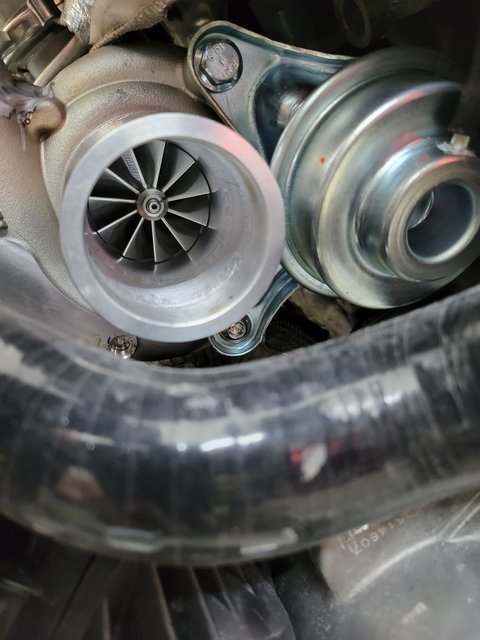 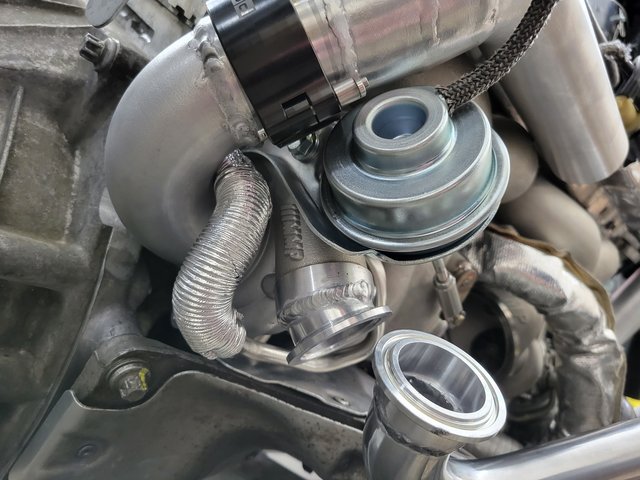 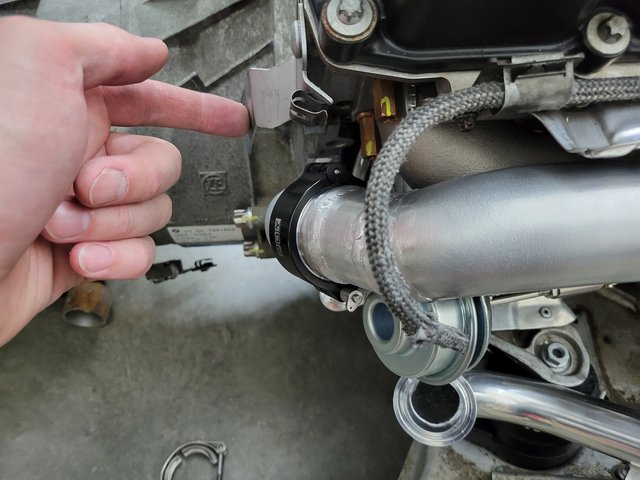 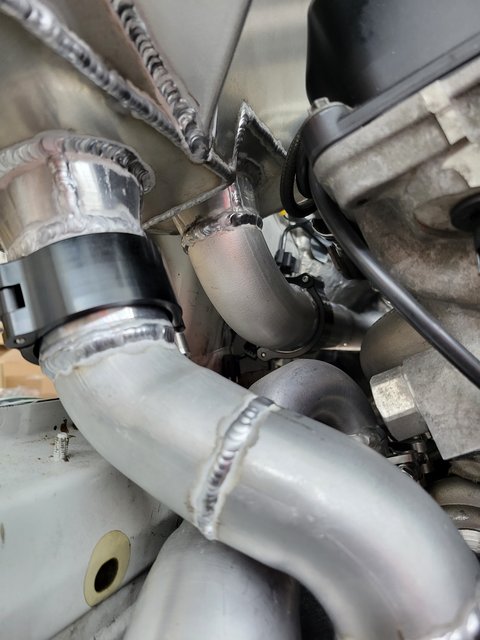 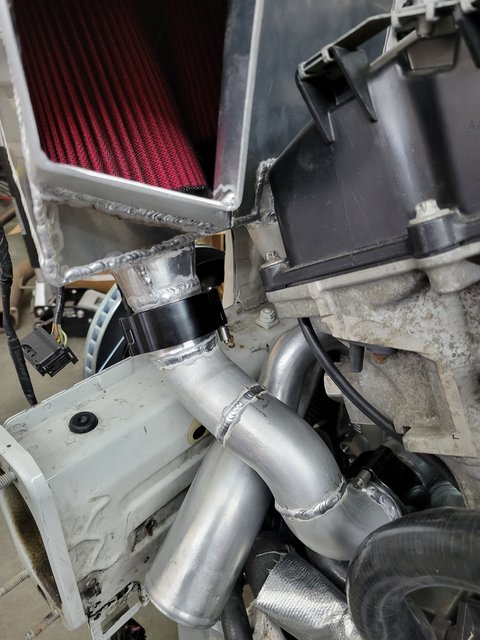 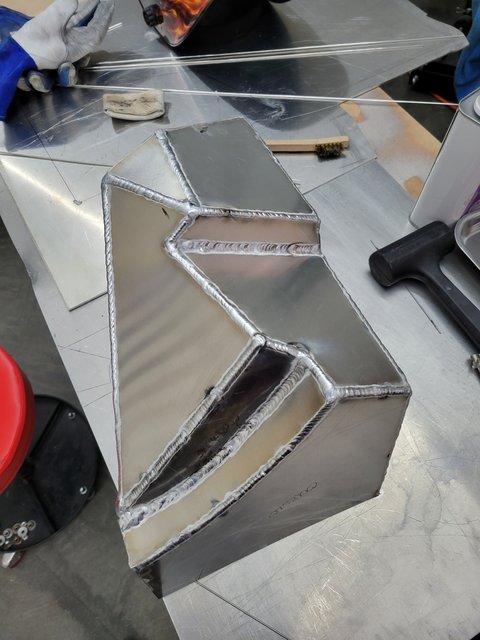 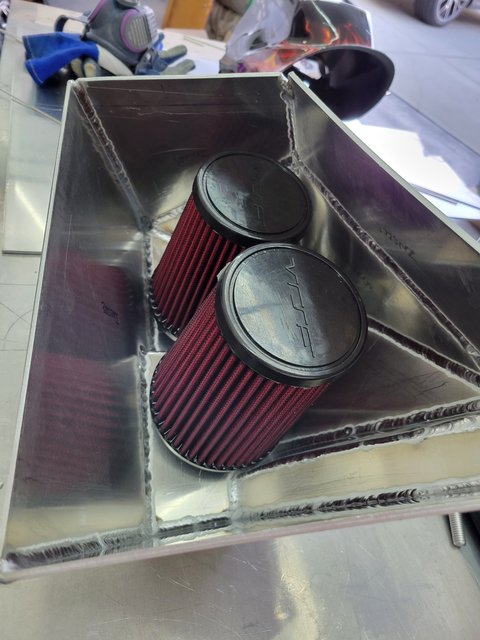 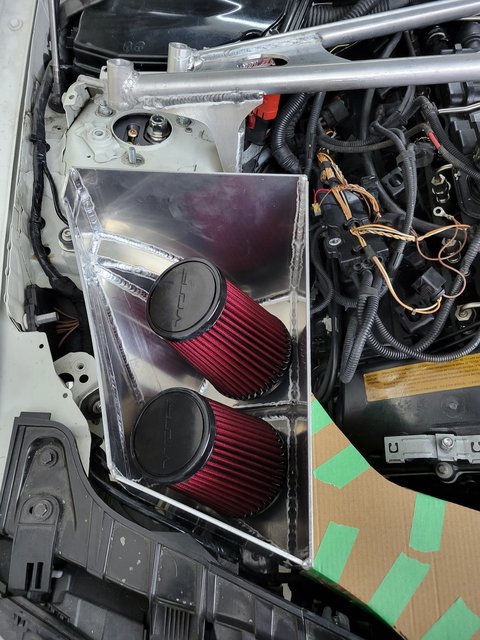 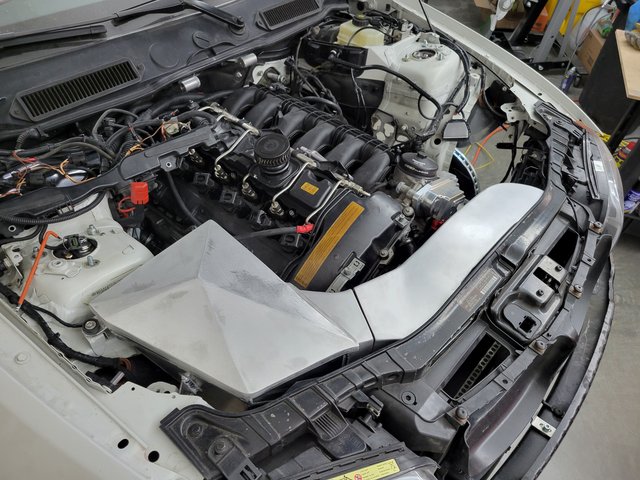 Heat management is a big deal when you're on the track for a long time, and the 135i really needs all the help it can get. 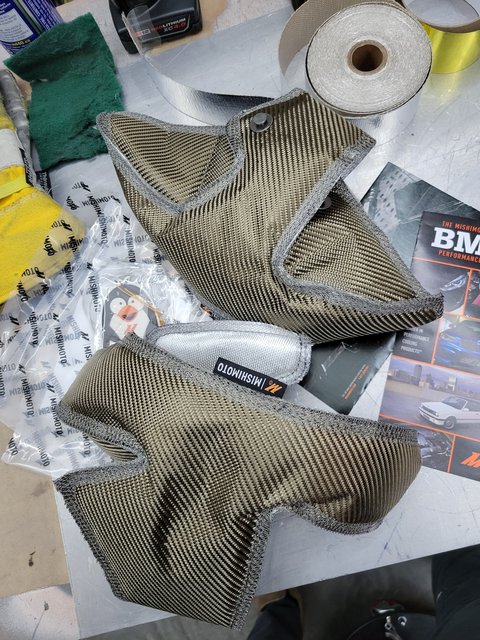 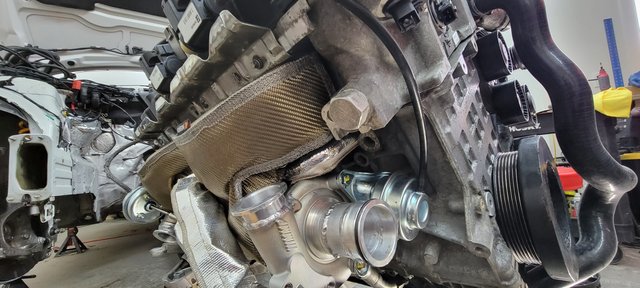 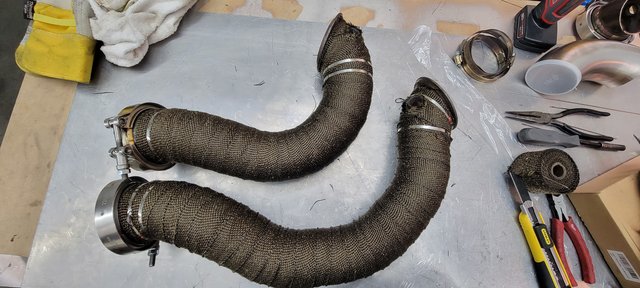 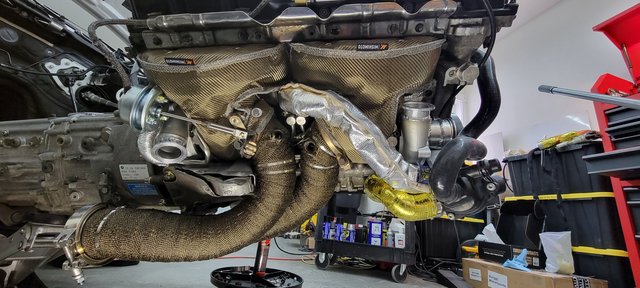 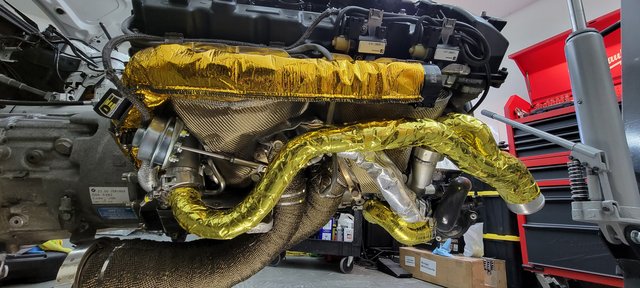 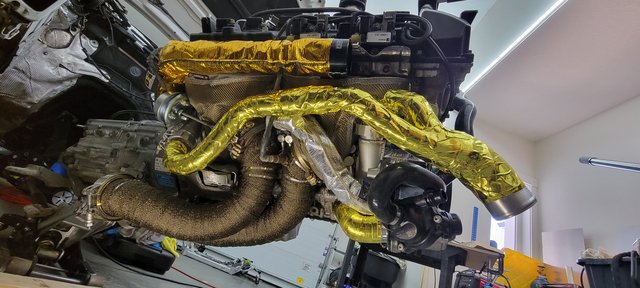 The custom exhaust I built 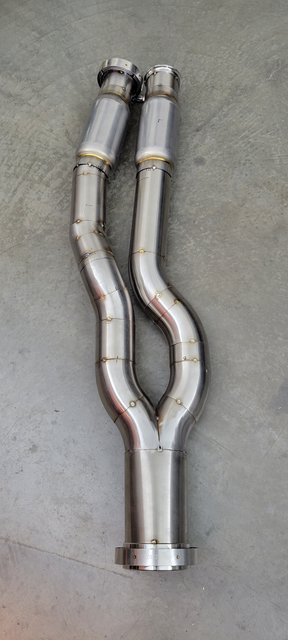 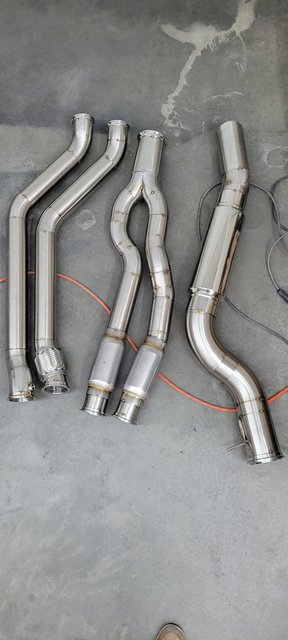 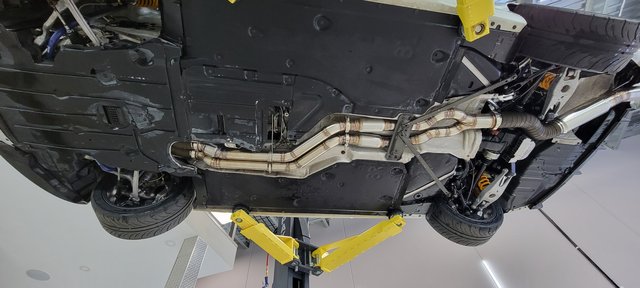 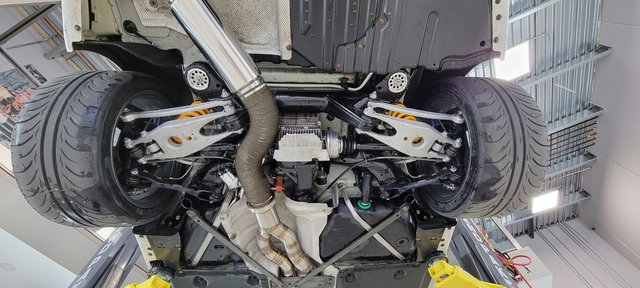 OMP Racing seat 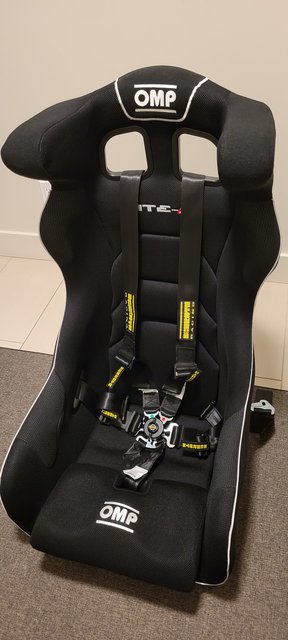 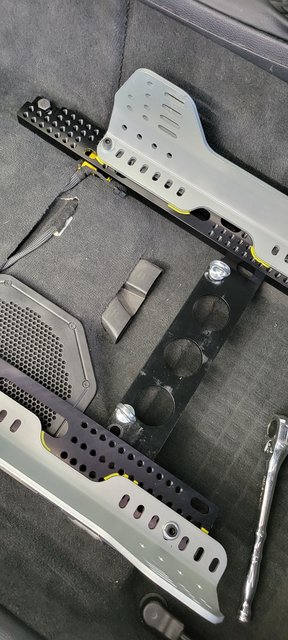 And done! Racing season started, got the car tuned by Ken and Wedgeperformance and it was great on track. Tires, and off to the track. 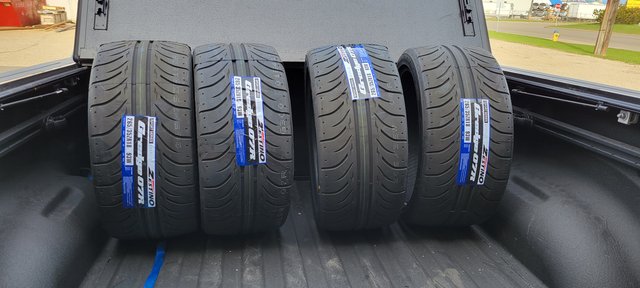 Last edited by Latebeemer; 03-12-2025 at 04:04 PM.. |
|
Appreciate
1
tracer bullet6189.00 |
| 03-12-2025, 04:02 PM | #9 |
|
Enlisted Member
70
Rep 40
Posts |
More issues
At this point I had done quite a few track days, sorted out the car's setup with all the new suspensions, diff, turbos etc. the intake system worked great and helped keep the intake temps lower, I of course have a water/meth system installed that came with the car, which also had an issue, pretty big one, it had no nozzle installed, so for a few years it had been spraying meth into the charge pipe in a stream not atomized and I never thought to check. I only ever asked Ken to give me a map for the track to run without meth injection. I would run a 3 gallon meth tank dry in just about 6 pulls. Once I fixed this issue I was running with meth on track and could do two 20min sessions before I needed to fill the meth tank.
One day on the freeway I lost boost, not all boost, it still showed that I had enough to give me atmospheric pressure, so no vacuum but also no boost. The car still felt like it had 250hp hahahaha. It was towards the end of the season, I was tired of dealing with the car, I parked it for the winter but not before doing compression testing and smoke testing to check if maybe I had a boost leak. 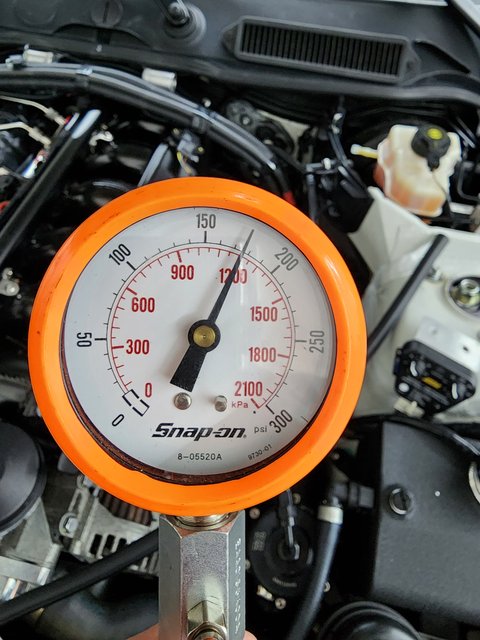 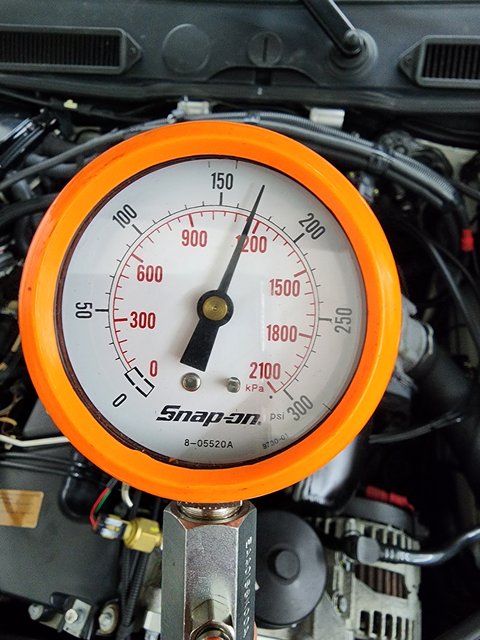 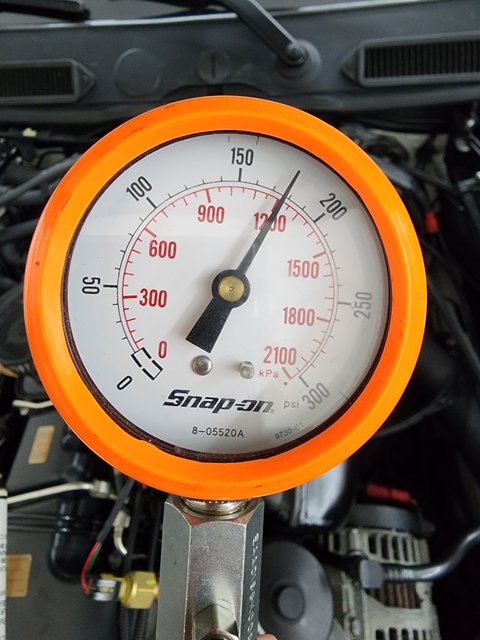 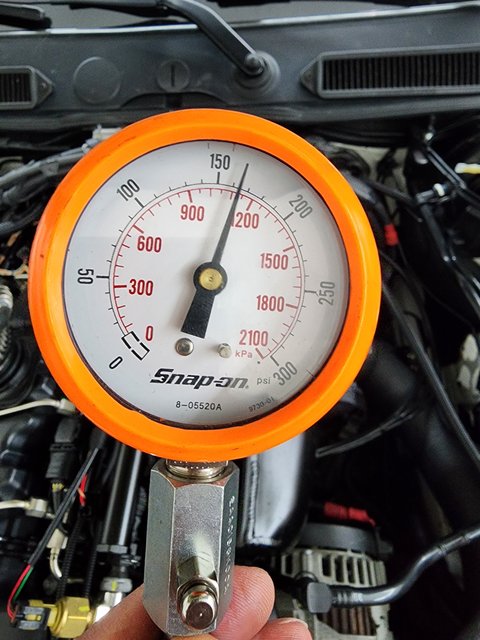 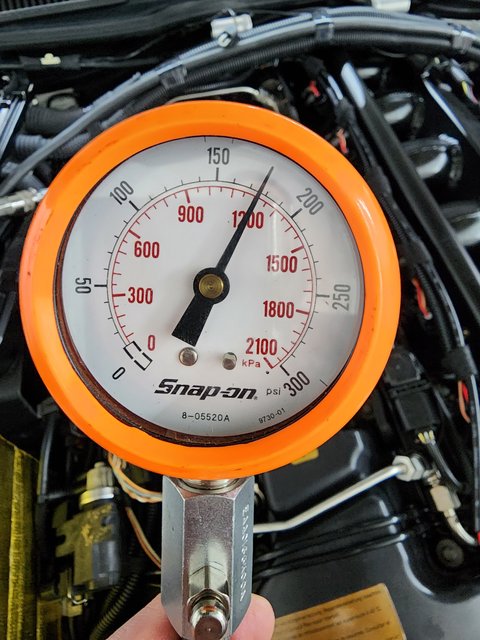 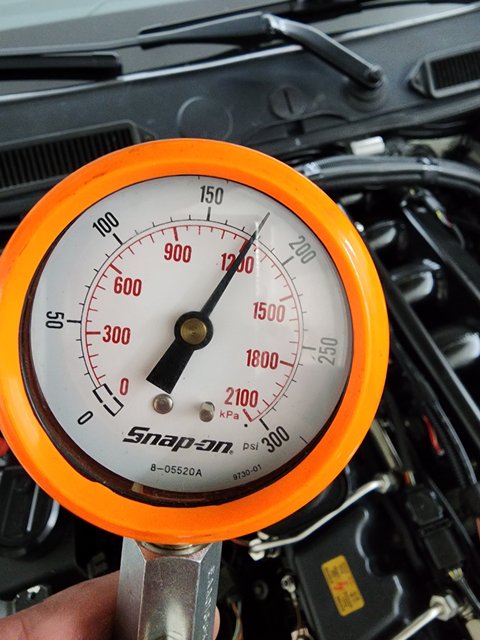 The car sat for most of winter with me not knowing what the issue was. My only conclusion was that the issue was turbo related. |
|
Appreciate
1
tracer bullet6189.00 |
| 03-12-2025, 04:56 PM | #10 |
|
Enlisted Member
70
Rep 40
Posts |
You've got mail
I pulled the trigger on a bottom mount single turbo kit from Speedtech on Ken from Wedgeperformance's recommendation for the purposes that I use my car for. Garrett G30-900 was what I ended up ordering. Now all that was left was to get started on the installation.
Parts list:
Engine out again 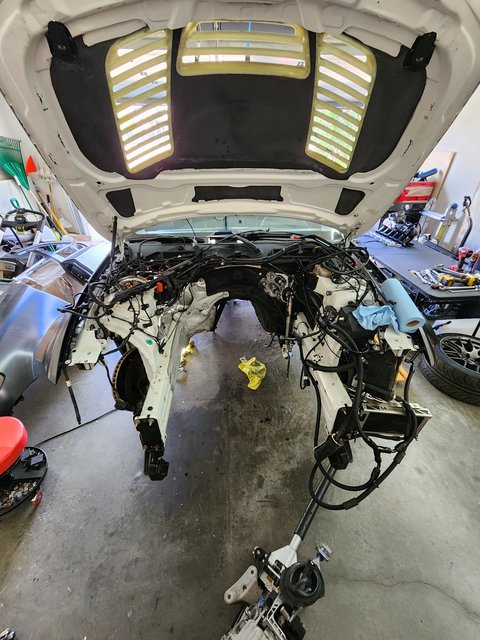 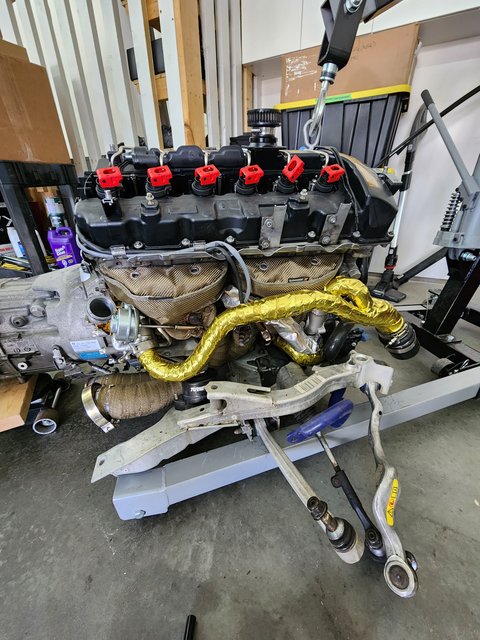 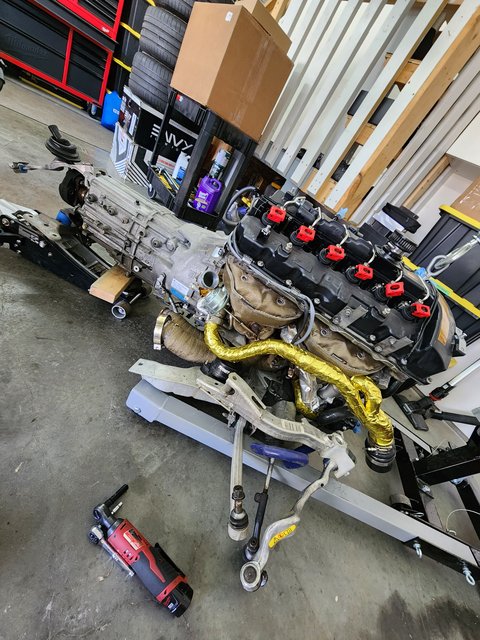 after taking the MMP turbos off, noticing that they were lose. It is a split design whereby the turbo is mounted to the manifold via a V-band clamp, but there is also a copper gasket that gets installed between to make sure it doesn't leak like copper gaskets on many other locations on cars and machines. This however, and I was so choked that I didn't catch this when I installed these, shouldn't have copper anywhere near this kind of heat. The copper got hot enough to just disintegrate. One piece got lodged between the turbine and the housing of one turbo which then stop that turbo from spinning causing the atmospheric boost pressure I saw on the logs. The copper gaskets not being there was also the reason for the turbos being lose. 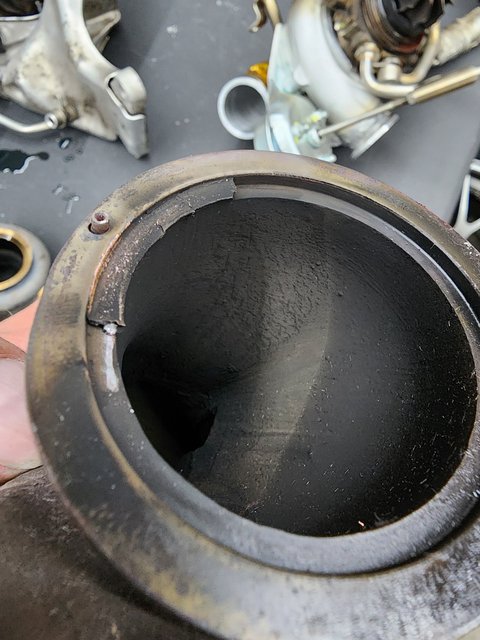 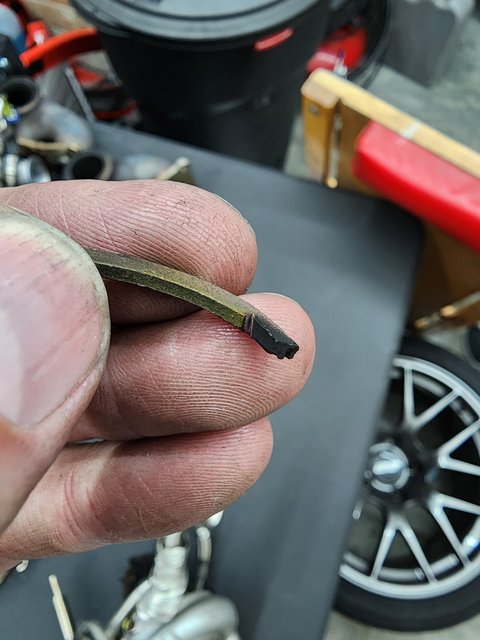 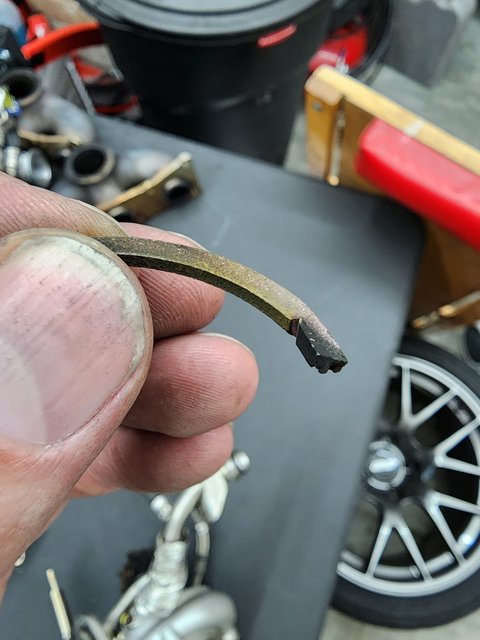 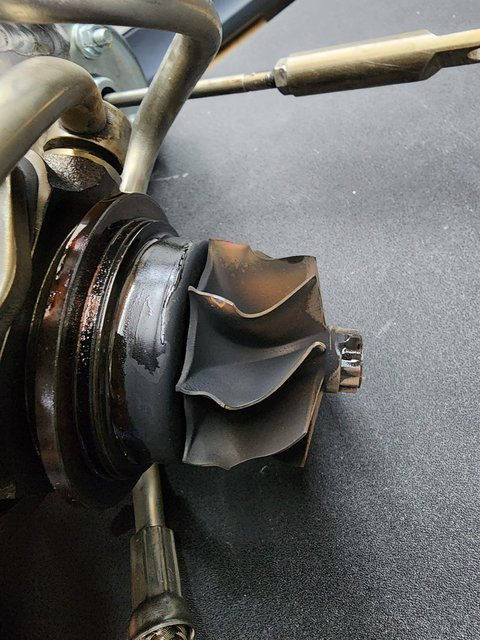 On to the Speedtech kit. 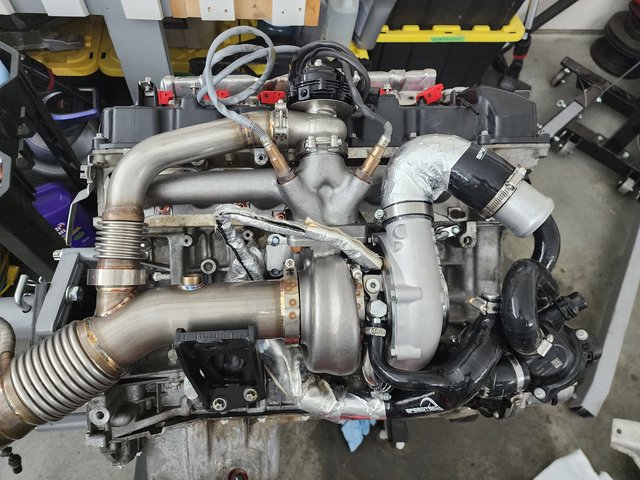 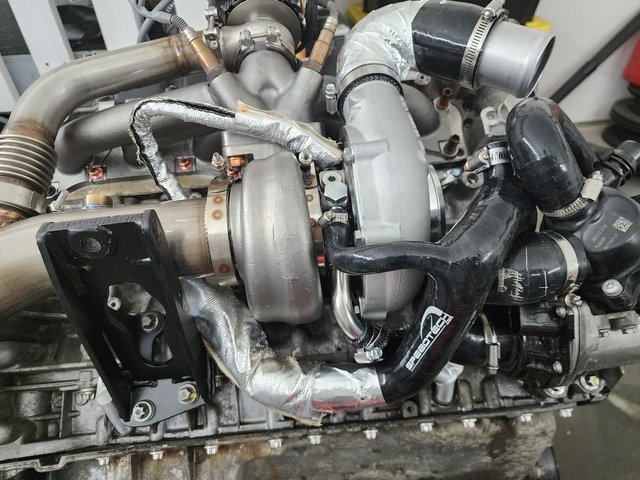 Heat management of course 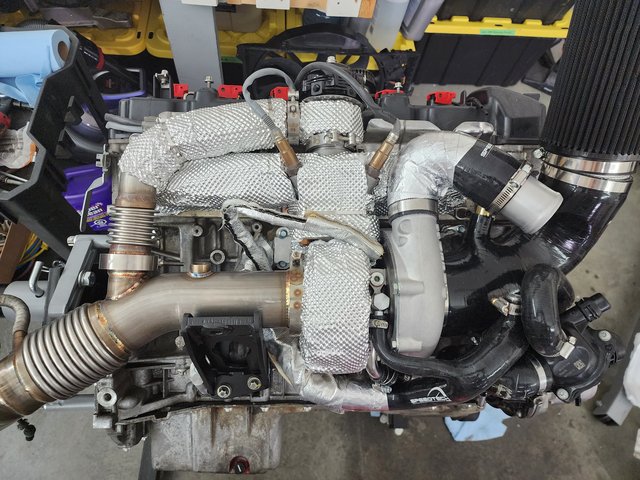 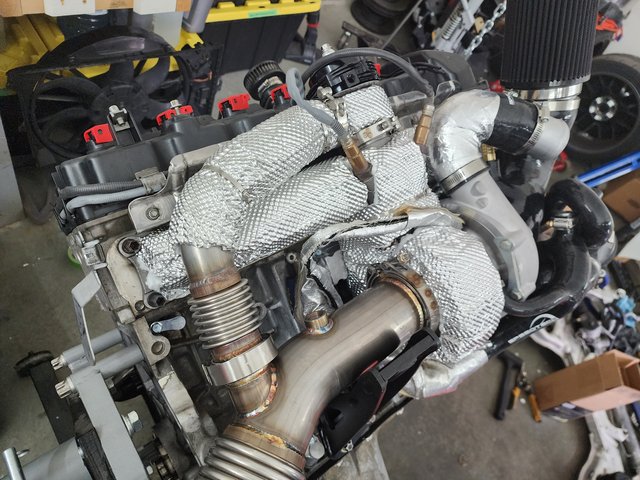 I also found out that if you don't follow the BMW way of installing the crank seals, they leak. I reinstalled a new rear seal according to procedure and it worked. 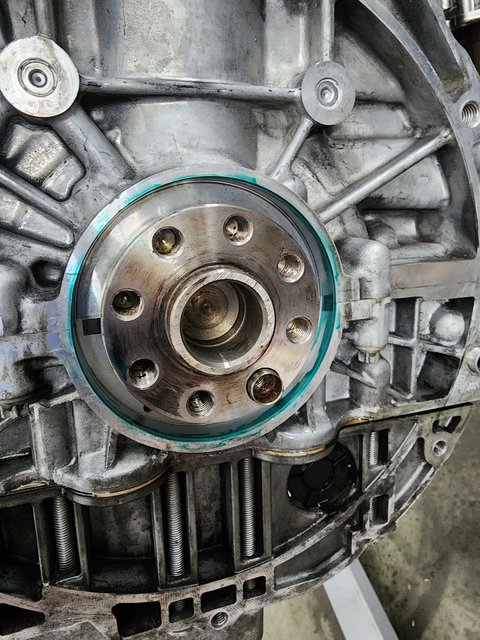 Here comes the part of the build I've always wanted to do from the moment I bought the car in 2019. It is also the part that can be super expensive if you have a shop do it for you. I did this myself however, my Dad used to have an auto body shop years ago and I used to work there during High School holidays and weekends so I picked up a few things over the years. It was still tough making those first cuts into a perfectly good car. 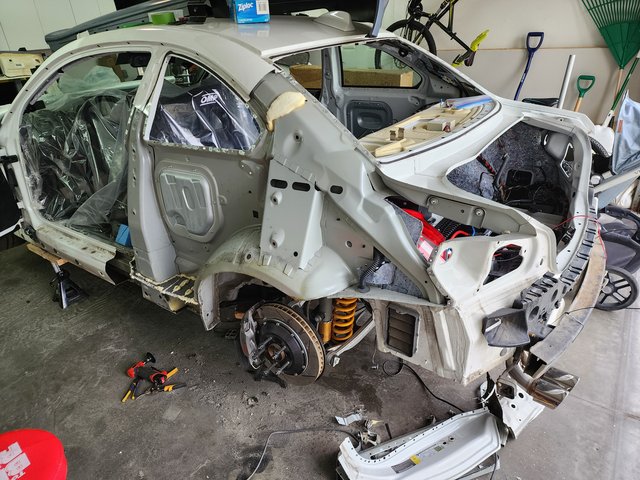 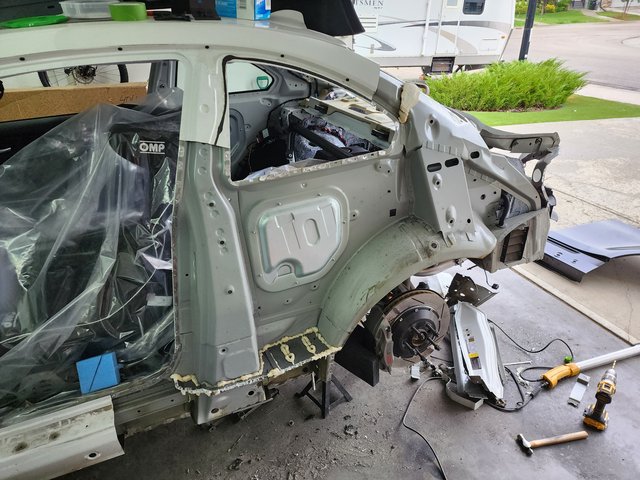 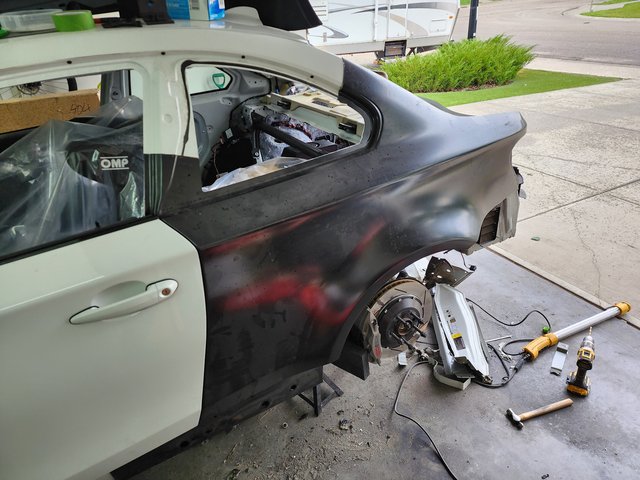 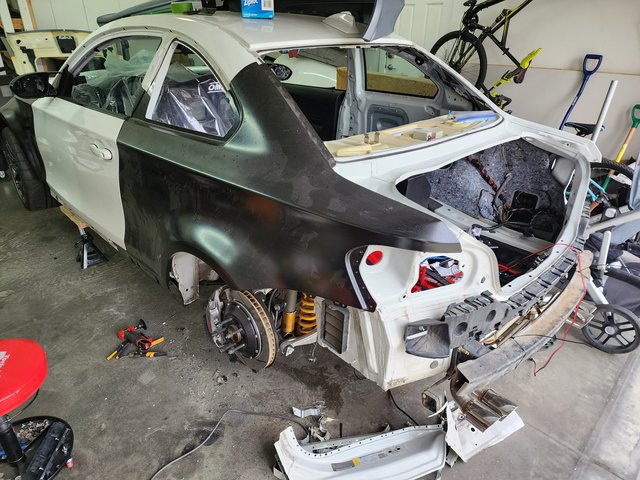 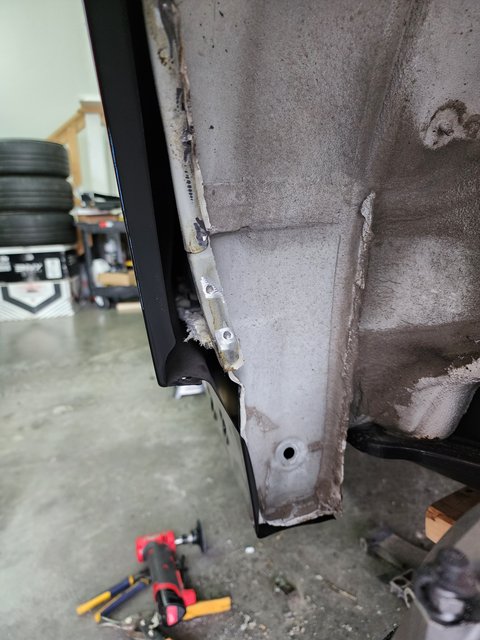 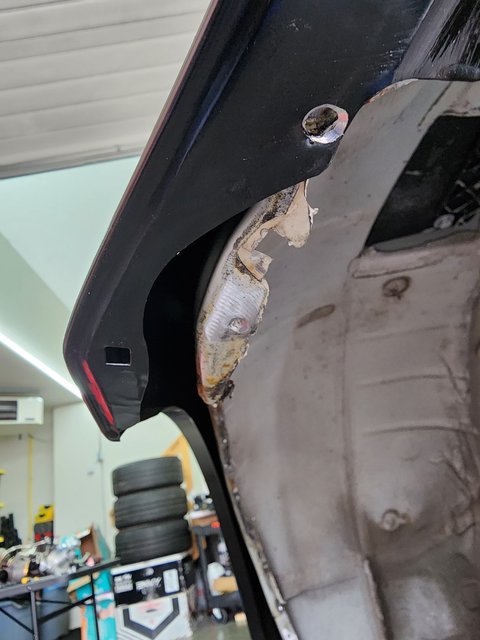 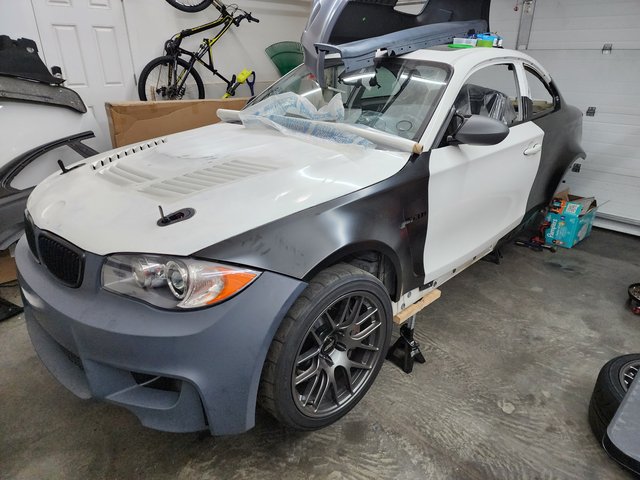 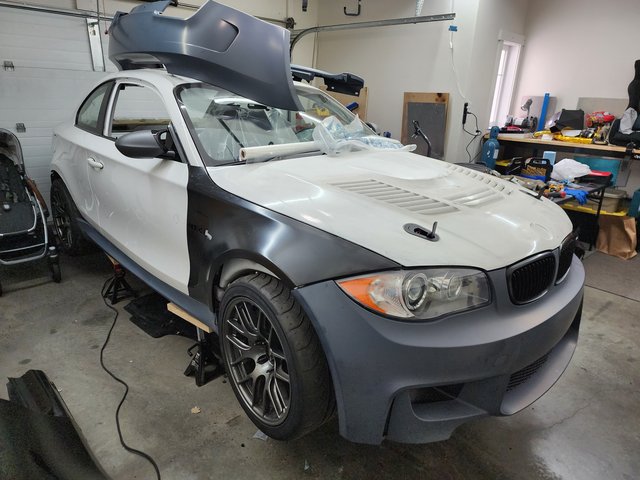 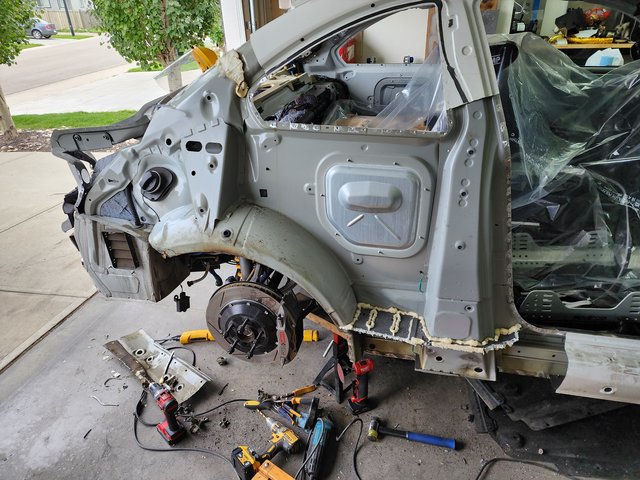 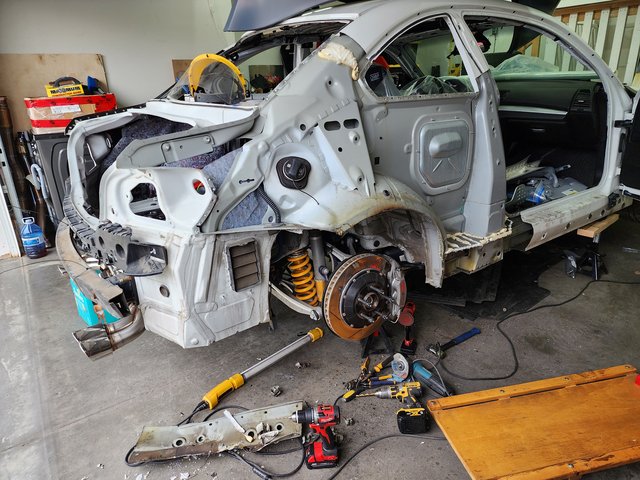 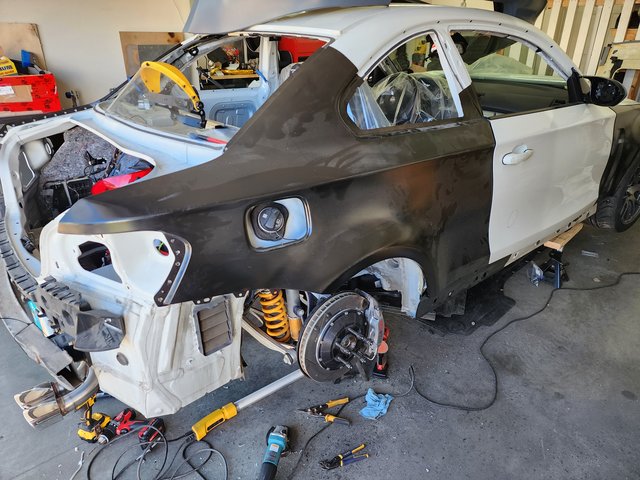 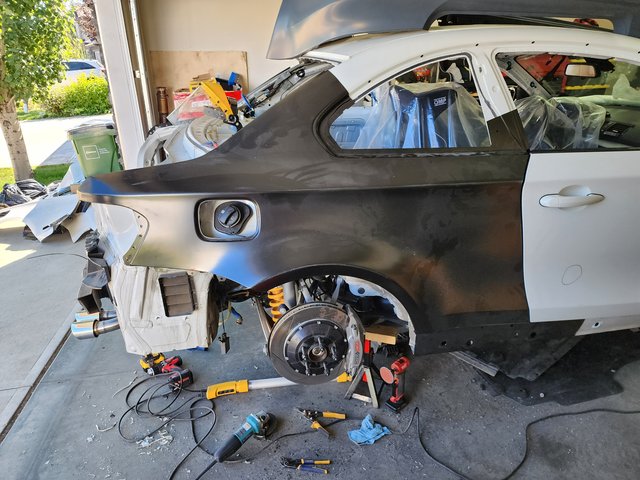 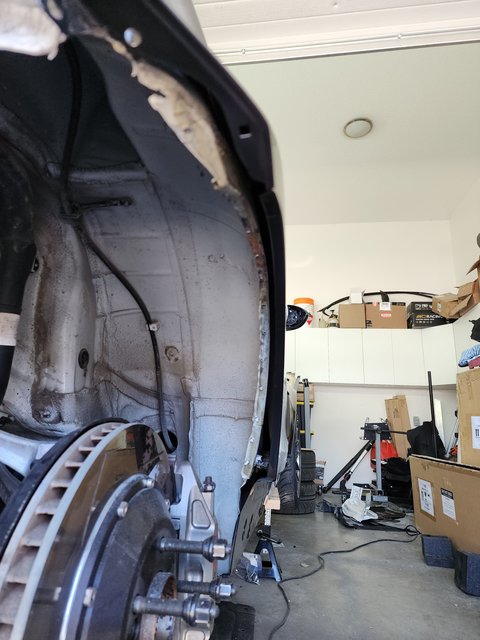 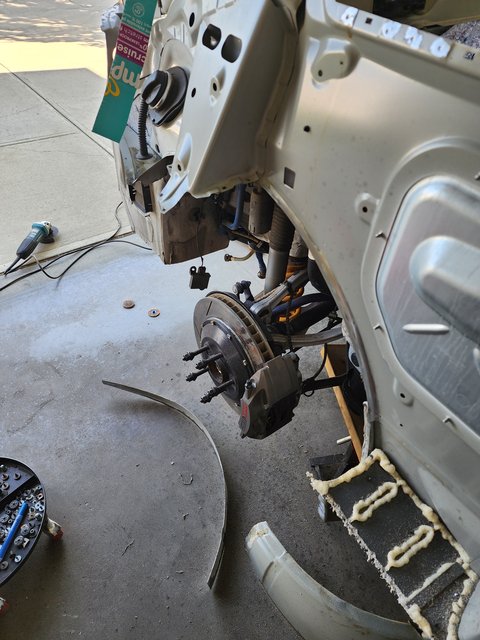 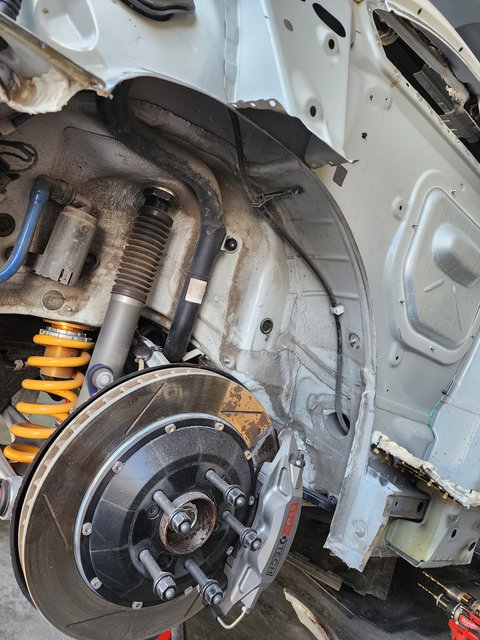 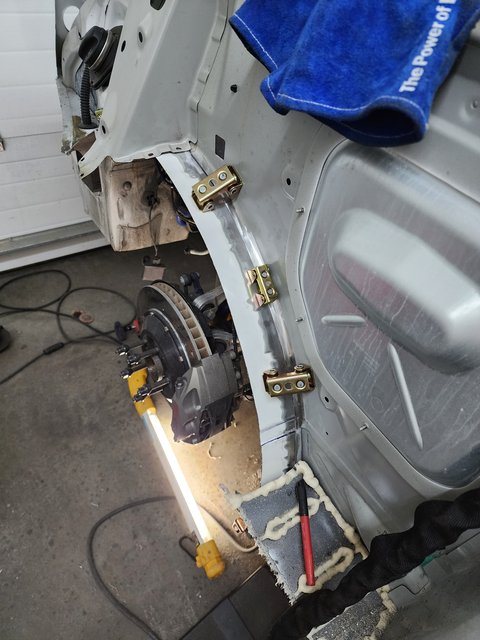 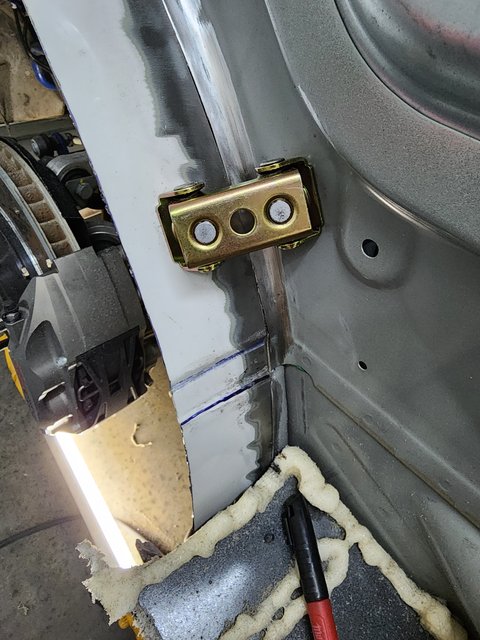 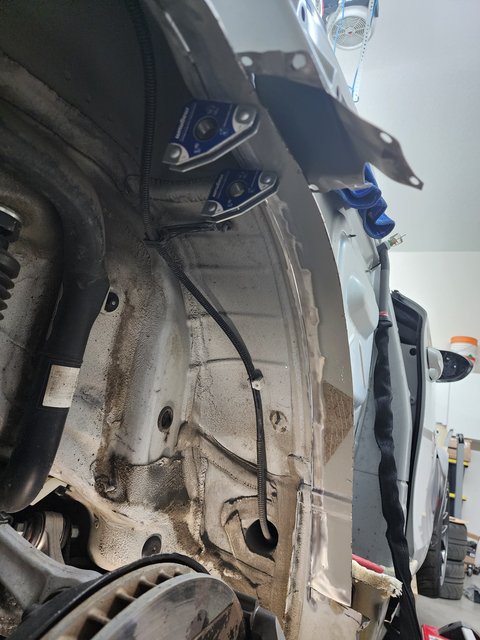 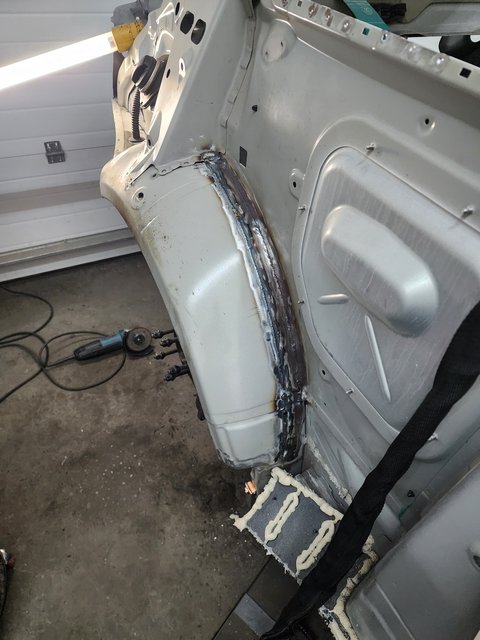 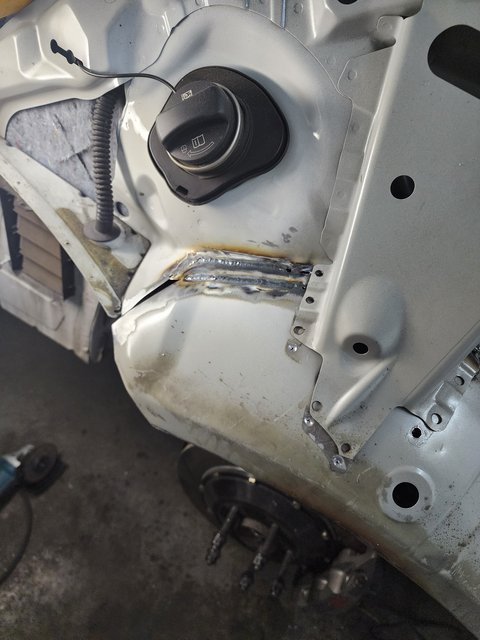 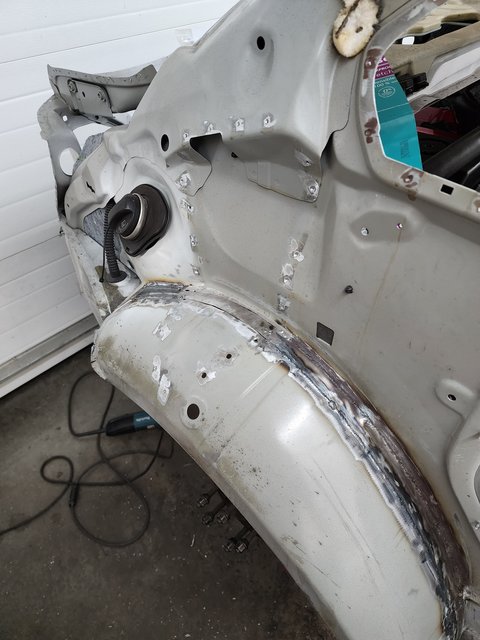 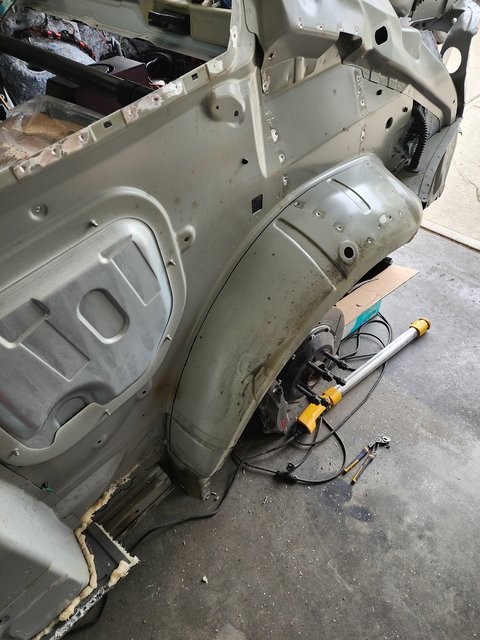 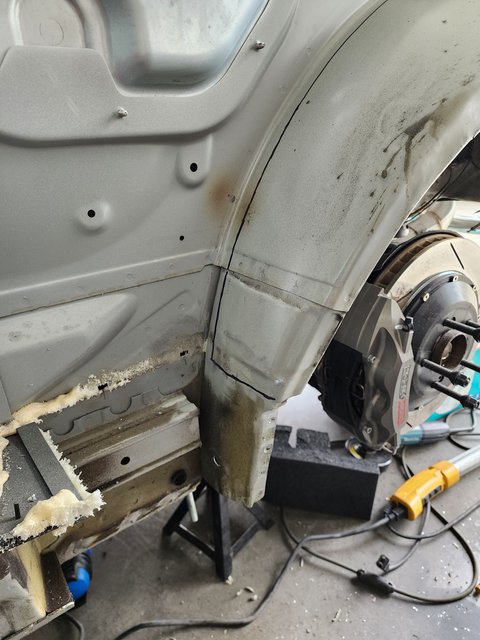 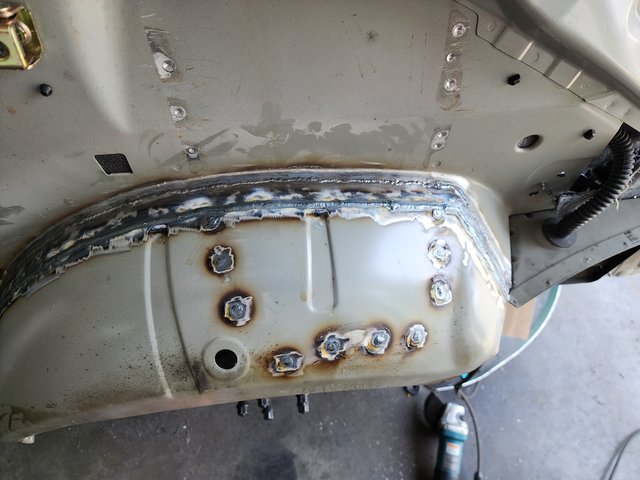 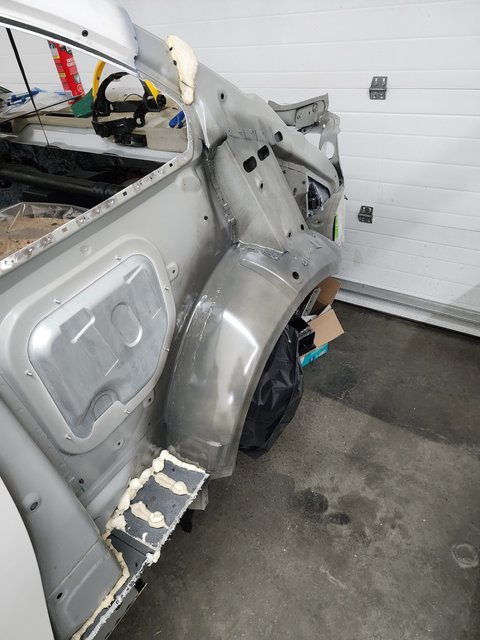 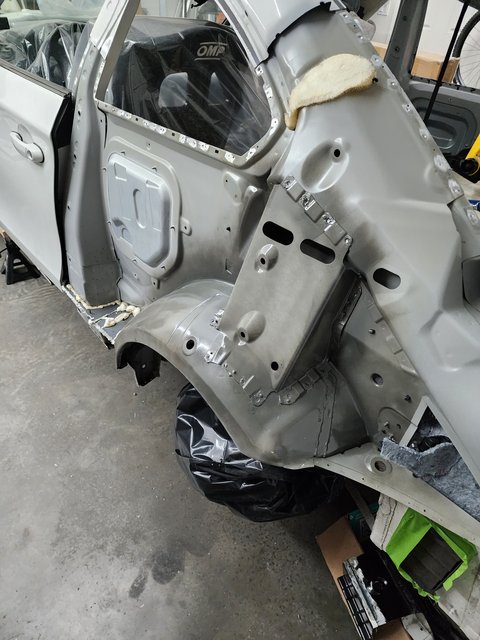 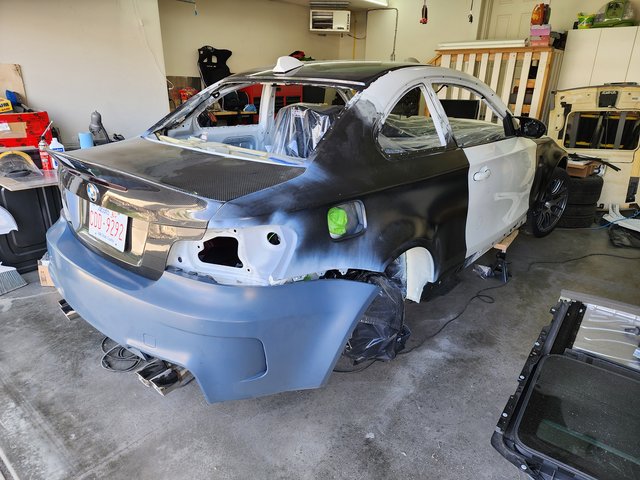 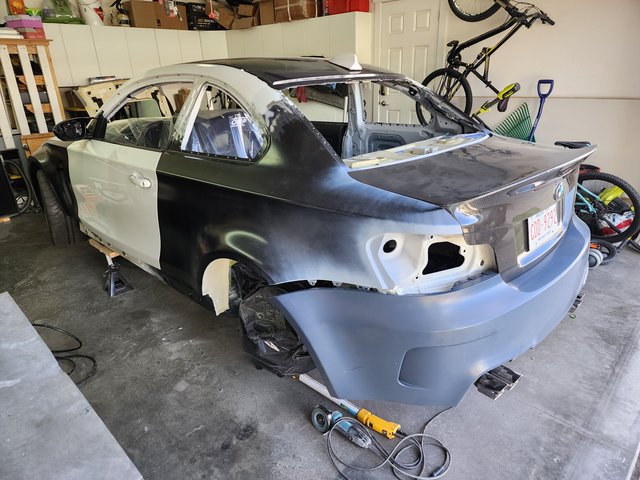 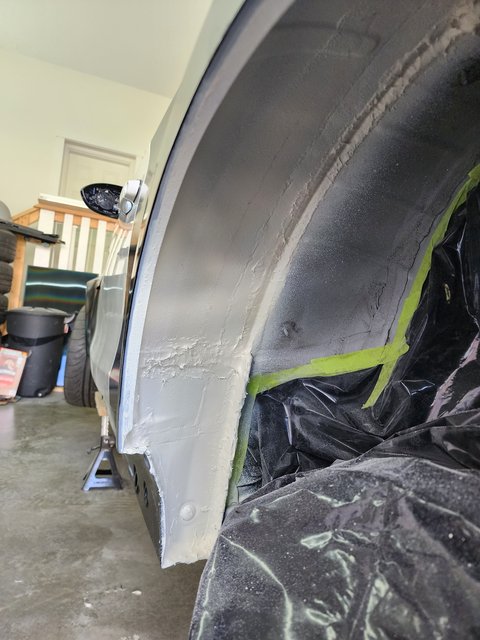 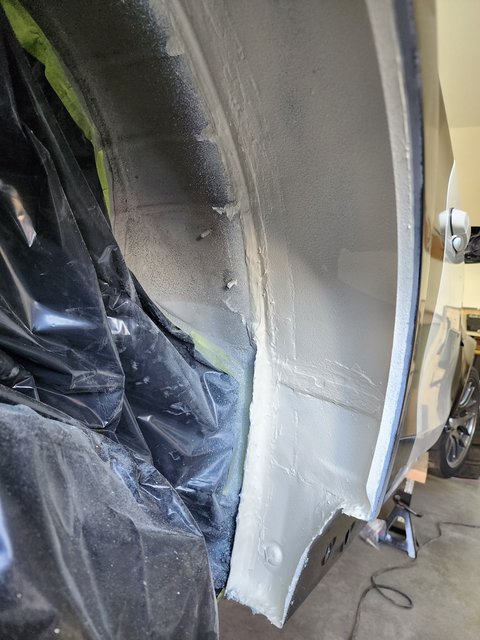 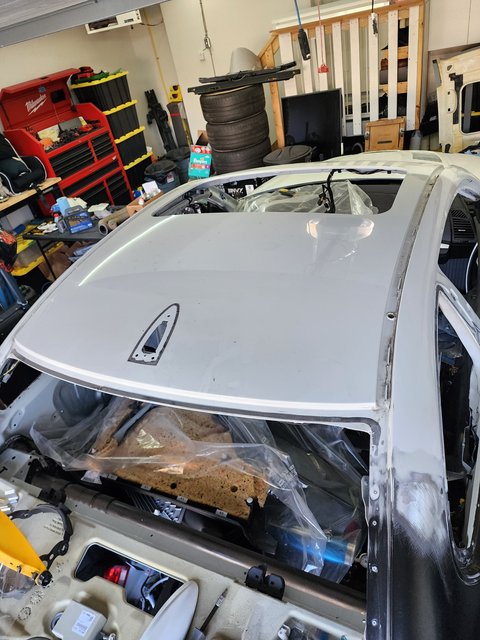 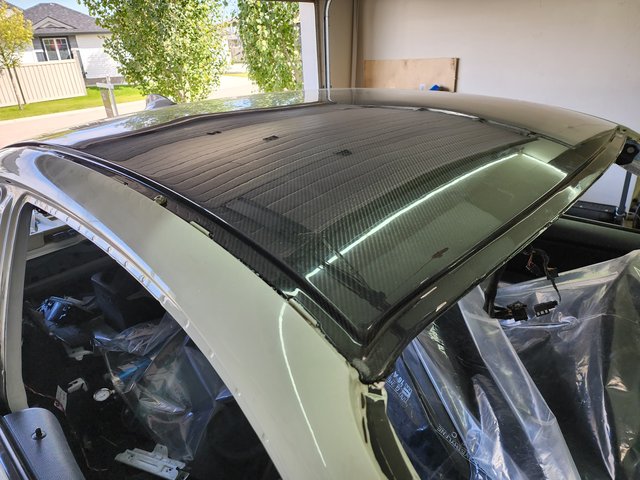 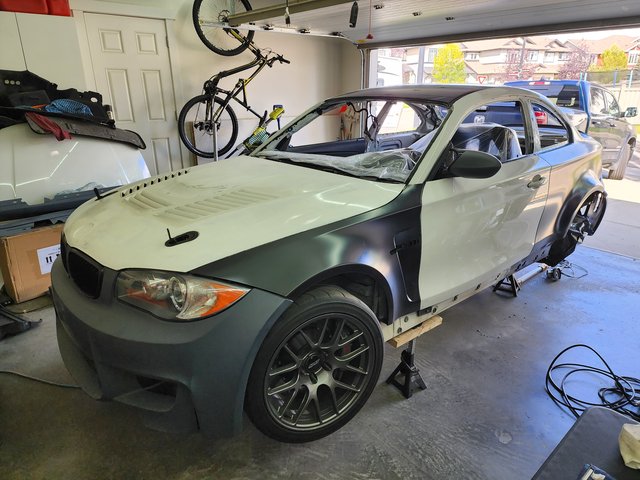 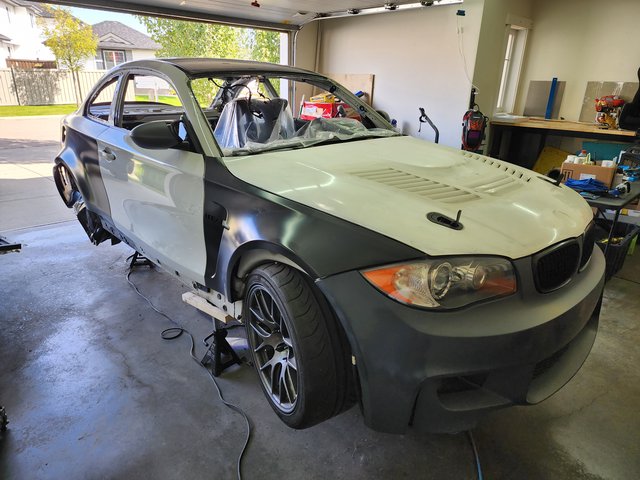 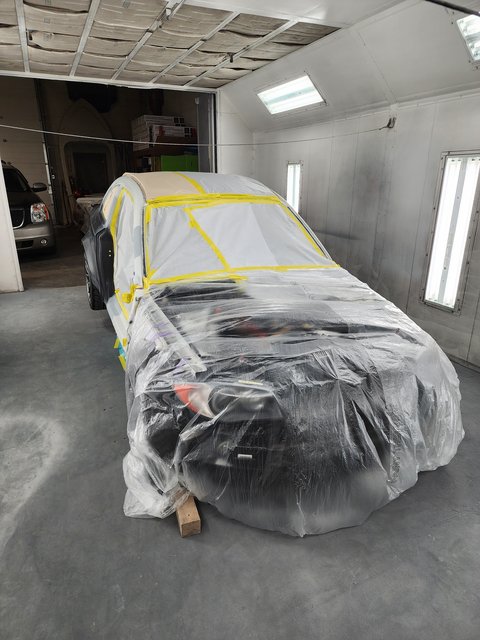 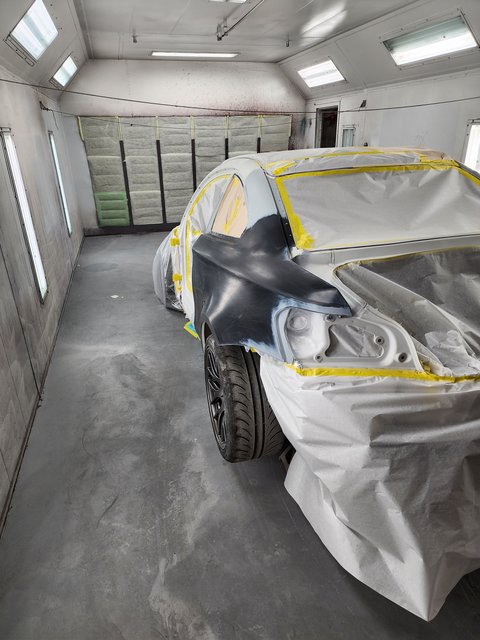 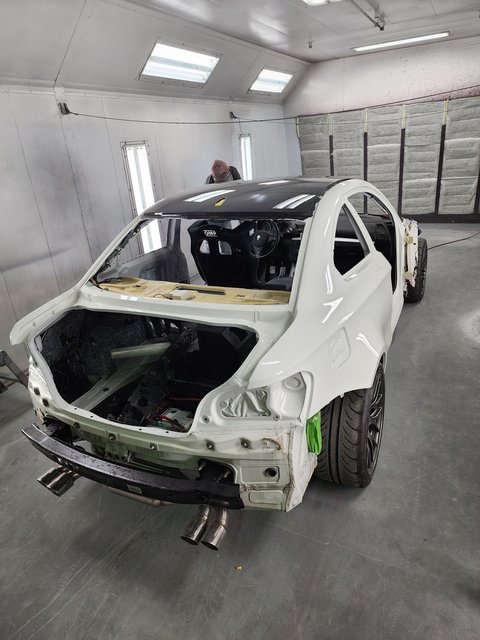 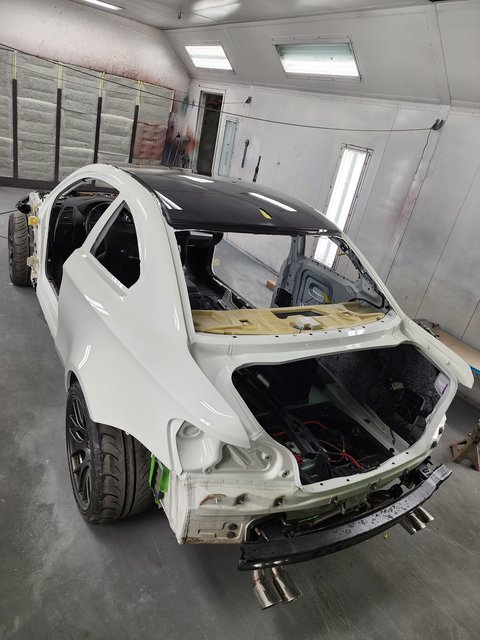 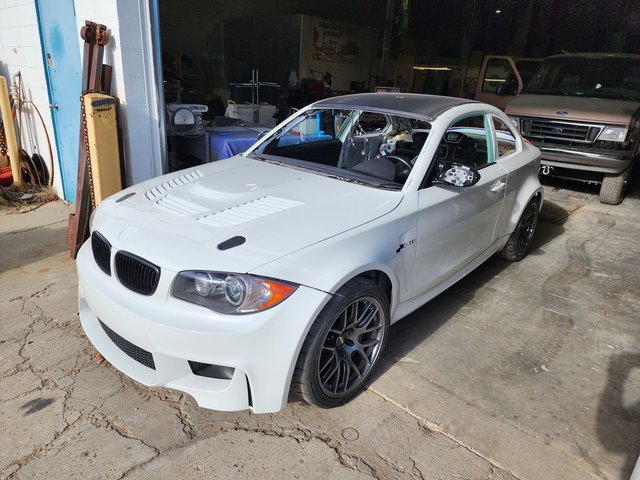 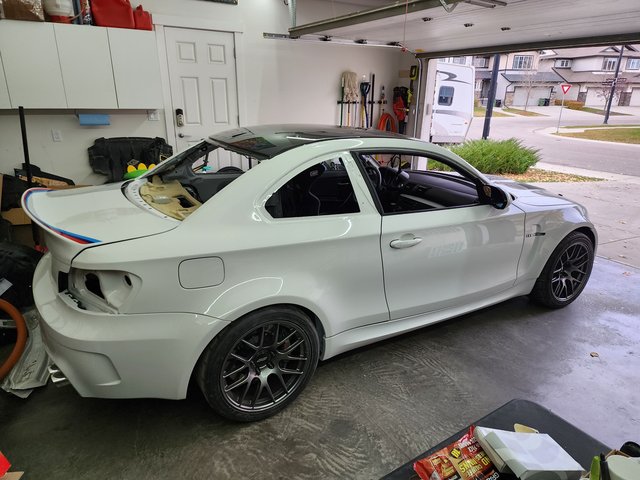 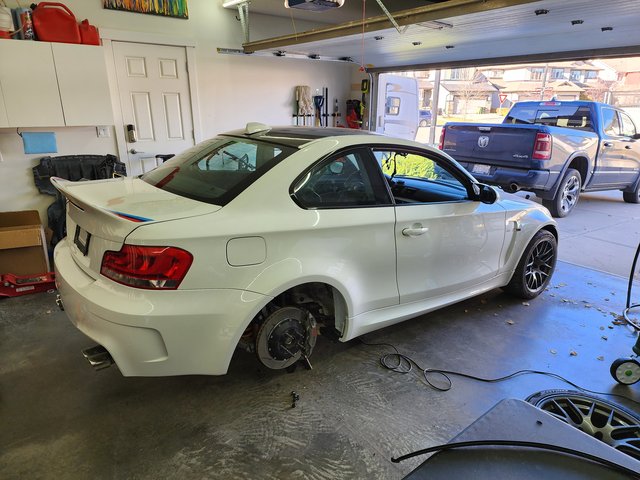 The brake cooling kit came in late but just in time 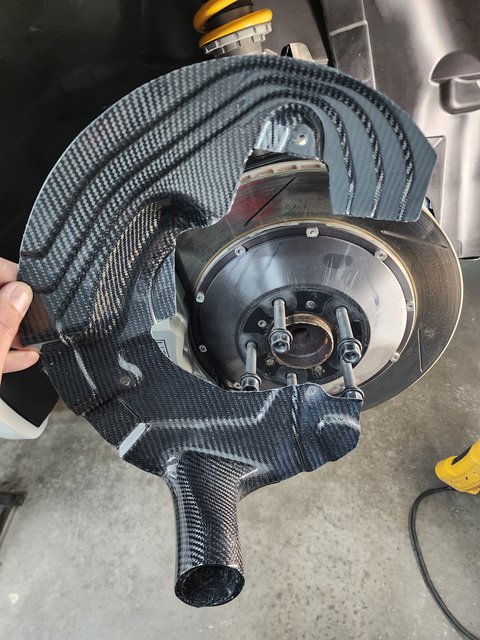 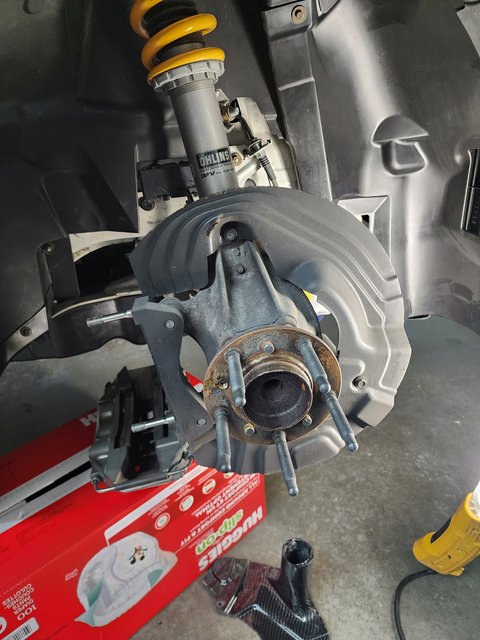 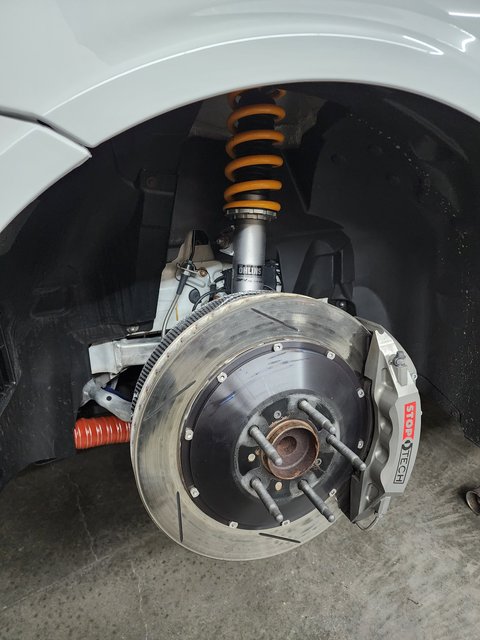 Almost there 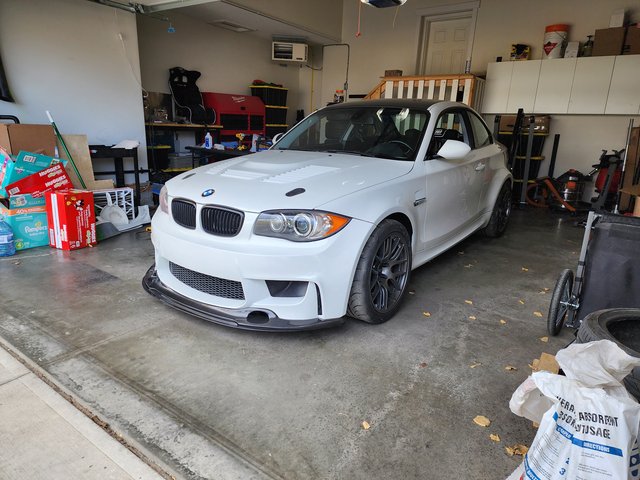 Sparco fire suppression system installed (engine bay only) and you can see the acccusump installed 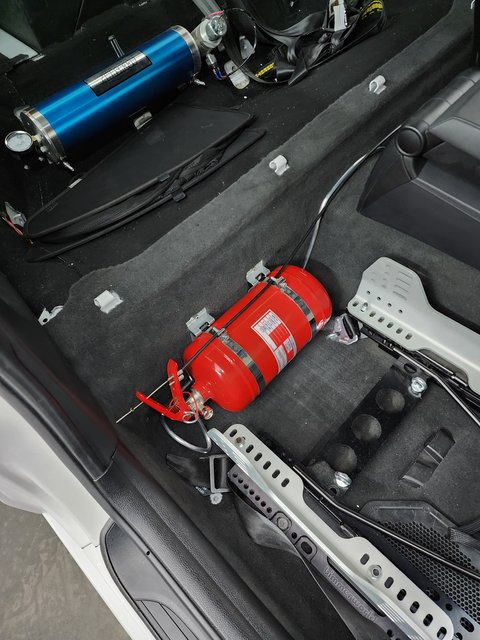 B58 Coil kit 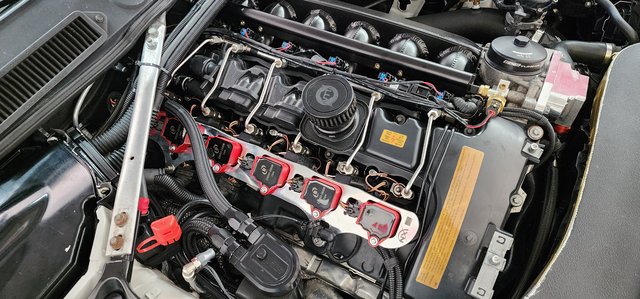 |
|
Appreciate
2
tracer bullet6189.00 eastsidaz327.50 |
| 03-12-2025, 05:36 PM | #12 |
|
Enlisted Member
70
Rep 40
Posts |
Here we go again...
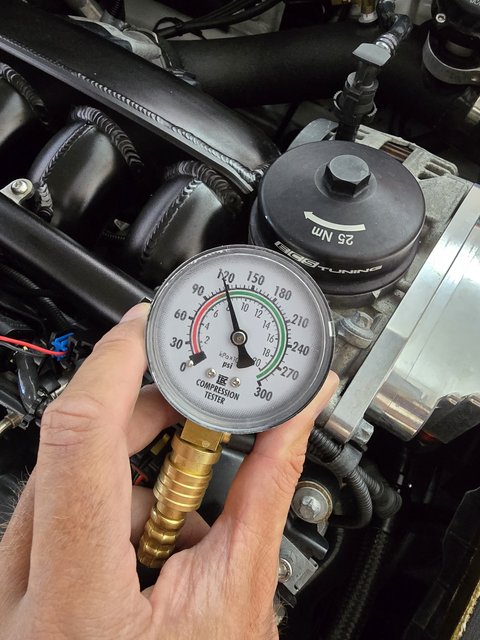
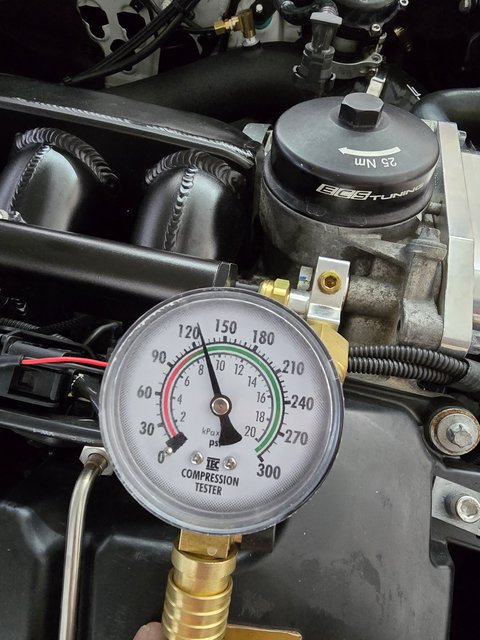
After tuning, struggling to get the reflex+ running properly because I'm not running on E85, I only run 94 Oct pump fuel. We got the car running pretty good, but it had a very slight miss at idle from the time I installed the single turbo setup (well I only noticed it then, it was after winter) I spoke with Ken and he said it was likely plugs or coils, the reason I did the B58 coil kit. We all know how unreliable the stock coils can be. After all this and a few months of diving the car (I didn't track it last year at all, I had a feeling something was not right) it developed a very rough idle after some boosted driving on the freeway. I got home, did a compression test and found cylinder 4 was down on compression. I feared the worst. Checked the oil filter, no glitter. The car ran fine but just had a very rough idle but once on boost it felt like normal. All it could be as far as my knowledge goes was broken ring, bent valve, bent conrod, or a broken ringland.
  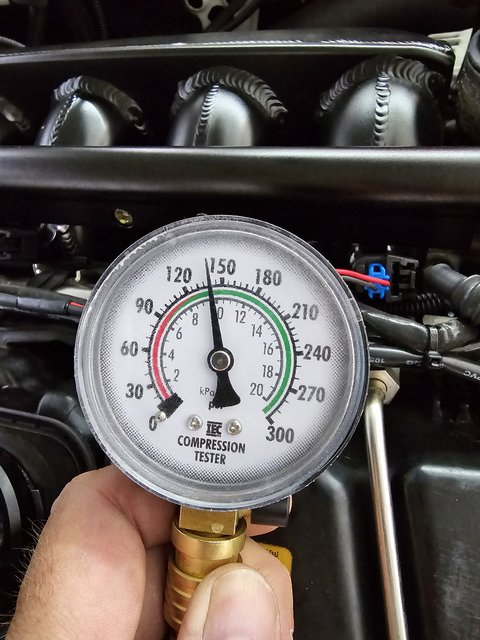 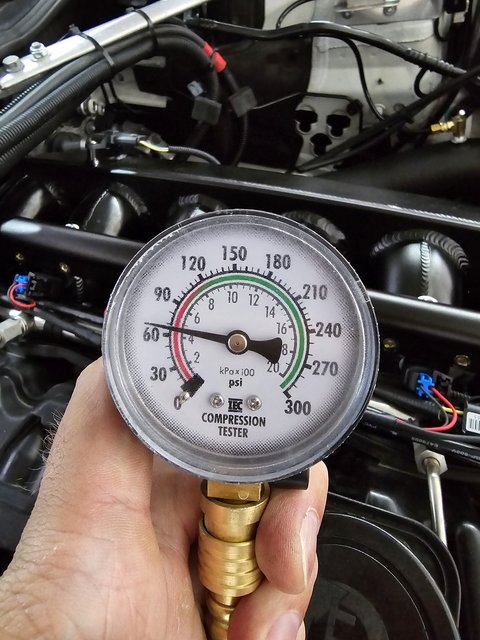 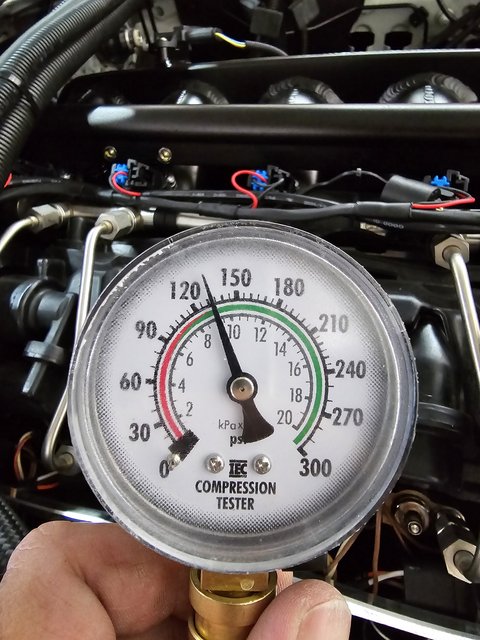 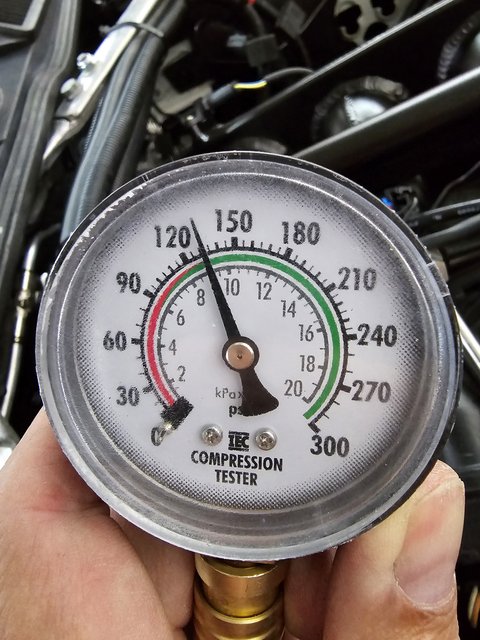 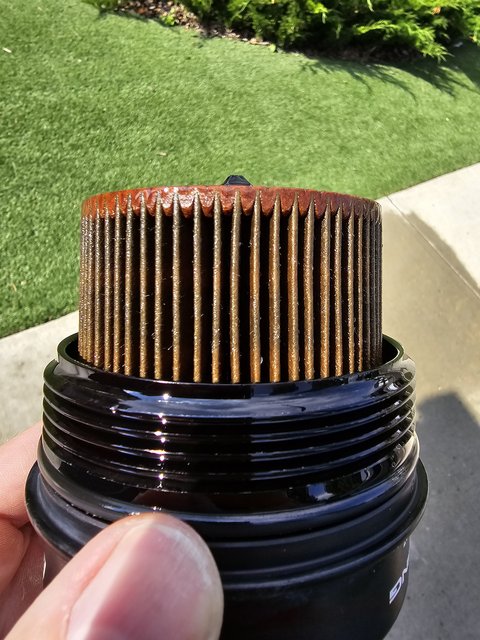 I parked the car for the winter again, fortunately it didn't happen at the beginning of the season. During the winter I had bought a used replacement engine, that I had to return because when I drained the oil out of it about 15 pieces of ring came out with it. At this point I seriously considered buying and converting to a S65. I had one locally that had everything, wiring harness, radiator, coolers, subframe, ecu etc. but a swap like that always comes with hidden costs and project creep. The decision was made to rebuild my engine. I pulled it out, stripped the timing gear and head off, still couldn't find anything wrong with it, no scoring or even wear on the sleeves. When the engine builder stripped the pistons and crank they found that indeed piston 4 broke a ringland. The engine is still with the builder and I'm hoping to have it back by early April. 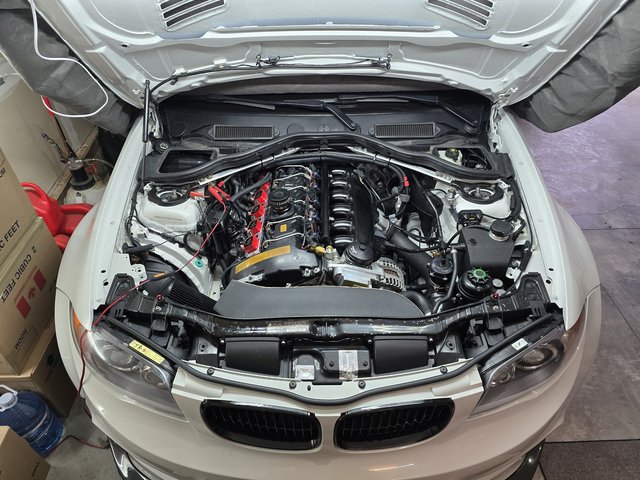 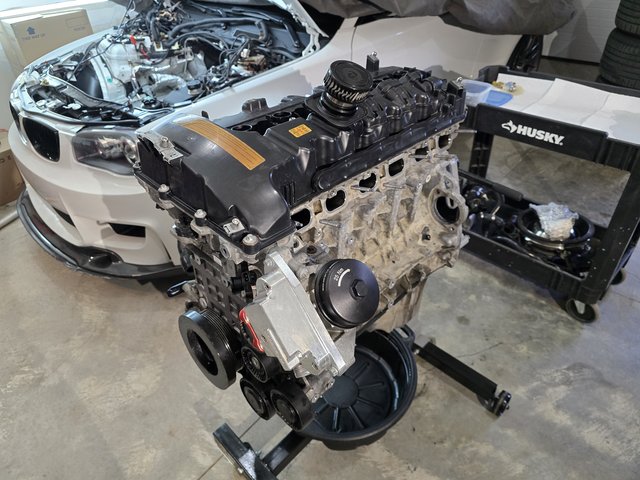 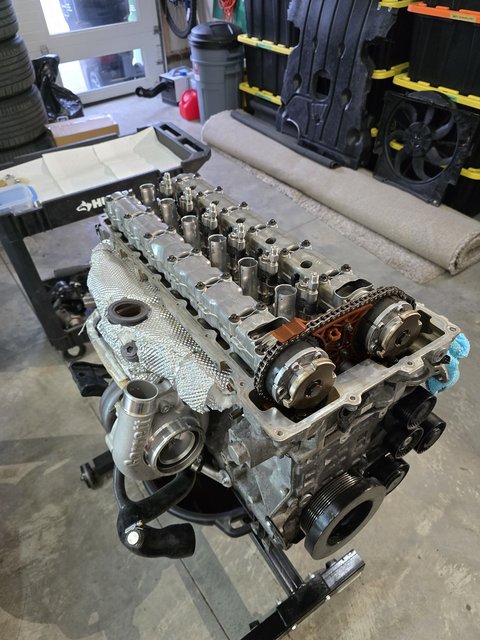 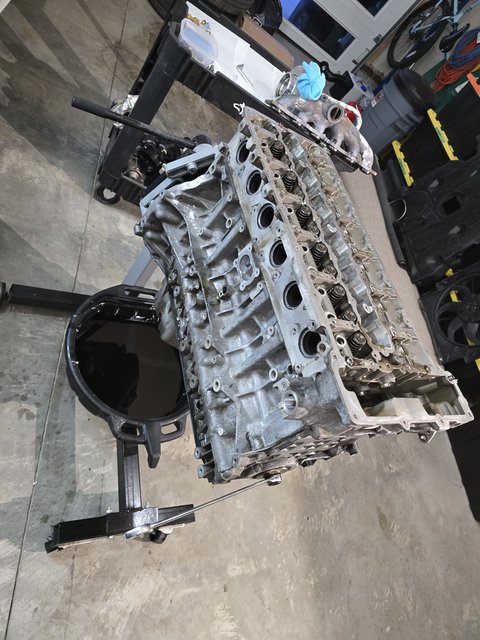 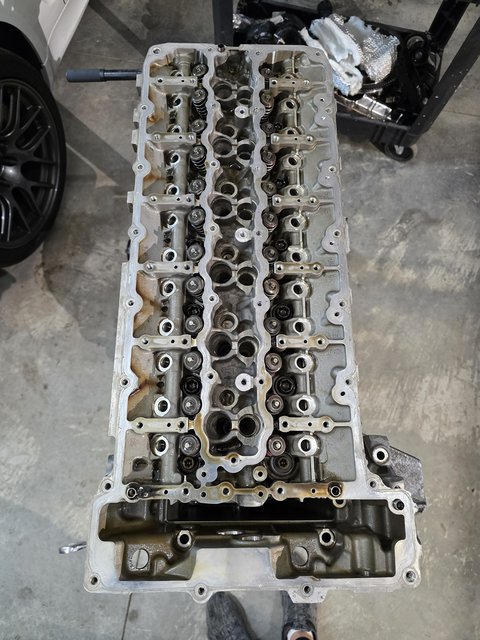 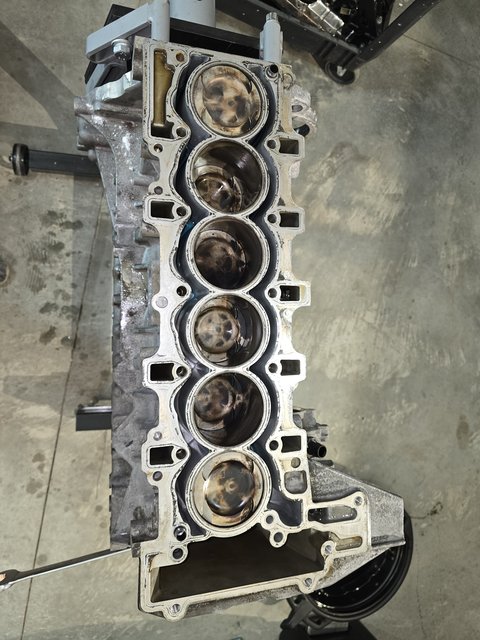 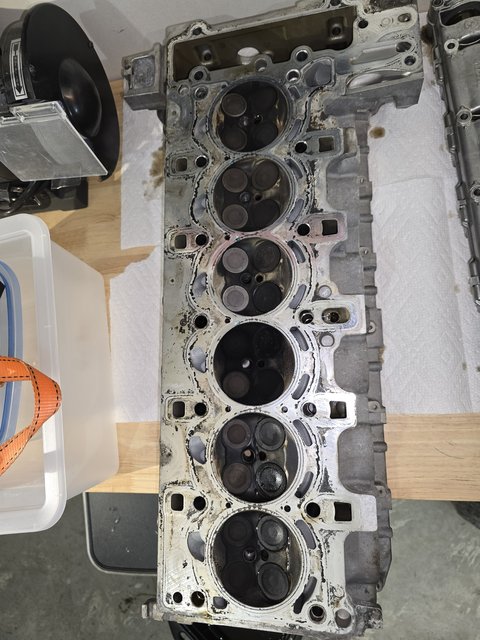 Piston 4 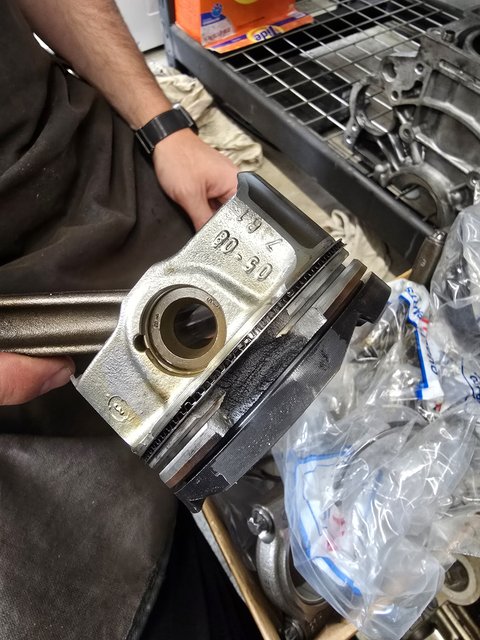 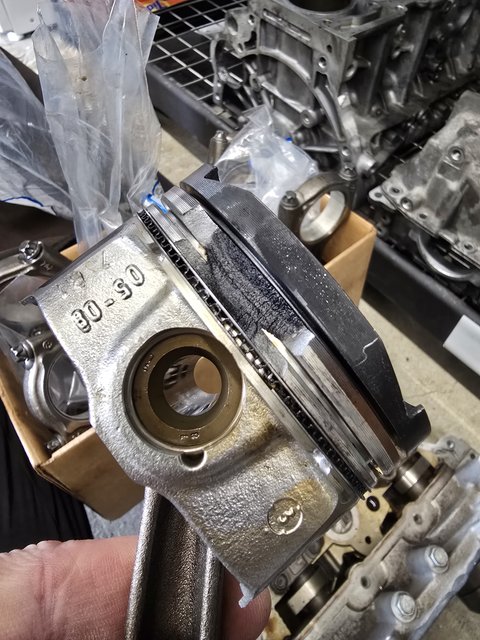 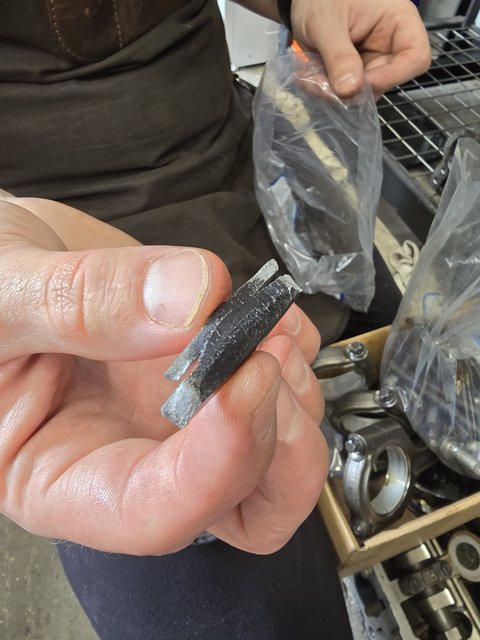 |
|
Appreciate
1
tracer bullet6189.00 |
| 03-12-2025, 05:50 PM | #13 | |
|
Enlisted Member
70
Rep 40
Posts |
Quote:
|
|
|
Appreciate
1
eastsidaz327.50 |
| 03-12-2025, 07:46 PM | #14 |
|
Enlisted Member
70
Rep 40
Posts |
N53/N54 experiment & 3D printing
It seems like there are a few people out there that have installed an N53 head on a N54 engine. I've also seen a lot of discussion around porting an N54 head and questioning if the N53 would still be better flowing than a ported N54 head.
I decided to get myself an N53 head in Germany, got it ported and polished and I've asked them to put it on the flow bench to see what kind of flow it has. I did this all for much cheaper than what it would have been to port an N54 head. That being said, the N53 head has larger valves, larger exhaust ports and much larger inlet ports especially just before the valves where the N54 is extremely narrow. I get that BMW had their reasons for it and that it probably didn't make any sense to spend time or money on a port in a boosted car making a little more than its NA variant. Boost overcome the inefficiencies I guess. My thinking with going this route after speaking to the engine builders was that turbo engines with a head ported like a NA car ends up breathing more easily and therefor require less boost to produce the same power. If this translates into the real world in this case then I would be very happy road course racing an engine that makes good power with less boost. We will see once the engine is built and tuned as to where we stand with this mod. If it doesn't work, then I can always just throw back the N54 head and I know exactly what kind of engine I have. Here are some images of the head and the ports. 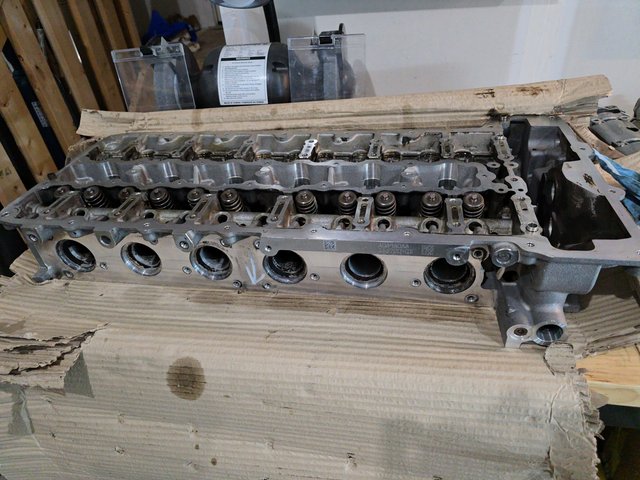 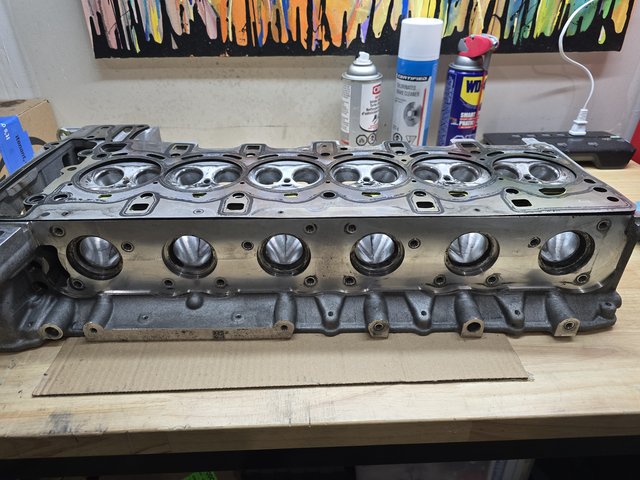 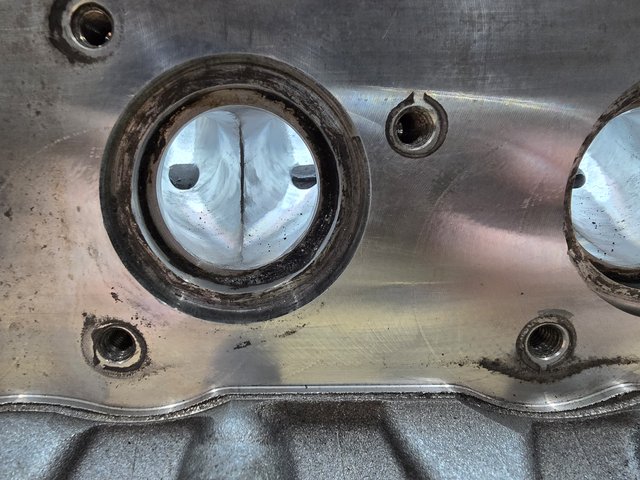 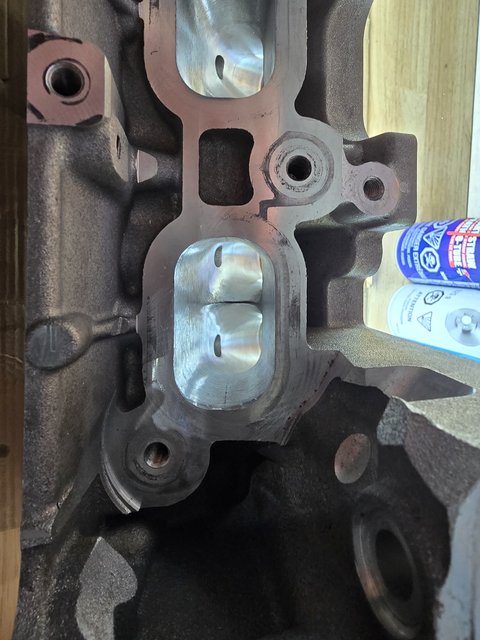 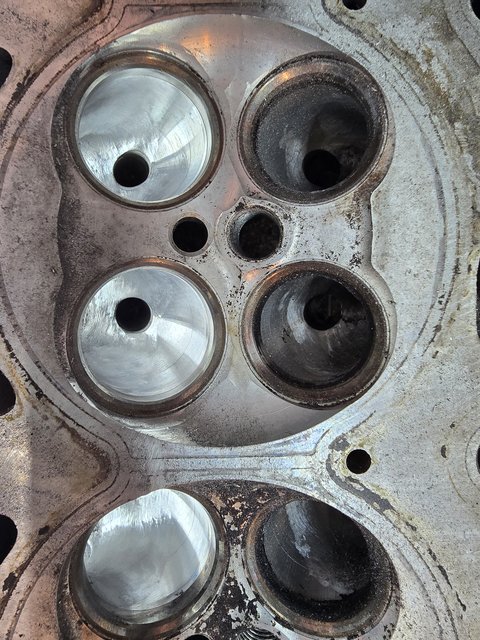 One reasonably big consideration when doing this kind of mod, is the turbo manifold. Whether single turbo or twins, the exhaust ports are larger and sit lower down on the head. You can use existing turbo manifolds but the ports will be mismatched in diameter and the turbo(s) will sit lower in the engine bay. This necessitated a rework of the manifold I had, modification would not have been that much but I couldn't guarantee the longevity of it with the mods I would have had to make. I ended up redesigning the manifold so that the turbo and wastegate remained in the same place in the engine bay. The design 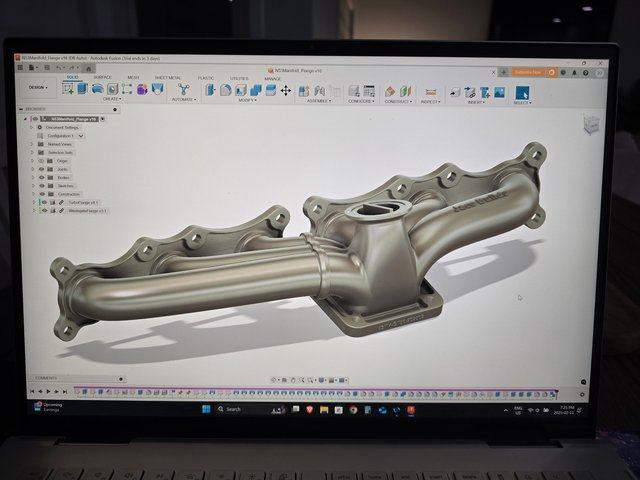 Test fitting the prototype 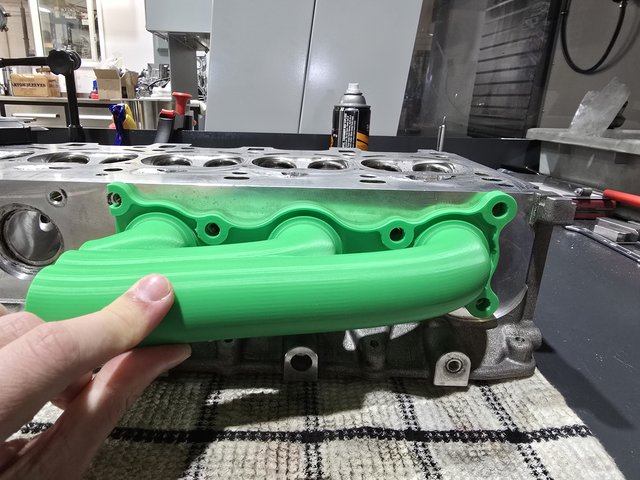 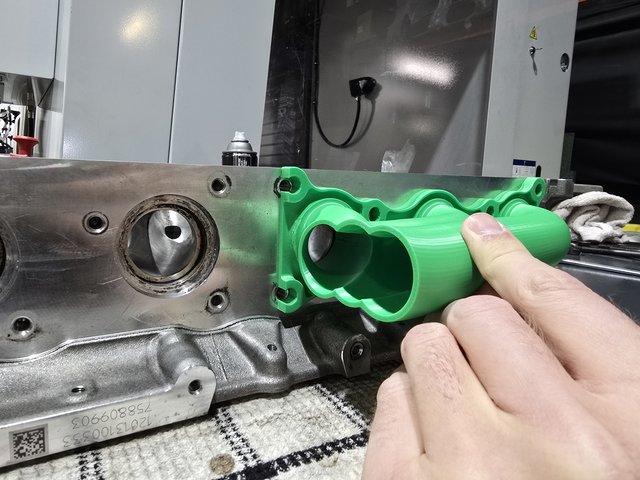 Once I was happy with the fitment I finished up the design and sent it off to get 3D printed out of 316L Stainless Steel. A couple weeks later (Last week) the manifold arrived at my door. 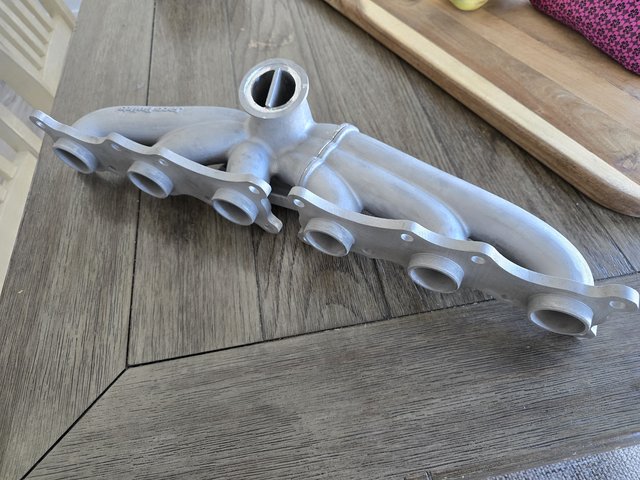 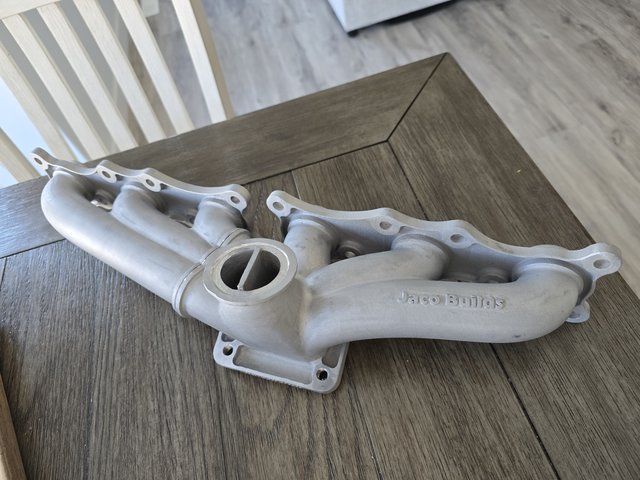 I'll have a breakdown of the engine build when I get back along with pictures and parts list of parts that still need to be installed. Cheers |
|
Appreciate
3
|
| 03-12-2025, 10:14 PM | #15 |
|
1Addict

5381
Rep 9,254
Posts |
First ST manifold I've seen for the N53 head. I think you're gonna love what the head does for the car. Total game changer.
Wish I could do the rear arches myself. It's holding me back finishing my clone.
__________________
2010 E82 1 Series M Clone
Hydra Performance augmented OEM+ |
|
Appreciate
1
tracer bullet6189.00 |
| 03-12-2025, 11:11 PM | #16 | |
|
Enlisted Member
70
Rep 40
Posts |
Quote:
I shopped around before I dived into my project with the quarter panels, I had all the panels, bumpers everything laying in my garage for months before I worked up enough courage to do it myself. It helped a lot being able to do it myself. I wanted to get the inner arches from as well but they were 8 months wait which I didn't want to deal with which then ended up complicating the change even further. I hope you can find someone that can do it for you for a decent price. |
|
|
Appreciate
0
|
| 03-19-2025, 05:45 PM | #17 | |
|
1Addict
5381
Rep 9,254
Posts |
Quote:
I'd be willing to do it myself, but I can't weld. I imagine that's the rate limiting step. Waiting on parts to redo the turbos and once that's done the rear body is next.
__________________
2010 E82 1 Series M Clone
Hydra Performance augmented OEM+ |
|
|
Appreciate
0
|
| 03-19-2025, 06:11 PM | #18 |
|
Enlisted Member
70
Rep 40
Posts |
Wow, that is quite a bit different from the normal N54. This makes me even more excited to get it done.
The only welding I did was the inner arch, the quarter panels were panel bonded and riveted as per BMW repair procedure. I like the panel bonding, its a much stronger joint than a spot welded one, it spreads the load evenly throughout the areas its bonded and it helps reduce the possibility of corrosion forming later on. I did however wax spayed the inner cavities where any work was done the way it would have been done in the factory just to be sure that even condensate that forms on the inner sections won't cause any issues. If welding is what's holding you back, I'd suggest you see if you can locate the inner repair arches from a dealership and use that. There are a couple of videos on youtube where guys show how to do the work if you have the inner arch and it makes things a lot easier than what I did. Line everything up, drill a bunch of holes, panel bond, rivet and its done. |
|
Appreciate
1
tracer bullet6189.00 |
| 03-19-2025, 06:34 PM | #19 |
|
1Addict
5381
Rep 9,254
Posts |
That sounds feasible. I believe the inner M3 arches can be modified too and are more available. Cutting my perfectly good car will be terrifying but the only thing I'm not willing to do is paint, and I kind of want to do a full glass out respray anyway. Not getting hosed on the fender job would free up capital for proper finish work and paint.
__________________
2010 E82 1 Series M Clone
Hydra Performance augmented OEM+ |
|
Appreciate
0
|
| 03-19-2025, 06:50 PM | #20 |
|
Enlisted Member
70
Rep 40
Posts |
It is terrifying for sure, the M3 arches will likely get you 90% there. I felt the same way after pricing out the job, it would have double the cost for me.
|
|
Appreciate
0
|
| 04-03-2025, 03:05 PM | #21 |
|
Enlisted Member
70
Rep 40
Posts |
Engine build update
Alberta Racing Engines are the guys building the engine for my car. We've opted to build it strong enough to be capable of 1000hp and then running it at around 650-700hp. The first step is to closed-deck the block. Is it necessary, probably not at 700hp. I don't want to deal with a head gasket leak in the future. If the N53 head allows for lower boost pressure at that power level then this is for sure overkill which in my book means reliability, hopefully.
Insert designed and ready to send to the CNC. 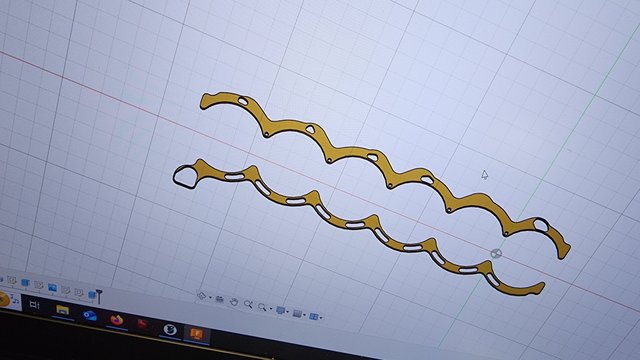 CNC 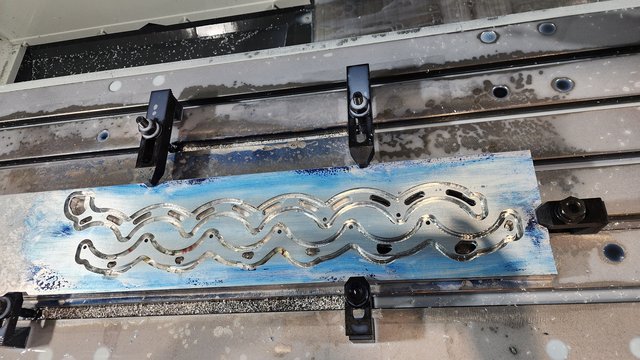 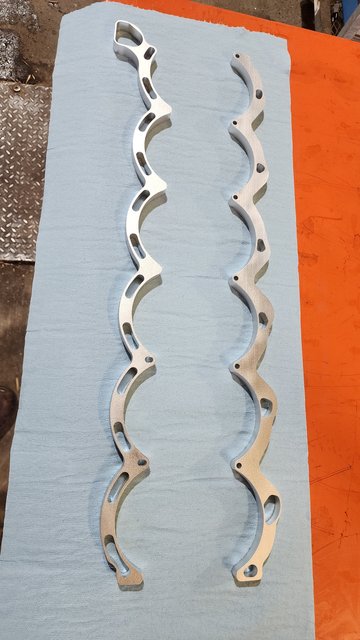 Prepping the block 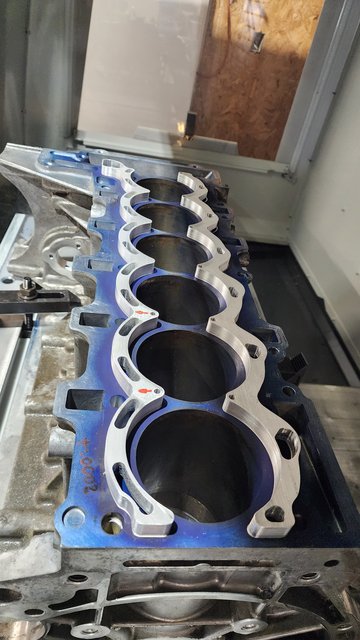 CNC machining done on the block to accept the inserts 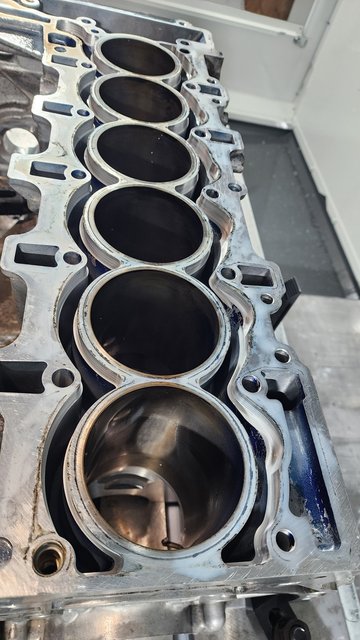 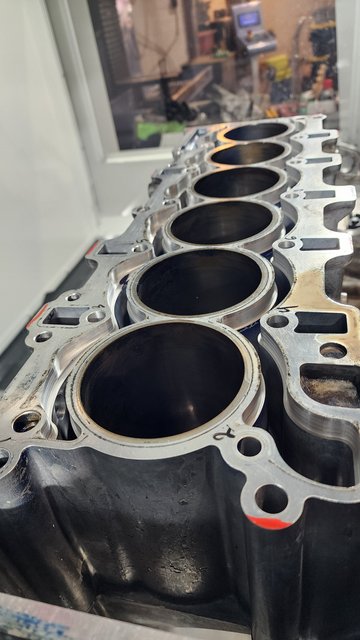 Inserts installed and machined 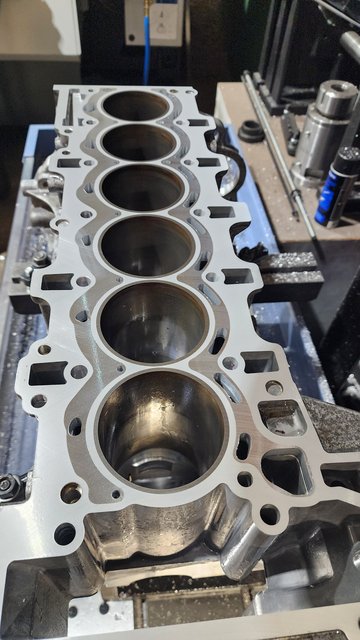 |
| 04-07-2025, 07:27 PM | #22 |
|
Private
 
268
Rep 96
Posts |
Just found this thread and holy smokes, you've done alot to that 1.
If I knew someone or could myself, I'd love to attempt a 1m conversion. But I dont so I get to live through your post of actually doing it lol. Been putting in solid amounts of work and seemingly trying to do it the best way possible the first time and not have to go back and do work over again. |
|
Appreciate
0
|
Post Reply |
| Bookmarks |
|
|