

|
|
|
|
|
| 07-22-2009, 10:57 PM | #3 |
|
Colonel
 
381
Rep 2,926
Posts
Drives: Cayman GT4, 135i
Join Date: Apr 2008
Location: NJ
|
damn that looks good.
__________________
Current: M2CS
Gone but not forgotten: Cayman GT4, M2C, 2011 135i, E83 X3 6MT, 2016 SO M3, 2012 335iS, 2010 135i and 2006 e90 325xi |
|
Appreciate
0
|
| 07-23-2009, 12:46 AM | #4 |
|
Major
 
72
Rep 1,239
Posts |
So, you did that all yourself? How much is that spring compressor that you have and where did you get it? Is that the only special tool that is needed other than patience?
__________________
● 2015 Cayman S (Current), 2011 1M BSM #297 (Sold), 2008 135i (Sold) ● |
|
Appreciate
0
|
| 07-23-2009, 08:35 AM | #6 |
|
Second Lieutenant
 
22
Rep 291
Posts |
I also did mine las weekend, I installed them myself, not as bad a I though it was going to be. For me the rears were more complicated than the fronts...
Here are some pictures that I took: 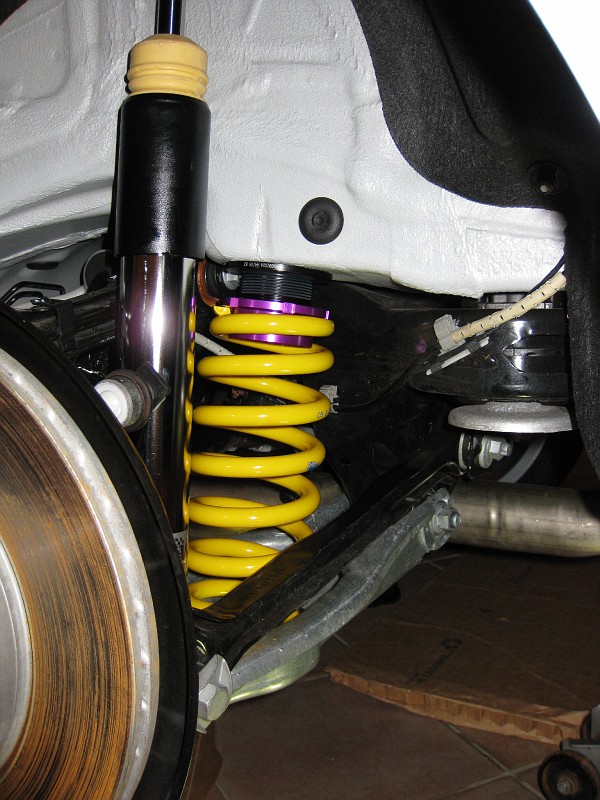 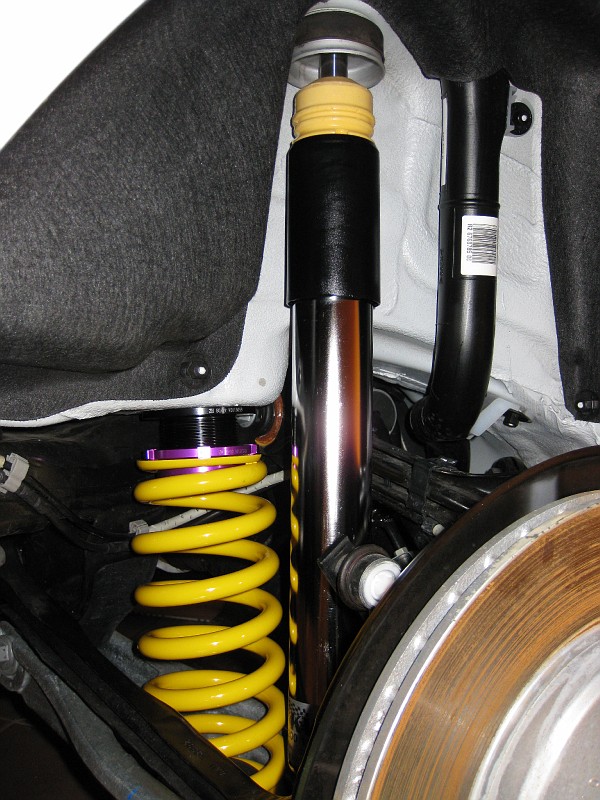 Spring Compressors wrapped on Racers Tape to avoid scratchs on the springs 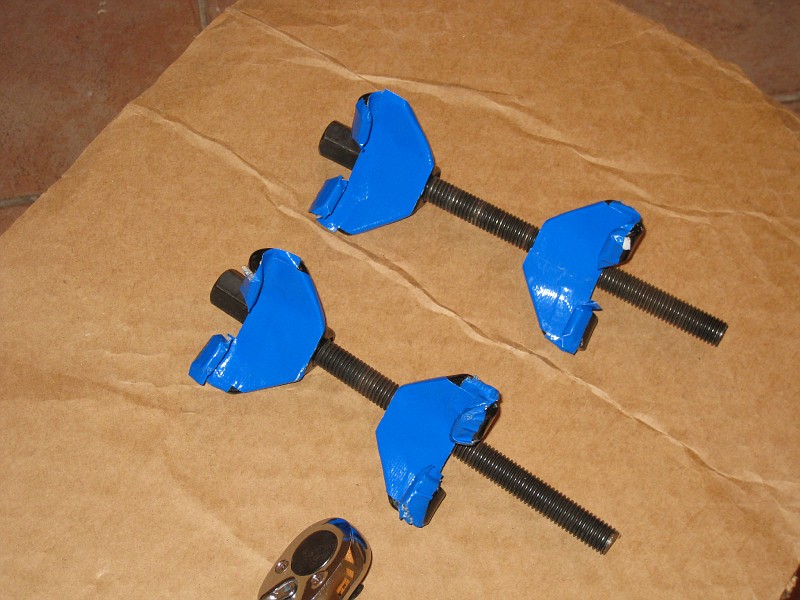 Modified tool to pry appart the carrier that clamp the strut to the lower carrier. 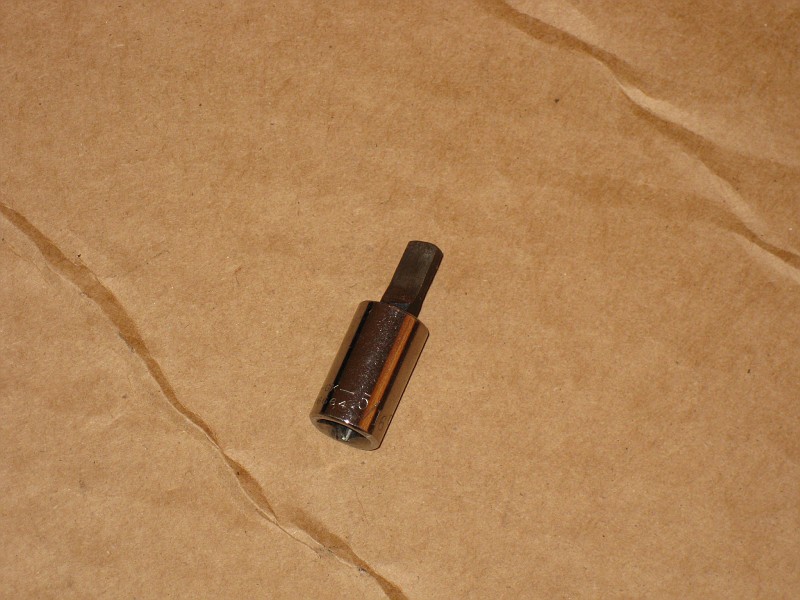  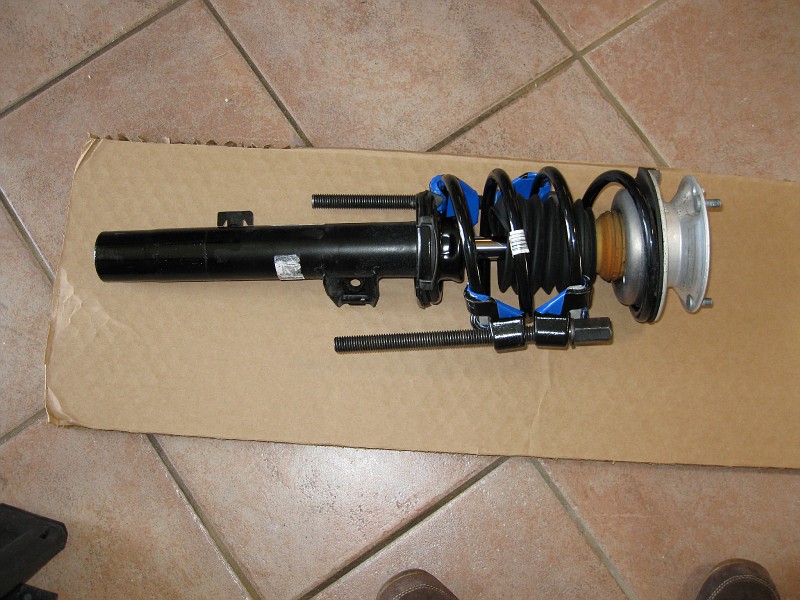 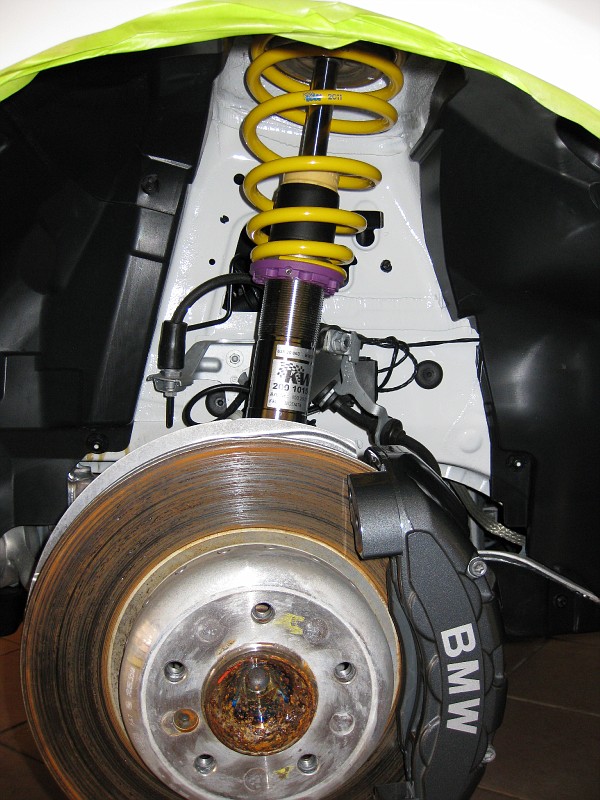 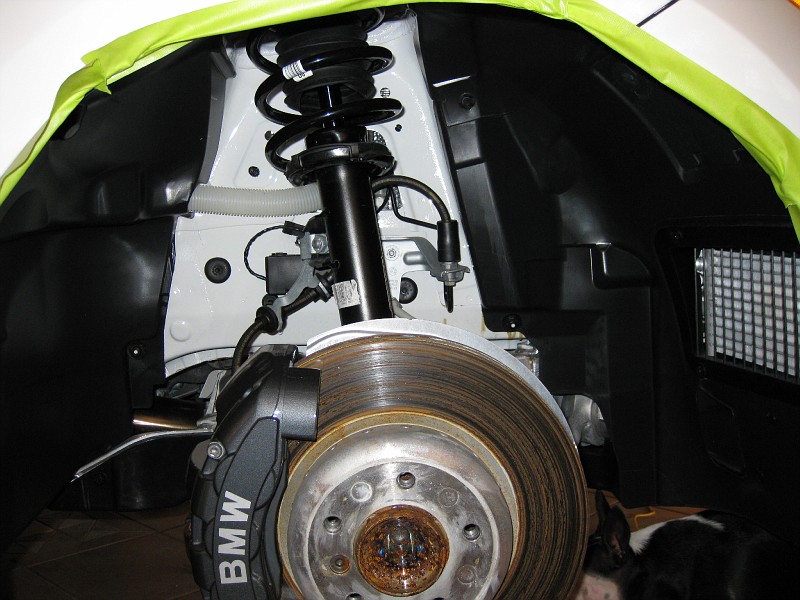 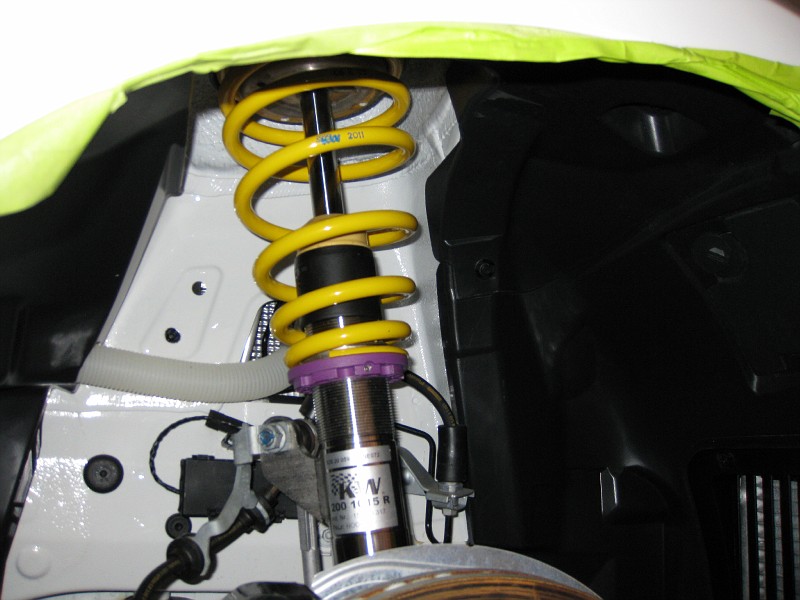 |
|
Appreciate
0
|
| 07-23-2009, 10:17 AM | #7 |
|
Captain
29
Rep 769
Posts |
How do you guys adjust the rears without taking part the suspension? I mean the fronts are easy, I don't even have to take my wheel off for that, just jack it up and turn the spring by hand. The rears I use the key, but sometimes the black base starts unscrewing too... so I have to wedge something up there to stop it. Any easier way?
__________________
 |
|
Appreciate
0
|
| 07-23-2009, 10:48 AM | #8 |
|
///Mmmm
78
Rep 796
Posts
Drives: '09 BMW 135i
Join Date: Jun 2008
Location: Tampa, FL
|
Nice job. that looked like a lot of work.
__________________
Current: E90 LCI 335i JetBlack - BMS OCC, JB4 w/ E85, ETS Charge Pipe, Vishnu Catted DP
Retired:///E82 135i LeMans - 12.710 @ 108 MPH Riss Racing OCC, Shadowline Grills, Magnaflow Axle-Back, JB4, ETS FMIC, BMS DCI, BMW Perf Sideskirts, BMS 12/10 Spacers, E93 Front Sway PDC Flickr YouTube |
|
Appreciate
0
|
| 07-23-2009, 01:14 PM | #10 |
|
Bla!
82
Rep 909
Posts |
wow thats cool ur actually the first one to take photos while installing KW's i believe. nice looking car!
__________________
......................::.........................
|
|
Appreciate
0
|
| 07-23-2009, 02:20 PM | #11 |
|
Colonel
57
Rep 2,251
Posts |
looks great! keep up updated on how it rides over time
__________________
-------------------------------------
 BMW 135i/6 Speed/Montego Blue/Formula One Ceramic Tint/JB4 G4/AA Sport Intercooler/19 inch Iconz 880Z(19X8.5 & 19X10)/PSS 225/35 & 265/30/E93 M3 front sway bar/TRW front and rear Control Arms/BMS Drop In Filter/Dinan Exhaust/BlackLines/Upgraded \\\M RSFB BMW 135i/6 Speed/Montego Blue/Formula One Ceramic Tint/JB4 G4/AA Sport Intercooler/19 inch Iconz 880Z(19X8.5 & 19X10)/PSS 225/35 & 265/30/E93 M3 front sway bar/TRW front and rear Control Arms/BMS Drop In Filter/Dinan Exhaust/BlackLines/Upgraded \\\M RSFB |
|
Appreciate
0
|
| 07-23-2009, 05:05 PM | #12 | |
|
Enthusiast
12
Rep 262
Posts |
Quote:
|
|
|
Appreciate
0
|
| 07-23-2009, 05:13 PM | #13 | |
|
Enthusiast
12
Rep 262
Posts |
Quote:
I spray some bicycle chain wax lube on the black base and the treads so that it won't stick to the spring. The chain wax is water soluble and won't stay there. So over time it will drop off. The wheels have to come off to take away the pressure on the springs also. |
|
|
Appreciate
0
|
| 07-23-2009, 05:22 PM | #16 | |
|
Enthusiast
12
Rep 262
Posts |
Quote:
|
|
|
Appreciate
0
|
| 07-23-2009, 05:25 PM | #17 | |
|
Enthusiast
12
Rep 262
Posts |
Quote:
|
|
|
Appreciate
0
|
| 08-07-2009, 12:55 AM | #18 |
|
Supreme Allied Commander

3847
Rep 54,376
Posts
Drives: F80 M3
Join Date: Mar 2007
Location: Santa Barbara, AP, Brembo, GIAC, Koni, Ohlins, Performance Friction, www.hpautosport.com
|
The rear ride height adjustment could have been easy if KW spent a bit more time in engineering and R&D.
BTW, be careful not to stress the frong brake hoses like you did in the install, they weren't made to hold the weight of the upright and brakes. To make the install easier, you only need to remove one bolt and nut from the lower camber link to install the springs and shocks. There is no need to remove the upper camber links, guide rods, wheel speed sensors, and anti roll bar end-links. |
|
Appreciate
0
|
Post Reply |
| Bookmarks |
|
|


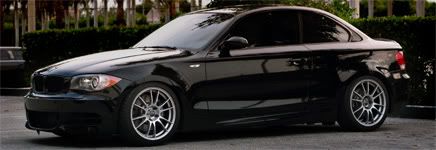
 I love my V2s, car looks great at that height.


